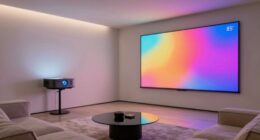
Yes, you can ceiling mount a short throw or UST projector, but it requires careful planning and proper hardware. These projectors are designed to be mounted close to the screen, so you’ll need specialized brackets and secure installation at the correct height and angle. Proper alignment is essential to avoid distortion and focus issues. If you want to understand the specifics and how to do it safely, you’ll find helpful tips below.
Key Takeaways
- Ceiling mounting is feasible with proper hardware and secure installation tailored for short throw or UST projectors.
- Precise measurement of ceiling height and distance from the screen is essential for optimal placement.
- Use specialized brackets and consider lens shift features to achieve correct alignment and focus.
- Low ceilings or irregular room shapes may require custom mounts or additional support for stability.
- Proper positioning prevents distortion, ensures image clarity, and maintains the projector’s intended throw distance.

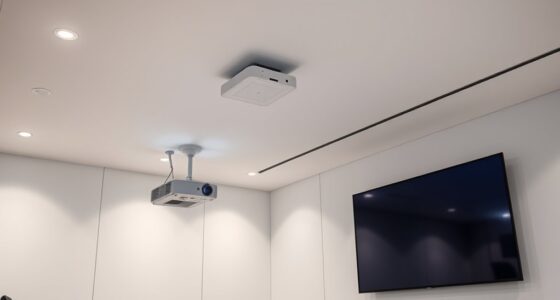
Many people wonder whether it’s possible to ceiling mount a short throw or ultra-short throw (UST) projector, and the answer is generally yes—under certain conditions. However, you’ll need to contemplate installation challenges and projector positioning to guarantee a successful setup. Unlike traditional projectors, short throw and UST models are designed to project large images from very close distances, which means their mounting requirements can be more specific. You’ll want to evaluate the space available and the mounting hardware to avoid issues like image distortion or improper alignment.
Ceiling mounting a short throw or UST projector is possible with proper setup and hardware considerations.
One of the main installation challenges is guaranteeing that the projector is securely mounted at the correct height and angle. Since short throw and UST projectors are meant to sit close to the wall or screen, your ceiling mount must accommodate this proximity. You might need specialized mounting brackets that allow for precise adjustments in pitch and yaw, so you can fine-tune the projector’s position without sacrificing image quality. Failing to do this could result in keystone distortion or uneven focus across the screen.
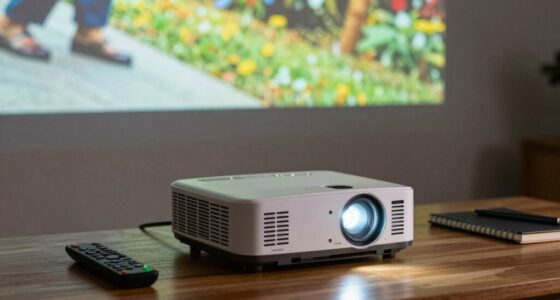
Projector positioning is vital. With ceiling mounting, you’ll want to measure the distance from the ceiling to the intended projection surface carefully. Short throw projectors typically require a distance of just a few inches to a couple of feet, while UST models can be as close as a few inches. If you mount the projector too high or too low, it may cause issues with image size and clarity, forcing you to readjust or remount. Some projectors have specific lens shift capabilities, which can make positioning more flexible, but others require exact placement for peak performance.
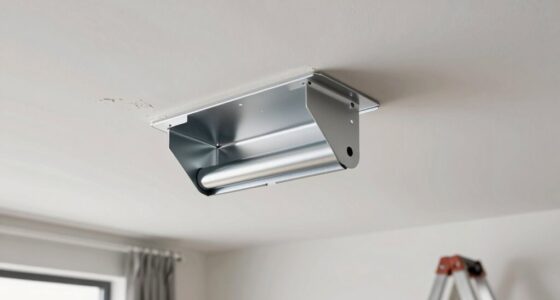
Another factor to contemplate is the shape and size of your space. Low ceilings or irregularly shaped rooms can complicate mounting. You might need to use extension brackets or custom mounts to reach the ideal position. Also, verify that the ceiling material can support the weight of the projector and mounting hardware. If you’re working with a suspended ceiling or a ceiling with limited support, reinforce the area or opt for a mount designed for lightweight projectors. Additionally, considering shelf stability or other support options may help in cases where ceiling support is insufficient.

NVRTTRR Vertically Mounted Projector Bracket Wall-Mounted Universal Ceiling Wall Projector, 1/4" Screw, Camera Bracket mini (2.36in)
If your projector is less than 12lbs and has one hole in the projector bottom will be suitable….
As an affiliate, we earn on qualifying purchases.
As an affiliate, we earn on qualifying purchases.
Frequently Asked Questions
Are There Specific Ceiling Types Suitable for Mounting a Short Throw Projector?
You should choose a ceiling with a strong, sturdy material like wood or concrete that can handle the weight capacity of your short throw projector mount. Avoid flimsy or uneven surfaces that might not support the weight and could cause instability. Make sure the ceiling material is compatible with your mounting hardware, guaranteeing secure installation and safety. Properly evaluating the ceiling type helps you avoid mishaps and ensures ideal projector performance.
How Do I Prevent Overheating of a UST Projector When Ceiling-Mounted?
Don’t let your UST projector become a hot potato; proper ventilation strategies are your best bet. Make certain there’s ample space around it for heat dissipation by installing it with clearance from the ceiling and nearby walls. Use an external fan or cooling system if needed, and avoid covering vents. Regularly clean air filters to keep airflow ideal. These steps help prevent overheating and keep your projector running smoothly.
Can I Adjust the Projector’s Angle After Ceiling Installation?
Yes, you can adjust the projector’s angle after ceiling mounting, but it depends on the mounting system’s stability and ceiling compatibility. Look for mounts with adjustable brackets or tilting features; these allow you to fine-tune the angle for maximum projection. Make sure the mount remains stable and secure after adjustment. Always check the manufacturer’s instructions to confirm the mount’s compatibility with your ceiling type and the projector’s weight.
What Safety Measures Should I Consider for Ceiling-Mounted Projectors?
Sure, safety’s a joke, right? But seriously, you should prioritize electrical safety by ensuring all wiring is properly insulated and grounded. Avoid fire hazards by using high-quality mounts and secure fixtures to prevent falls. Regularly inspect the mounting hardware and electrical connections, and keep flammable materials away. Taking these precautions might seem overkill, but it keeps your setup safe and your entertainment stress-free.
Is Professional Installation Necessary for Ceiling-Mounting a Short Throw Projector?
You don’t necessarily need professional installation for ceiling-mounting a short throw projector, but it’s highly recommended. DIY mounting can work if you guarantee ceiling compatibility and follow precise instructions. Professional installers have the expertise to secure the mount properly, prevent damage, and optimize projector placement. If you’re unsure about your skills, consulting a professional guarantees safety, a clean setup, and the best image quality.
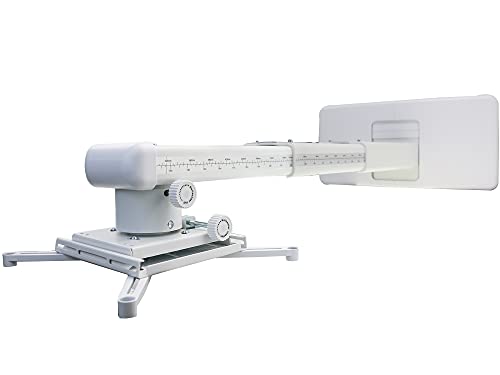
NC Projector Wall Mount with Universal mounting ,Telescopic Bracket Hanger,33lbs Load Capacity,High-Precision Adjustable: (12.8’’-29.13’’),white,(TYYZJ02)
ultra Short Throw Projection,Most sturdy of all, great fine tune knobs, best manual (very very detailed),It has the…
As an affiliate, we earn on qualifying purchases.
As an affiliate, we earn on qualifying purchases.
Conclusion
Yes, you can ceiling mount a short throw or UST projector, but it requires careful planning, proper mounting brackets, and precise positioning. You need to take into account the projector’s throw distance, guarantee alignment, and select compatible mounting hardware. By doing so, you create a clean, space-saving setup, improve image quality, and enjoy a seamless viewing experience. Proper installation transforms your space, enhances your viewing, and maximizes your projector’s potential—making your entertainment setup functional, stylish, and efficient.

DYNAVISTA Full Motion Universal Ceiling Projector Mount Bracket with Adjustable Height and Extendable Arms Rotating Swivel Mount for Home and Office Projector (Black)
Universally Compatible: This projector ceiling mount supports most projector brands with distance between the mounting holes on back…
As an affiliate, we earn on qualifying purchases.
As an affiliate, we earn on qualifying purchases.

Mount-It! Projector Screen Wall Mount L-Brackets – Extra Large Wall and Ceiling Hanging Bracket for Home Projector and Movie Screens, 12 inch Mounting Hooks, 1 Pair, Black, 66 Lb Each Capacity
UNIVERSAL L-SHAPED PROJECTION SCREEN BRACKETS: Our projector screen wall mount makes setting up for your next movie or…
As an affiliate, we earn on qualifying purchases.
As an affiliate, we earn on qualifying purchases.