
To effectively use placement in projection mapping on irregular surfaces, you need to start with accurate 3D surface modeling. This allows you to visualize how visuals will conform to complex contours and identify distortion points. Proper software lets you warp images and adjust projector positioning for precise alignment. By carefully calibrating your setup and fine-tuning projections, you can turn challenging surfaces into seamless visual displays. Keep exploring, and you’ll discover how these techniques can transform your projects into stunning visuals.
Key Takeaways
- Conduct thorough surface scans to create accurate 3D models for proper content placement.
- Use mapping software to manipulate visuals, warping images to match irregular surface contours.
- Adjust projector position, angle, and focus during calibration for precise alignment with surface features.
- Employ multiple projectors and overlapping zones to cover complex surfaces seamlessly.
- Fine-tune content and placement iteratively to compensate for surface irregularities and achieve cohesive visuals.

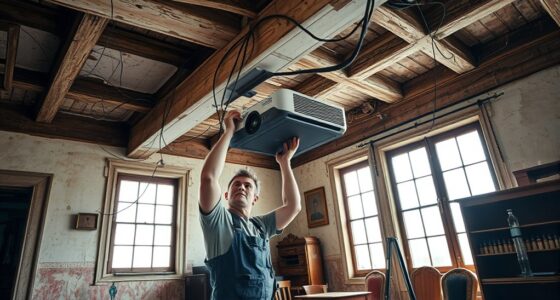
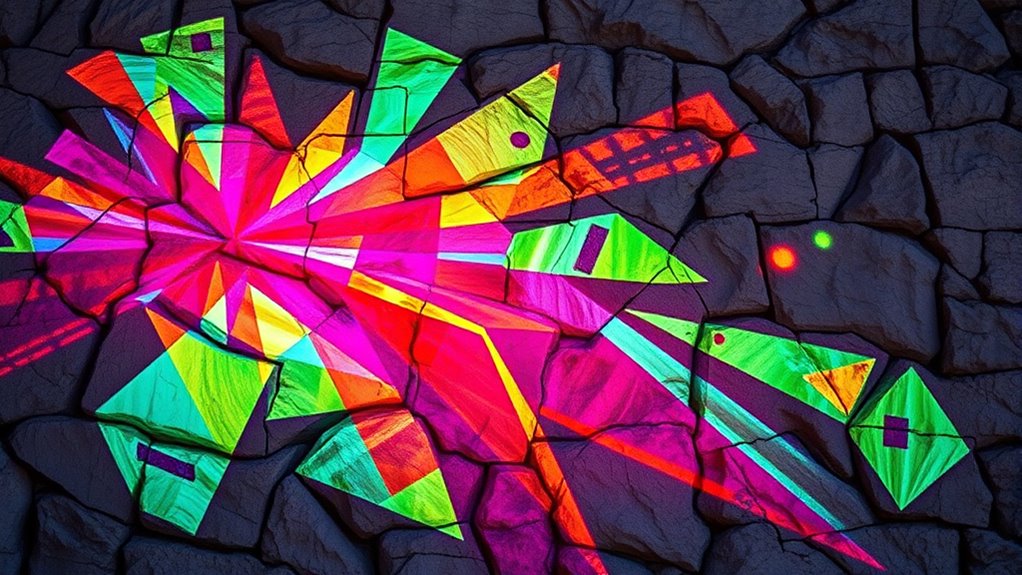
Projection mapping is a mesmerizing technique that transforms ordinary surfaces into dynamic visual displays. When you’re working with complex or irregular surfaces, understanding how to adapt your projections becomes vital. 3D surface adaptation is at the core of this process, allowing you to precisely align your visuals with the unique contours and shapes of your target surface. Whether you’re projecting onto a building with intricate architectural details, a sculpture with uneven curves, or any irregular surface, the key lies in mastering how to handle those irregular surface challenges. These challenges can seem intimidating at first—surfaces that aren’t flat or predictable can distort your images or make alignment difficult. But with the right approach, you can turn these obstacles into opportunities for creative expression.
Master irregular surfaces with precise 3D adaptation for stunning projection mapping.
First, you need to scan or model your surface accurately. A detailed 3D model provides the foundation for precise projection mapping, helping you visualize how your visuals will interact with the surface’s geometry. This step is vital because irregular surfaces often cause distortions if not properly accounted for. Once you have an accurate model, you can use specialized software to map your content onto it. This software allows you to manipulate the visual content in three dimensions, matching the projection to every curve, indentation, or protrusion. The process involves adjusting the digital content so that when projected, it appears seamlessly integrated with the physical surface.
Handling irregular surface challenges requires careful calibration. You’ll need to adjust your projector’s position, angle, and focus to guarantee the projection aligns perfectly with the surface features. Sometimes, you might employ multiple projectors to cover large or complex areas, making sure that each projector’s output overlaps smoothly without gaps or mismatched edges. This careful placement and calibration help in overcoming distortions caused by the surface’s unevenness. Additionally, you may need to fine-tune the content—distorting or warping images within the projection mapping software to compensate for the surface’s irregularities. This ensures your visuals appear natural and cohesive, even on the most challenging surfaces.
Furthermore, incorporating accurate 3D modeling into your workflow enhances the precision of projection alignment and helps address complex surface geometries. In essence, mastering 3D surface adaptation and understanding the irregular surface challenges empower you to create captivating and precise projection displays. Whether the surface is rough, uneven, or intricately shaped, your ability to adapt your placement and content will determine the success of your projection mapping project. With patience and attention to detail, you’ll learn how to turn difficult surfaces into stunning canvases for your visual storytelling. It’s this combination of technical knowledge and creative problem-solving that makes projection mapping an exciting and versatile tool for transforming any space into a visual spectacle.
Revopoint 3D Scanning Spray for 3D Scanners, No Cleaning Needed, for Transparent, Reflective or Highly Textured Surfaces Objects, 500ml, AB6
Attention: All scanning sprays contain solvents. Perform a material compatibility test before use to ensure no damage to…
As an affiliate, we earn on qualifying purchases.
As an affiliate, we earn on qualifying purchases.
Frequently Asked Questions
What Types of Surfaces Are Best Suited for Projection Mapping?
You should choose smooth, flat surfaces like walls and screens for projection mapping, as they offer ideal surface texture and material compatibility. These surfaces ensure your images stay clear and aligned, making the projection process more seamless. While irregular surfaces can work, they require careful placement and adjustments. Focus on surfaces that reflect light evenly and are compatible with your projector’s capabilities to achieve the best visual impact.
How Do I Calculate the Optimal Projection Distance?
To calculate the *best* projection distance, you need to measure the size of your surface and the projector’s throw ratio. Use this to determine the ideal distance for projection accuracy, ensuring your image covers the surface evenly. Adjust the projector accordingly, testing the projection to confirm clarity and coverage. Remember, calculating distances carefully helps prevent distortions and guarantees your mapping looks sharp and precise on irregular surfaces.
What Equipment Is Necessary for Complex Surface Mapping?
Ever wondered what it takes to map complex surfaces seamlessly? You’ll need a high-quality projector with adjustable lens options, a powerful computer for projection calibration, and specialized software for precise alignment. Don’t forget surface preparation—clean and smooth surfaces improve accuracy. Equipment like mounting rigs and calibration tools guarantee stability and precision. With these, you can tackle intricate designs on irregular surfaces, creating stunning visual effects that captivate your audience.
How Do Lighting Conditions Affect Projection Accuracy?
Lighting conditions notably impact your projection accuracy. Bright ambient light washes out images, making details harder to see, so you should control or reduce ambient light levels. Shadows from objects or uneven surfaces can distort projections, so you need to implement shadow mitigation techniques like strategic placement or additional lighting. Ensuring ideal lighting conditions helps your projection stay clear, vibrant, and accurately aligned on irregular surfaces.
Can Projection Mapping Be Used Outdoors Reliably?
Think of your projection surface as a canvas that faces nature’s unpredictable brushstrokes. Yes, projection mapping can be used outdoors reliably if you choose weather-resistant equipment and plan for changing conditions. You’ll want to guarantee your projectors are protected from moisture, dust, and temperature swings. With proper weather resilience measures, your visuals will shine brightly, transforming outdoor spaces into enchanting displays that withstand the elements.

Mastering Projection Mapping: The Complete Guide to 3D Visual Design, Tools, and Creative Immersion + AI section Bonus: From Concept to Installation — … Software, and Practical Applica-tions
As an affiliate, we earn on qualifying purchases.
As an affiliate, we earn on qualifying purchases.
Conclusion
As you master projection mapping, remember it’s like fitting a puzzle piece perfectly—your placement and angles are vital. I once watched a projection transform an uneven building surface into a stunning canvas, much like wrapping a gift seamlessly around its shape. With practice, you’ll learn to adapt your placement to any surface, turning even the most irregular shapes into mesmerizing displays. Keep experimenting, and you’ll create magic on any surface, no matter how tricky it seems.
![[4000 ANSI & Now with Netflix] 4K Projector with WiFi and Bluetooth for Display Booths, Auto Focus Keystone Smart Projector , Voplls Mini Projector with Adjustable Stand for Home Bedroom (Silver Grey)](https://m.media-amazon.com/images/I/41btdw84gxL._SL500_.jpg)
[4000 ANSI & Now with Netflix] 4K Projector with WiFi and Bluetooth for Display Booths, Auto Focus Keystone Smart Projector , Voplls Mini Projector with Adjustable Stand for Home Bedroom (Silver Grey)
[POCKET-SIZED 1080P PROJECTOR – SAME PERFORMANCE, LOWER PRICE] Why lug a heavy, noisy projector? This Voplls small projector…
As an affiliate, we earn on qualifying purchases.
As an affiliate, we earn on qualifying purchases.

BenQ TK850i True 4K HDR-PRO Smart Home Entertainment Projector powered by Android TV | 3000 Lumens | 98% Rec.709 | Lens shift & Keystone for Easy Setup | 3D Projector for Binge Watchers and Sports
4K UHD RESOLUTION IMAGE QUALITY: True 8.3 million pixels deliver 3840×2160 4K UHD image quality with striking clarity…
As an affiliate, we earn on qualifying purchases.
As an affiliate, we earn on qualifying purchases.