If you notice spots or dots on your projector image, start by inspecting and gently cleaning the lens with a soft, lint-free cloth and a lens-safe cleaner. If the spots persist, check for dust inside the projector, but be careful when opening it—professional help might be best. Dead pixels can also cause dots; try using pixel-fixing software or consider repairs. Continue exploring to learn effective ways to restore your projector’s clarity.
Key Takeaways
- Inspect and clean the projector lens with a soft, lint-free cloth and suitable lens cleaner to remove dust or smudges causing spots.
- Carefully open the projector to check internal components for dust buildup; use gentle air or a cleaning brush to clear debris.
- Use dead pixel repair software or built-in tools to attempt reanimation of stuck or dead pixels on the display.
- Regular maintenance and prompt cleaning prevent dust accumulation and minimize persistent spots or dots on the image.
- If spots remain unresolved, contact professional repair services or the manufacturer for further diagnosis and possible component replacement.
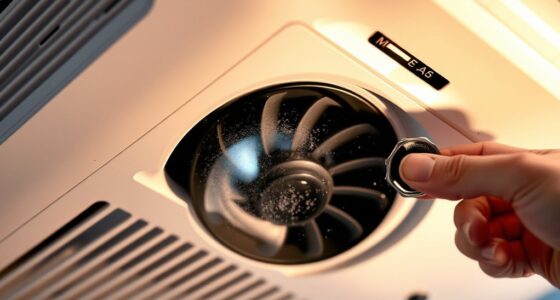
Have you ever noticed spots or dots appearing on your projector image? It can be frustrating, especially when you’re trying to enjoy a movie or give a presentation. These unwanted spots usually come from dust, dirt, or dead pixels inside the projector. Fortunately, you can fix many of these issues with a few simple steps. Start by inspecting the lens carefully. Dust or smudges on the lens often cause spots to appear on the projected image. To fix this, you should perform lens cleaning using a soft, lint-free cloth and a gentle lens cleaner designed for optics. Be gentle to avoid scratching the lens surface. Regular cleaning prevents dust buildup that can cause persistent spots. Besides cleaning the lens, you might need to look inside your projector to see if dust has settled on the internal components, especially the LCD panels or DLP chips. Carefully opening the projector to clean these parts might be necessary, but only if you’re comfortable doing so, or otherwise seek professional help. When cleaning, avoid using compressed air directly on delicate parts, as this can sometimes cause more harm than good. Instead, use a gentle, controlled blast of air or a specialized cleaning brush.
Sometimes, spots on the image aren’t caused by dirt but by dead pixels. Dead pixel repair can be a bit more complicated. Dead pixels appear as tiny, permanently black or discolored dots on the screen. They happen when individual pixels stop functioning correctly. Some projectors come with built-in dead pixel repair tools or software, which attempt to reanimate these pixels by rapidly changing the colors around them. If your projector has this feature, give it a try. If not, you might consider using a pixel-fixing program or app, which displays rapidly changing colors to stimulate dead pixels back into activity. Keep in mind, though, that dead pixels are sometimes permanent, and repair options may not work on all models. If dead pixels persist and considerably impact your viewing experience, it might be worth contacting the manufacturer or a professional repair service. They can often replace or fix faulty components, especially if your projector is under warranty.
Ultimately, addressing spots and dots on your projector image involves a combination of proper lens cleaning, internal maintenance, and possibly dead pixel repair. Regularly maintaining your projector by keeping it clean and free of dust can prevent many common issues. When problems do appear, act promptly—clean the lens, try to repair dead pixels, and seek professional help if needed. This way, you’ll enjoy a clearer, sharper image and prolong the life of your projector.
Altura Photo Camera Cleaning Kit – Lens Cleaner Spray, Brush, Pen, Blower, Microfiber Cleaning Cloths, Tissue Wipes for Canon Nikon Sony Fuji Olympus Pentax Sigma Tamron DSLR & Mirrorless Cameras
COMPLETE CAMERA CLEANING KIT: Our camera lens cleaning kit includes an alcohol & ammonia-free lens cleaner spray, cleaning…
As an affiliate, we earn on qualifying purchases.
As an affiliate, we earn on qualifying purchases.
Frequently Asked Questions
Can Dust Spots Be Permanently Removed From a Projector Lens?
Dust spots can’t be permanently removed from a projector lens through cleaning alone, as they’re often caused by dust inside the device. Regular lens cleaning helps prevent dust buildup, but if spots persist, professional cleaning or lens replacement may be necessary. To minimize future issues, practice dust prevention by storing your projector in a clean, dust-free environment and using covers when not in use. This keeps your lens clear and image sharp.
What Causes Dead Pixels to Appear on Projector Images?
Dead pixels appear due to pixel malfunction, often caused by manufacturing defects or prolonged use, making them stubborn guests in your image. Sometimes, light interference or damage can also contribute to these tiny troublemakers. It’s like your projector’s version of a rebellious teen—refusing to display correctly. While a bit of troubleshooting might hide them temporarily, these pixel malfunctions are usually permanent, turning your once flawless image into a pixelated battlefield.
Are Dust Spots on a Projector Harmful to Its Components?
Dust spots on your projector aren’t typically harmful to its components, but they can affect image quality. You should regularly clean the lens and filters through lens cleaning to prevent dust buildup. Additionally, practicing dust prevention by keeping the projector in a clean, dust-free environment helps maintain performance. While dust isn’t usually damaging, avoiding excessive dust accumulation ensures your projector stays in peak condition without unnecessary repairs.
How Often Should I Clean My Projector to Prevent Dust Spots?
You should clean your projector every three to six months to stay ahead of dust accumulation. If you notice spots or dots on the image, it’s a sign you’re playing with fire. Regular cleaning keeps dust at bay and prevents spots from becoming a bigger problem. Stick to a consistent cleaning schedule, especially in dusty environments, to keep your projector running smoothly and images crystal clear.
Is There a Way to Prevent Dead Pixels From Forming?
You can’t completely prevent dead pixels from forming, but proper pixel maintenance can help reduce their occurrence. Avoid static images for long periods, keep your projector clean, and guarantee proper ventilation to maintain image quality. Using a gentle screen cleaner and avoiding direct sunlight also help preserve the display. Regularly checking and handling your projector carefully can minimize stress on the pixels, ensuring better performance and clearer images over time.

3 Piece Anti Static Black Plastic Spudger ESD Safe Pry Opening Tool for Mobile Phone Tablet Laptop Repair Tools Kit
Material: Carbon fiber plastic; Length: approx 150 mm
As an affiliate, we earn on qualifying purchases.
As an affiliate, we earn on qualifying purchases.
Conclusion
Think of your projector as a canvas, each spot or dot like a tiny pebble disrupting the artwork. With patience and careful cleaning, you can smooth out the imperfections, restoring clarity to your masterpiece. Sometimes, these imperfections are just fleeting shadows, not permanent scars. Embrace the process as a craftsman tending to a delicate tapestry—every effort brings your image closer to perfection, transforming a flawed view into a clear, vivid scene.
dead pixel repair software for projectors
As an affiliate, we earn on qualifying purchases.
As an affiliate, we earn on qualifying purchases.

NothingProjector Cleaning Set for Projector Screen: Lint Roller + Brush + Cleaning Cloth
Comprehensive Cleaning Set – Includes lint roller, brush, and microfiber cloth for thorough care of your screen.
As an affiliate, we earn on qualifying purchases.
As an affiliate, we earn on qualifying purchases.