Using a shelf or rear wall for your projector provides a stable, adjustable setup that keeps your image sharp and consistent. Make sure your wall or shelf can support the projector’s weight securely, and choose materials like wood or metal for durability. Proper placement at the right height and angle reduces wobble, glare, and the need for digital corrections. To learn more about creating a safe, perfect setup, keep exploring these essential tips.
Key Takeaways
- Use sturdy, solid shelves or secure rear wall mounts to prevent wobbling and ensure projection stability.
- Confirm the wall can support the projector’s weight with appropriate anchors and brackets.
- Position the projector at the optimal height and angle to reduce keystone correction and improve image clarity.
- Securely install shelves or mounts to prevent vibrations or accidental knocks that could blur images.
- Regularly check stability and alignment to maintain sharp, consistent projection quality.

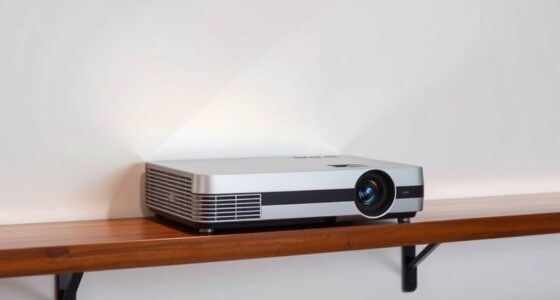
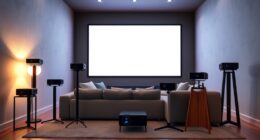
Placing your projector on a shelf or against a rear wall can considerably improve your viewing experience by providing stability and ideal projection angles. When you choose wall mounting or use a sturdy shelf, you eliminate the common issues of wobbling or shifting that can distort your image. Wall mounting especially offers a secure, permanent solution that keeps your projector steady and precisely positioned. A well-mounted projector allows you to optimize the lens tilt and throw distance, reducing the need for frequent adjustments and ensuring a clear, sharp picture every time. If you prefer a more flexible setup, a shelf can also deliver excellent stability if chosen carefully. Look for a shelf made of solid material, like wood or metal, that can support your projector’s weight without sagging or wobbling. The key is ensuring shelf stability to prevent any movement that could affect image quality or cause misalignment. Additionally, ensuring proper ventilation is crucial to avoid overheating during prolonged use.
Placing your projector on a sturdy shelf or against a rear wall enhances stability and projection quality.
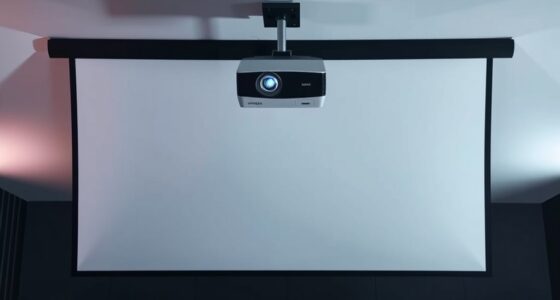
When considering wall mounting, you want to make sure your wall is strong enough to hold the weight of your projector. Use appropriate anchors and brackets designed for your wall type—whether drywall, brick, or concrete. Proper installation guarantees your projector remains fixed and safe, avoiding accidental falls or shifts that might damage the device or impair your viewing experience. Wall mounting also allows you to position the projector at the optimal height and angle, reducing the need for keystone correction or digital adjustments that can reduce image clarity. Plus, mounted projectors stay out of the way, keeping your viewing area tidy and free from clutter.
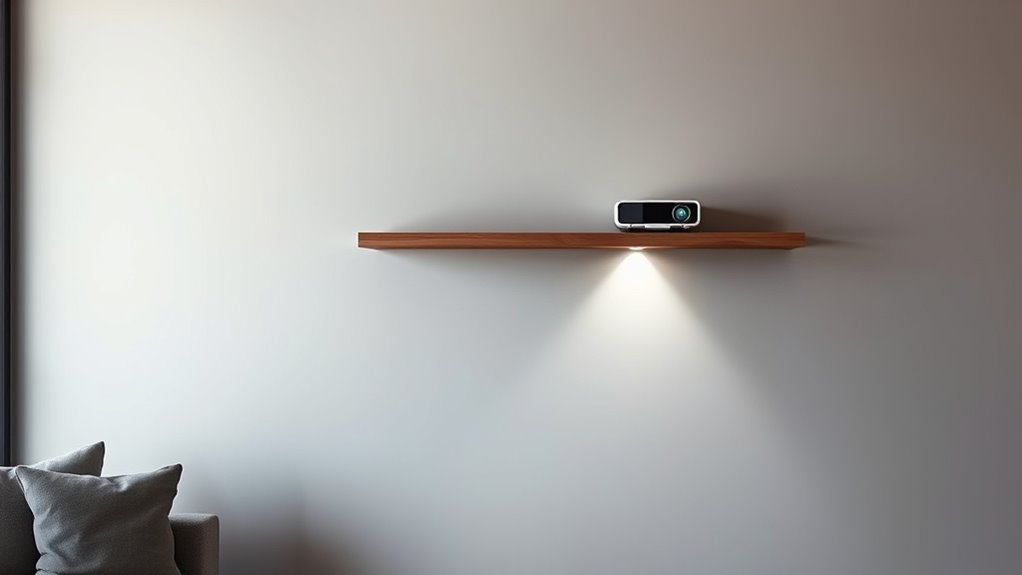
If you opt for a shelf, choose one that’s specifically designed to hold projectors or, at the very least, has a weight capacity well above your projector’s weight. Place the shelf at a height that aligns with your desired projection angle, ideally at eye level or slightly above, to minimize neck strain and maximize comfort. Secure the shelf firmly to the wall using appropriate mounting hardware—this enhances shelf stability and ensures your projector remains in position. Remember, a stable shelf prevents vibrations or accidental knocks that could blur or distort the image, especially during intense scenes or when adjusting the projector. Ensuring proper installation techniques can further enhance stability and safety.
In both cases, the goal is to keep your projector steady and well-positioned, so your viewing experience remains sharp and consistent. Wall mounting offers a sleek, permanent solution, while a sturdy shelf provides flexibility and ease of installation. Whichever option you choose, prioritize stability and proper placement to make the most of your home theater setup.

BAISHUN Projector Stand, Wall and Mini Ceiling Mount with 1/4-Inch Thread, 360-degree Rotation, Adjustable Tilt & Swivel, Foldable, Easy Setup Compatible with Most Projectors for Office, Home
Stable & Durable: High-quality metal, supports up to 4.4 lbs (2 kg), this wall mount delivers strong stability….
As an affiliate, we earn on qualifying purchases.
As an affiliate, we earn on qualifying purchases.
Frequently Asked Questions
How Do I Ensure Proper Ventilation With a Mounted Projector?
To guarantee proper ventilation with a mounted projector, you need to prioritize airflow management. Keep vents clear of obstructions and avoid placing the projector in tight, enclosed spaces. Use ventilation tips like installing a small fan nearby if needed, and regularly clean dust filters to prevent overheating. Proper airflow helps maintain ideal performance and prolongs your projector’s lifespan, so always check for adequate ventilation around your mounted unit.
Can I Use a Shelf for Short-Term or Temporary Projector Setups?
Yes, you can use a portable shelf for a temporary setup, making it convenient to move your projector quickly. Just make sure the shelf is sturdy enough to support the projector’s weight and is positioned at the correct height and angle for ideal projection. Remember to check ventilation and cable management to prevent overheating or tripping hazards. This flexible approach works well for short-term needs or occasional presentations.
What Are the Safety Considerations for Mounting Projectors on Walls?
When mounting a projector on a wall, guarantee mounting stability by securely anchoring the brackets to avoid falls or damage. Check electrical safety by using properly rated outlets and avoiding overloaded circuits. Keep cords organized and away from walkways to prevent tripping hazards. Regularly inspect the mount for looseness or wear, and follow manufacturer guidelines to maintain safety and prevent accidents, assuring your setup remains secure and safe.
How Does Ambient Light Affect Projector Performance on a Shelf or Wall?
Imagine you’re in a bright living room, and sunlight streams through the windows. Ambient light markedly impacts projector visibility, making images harder to see. When placed on a shelf or wall, high ambient light can wash out the projection, reducing clarity and contrast. To optimize performance, consider dimming lights or using blackout curtains. Managing ambient light ensures your projector displays sharp images, regardless of placement, enhancing your viewing experience.
Are There Specific Wall Materials Suitable for Projector Mounting?
You should choose wall materials that provide solid wall mounting and shelf stability. Concrete, brick, or wood studs are ideal because they support the weight and guarantee secure mounting. Avoid drywall alone, unless reinforced, as it may not hold the projector securely. Ensuring proper wall mounting and sturdy shelf stability guarantees your projector stays in place, reduces vibrations, and maintains ideal picture quality, even with ambient light variations.

SRTFINE Heavy Duty Floating Shelves, Drillable No Drill Metal Wall Mount Shelves with Cable Access – Carbon Steel Bracket for Projector, Router, Camera, Living Room Office (Large)
【Versatile 3-Size Set & Universal Use】 This wall-mounted floating shelf set includes multiple sizes, offering flexible storage for…
As an affiliate, we earn on qualifying purchases.
As an affiliate, we earn on qualifying purchases.
Conclusion
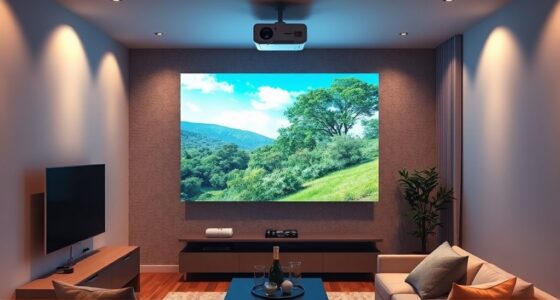
By placing your projector on a sturdy shelf or against a rear wall, you create a seamless viewing experience. Imagine the gentle hum of the projector, casting vivid images onto your screen, with everything perfectly aligned. As you settle in, the room transforms into a private theater, where every detail is crisp and clear. With the right setup, your space becomes a haven of immersive entertainment, all anchored by thoughtful placement.

Universal TV Mounting Hardware Screw Kit Set with Box – M4 M5 M6 M8 Screws and Washers Spacers, Replacement Screws for TV VESA Mounting, Fits Most TV/Monitor up to 80 inch
Packed in a Box:Store and organize mounting accessories in one place. Not only does this box keep screws,…
As an affiliate, we earn on qualifying purchases.
As an affiliate, we earn on qualifying purchases.

BAISHUN Projector Stand, Wall and Mini Ceiling Mount with 1/4-Inch Thread, 360-degree Rotation, Adjustable Tilt & Swivel, Foldable, Easy Setup Compatible with Most Projectors for Home, Office, White
Stable & Durable: Made of high-quality metal, supports up to 4.4 lbs (2 kg), this wall mount delivers…
As an affiliate, we earn on qualifying purchases.
As an affiliate, we earn on qualifying purchases.