
To troubleshoot your acoustically transparent screen, start by checking for gaps, tears, or improper installation that could cause sound leaks. Make sure your speakers are placed correctly, aimed at the listening area, and that the fabric is taut and snugly fitted to avoid muffling sound. Regularly inspect the material for wear or fading. If issues persist, adjusting placement or consulting a professional can help you optimize both sound quality and screen performance. Keep exploring to learn more solutions.
Key Takeaways
- Check for gaps, tears, or misaligned fabric that may cause sound leakage or muffling.
- Ensure the screen material is high-quality, durable, and properly installed to maintain sound transparency.
- Confirm speakers are correctly positioned and calibrated relative to the screen for optimal sound clarity.
- Inspect the mounting tension; a taut fabric reduces vibrations and improves sound transmission.
- Regularly maintain and replace fabric if fading, tearing, or sagging occurs to preserve sound and visual quality.

Silver Ticket Products STR Series 6 Piece Home Theater Fixed Frame 4K / 8K Ultra HD, HDTV, HDR & Active 3D Movie Projection Screen, 16:9 Format, 120" Diagonal, Woven Acoustic Material STR-169120-WAB
Wall Mounted Fixed Frame Projection Screen (Overall Size 65.175" Tall x 110.8" Wide) (Viewing Area 120" Diagonal x…
As an affiliate, we earn on qualifying purchases.
As an affiliate, we earn on qualifying purchases.
Understanding How Acoustically Transparent Screens Work
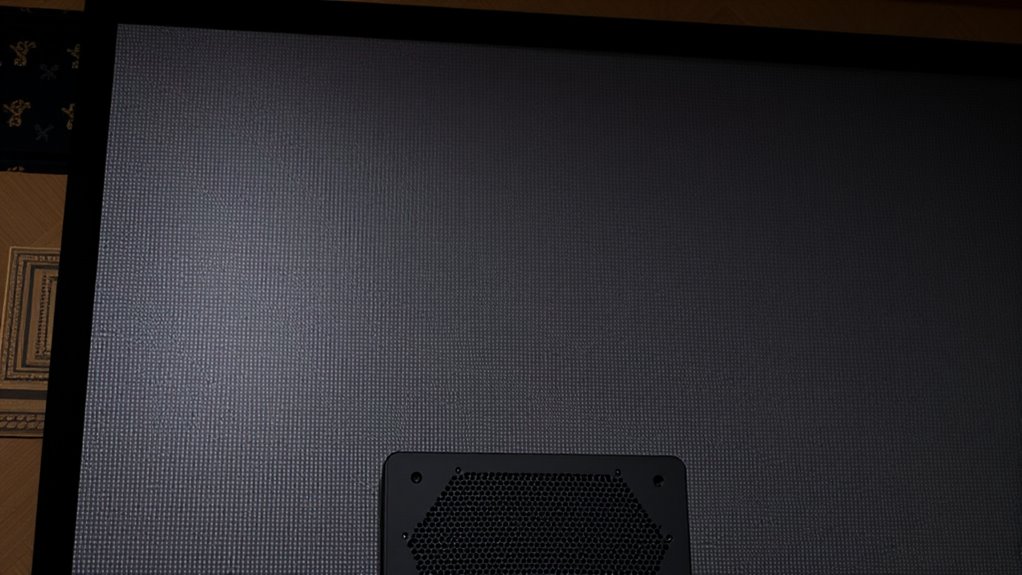
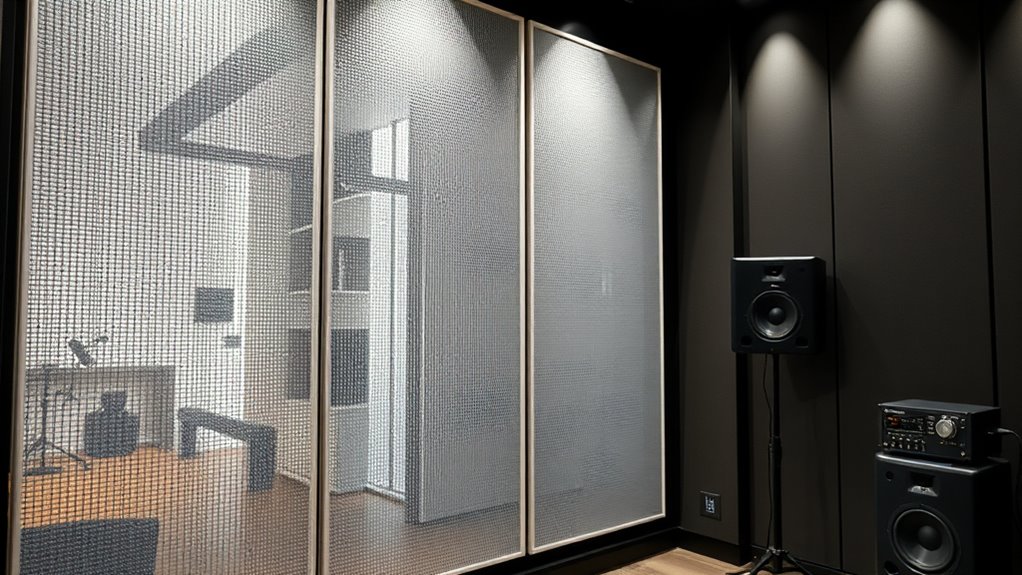
Although acoustically transparent screens appear like regular screens, they’re specially designed to let sound pass through without distortion. This is achieved through the screen fabric, which is crafted with acoustic transparency in mind. The fabric is woven or perforated to ensure it doesn’t block or muffle sound waves, allowing audio to travel freely behind the screen. Unlike traditional screens that can absorb or reflect sound, acoustically transparent screens maintain audio clarity while displaying visuals. The key is the unique material and structure of the screen fabric, which balances visual quality with sound permeability. By understanding this, you can better appreciate how these screens work seamlessly to deliver both clear sound and sharp images without compromise. Additionally, the design of these screens is often inspired by Audi Tuning techniques that optimize performance and efficiency.

XINLEI Universal Projector Screen Wall Mount L-Brackets Hanging Ceiling Mount, 6 inch Adjustable Extension with Hook for Home Projector and Movie Screens, Hold up to 66 lbs, White PRL003W
UNIVERSAL: Compatible with most manual or spectrum projector screen on the market. Suitable for wood stud, concrete wall,…
As an affiliate, we earn on qualifying purchases.
As an affiliate, we earn on qualifying purchases.
Common Sound Problems With These Screens
You might notice sound isn’t passing through the screen as clearly as it should. This often happens because of gaps in sound transmission or issues with the panel material. Understanding these common problems can help you troubleshoot effectively. Additionally, the type of screen material used can significantly impact its acoustic transparency, making it essential to select the right sound-permeable material for your setup.
Sound Transmission Gaps
Ever wonder why some acoustically transparent screens fail to block sound effectively? Sound transmission gaps happen when tiny openings or mismatched materials allow sound to leak through. These gaps can create noticeable sound leakage, undermining your setup’s effectiveness. To prevent this, check for material compatibility and proper installation. Here’s a quick comparison:
| Issue | Solution |
|---|---|
| Small gaps or tears | Seal with acoustical tape or fabric |
| Poor material fit | Use compatible, dense fabrics |
| Incorrect installation | Ensure tight, secure mounting |
Addressing these sound transmission gaps improves sound blocking and keeps your environment quiet and professional. Proper material compatibility is key to minimizing sound leakage and maximizing acoustical transparency. Staying informed about automation technologies can also help optimize maintenance and installation processes.
Panel Material Issues
Panel material selection plays a significant role in how well acoustically transparent screens perform. If you choose low-quality fabric, it may lack durability, leading to tears or wear over time, which can compromise sound clarity. Additionally, some fabrics are prone to color fading when exposed to sunlight or frequent cleaning, diminishing the visual appeal of your screen. To avoid these issues, opt for durable materials specifically designed for high traffic or prolonged use. Regular maintenance can help preserve fabric integrity and color vibrancy. Keep in mind that cheaper fabrics might save money initially but could result in costly replacements or repairs later. Choosing the right panel material guarantees your screen remains effective, visually appealing, and long-lasting. Furthermore, understanding the impact of AI advancements can assist in selecting materials that are more resilient and adaptable to evolving technology needs.

AcouZen DIY Acoustic Fabric | 58.3" x 78.7" Acoustically Transparent Fabric for Acoustic Panels | Ideal for Music Studios, Recording Rooms, Home Studios, and Rehearsal Spaces (Black)
Acoustically Transparent Fabric for Enhanced Sound Absorption AcouZen’s Acoustic Fabric is designed with superior sound transparency, allowing it…
As an affiliate, we earn on qualifying purchases.
As an affiliate, we earn on qualifying purchases.
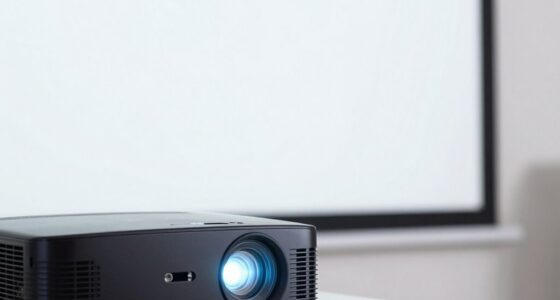
Checking and Adjusting Your Speaker Placement

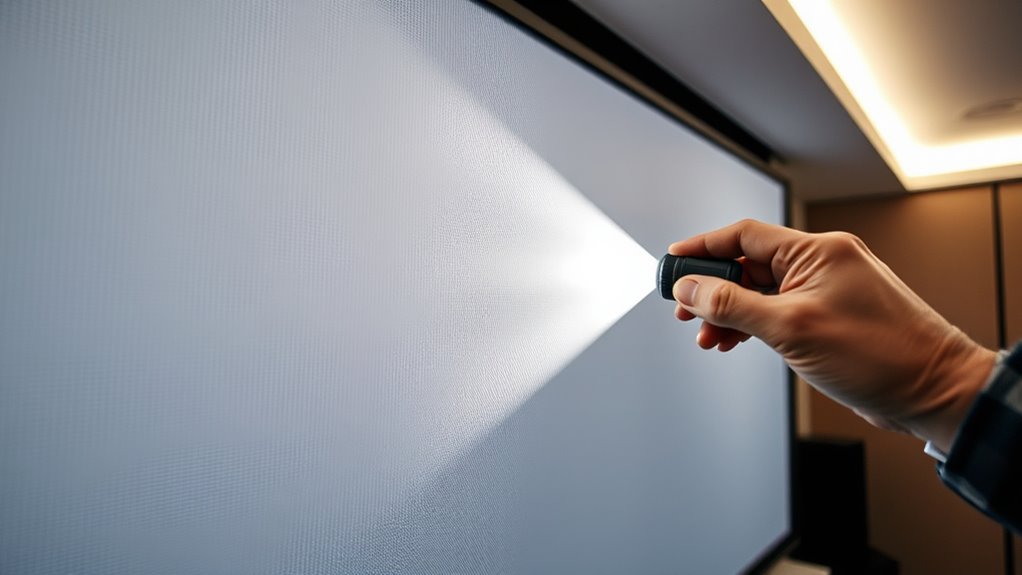
Proper speaker placement is essential for achieving the best sound quality with acoustically transparent screens. Start by examining your speaker positioning, ensuring they are aimed directly at your listening area. The distance between speakers and your seating should be balanced for *ideal* stereo imaging. Keep in mind that room acoustics influence sound, so avoid placing speakers too close to walls or corners, which can cause unwanted reflections or bass buildup. Use a mirror to find the speaker’s reflection points on the wall behind your screen—these are *perfect* locations for mounting or positioning speakers. Make small adjustments and listen carefully to identify improvements. Properly aligned speakers, considering your room’s acoustics, will deliver clearer, more immersive sound through your transparent screen setup. Additionally, understanding the importance of sound calibration can help optimize your audio experience.

Secopad Grey Window Screen Repair Tape, 2IN X 30FT (360IN) Screen Repair Kit for Windows or Doors, Strong Adhesive Patch Kit Fiberglass Mesh Tape
Easy and Fast: Cut a suitable size or shape of the screen repair tape, then cover the tear…
As an affiliate, we earn on qualifying purchases.
As an affiliate, we earn on qualifying purchases.
Ensuring Proper Screen Installation and Material Use
To guarantee ideal sound quality with your acoustically transparent screen, you need to carefully install it and select the right materials. Proper installation ensures minimal sound disruption and optimal speaker calibration. Choose materials with high durability to prevent sagging or damage over time, which can affect sound clarity. When installing, keep the screen taut and aligned, avoiding wrinkles or gaps that interfere with sound transmission. Use sturdy mounting hardware suited for your wall type. Ensure your speakers are correctly calibrated relative to the screen’s position. Consider this visual guide:
| Step | Focus Area | Key Point |
|---|---|---|
| Mounting the Screen | Material Durability | Secure, durable mounting |
| Screen Tensioning | Proper Installation | Keep taut without wrinkles |
| Speaker Calibration | Placement & Alignment | Maintain clear sound flow |
Additionally, paying attention to sound transmission properties can help optimize overall acoustic performance.
Tips for Improving Sound Clarity and Volume
To boost sound clarity and volume, start by placing your screen in the ideal position for sound distribution. Make sure to minimize any objects that could block or reflect sound waves. Finally, adjust the screen tension to prevent sagging, which can distort audio quality. Additionally, considering soundproofing techniques can help reduce external noise interference and improve overall audio clarity.
Proper Screen Placement
Ensuring your acoustically transparent screen is positioned correctly can make a significant difference in sound clarity and volume. Proper screen placement depends on your screen alignment and viewer positioning. To maximize sound, align the screen so it’s centered with your listening area, avoiding angles that cause sound reflections or obstructions. Consider your seating arrangement and ensure viewers face the screen directly for consistent sound quality. Here’s a helpful guide:
| Viewer Positioning | Screen Alignment |
|---|---|
| Directly in front | Centered horizontally |
| Slightly off-center | Slight tilt toward viewer |
| Behind the seating | Slightly angled for better sound |
| Multiple viewers | Equidistant placement |
| Close to the screen | Maintain maximum distance |
Correct placement enhances sound clarity, making your viewing experience immersive and enjoyable. Proper positioning is essential for achieving the best acoustically transparent screen performance.
Minimize Sound Obstructions
Minimizing sound obstructions is essential for achieving clear and loud audio from your screen. When objects block or reflect sound waves, certain audio frequencies can get muffled or distorted. To improve clarity, keep the area around your screen free of unnecessary items that may absorb sound or cause unwanted reflections. Use sound-absorbing materials, like foam panels or curtains, strategically placed to reduce echo and improve sound absorption. This helps maintain the integrity of different audio frequencies, ensuring speech and music sound crisp and balanced. Clear pathways for sound to travel directly to your ears increase volume and clarity. By reducing obstructions, you create a more favorable environment for your acoustically transparent screen to perform at its best. Additionally, understanding how soundproofing techniques can further enhance acoustic performance will help you optimize your setup.
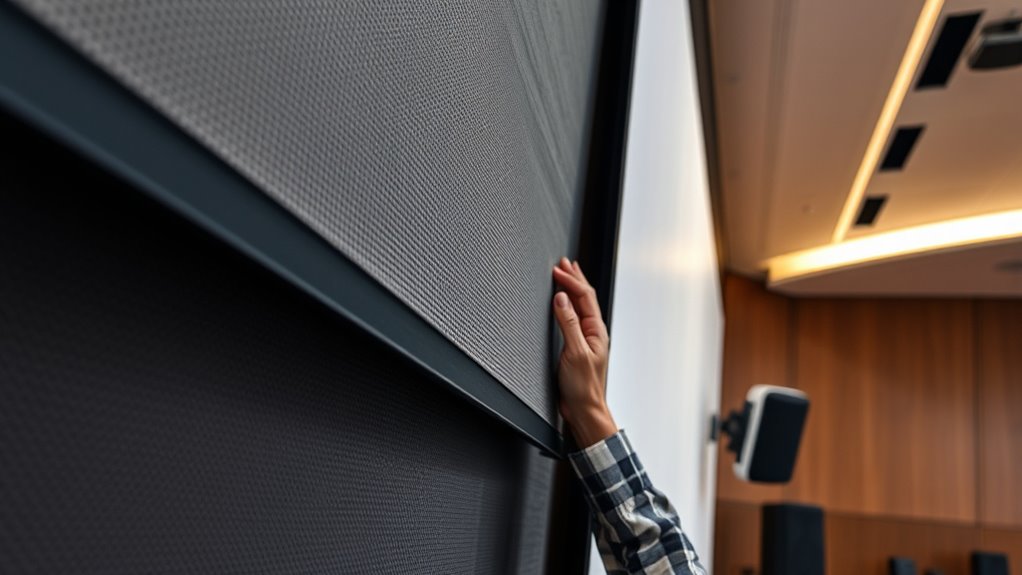
Adjust Screen Tension
Adjusting your screen tension can considerably enhance sound clarity and volume by reducing unwanted vibrations and resonance. To do this, focus on fabric stretch; when the fabric is too loose, it causes muffled sound and uneven volume. Begin tension adjustment by carefully tightening the screen’s frame or mounting points to achieve a taut fabric surface. Make small, even adjustments to avoid over-tightening, which can cause fabric damage or warping. Proper tension ensures the fabric remains smooth and tight, minimizing vibrations that distort sound. Check your screen regularly and adjust tension as needed to maintain excellent sound quality. Remember, a well-tensioned screen delivers clearer audio, with better volume and less distortion, making your listening experience much better. Regularly inspecting and maintaining your encryption software or hardware can also help protect your audio and visual equipment from digital threats, ensuring consistent performance.
When to Seek Professional Help

Sometimes, despite your best efforts, acoustically transparent screens may still malfunction or cause persistent issues. If you’ve tried adjusting tension and guaranteeing proper setup but still face problems, it’s time to seek professional help. A specialist can perform precise audio calibration to optimize sound quality and identify underlying issues you might overlook. If the screen wasn’t installed correctly, or if you’re unsure about the mounting, a professional installer can ensure everything is set up properly, reducing future problems. Don’t hesitate to get expert assistance if troubleshooting efforts don’t resolve your issues quickly. Professional help can save you time, prevent further damage, and ensure your screen functions as intended, providing the best audio experience.
Frequently Asked Questions
Can Acoustically Transparent Screens Affect Overall Home Theater Sound Quality?
Yes, acoustically transparent screens can influence your home theater sound quality. While they allow speakers to be placed behind the screen, some may cause a slight sound quality impact, especially if not chosen or installed correctly. To minimize issues, focus on proper installation considerations like using high-quality screens and positioning speakers properly. This ensures you enjoy clear, immersive sound without sacrificing picture quality.
Are There Specific Brands Best Suited for Acoustically Transparent Screens?
Think of finding the perfect brand as uncovering hidden gems. For acoustically transparent screens, brands like Stewart Filmscreen, Elite Screens, and Seymour Screens stand out. They offer first-rate material options that blend sound and visuals seamlessly. These brands are trusted for their quality, durability, and clarity, making your home theater experience richer and more immersive. Trust their reputation to guide your choice and bring your cinematic dreams to life.
How Often Should I Clean or Maintain My Acoustically Transparent Screen?
You should clean your acoustically transparent screen every 3 to 6 months, depending on usage and environment. Follow a regular cleaning schedule and use gentle tools like a soft cloth or a vacuum with a brush attachment to remove dust. Maintenance tips include avoiding harsh chemicals and checking for any tears or damage. Regular cleaning keeps the screen performing well and prolongs its lifespan, ensuring peak sound quality.
Do Acoustically Transparent Screens Work Equally Well With All Speaker Types?
Acoustically transparent screens work well with most speaker types, but you should check speaker compatibility and screen material before installation. Some speakers, especially larger or more sensitive ones, might require specific screen materials to avoid sound distortion. Make certain the screen material is designed for your speaker’s size and sound output. If unsure, consult the manufacturer’s guidelines to confirm that your speaker type will perform at its best with the screen.
Can Environmental Factors Like Humidity Impact Screen Performance?
Humidity hurts, and temperature variations can cause chaos with your acoustically transparent screen. High humidity levels may lead to moisture buildup, muffling sound clarity and causing material warping. Sudden temperature swings can stretch or shrink the screen fabric, affecting its performance and appearance. To keep your screen singing smoothly, maintain stable humidity and temperature conditions, ensuring peak acoustical transparency and preventing environmental elements from sabotaging your sound system’s success.
Conclusion
While troubleshooting acoustically transparent screens might seem complicated, most issues are straightforward fixes you can handle yourself. Don’t assume you need expert help for every problem—many sound issues stem from simple adjustments or placement tweaks. With a little patience and basic knowledge, you can improve your home theater’s sound quality and enjoy clear, immersive audio. Remember, understanding how your screen and speakers work together makes troubleshooting much easier and more effective.