
To remove dust spots inside your lens, first identify the spots by taking test shots against a plain background. Carefully disassemble the lens and use a blower to gently dislodge dust, avoiding contact with glass. If dust remains, apply specialized cleaning solutions with a soft cloth or swab to dissolve and lift the particles. Reassemble the lens and test it again. For detailed steps and tips, explore the full process below.
Key Takeaways
- Use a blower to gently dislodge dust from lens elements without touching the glass.
- Avoid liquids; if needed, apply specialized lens cleaning solution carefully with a lint-free cloth.
- Detach the lens from the camera in a clean, dust-free environment before cleaning inside.
- Use a soft brush or cleaning swab to remove stubborn dust particles delicately.
- Reassemble and test the lens with test shots to ensure dust spots are fully removed.
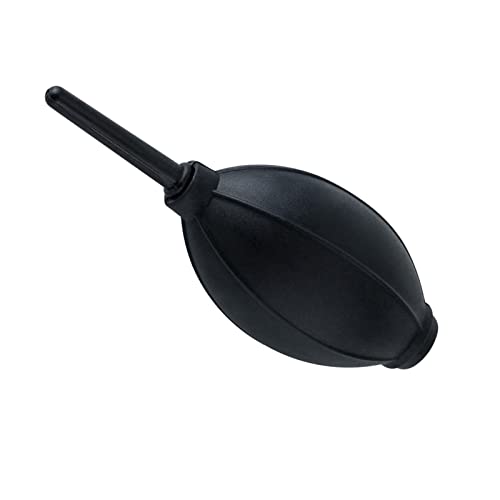
Soft Tip Silicone Super Air Blower Blaster Pump Dust Cleaner Include Micro Fiber Cleaning Cloth, Bulb Blower for Digital SLR Lens Sensor LCD Screens Musical Instruments Keyboards Telescope Filters
- Multipurpose Cleaning Tool: Cleans lenses, sensors, instruments, and more
- Soft & Comfortable Material: Silicone bag is gentle on skin and surfaces
- High Air Output & Scratch-Free: Powerful airflow with soft tip prevents scratches
As an affiliate, we earn on qualifying purchases.
As an affiliate, we earn on qualifying purchases.
Identifying Dust Spots and Assessing the Damage

Dust spots inside your lens can be tricky to spot at first, but identifying them is essential before attempting any cleaning. Start with a thorough sensor inspection by taking test shots against a plain, bright background—like a white wall or clear sky. Look closely at the images for dark spots or irregular patterns that indicate dust. Once identified, assess whether the spots are on the lens elements or the sensor itself. Carefully examine your equipment for any signs of damage, such as scratches or cracks, which could worsen during cleaning. Proper damage assessment helps you determine if professional help is needed. Remember, detecting dust early and understanding your camera’s condition prevents further issues and ensures safe, effective cleaning later on. Additionally, understanding lens technology can help prevent dust intrusion during future use.

MagicFiber Microfiber Cleaning Cloth, 6 Pack – Premium Cloth for Glasses, Lens, Screens & More
- High-Quality Microfiber Material: Absorbs dust, oil, smudges, and fingerprints
- Scratch-Free Cleaning: Leaves no scratches, streaks, or lint
- Versatile Use: Suitable for glasses, screens, and TVs
As an affiliate, we earn on qualifying purchases.
As an affiliate, we earn on qualifying purchases.
Preparing Your Workspace and Necessary Tools
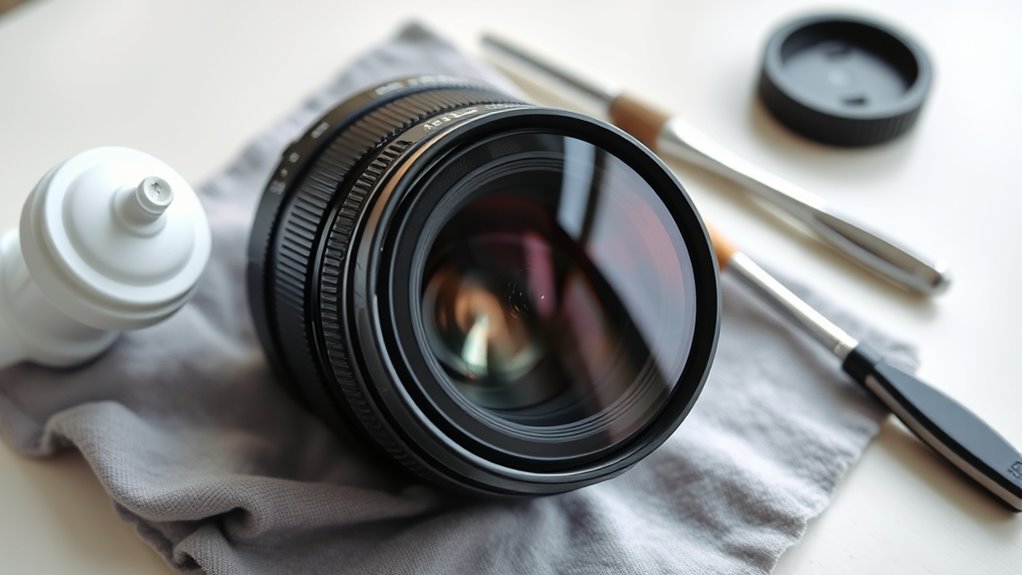
Start by cleaning your work area to keep dust and debris away from your lens. Gather all essential tools, like a blower, microfiber cloth, and cleaning solution, so everything’s ready. Don’t forget to protect surrounding surfaces with a soft cloth or tape to prevent accidental damage during the cleaning process. Additionally, consider implementing AI-powered virtual reality in e-learning techniques to simulate cleaning procedures for better understanding before actual practice.
Clean Work Area
Creating a clean, organized workspace is vital before you begin cleaning your lens. Start by choosing a work surface free of dust and debris to prevent any particles from settling on your lens. Clear the area of unnecessary clutter to maintain focus and reduce distractions. Good lighting conditions are essential—bright, natural light or a well-lit environment helps you see dust spots clearly and ensures you don’t miss any particles. Keep your workspace tidy so tools and materials are easily accessible, minimizing the risk of accidental damage. A clean work area not only protects your equipment but also makes the cleaning process more efficient and safer. Ensuring that your workspace adheres to proper safety protocols can help prevent accidental damage during cleaning. Taking these steps sets the foundation for a successful and dust-free lens cleaning.
Gather Essential Tools
Before you begin cleaning your lens, gather all the tools you’ll need to make the process smooth and efficient. For effective lens cleaning and dust removal, you’ll want a blower, a lens cleaning brush, microfiber cloths, and lens cleaning solution. The blower helps remove loose dust without scratching, while the brush targets stubborn particles. Microfiber cloths are essential for gentle wiping, and a lens cleaning solution ensures proper cleaning without damaging coatings. Having these tools ready prevents interruptions and reduces the risk of introducing new dust or fingerprints during cleaning. Additionally, understanding the types of headphone jacks can help ensure compatibility if you need to connect cleaning tools or devices during maintenance. Make sure all items are clean and free of debris. With your tools prepared, you’ll be ready to perform precise dust removal and achieve a spotless interior lens.
Protect Surrounding Surfaces
To make certain your workspace stays protected during lens cleaning, clear the area of any fragile or valuable items that could be damaged or knocked over. This helps prevent accidents and keeps dust from settling on nearby surfaces. Before you begin, gather tools like microfiber cloths, a blower, lens cleaning solution, and a soft brush. Create a clean, clutter-free zone to minimize dust and debris, which can hinder dust prevention efforts during lens cleaning. Cover nearby electronics or reflective surfaces to avoid scratches or smudges. Keep small parts within reach to avoid dropping them. Ensuring your workspace is organized and protected makes dust removal easier and more effective, reducing the risk of dust spots inside the lens or on surrounding surfaces. Additionally, being aware of AI’s impact on customer experience can help you understand how modern tools might assist in maintaining your equipment and workspace.

Eclipse Optic Cleaning Solution – Camera Lens and Digital Sensor Cleaner Fluid – Works with All Cameras, Binoculars, and Other Optical Products – Dropper Tip (15ml) – 0.5oz (2-Pack)
- Safe for All Optical Equipment: Won't damage cameras, lenses, or sensors
- Compatible with PEC-PAD Wipes: Safe for optical glass surfaces
- Ideal for Sensor Cleaning: Quick-drying, residue-free sensor cleaner
As an affiliate, we earn on qualifying purchases.
As an affiliate, we earn on qualifying purchases.
Removing the Lens From Your Camera Safely
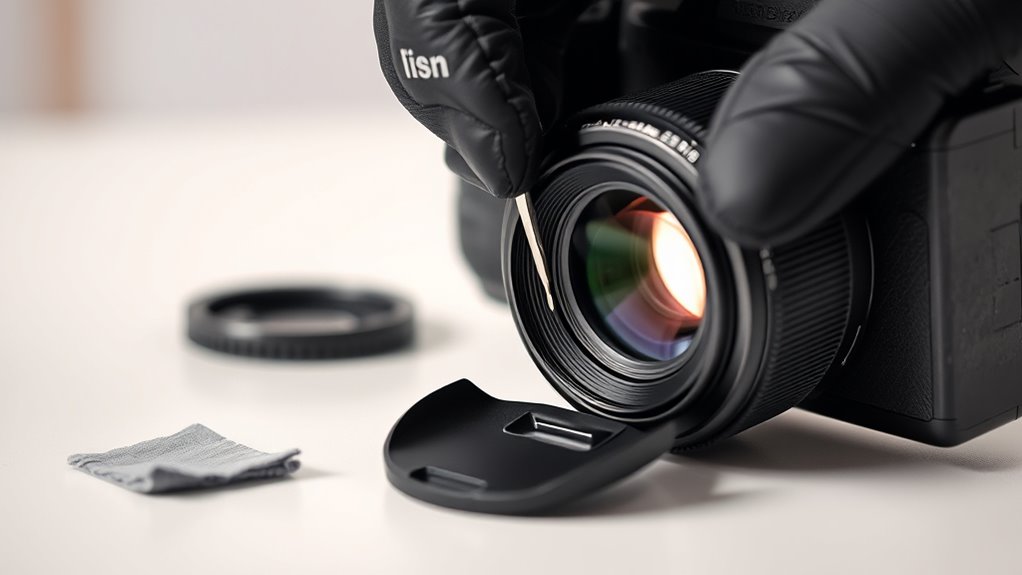
Removing the lens from your camera might seem intimidating, but with the right approach, it’s straightforward. First, turn off your camera and remove the battery to prevent static. Carefully detach the lens, holding it by the barrel to avoid touching glass elements. This step is essential for lens calibration and maintaining optical alignment. Use a clean, soft cloth to wipe the mount area if needed. Keep the lens in a safe, dust-free space. Here’s a quick guide:
| Step | Tools Needed | Tips |
|---|---|---|
| Turn off camera | None | Prevent damage from static |
| Detach the lens | None | Hold by barrel, not glass |
| Store safely | Soft cloth or case | Avoid dust and scratches |
Following these steps keeps your equipment ready for safe cleaning.

K&F CONCEPT 4-in-1 Camera Lens Cleaning Kit with Lens Cleaning Pen, Camera Air Blower, Microfiber Cleaning Cloth, Lens Cleaner Kit for Canon Nikon Pentax Sony DSLR Camera Lens Filter Cell Phones
- Complete Camera Cleaning Kit: Includes blower, pen, cloths
- Eco-friendly Air Blower: Soft silicone nozzle, large air volume
- Versatile Lens Cleaning Pen: Brush and carbon head for thorough cleaning
As an affiliate, we earn on qualifying purchases.
As an affiliate, we earn on qualifying purchases.
Using Blower Bulbs to Dislodge Dust

To effectively remove dust from inside your lens, you should use a blower bulb carefully. Proper handling guarantees you dislodge dust without risking damage to the glass or coatings. When used correctly, the blower is a simple, effective tool to clear away dust particles. Additionally, understanding Kia Tuning options can help you maintain optimal vehicle performance after cleaning.
Proper Blower Handling
Using a blower bulb is one of the safest and most effective ways to dislodge dust from inside your lens. Proper blower handling ensures you don’t damage delicate components. Always handle compressed air carefully—avoid squeezing too hard, which can cause sudden bursts that might harm your lens. Regularly perform proper blower maintenance by cleaning the bulb and nozzle to prevent dust buildup and ensure ideal airflow. When using the blower, keep it at a safe distance and avoid direct contact with the lens elements. Also, don’t shake or invert the blower, as this can introduce moisture or debris. Remember, gentle, controlled bursts are most effective. Proper handling prolongs your blower’s lifespan and keeps your lens free of dust without risking damage. Being aware of supermarket hours can help you plan your shopping trips around store availability, much like knowing how to carefully handle your equipment ensures optimal performance.
Effective Dust Dislodging
A blower bulb is a simple yet highly effective tool for dislodging dust from inside your lens. Using it properly is key to effective lens cleaning and dust removal techniques. Gently squeeze the bulb to create a stream of air that loosens dust particles without touching delicate elements. To help visualize, here’s a quick overview:
| Step | Action | Result |
|---|---|---|
| 1 | Hold the blower firmly | Stability during use |
| 2 | Aim the nozzle at the lens | Precise dust targeting |
| 3 | Squeeze gently to blow air | Dust dislodges safely |
| 4 | Repeat if needed | Thorough dust removal |
Using a blower bulb correctly ensures safe lens cleaning and effective dust removal without risking scratches or damage. Proper technique can also prevent further damage to your lens components.
Cleaning the Inside of the Lens With Special Solutions
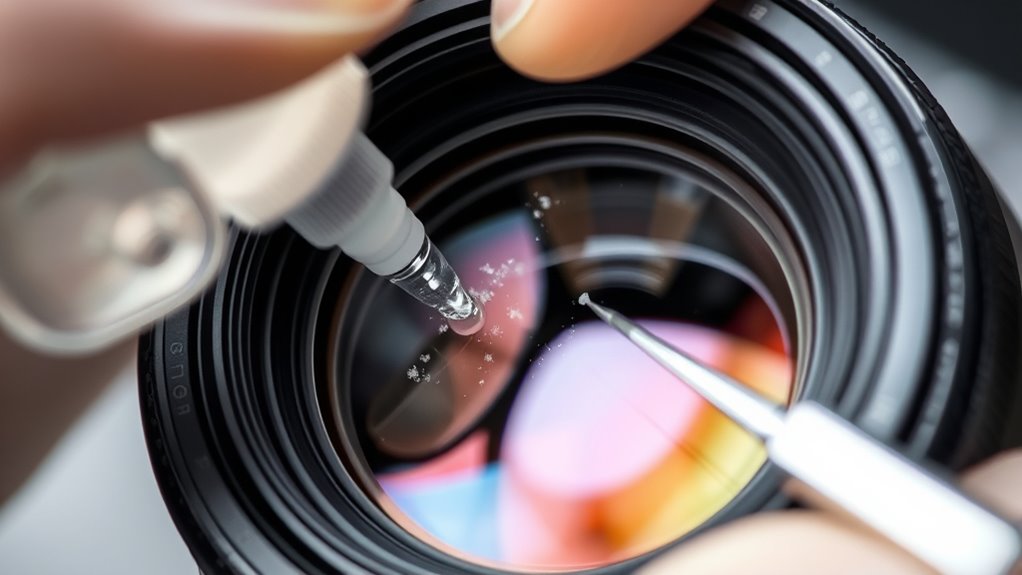
When cleaning the inside of your lens, special solutions can effectively dissolve and loosen dust spots without damaging delicate optical coatings. These solutions are designed specifically for lens cleaning and dust removal inside sealed units. To use them properly, verify you have a precision dropper or applicator. Carefully apply a small amount of solution to a lint-free cloth or cleaning swab. Proper handling of these cleaning agents is essential to avoid compromising the lens’s optical integrity and performance. Consider these tips:
- Use only recommended solutions to avoid damage.
- Apply gently to prevent pushing dust further inside.
- Avoid excessive liquid to prevent leaks.
- Follow manufacturer instructions precisely.
This method helps loosen stubborn dust, making future dislodging easier. Always handle your lens with care during this process to maintain its optical quality and avoid introducing new dust.
Reassembling the Lens and Testing for Remaining Spots

After reassembling the lens, carefully tighten all screws and make certain the housing is securely sealed to prevent dust from entering again. During lens reassembly, guarantee all parts are aligned properly and nothing is left loose. Once the lens is fully reassembled, proceed to testing for spots by attaching it to your camera and taking test shots. Check the images closely for any remaining dust spots or imperfections. If spots still appear, you may need to disassemble and inspect the lens again. Confirm that all internal components are properly seated and clean. Testing for spots helps verify the success of your cleaning process and ensures your lens performs at its best. Proper reassembly and thorough testing are essential to maintain image quality. Additionally, understanding lens maintenance techniques can help you prevent future issues and prolong the life of your equipment.
Preventative Tips to Keep Dust Out of Your Lens
Proper reassembly minimizes dust entry, but taking proactive steps can keep your lens cleaner for longer. To enhance dust prevention, handle your lens with clean hands and avoid touching the glass directly. Store your lens in a dust-free environment, preferably in a sealed case or with silica gel packs. Regularly inspect and clean your lens coatings gently with a microfiber cloth designed for optics. Keep dust off your equipment by avoiding windy or dusty locations when changing lenses. Also, consider using a lens filter to protect the glass and reduce dust buildup. These simple habits help maintain the integrity of your lens coatings and prevent dust from settling inside, ensuring clearer images and less frequent cleaning.
Frequently Asked Questions
Can Dust Spots Affect the Overall Image Quality Significantly?
Dust spots on your sensor dust can noticeably affect your image quality, especially in shots with uniform backgrounds like skies or walls. These spots appear as dark specks or blemishes, distracting from your overall photo. If you notice sensor dust, it’s essential to clean it promptly to maintain sharp, clear images. Ignoring it can lead to persistent flaws that diminish your photos’ professional appearance and overall quality.
What Are the Risks of Opening a Lens Without Professional Help?
Opening a lens without professional help is like trying to fix a delicate watch—you’re risking misalignment and damaging the intricate parts. You could ruin the lens’s calibration and optical alignment, leading to blurry images or uneven focus. Dust or debris might get trapped, and reassembling the lens without proper tools or expertise can cause irreversible harm. Always consult a professional to maintain your lens’s performance and avoid costly mistakes.
How Often Should I Clean the Inside of My Lens?
You should clean the inside of your lens only when you notice dust or spots affecting your photos. Regular lens maintenance helps prevent dust buildup, but frequent internal cleaning isn’t necessary and can cause damage if done improperly. To minimize dust, store your lens properly and keep it sealed when not in use. Cleaning intervals depend on usage and environment, but always handle with care to avoid damaging sensitive components.
Are There Any DIY Methods to Prevent Dust Accumulation?
To prevent dust accumulation, you should practice regular lens cleaning and dust prevention techniques. Keep your camera and lenses in a clean, dust-free environment, using lens caps when not shooting. Use air blowers or gentle brushes for dust removal, avoiding contact with the glass. Store your gear properly in sealed cases, and avoid changing lenses in dusty areas. These steps help minimize dust buildup and keep your lens in ideal condition.
What Signs Indicate It’s Time to Replace My Lens Instead of Cleaning?
Think of your lens as a delicate puzzle; when pieces no longer fit perfectly, it’s time to substitute it. If cleaning doesn’t restore clarity, signs include persistent spots, blurred images, or compromised lens coating, indicating damage to optical alignment. These issues affect image quality and can’t be fixed with cleaning alone. Trust your eyes—if the picture’s quality suffers despite cleaning, swapping out the lens ensures your photos stay sharp.
Conclusion
And there you have it—your foolproof guide to banishing those pesky dust spots. Just remember, a spotless lens guarantees crystal-clear shots, unlike your cluttered mind. So go ahead, get your hands dirty (literally), and pretend you’re a high-tech surgeon. After all, if your camera’s inner life can’t stay dust-free, maybe it’s time for a new hobby—like building sandcastles. Happy cleaning, and may your images stay flawlessly dust-free!