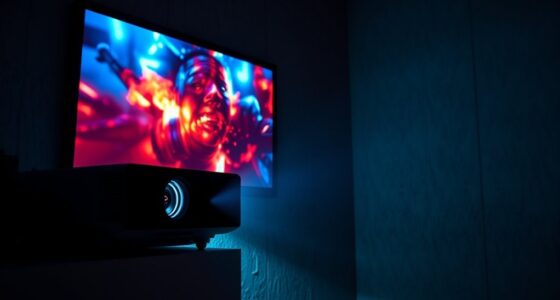
Using test patterns helps you accurately calibrate your display, ensuring your images show true-to-life colors, proper contrast, and sharpness. By selecting the right pattern—like grayscale ramps for tonal balance or color bars for color accuracy—you can fine-tune your monitor settings effectively. Regularly checking these patterns helps you maintain consistent image quality across projects. If you want to learn how to use these tools step-by-step, keep exploring further techniques.
Key Takeaways
- Select test patterns that match your display’s resolution and features, such as grayscale ramps, color bars, and resolution charts.
- Calibrate your monitor regularly using test patterns to ensure accurate color reproduction and consistent tonal response.
- Use grayscale gradients within test patterns to fine-tune brightness, contrast, and gamma settings for optimal tonal balance.
- Analyze color patches and gradients in test patterns to identify color casts, tints, and adjust white balance and color tints accordingly.
- Incorporate test pattern evaluations into your workflow to maintain display accuracy, sharpness, and color fidelity during image editing.

GME MT830A Portable Computer Monitor Tester Video Test Pattern Generator for PC Monitor, Designed and Engineered in The USA
【TEST, CALIBRATE, SERVICE, TROUBLESHOOT PC MONITOR】 Handheld video monitor tester that generates a wide variety of test patterns…
As an affiliate, we earn on qualifying purchases.
As an affiliate, we earn on qualifying purchases.
Understanding the Role of Test Patterns in Image Editing

Test patterns play a essential role in image editing by providing standardized references that help evaluate and refine adjustments. They are indispensable for accurate color calibration, ensuring that your display shows true-to-life colors. By using test patterns, you can identify color inaccuracies and make precise adjustments to achieve consistent results across different devices. Display profiling is another key aspect supported by test patterns; it involves creating a detailed profile of your monitor’s characteristics. This profile helps your editing software apply correct color and luminance settings, leading to more accurate edits. Without these reference patterns, your work could be compromised by inconsistent colors and poor display performance. Additionally, Kia Tuning techniques can influence visual modifications to vehicles, highlighting the importance of precise calibration in both digital and physical realms. Overall, test patterns are critical tools for maintaining color fidelity and reliable display profiling in professional image editing.

DGK Color Tools Digital Kolor Pro 16:9 Large Color Calibration and Video Chip Chart, 2-Pack
SUPERIOR ACCURACY – Ensures precise color calibration with professional-grade chips, delivering consistent and reliable results for video production.
As an affiliate, we earn on qualifying purchases.
As an affiliate, we earn on qualifying purchases.
Selecting the Right Test Pattern for Your Needs

Choosing the right test pattern depends on your display type and the specific adjustments you need. Different patterns serve different purposes, like checking color accuracy or sharpness. Matching the pattern to your display guarantees accurate fine-tuning results. Additionally, using patterns that assess color fidelity helps ensure your projector produces realistic and vibrant images.
Pattern Types and Purposes
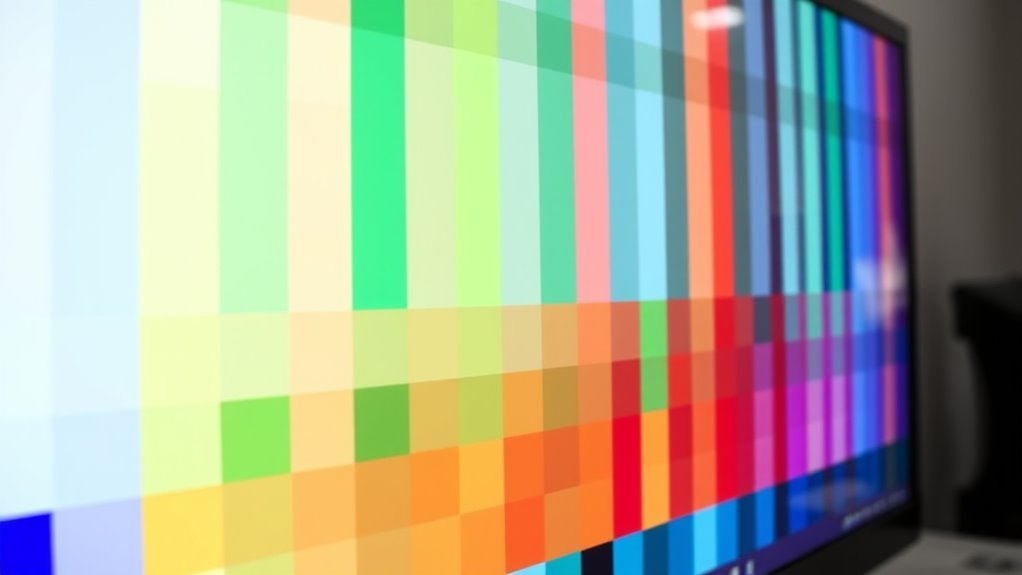
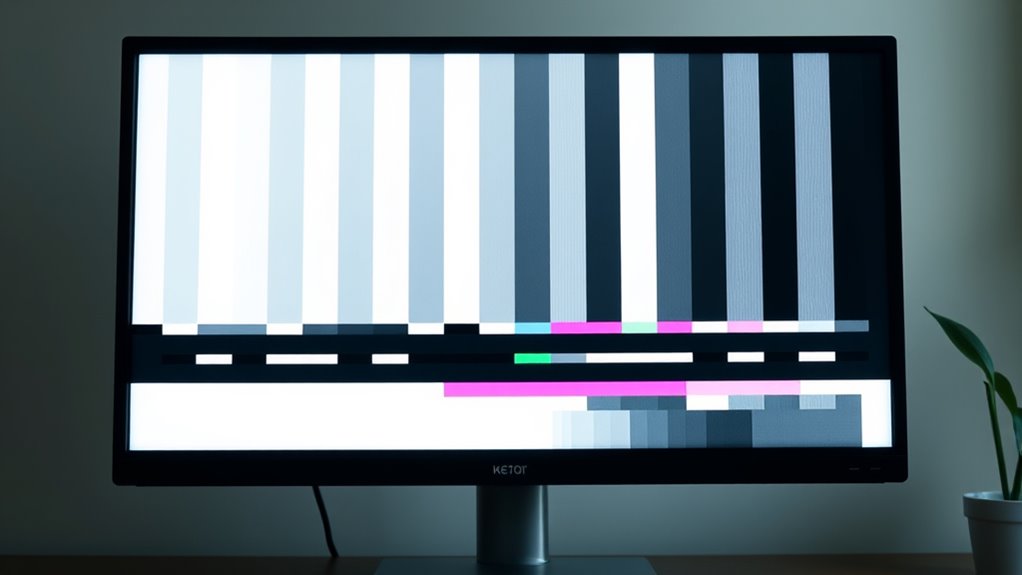
Selecting the right test pattern depends on your specific image fine-tuning goals, as different patterns serve different purposes. For instance, grid patterns help you assess geometric accuracy, straight lines, and resolution, making them ideal for checking distortion or alignment issues. Color bars are essential for evaluating color accuracy, saturation, and consistency across your display. They allow you to fine-tune color balance and ensure uniform color reproduction. Other patterns, like grayscale ramps or resolution charts, target contrast and sharpness. By understanding the purpose of each pattern, you can choose the most effective one for your adjustments. Combining patterns often provides detailed insights, helping you achieve the best possible image quality tailored to your display’s capabilities. Additionally, understanding bedroom decor styles can help you select patterns that complement your overall aesthetic.
Matching Test Patterns to Displays
Matching the right test pattern to your display starts with understanding its specific features and limitations. For effective color matching and pattern recognition, select patterns that highlight your display’s strengths and weaknesses. For example, use grayscale gradients to check tonal accuracy, color bars for color consistency, and fine detail patterns for sharpness. Consider the display’s resolution, contrast, and color range when choosing patterns. Here’s a quick guide:
| Pattern Type | Purpose | Best For |
|---|---|---|
| Gradient Strips | Tonal range, smooth gradation | Color matching, shading |
| Color Bars | Color accuracy and consistency | Color calibration |
| Fine Grids | Sharpness and detail | Pattern recognition |
| Test Patterns | Overall calibration | General fine-tuning |
Choosing the right pattern ensures precise adjustments and ideal display quality. Additionally, understanding Special Occasions can help you select appropriate themes for celebratory displays or presentations.

SEWACC Monitor Color Calibration Card, CCTV Calibration Tool, Camera Focus Adjustment Chart for Lens Resolution Testing, Display Color Accuracy Checker for Home Surveillance and Professional Use
Portable and user-friendly design: sized at 15.74 by 11.81 inches, this surveillance calibration card is easy to carry…
As an affiliate, we earn on qualifying purchases.
As an affiliate, we earn on qualifying purchases.
Setting Up Your Workspace for Accurate Testing

To guarantee your testing is accurate, start by calibrating your monitor so colors and brightness are true to life. Make sure your workspace has proper, consistent lighting to avoid shadows or glare that can skew results. Use the same test files each time to maintain consistency and reliable comparisons. Being aware of environmental factors such as lighting conditions can further enhance the accuracy of your assessments.
Calibrate Your Monitor
Calibrating your monitor is a crucial step to guarantee your test patterns accurately reflect real-world image quality. Proper calibration ensures your display’s color management aligns with industry standards, allowing you to see true colors and tonal ranges. Understanding your display technology—whether LCD, OLED, or IPS—helps you make precise adjustments. First, use calibration tools or software designed for your monitor type to set brightness, contrast, and gamma levels. This process minimizes color shifts and ensures consistency across devices. Accurate calibration creates a reliable workspace, so your test patterns reveal genuine issues rather than artifacts caused by improper settings. Additionally, knowing your monitor’s color accuracy helps you achieve optimal image fidelity. Take the time to calibrate regularly, especially when switching displays or after updates, to maintain ideal image fidelity and precise fine-tuning.
Choose Proper Lighting
Choosing the right lighting setup is essential to guarantee your test patterns accurately reflect how images will appear in real-world conditions. Focus on consistent ambient lighting to prevent color shifts and glare that can skew your results. Use light sources with a stable color temperature, ideally around 5000K to 6500K, which mimics natural daylight and provides accurate color reproduction. Avoid mixed lighting or overly warm/cool bulbs that can distort hues. Position your lights evenly and avoid direct reflections on the screen. If possible, control ambient lighting by turning off or dimming other sources to maintain a stable environment. Ensuring proper lighting calibration helps maintain consistency across different testing sessions. Proper lighting ensures your test patterns reveal true color, contrast, and details, making your fine-tuning efforts more precise and effective.
Use Consistent Test Files
Using consistent test files is vital for accurate image fine-tuning. When you stick to the same test patterns, it guarantees color consistency across your adjustments, making your results reliable. Carefully select patterns that accurately reflect your typical images, focusing on details like contrast, color balance, and sharpness. Consistent pattern selection helps you compare changes directly, avoiding confusion caused by different test files. Keep your test files unchanged during each tuning session to maintain accuracy. This consistency allows you to identify subtle improvements and prevent misinterpretation of your adjustments. By establishing a stable testing environment with consistent files, you streamline the fine-tuning process and achieve more precise, professional results in your images.

EZVALO 80RGB Color Changing Under Cabinet Lighting Wireless, 1800mAh Rechargeable Led Strip Shelf Lights, Timer & Dimmable Bar Light with Remote for Kitchen, Bedroom, Display Case, Car, 6Pack
Manual Control Design – No Motion Sensor: This RGB under cabinet light is designed for remote and button…
As an affiliate, we earn on qualifying purchases.
As an affiliate, we earn on qualifying purchases.
Evaluating Color Accuracy and Calibration
Evaluating color accuracy and calibration is essential to guarantee that your images display true-to-life hues across different devices. Start by checking the color space your monitor uses—ideally sRGB or Adobe RGB—since this impacts how colors are reproduced. Next, assess the color gamut, the range of colors your display can produce; a wider gamut means more vibrant, accurate colors. Use test patterns with color swatches and gradients to compare what you see against reference images. If colors look off or washed out, calibration tools or software can help fine-tune your display settings. Proper evaluation assures that your images maintain consistent, accurate colors whether viewed on your monitor or shared across various screens. Additionally, understanding the hours of operation of local stores can help plan your editing and printing schedules around optimal times for color-critical work. This process lays the foundation for precise, professional-quality image editing.
Adjusting Contrast and Brightness Using Test Patterns
Adjusting contrast and brightness is essential for guaranteeing your images display with ideal depth and clarity. Test patterns help you identify whether your display needs color correction or gamma adjustment to achieve accurate visuals. Begin by viewing a test pattern with grayscale gradients and detailed shadow areas. If the dark regions appear too washed out or too deep, adjust the contrast to balance shadow detail without losing highlight information. Brightness tweaks ensure midtones aren’t too dark or overly bright. Proper gamma adjustment helps fine-tune tonal response, guaranteeing subtle gradations are visible. Use the test pattern to evaluate these settings, making incremental changes until the image displays smooth transitions and accurate tonal range. This process results in a well-balanced image with enhanced depth and visual fidelity.
Fine-Tuning Sharpness and Detail With Test Charts

After setting the proper contrast and brightness, sharpening the image guarantees fine details stand out clearly. To achieve ideal sharpness enhancement while preserving detail, use test charts designed for this purpose. Be mindful that over-sharpening can introduce artifacts, so gradual adjustments are recommended. Additionally, understanding local laws and regional resources can help tailor your approach to specific situations. Here are three key steps: 1. Focus on edge contrast to boost sharpness without introducing halos. 2. Adjust sharpening settings incrementally, monitoring detail preservation. 3. Use high-frequency patterns to ensure fine lines remain crisp without over-sharpening.
Identifying and Correcting Color Casts and Tints

Color casts and tints can subtly distort your images, making them look unnatural or off-balance. To fix this, start with effective color correction by analyzing test patterns that reveal unwanted color shifts. Look for areas that appear overly warm (yellow or red) or cool (blue or green). Use tint adjustment tools to neutralize these tints, aiming for balanced, natural skin tones and accurate color representation. Adjust the sliders gradually, checking the test pattern as you go, until the colors appear consistent and true to life. Avoid overcorrecting, which can introduce new color imbalances. Remember, the goal is to achieve a neutral, clean image where no color dominates unnaturally. Proper color correction and precise tint adjustment help produce a professional, visually appealing result. Additionally, understanding drivetrain components and their maintenance can ensure your equipment performs optimally during editing sessions.
Verifying Overall Image Quality and Consistency
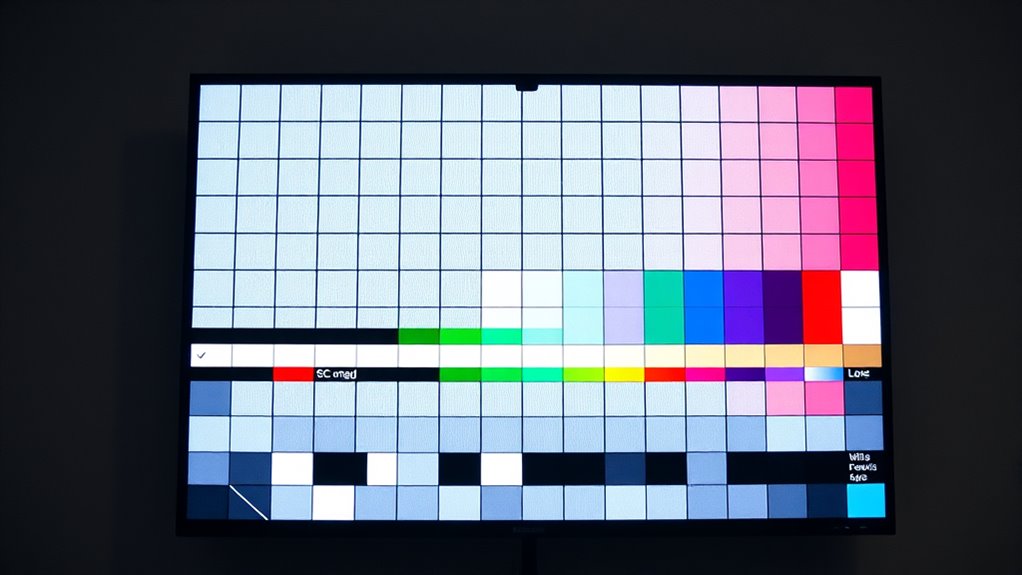
How can you guarantee that your image maintains consistent quality across the entire frame? Start by evaluating color matching and overall image consistency. Use test patterns with uniform color patches and grayscale ramps to spot discrepancies. To ensure quality, focus on these key steps:
Ensure consistent image quality by checking color uniformity, smooth grayscale transitions, and sharp details across the frame.
- Check for uniform color distribution to confirm color matching across different areas.
- Verify that grayscale tones transition smoothly, indicating consistent brightness and contrast.
- Examine edges and details to detect any blurring or artifacts that could compromise image quality.
Incorporating Test Pattern Checks Into Your Workflow

Incorporating test pattern checks into your workflow helps guarantee consistent image quality throughout your editing process. Regularly using test patterns ensures your display remains color calibrated, which is essential for accurate edits and true-to-life colors. By integrating these checks at key stages, you can identify and correct display inconsistencies early, preventing drift over time. This practice allows you to maintain a reliable reference point, so your adjustments reflect the actual image rather than monitor inaccuracies. Automate parts of this process with calibration tools or scheduled checks, making it seamless within your routine. Overall, embedding test pattern checks helps you sustain display consistency, leading to more predictable and professional results in your final images.
Frequently Asked Questions
How Often Should I Retake Test Pattern Assessments for Optimal Results?
You should retake test pattern assessments every few weeks to maintain ideal results. Regular assessment scheduling helps you identify any changes in your display or equipment, ensuring your image stays sharp. Adjust the retake frequency based on your usage and environment, but generally, a monthly retake works well. Consistent retakes allow you to fine-tune your settings effectively and keep your display in top condition.
Can Test Patterns Help Improve Print and Display Color Consistency?
Yes, test patterns can help improve your print and display color consistency. By regularly using test patterns, you can perform color calibration and create accurate color profiles for your devices. This process helps identify and correct color discrepancies, ensuring your images look consistent across different screens and printers. Consistent use of test patterns maintains peak color accuracy over time, making your images vibrant and true to the original.
What Common Mistakes Should I Avoid When Using Test Patterns?
You should avoid pattern misalignment, which can skew your calibration results, and verify your test patterns are correctly aligned with your display or printer. Be careful not to rush the process, as improper adjustments may lead to inaccurate color calibration. Always double-check your patterns for clarity and consistency, and avoid using outdated or low-resolution patterns that can mislead your calibration efforts. Proper attention prevents errors and improves overall color accuracy.
Are There Specific Test Patterns Recommended for Different Types of Displays?
While it’s wise to choose patterns suited for your display type, specific test patterns can enhance calibration for different screens. For example, LCDs benefit from contrast and color patterns, while projectors need uniformity and brightness tests. You might find pattern selection varies, so tailor your approach to your display’s characteristics. This personalized calibration ensures ideal image quality, making your setup more refined and enjoyable.
How Do Ambient Lighting Conditions Affect Test Pattern Accuracy?
Ambient influence considerably impacts test pattern accuracy because changing lighting conditions can alter how you perceive colors and contrast. To guarantee precise lighting calibration, you should perform tests in a controlled environment with consistent lighting. Adjust your display settings accordingly, and avoid bright or flickering lights that could skew your results. Proper ambient management helps you achieve ideal calibration, ensuring your test patterns accurately reflect your display’s true performance.
Conclusion
By mastering test patterns, you hold the secret weapon to flawless images. They’re your ultimate tool to perfect every hue, contrast, and detail with precision. With consistent use, you’ll transform your editing from good to legendary—like wielding a magic wand for perfect photos. Embrace these patterns as your trusted allies, and watch your images reach levels of quality that seem almost too good to be true. Start fine-tuning today and reveal photography greatness!