
To make the biggest impact when upgrading your living room for projection, focus on improving your space’s layout, lighting control, and equipment quality. Reposition furniture for clear sightlines and add blackout shades to eliminate glare. Invest in a high-resolution projector with good contrast and a large screen or matte wall. Upgrading sound with a surround system boosts immersion. Organized cables and comfortable seating complete the look, creating a more cinematic experience. Explore these tips to transform your space seamlessly.
Key Takeaways
- Optimize room layout by repositioning furniture for clear sightlines and optimal viewing angles.
- Install blackout curtains and dimmable lighting to create a dark, adjustable environment.
- Choose a high-resolution projector with good contrast and suitable screen or wall surface.
- Manage cables neatly using organizers to reduce clutter and improve aesthetics.
- Incorporate comfortable seating and sound systems to enhance overall viewing comfort and immersion.
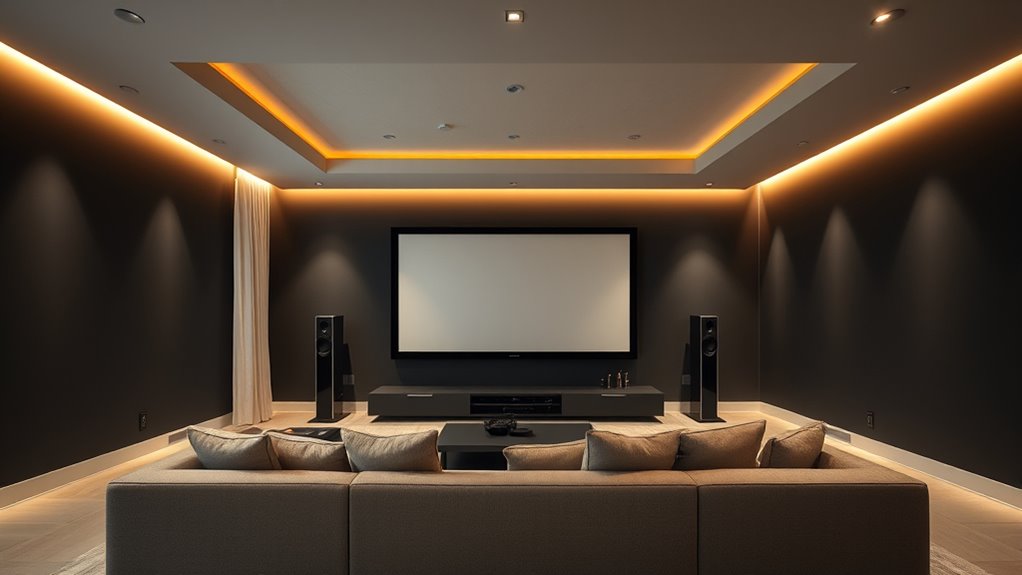
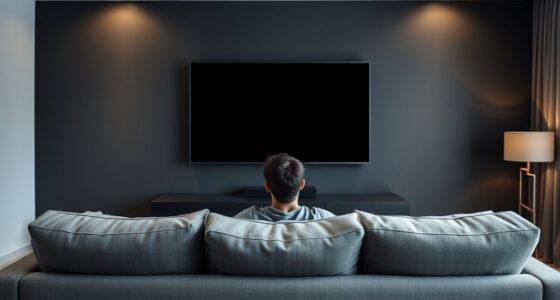
Transforming your living room into an ideal projection space requires careful planning and the right equipment. Your goal is to create an immersive home theater experience where visuals are crisp, colors pop, and ambient lighting doesn’t interfere with the picture quality. To achieve this, start by evaluating your space’s layout and identifying areas where you can optimize viewing angles and acoustics. A dedicated home theater setup often involves repositioning furniture to guarantee everyone has a clear line of sight to the screen, and choosing a wall that’s free from windows or bright light sources. This way, you minimize glare and reflections that can diminish picture clarity.
Lighting control is essential when upgrading your living room for projection. You want the ability to dim or turn off lights easily so that ambient illumination doesn’t wash out the image on the screen. Installing dimmable lights or smart lighting systems gives you the flexibility to adjust brightness precisely, enhancing contrast and color richness during movie nights. Consider adding blackout curtains or shades to block out external light entirely, especially if your living room faces the street or has large windows. These adjustments help you achieve a dark environment that boosts the impact of your projector’s display.
Controlling lighting with dimmers or smart systems enhances contrast and viewing quality.
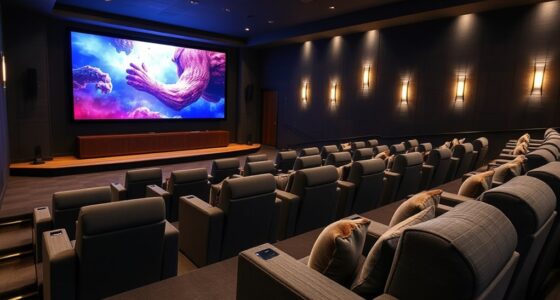
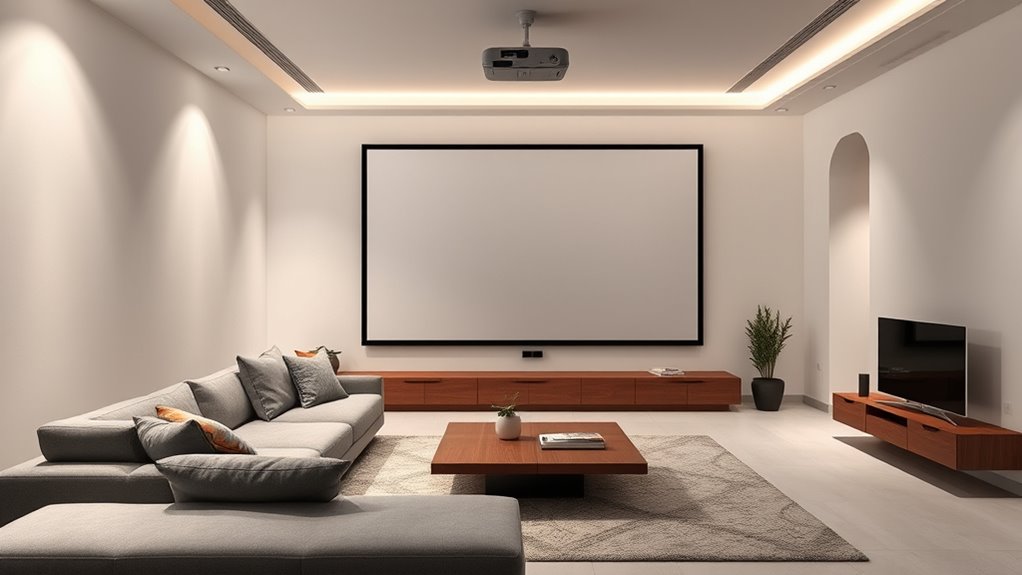
Next, invest in quality equipment tailored for a home theater. A good projector is indispensable—look for one with high resolution, high contrast ratio, and ample lumens for your room size. Pair it with a large screen or a blank wall painted with a neutral matte color to prevent reflections. Speakers also play an essential role; upgrading to a surround sound system or soundbar considerably elevates audio clarity and depth, making your movies feel more immersive. Remember, the placement of speakers and the projector should be optimized for the best viewing and listening experience.
Cable management is often overlooked but makes a noticeable difference in maintaining a clean, professional look. Use cable organizers or conduits to hide wires, preventing tripping hazards and visual clutter. This small upgrade can make your home theater feel more polished and enjoyable to use. Additionally, consider setting up a dedicated media console or shelves for your equipment, ensuring everything is accessible yet unobtrusive.
Finally, think about comfort and ambiance. Comfortable seating, appropriate rugs or carpets, and even decorative elements can make your projection space inviting. Proper projector resolution and contrast ratio are crucial for a clear and vibrant image, so choose equipment that excels in these areas. With proper lighting control, the right equipment, and thoughtful layout adjustments, your living room will transform into a captivating home theater that’s perfect for movie nights, gaming, or streaming your favorite shows.

4K Projector with Built-in Apps, 1500ANSI Auto Focus&6D Keystone Dolby Audio Kogata Smart Projector with WiFi 6 Bluetooth Outdoor Movie Proyector for Home Theater HDR10+ UPGRADE
【UPGRADE Version】Unlimited Streaming –Compatible with Netflix & Dolby Audio& DTS Audio: The Kogata GC357 home projector comes with…
As an affiliate, we earn on qualifying purchases.
As an affiliate, we earn on qualifying purchases.
Frequently Asked Questions
How Do I Choose the Best Projector for My Space?
To select the best projector for your space, consider your screen size and projector brightness. Measure your room to determine the ideal screen size that fits comfortably without overwhelming the space. Opt for a projector with enough brightness (lumens) to guarantee clear images, especially in well-lit rooms. Balancing these factors ensures vibrant visuals and a comfortable viewing experience tailored to your specific living room setup.
What Are Affordable Ways to Improve Room Acoustics?
To improve room acoustics affordably, start by adding acoustic panels to reduce echo and absorb sound. You can also place carpet padding under rugs or carpets to dampen footsteps and noise bouncing around. Rearranging furniture to create soft surfaces helps, too. These simple changes make a big difference, enhancing sound clarity without breaking the bank, and create a more immersive viewing and listening experience in your living room.
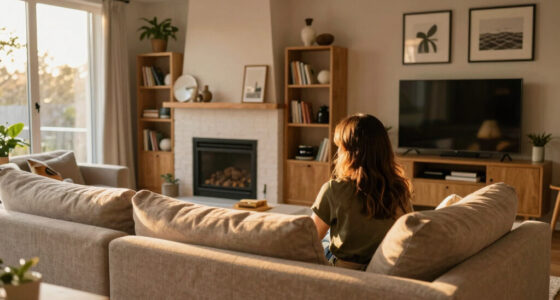
Can Existing Furniture Be Adapted for Projection Setup?
Did you know that 78% of home theater enthusiasts reuse existing furniture? You can adapt your current furniture for your projection setup through simple modifications like repositioning sofas or adding custom shelves. This enhances space optimization and creates a comfortable viewing environment without extra costs. By creatively adjusting your furniture, you’ll maximize your room’s potential, making your movie nights more immersive and enjoyable.
How Do Window Treatments Affect Projection Quality?
Window treatments substantially impact projection quality by controlling ambient light. Choose blackout curtains or shades, as they block out external light sources, ensuring sharper images. Use light control techniques like layered window treatment options—combining blinds with blackout drapes—to customize light levels throughout the day. Proper light management minimizes glare and enhances contrast, making your projection clearer and more vibrant, creating an ideal viewing environment.
What Safety Precautions Should I Consider During Installation?
Think of your installation like threading a needle; safety comes first. You should secure cables with proper cable management to prevent tripping hazards, and always turn off power before connecting or adjusting electrical components. Use grounded outlets and avoid overloading circuits to guarantee electrical safety. Wearing gloves and using insulated tools further reduces risks. Taking these precautions keeps your setup safe, reliable, and ready for impressive movie nights.

MIULEE Blackout Curtains for Bedroom Living Room 2 Panels, Thermal Insulated Room Darkening Drapes Grommet Noise Reducing Light Blocking Window Treatments 84 Inches Long 40×84 Inch Black
Pair Sold: Each package includes 2 panels of blackout curtains. Each panel measures 40"W x 84"L, with a…
As an affiliate, we earn on qualifying purchases.
As an affiliate, we earn on qualifying purchases.
Conclusion
Upgrading your living room for projection can truly transform your space. Focusing on lighting, screen placement, and sound can make a big difference. Did you know that 85% of viewers say picture quality impacts their viewing experience the most? By making just a few thoughtful changes, you’ll enjoy movies and shows like never before. So go ahead, create that perfect projection setup — your home theater dreams are closer than you think!

ULTIMEA 7.1ch Dolby Atmos Surround Sound System for TV, with 4 Surround Speakers, Surround Sound System Sound Bar with Subwoofer for Home Theater, App Control, HDMI eARC, Aura A60, 2026 Model
Dolby Atmos Delivers an Immersive 3D Soundscape: This 7.1ch dolby atmos soundbar enhances your listening experience with multidimensional…
As an affiliate, we earn on qualifying purchases.
As an affiliate, we earn on qualifying purchases.
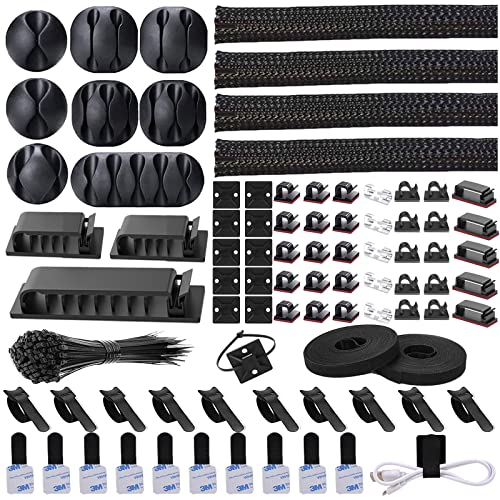
N NOROCME 192 PCS Cable Management Kit 4 Wire Organizer Sleeve,11 Cable Holder,35Cord Clips 10+2 Roll Cable Organizer Straps and 100 Fastening Cable Ties for Computer TV Under Desk, black,clear
Cable Management Kit: 4pcs Cable Sleeves( 20 in L x 0.4 in w), 20pcs reusable wire ties,35Cable Clips…
As an affiliate, we earn on qualifying purchases.
As an affiliate, we earn on qualifying purchases.