
To set up a rear projection system, start by choosing a flat, secure location to mount your screen, ensuring it’s aligned with your projector. Position the projector at the recommended distance for sharp, bright images, and double-check that the screen is taut and properly aligned to prevent distortion. Control ambient lighting with curtains or dimmers to boost contrast. Proper installation, calibration, and environment control help you achieve clear visuals; keep going for more detailed tips and tricks.
Key Takeaways
- Ensure the projector is positioned at the recommended throw distance for optimal focus and image clarity.
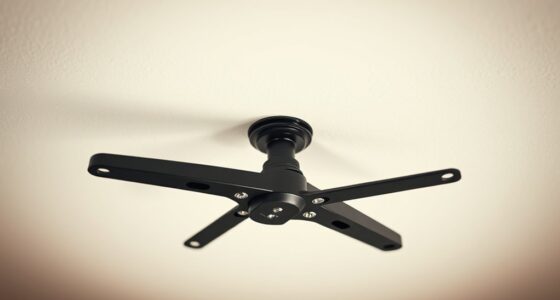
- Mount the screen flat, taut, and aligned precisely with the projector lens to prevent distortion.
- Use a high-gain rear projection screen suited for ambient conditions to maximize brightness and color accuracy.
- Control ambient lighting with blackout curtains or dimmers to enhance image contrast and reduce washout.
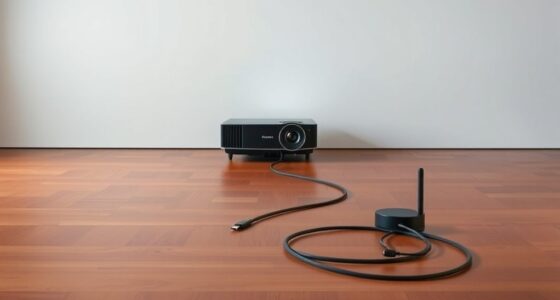
- Manage cables securely with conduits or clips to prevent hazards and maintain proper ventilation for the projector.

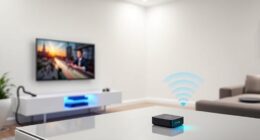
Are you ready to set up a rear projection system that delivers sharp, vibrant images? If so, understanding the rear projection advantages and common setup mistakes is essential to guarantee your system performs at its best. Rear projection can offer a sleek, space-saving alternative to traditional front projection, especially in environments where ambient light control or room aesthetics matter. It allows you to place the projector behind the screen, creating a clean look with fewer shadows and glare that can interfere with image quality. Plus, rear projection setups often reduce the risk of damage or theft since the projector isn’t in plain sight, making them ideal for public spaces or areas where aesthetics are a priority.
Rear projection offers a sleek, space-saving display with reduced shadows and theft risk, ideal for aesthetic and public spaces.
However, to maximize these benefits, you need to avoid some common setup mistakes. One of the biggest pitfalls is improper screen placement. If your screen isn’t perfectly flat or is positioned at an incorrect angle, image distortion or loss of sharpness can occur. Ensure the screen is taut and mounted securely, and align it precisely with the projector’s lens. Another frequent mistake involves the projector’s distance from the screen. Placing it too close can result in a blurry or pixelated picture, while positioning it too far may cause dim images or focus issues. Consult your projector’s specifications to find the ideal throw distance and avoid guessing.
Lighting is also a critical factor. Rear projection works best in environments with controlled lighting. Excessive ambient light can wash out the image, reducing vibrancy and contrast. Use blackout curtains or dim the lights if necessary, and consider installing a high-gain screen designed for rear projection to enhance brightness and color accuracy. Additionally, don’t forget about ventilation. Projectors generate heat, so ensure there’s enough airflow behind the screen to prevent overheating, which can shorten the lifespan of your equipment. Proper installation techniques ensure your system functions reliably and efficiently.
Cable management is another aspect that’s often overlooked during setup. Running cables haphazardly can cause tripping hazards and obstruct airflow. Use proper cable conduits or clips, and ensure connections are secure and protected from accidental disconnects. Finally, calibration is crucial. After setting everything up, take the time to fine-tune your projector’s focus, keystone correction, and color settings. Proper calibration ensures sharp, vibrant images that truly showcase the advantages of rear projection.
Frequently Asked Questions
Can Rear Projection Be Used Outdoors Effectively?
Yes, you can use rear projection outdoors effectively if you address outdoor lighting and weatherproofing considerations. Make sure you select a projector with high brightness to combat ambient light and use a weatherproof screen to safeguard against rain or humidity. Additionally, position your setup in a shaded area or use additional shading to reduce glare. Proper weatherproofing and lighting control guarantee a clear, vibrant image for outdoor rear projection.
What Are the Best Materials for Rear Projection Screens?
You’ll want to choose projection materials that maximize brightness and clarity, especially since rear projection can sometimes be 50% less bright than front projection. Opt for high-quality screen fabrics like vinyl, matte white, or specialized rear projection fabrics. These materials guarantee excellent light diffusion and minimal distortion, giving you a crisp image. Selecting the right screen fabric is essential for a clear, vibrant display, making your setup stand out.
How Do I Troubleshoot Image Distortion Issues?
To troubleshoot image distortion, start by checking your image calibration; guarantee the projector settings match your screen’s size and aspect ratio. Use lens correction features if available to fix distortion caused by the lens. Adjust the projector’s position and focus to improve clarity. Additionally, verify that the projection surface is smooth and properly aligned, as uneven surfaces can cause image warping. Regular calibration helps maintain a sharp, distortion-free image.
Is Special Maintenance Required for Rear Projection Setups?
Did you know that regular projector care can extend your device’s lifespan by up to 30%? For rear projection setups, special maintenance isn’t complicated but essential. You should periodically clean the lens and vents, keep the projector in a dust-free environment, and check connections. Routine rear projection maintenance helps prevent overheating and image issues, ensuring consistent performance and clear visuals. Stay proactive with your projector care to enjoy supreme image quality over time.
What Safety Precautions Should I Consider During Installation?
During installation, you should carefully consider the projection angle to guarantee the best image quality and avoid strain. Make sure to secure the projector properly to prevent accidents, and check ambient light levels to prevent glare or washed-out images. Keep cords organized to avoid tripping hazards, and wear safety gear if working at heights. Also, verify power sources are safe and grounded to prevent electrical issues.
Conclusion
Now that you know the essentials of setting up rear projection, you’re ready to transform your space. But remember, the true magic lies in what you can create beyond the basics. Will your setup deliver the perfect picture, or will unexpected challenges arise? The key is in your hands—every detail counts. Stay curious, experiment, and don’t settle for less. Your perfect projection experience might just be one small adjustment away. Are you ready to discover what’s possible?