
To make certain safe ceiling mounts, first check your ceiling material and support structure, using a stud finder or inspecting for damage. Choose hardware rated for your load and properly reinforce weak spots. Always follow installation steps carefully, use the right tools, and secure all fasteners tightly. Regular inspections and maintenance help prevent accidents and damage. Keep safety top of mind, and you’ll discover simple ways to make your ceiling mounts secure and reliable.
Key Takeaways
- Verify ceiling material and structural integrity before mounting to ensure safety and support.
- Use appropriate hardware rated for the weight and ceiling type to prevent support failure.
- Follow proper installation procedures, including accurate drilling and leveling, to ensure secure mounts.
- Regularly inspect and maintain mounts to identify and fix looseness, corrosion, or damage.
- Distribute weight evenly and adhere to load limits to avoid overloading and potential ceiling collapse.

PenX Wall and Ceiling – Stud and Joist – Magnetic Finder – Tool and Scanner – PRO
ACCURATE, EASY TO USE, AND SAFE: PenX Wall and Ceiling Stud and Joist Magnetic Finder innovative US patent…
As an affiliate, we earn on qualifying purchases.
As an affiliate, we earn on qualifying purchases.
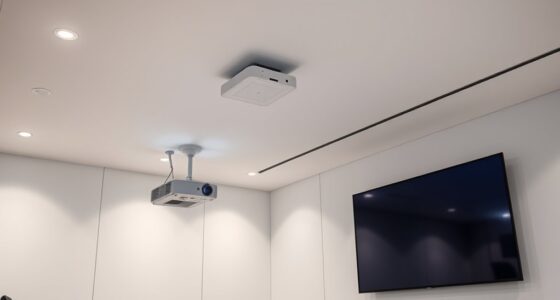
Assessing Ceiling Mount Compatibility and Load Limits
Before installing a ceiling mount, you need to verify it’s compatible with your ceiling structure and understand its load limits. Start by examining your ceiling material—whether it’s drywall, plaster, or concrete—as each affects mounting strength. Drywall requires additional reinforcement, while concrete can support heavier loads directly. Check for electrical wiring running through the ceiling; you don’t want to drill into wires, which can cause shorts or damage. Use a stud finder to locate ceiling joists or support beams, ensuring your mount attaches securely to a solid structure. Always confirm the maximum weight capacity of both the mount and your ceiling’s materials to prevent accidents. Additionally, understanding ceiling support capabilities is crucial for ensuring safety and stability, protecting your equipment and everyone around you.

AONAYIOA 72"/6FT Ceiling Mount Box Rail Barn Door Hardware Heavy Duty Sliding Barn Door Track, Aluminium Alloy Kit for Single Door (No Door)
【Reference Dimension】Ceiling mount barn door box rail fit Max door opening width up to 32" and fit door…
As an affiliate, we earn on qualifying purchases.
As an affiliate, we earn on qualifying purchases.
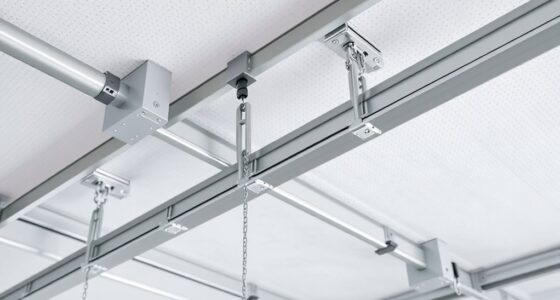
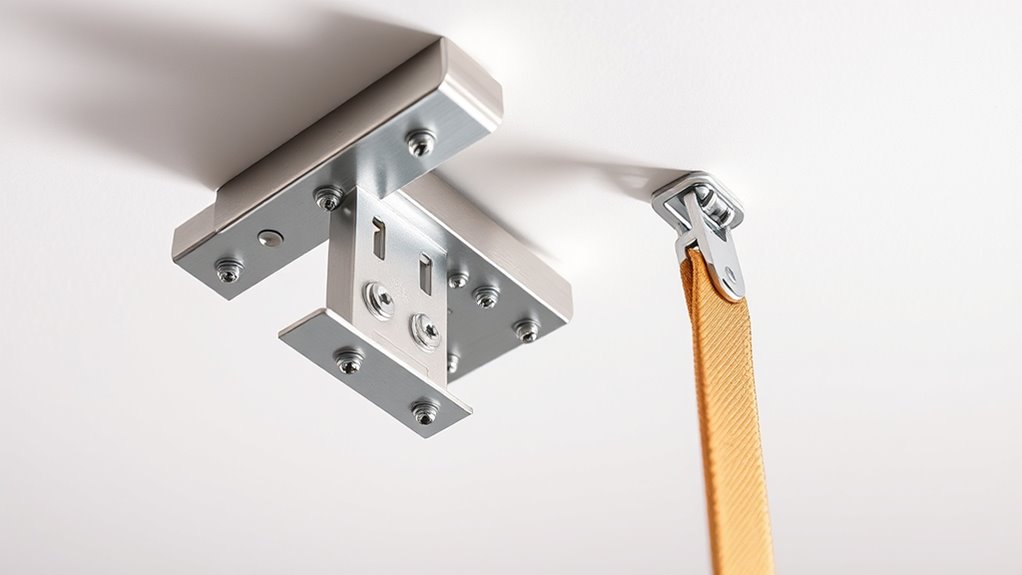
Choosing the Right Mounting Hardware and Materials
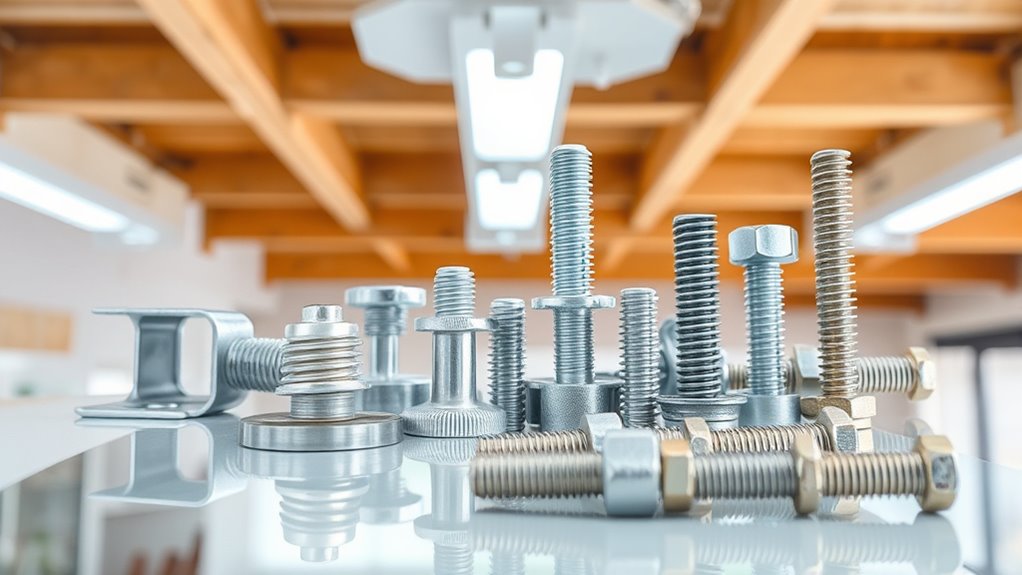
Selecting the appropriate mounting hardware and materials is crucial to guarantee your ceiling mount is secure and stable. Proper hardware selection depends on understanding the weight and type of the item you’re mounting, ensuring the hardware can handle the load. Make sure the hardware is compatible with your ceiling material—whether concrete, drywall, or wood—to prevent failures. Use anchors, brackets, or hooks suitable for your ceiling’s structure, avoiding generic or mismatched options. Check that all components are rated for your specific weight requirements and are made from durable, corrosion-resistant materials. Proper material compatibility reduces the risk of damage or failure over time. When choosing hardware, prioritize quality and specifications to ensure safety and longevity of your ceiling mount setup. Additionally, verifying the correct hardware ratings can help prevent accidents or damage caused by inadequate support.

Reinforced Nylon 66 Drywall Anchors 90lb Limit, Self Drilling, Home Improvement Value Pack for Home Projects & Picture Hanging Kit, 25 Plastic Dry Wall Expansion Anchors and 25 Sheetrock Screws
✔ 30% STRONGER THAN THE LEADING BRANDS: Don't settle for standard nylon anchors and wall screws that crack…
As an affiliate, we earn on qualifying purchases.
As an affiliate, we earn on qualifying purchases.
Proper Wall and Ceiling Structure Inspection
Inspecting your wall and ceiling structures thoroughly is essential to guarantee they can support the weight of your mount safely. Check the ceiling material—whether drywall, plaster, or concrete—to ensure it’s solid and free of damage. Examine the wall anchoring points for stability, looking for cracks or looseness that could compromise support. Use this table to visualize common ceiling and wall types:
| Ceiling Material | Wall Anchoring Suitability |
|---|---|
| Drywall | Anchors needed for heavy loads |
| Concrete | Direct bolting possible |
| Plaster | Reinforcement recommended |
Understanding your structure helps prevent accidents. If in doubt, consult a professional before proceeding with installation. Proper inspection minimizes risks and ensures your ceiling mount remains secure over time. Additionally, self-watering planters can be an effective way to maintain healthy plants with minimal effort, especially if your mounting setup is part of a garden or outdoor space.

Faswin Wall Mount Bracket for Suspension Straps, Ceiling Anchor X Mount for Rings, Body Weight Strength Training Systems, Yoga Swings & Boxing Equipment
Workout anywhere indoors or outdoors with this durable anchor point
As an affiliate, we earn on qualifying purchases.
As an affiliate, we earn on qualifying purchases.
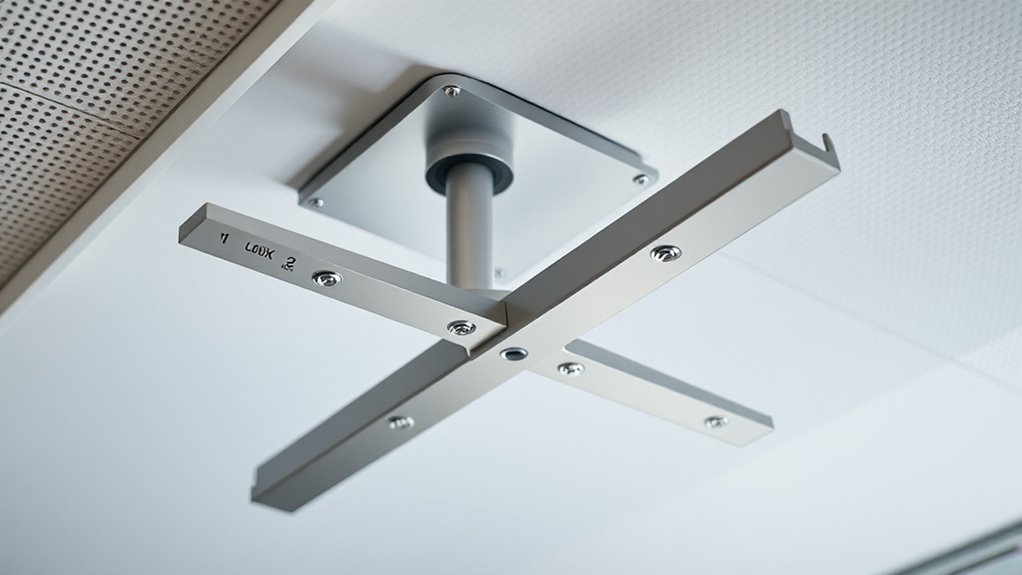
Ensuring Adequate Support and Reinforcement
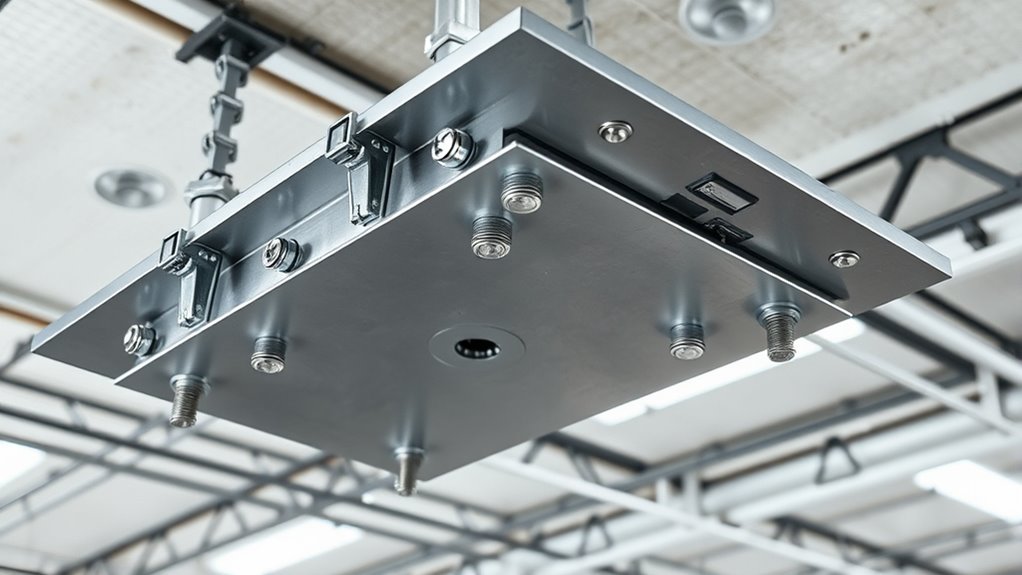
After verifying your wall and ceiling structures are in good condition, the next step is to make certain they can support the weight of your mount with adequate reinforcement. Start by examining the ceiling material, whether it’s drywall, plaster, or concrete, to determine its load-bearing capacity. Reinforce weak spots using proper anchors or mounting brackets designed for your ceiling type. Check for electrical wiring running through the ceiling; ensure it’s properly secured and not in the way of mounting hardware. If wiring is present, consider consulting an electrician to prevent accidental damage or hazards. Proper reinforcement ensures your ceiling can handle the mount’s weight safely, reducing the risk of failure and ensuring a secure, long-lasting installation. Additionally, understanding your ceiling’s load-bearing capacity is essential for selecting appropriate mounting hardware and avoiding structural damage.
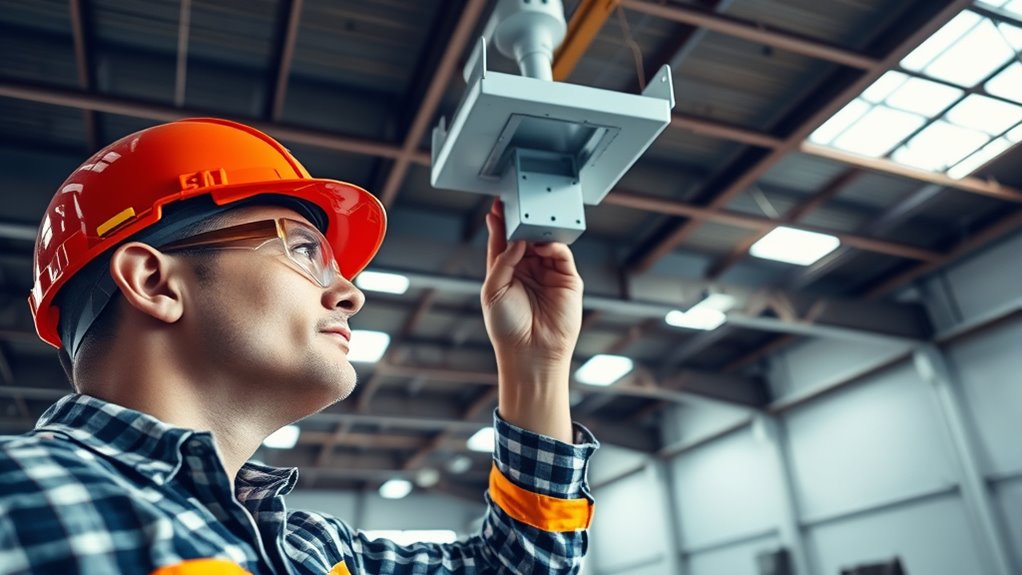
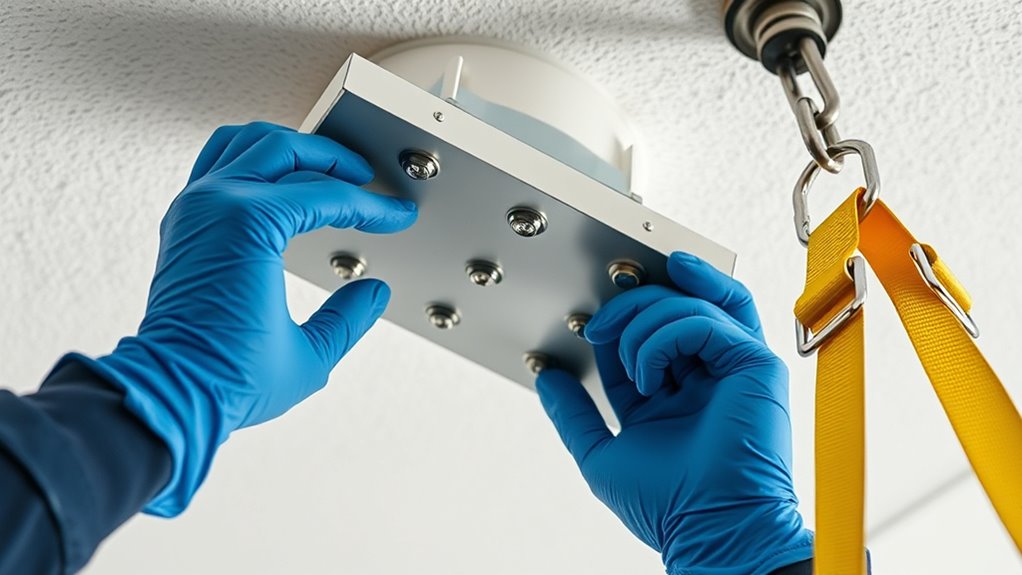
Step-by-Step Installation Safety Precautions

Before starting installation, you need to carefully inspect the mounting area for stability. Make sure you’re using the right tools and handling them properly to avoid accidents. Additionally, verify the structural integrity of the ceiling to ensure it can support the weight safely. Finally, secure all anchors firmly to guarantee the ceiling mount is safe and reliable.
Inspect Mounting Area
To guarantee a safe and secure installation, you need to thoroughly examine the mounting area for potential hazards. Start by inspecting the ceiling material to confirm it can support the weight of the mount and equipment. Look for signs of damage, such as cracks or sagging, which could compromise stability. Next, check for electrical wiring that might run through the area. Ensure wiring is properly secured and not exposed or loose, as drilling into live wires can cause serious injury or damage. Use a stud finder to locate joists or beams that can bear the load. Avoid areas with existing electrical or plumbing infrastructure. Additionally, verify the presence of essential oils in the environment, as strong odors or vapors could interfere with installation or indicate underlying issues. Taking these precautions helps prevent accidents and guarantees your ceiling mount is both safe and reliable.
Use Proper Tools
Using the right tools is essential for a safe and successful ceiling mount installation. Power tools like drills and screwdrivers make the job faster and guarantee holes are precise, reducing the risk of slips or mistakes. Hand tools such as levels, tape measures, and screwdrivers help you position the mount correctly and tighten components securely. Always select tools appropriate for the task, and check that they’re in good condition before starting. Wearing safety gear, like goggles and gloves, enhances your safety while handling tools. Avoid improvising with unsuitable tools, as this can lead to accidents or damage. Using proper tools not only increases the accuracy of your work but also minimizes hazards, helping you complete the installation safely and efficiently. Additionally, understanding regional resources can provide access to expert guidance or assistance if needed.
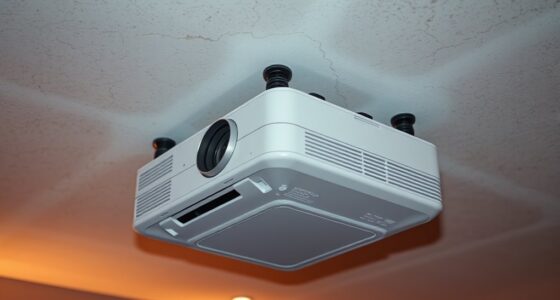
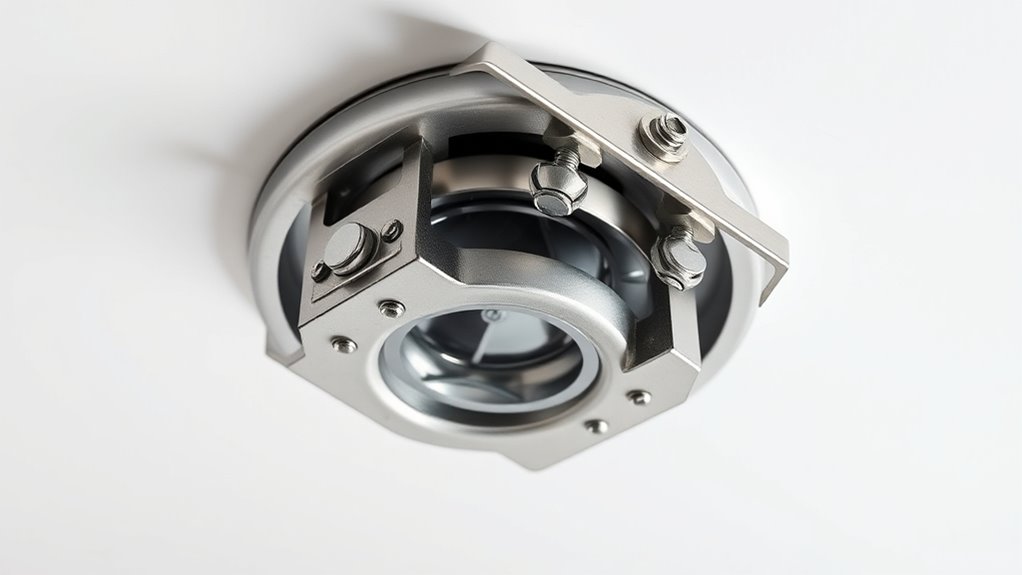
Secure Anchors Firmly
Securely anchoring your mount is essential to guarantee the ceiling fixture stays firmly in place. The ceiling material influences your choice of anchor types; for example, drywall requires different anchors than concrete or wood. To make certain safety, select the appropriate anchors designed for your ceiling material. When installing, firmly insert the anchors so they grip tightly, avoiding loose or insecure fittings. Use a drill to make precise holes and follow the manufacturer’s instructions for each anchor type. Properly secured anchors prevent the mount from shifting or falling, reducing safety risks. Always double-check that the anchors are flush with the ceiling and test their stability before hanging any weight. This careful approach guarantees a secure, safe installation that lasts. Incorporating proper installation techniques can further enhance safety and stability.
Avoiding Common Mistakes During Installation

To avoid mistakes during installation, focus on using proper mounting techniques and ensuring the mount is aligned correctly. Always verify that the weight capacity matches the item you’re hanging and that your fasteners are secure. Skipping these steps can lead to safety hazards or damage, so double-check each part before completing the process. Additionally, consider the anti-aging effects of proper mounting to maintain safety and functionality over time.
Proper Mounting Techniques
Proper mounting techniques are vital to guarantee ceiling mounts are safe and reliable. If you skip steps or rush, you risk damaging ceiling aesthetics and compromising mounting aesthetics. To avoid common mistakes, ensure you:
- Use the right tools and hardware specific to your ceiling type
- Mark drill points accurately, aligning with studs or anchors
- Double-check that mounts are level for a clean look
- Follow manufacturer instructions carefully for secure installation
- Regularly inspect and maintain mounts to ensure ongoing safety and stability vertical storage solutions.
Pay attention to these details, and your ceiling mount will blend seamlessly while maintaining safety. Proper technique not only keeps your setup secure but also preserves the visual appeal of your ceiling. Remember, a well-installed mount combines safety with a sleek, unobtrusive appearance.
Correct Weight Capacity
Ensuring you select the correct weight capacity for your ceiling mount is essential to prevent accidents and damage. Always follow the manufacturer’s weight capacity guidelines, which specify the maximum load the mount can safely support. Ignoring these guidelines can lead to failure and safety hazards. Apply load distribution principles by evenly spreading the weight across all mounting points to avoid undue stress on any single area. Confirm that the ceiling structure can handle the combined weight of the mount and the load. Don’t underestimate the importance of double-checking weight capacities before installation. Proper adherence to weight capacity guidelines guarantees your setup remains stable and secure, reducing the risk of accidents and prolonging the lifespan of your ceiling mount.
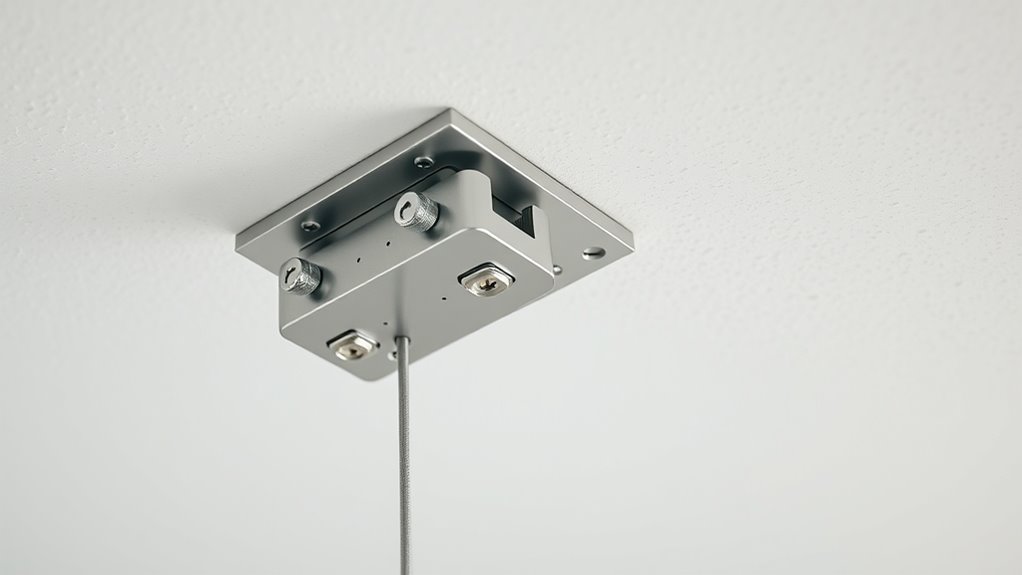
Secure Fastening Methods
Secure fastening is critical to prevent your ceiling mount from coming loose or failing unexpectedly. Proper installation guarantees safety and maintains the aesthetic appeal of your space. When securing your mount, avoid common mistakes like using the wrong anchors or over-tightening screws. Focus on precise placement and sturdy hardware to support the weight effectively. For wireless mounting, ensure cables are neatly concealed to keep the setup clean and unobtrusive. Consider aesthetic aspects by choosing fasteners that blend seamlessly with your ceiling finish. Double-check that all components are level and secure before completing the installation. Remember, a solid fastening method not only guarantees safety but also enhances the overall look. Keep these tips in mind to ensure your ceiling mount is both safe and visually appealing.
Securing Equipment to Prevent Accidents

To prevent accidents caused by falling equipment, it’s essential to properly secure all items mounted on ceilings. Use high-quality anchors and secure fasteners to keep fixtures stable. This not only ensures safety but also maintains ceiling aesthetics, preventing unsightly sagging or loose fittings. When selecting mounts, consider decorative options that blend seamlessly with your space, avoiding distraction or visual clutter. Properly secured equipment minimizes the risk of accidental falls and damage to property or people. Always follow manufacturer instructions and double-check fittings regularly. By taking these precautions, you create a safe environment where ceiling-mounted devices stay firmly in place, protecting everyone below. Remember, secure mounting isn’t just about safety; it’s about preserving the clean, professional look of your space.
Regular Inspection and Maintenance Tips
Regular inspection and maintenance are essential to keeping ceiling-mounted equipment safe and reliable. Regularly check mounting points for signs of wear, corrosion, or looseness, especially around decorative fixtures that add aesthetic considerations. Ensure all fasteners are tight and secure, and look for any sagging or misalignment that could indicate mounting issues. Clean fixtures and mounting surfaces to prevent dust buildup, which can compromise stability. Replace any damaged or worn components promptly to prevent accidents. Pay special attention to decorative fixtures, as they often hide mounting hardware but also require regular upkeep. Keep detailed records of inspections and maintenance activities to track the equipment’s condition and guarantee ongoing safety. Staying proactive helps prevent costly repairs and keeps your ceiling mounts secure.
Troubleshooting Common Mounting Issues
When mounting ceiling equipment, it’s common to encounter issues like wobbling, misalignment, or looseness that can compromise safety. To address these problems, start by checking the mounting hardware and ensuring all screws and brackets are tight. Poor cable management can also cause instability or clutter, so organize cables properly to prevent strain on the mount. Misalignment may result from uneven ceiling surfaces or improper installation; recheck the placement and adjust as needed. Consider aesthetic considerations to hide any exposed hardware or cables, which not only improves appearance but also minimizes accidental snagging. If wobbling persists, verify that the mounting bracket is securely anchored into the ceiling structure. Proper troubleshooting maintains safety and ensures your ceiling mount functions reliably and looks neat.
When to Seek Professional Assistance
Recognizing the right moment to call in a professional can guarantee safety hazards and assure your ceiling mount is secure. If you encounter DIY pitfalls or safety warnings during installation, it’s best to seek expert help. You should contact a professional if:
Knowing when to call a professional ensures safety and a secure ceiling mount.
- You’re unsure about the ceiling’s structural integrity
- The mounting involves complex wiring or electrical work
- You notice cracks or instability after mounting
- You’re uncomfortable working at heights or with heavy tools
Ignoring these signs risks damaging your ceiling or causing injury. Professionals have the experience and proper tools to ensure safe, secure installations. Don’t compromise safety—knowing when to seek help can prevent costly mistakes and keep your space secure. When in doubt, it’s always safer to call in a qualified technician.
Frequently Asked Questions
How Do I Determine the Maximum Weight My Ceiling Can Support?
To determine your ceiling’s maximum weight capacity, start by checking the ceiling material—whether it’s drywall, wood, or concrete—as each supports different loads. Then, examine the existing structure or mount specifications for weight limits. If uncertain, consult a professional or review manufacturer guidelines for the ceiling mount you’re using. This guarantees you don’t exceed the ceiling’s weight capacity, keeping your setup safe and secure.
Are There Specific Certifications I Should Look for in Mounting Hardware?
You should look for hardware labels that indicate certification standards like UL or ISO, which guarantee safety and quality. These certifications confirm the mounting hardware meets industry safety requirements. Always verify the hardware’s packaging or product descriptions for clear certification labels. Choosing certified hardware gives you peace of mind knowing your ceiling mount is reliable and safe, reducing the risk of accidents or failure over time.
How Often Should I Inspect Ceiling Mounts for Potential Damage?
Like a vigilant guardian, you should inspect your ceiling mounts monthly to catch damage indicators early. Regular inspection frequency helps prevent accidents caused by wear, corrosion, or loose fittings. Look for signs like rust, cracks, or wobbling, which signal potential failure. By staying proactive, you guarantee safety and longevity, much like a hero safeguarding their domain. Don’t wait—routine checks keep your ceiling mounts secure and reliable.
Can Ceiling Mounts Be Installed in Suspended or Drop Ceilings Safely?
Yes, ceiling mounts can be installed in suspended or drop ceilings safely if you consider alternative mounting options and ceiling material considerations. You should use appropriate anchors and supports designed for lightweight ceilings, and guarantee the mounting hardware doesn’t damage the grid or tiles. Always verify the weight capacity and consult manufacturer guidelines or a professional to prevent accidents and ensure a secure installation in these types of ceilings.
What Signs Indicate My Ceiling Mount May Be Failing?
You might notice subtle signs that your ceiling mount is struggling, like slight cracks in the ceiling material or gentle shifts near the installation points. Sagging or looseness can also hint at underlying issues. Keep an eye on how the mount and ceiling behave over time, especially if your installation techniques weren’t ideal. Regular inspections help catch these warning signs early, ensuring safety and peace of mind before problems escalate.
Conclusion
Remember, prioritizing safety when installing ceiling mounts isn’t optional—it’s essential. For example, a homeowner once installed a heavy projector without proper reinforcement, leading to a dangerous fall. Always assess compatibility, choose quality hardware, and inspect your ceiling structure thoroughly. When in doubt, don’t hesitate to seek professional help. Taking these precautions guarantees your equipment stays secure and your space remains safe for everyone.