
To build a DIY screen frame, start by gathering the right tools like a saw, screwdriver, measuring tape, and materials such as wood or aluminum suited to your environment. Measure carefully, add a little extra for adjustments, and cut precisely. Assemble the frame with glue and reinforcement, ensuring all corners are square. Secure the screen mesh tightly, then finish by weatherproofing and sealing gaps for durability. For a detailed step-by-step process, you can explore more about each stage below.
Key Takeaways
- Gather proper tools and select durable, weather-resistant materials suited for your environment.
- Measure accurately, cut with steady techniques, and assemble the frame at right angles for stability.
- Secure mesh tightly with spline or staples, ensuring a wrinkle-free, professional finish.
- Apply weatherproof coatings and seal gaps to enhance durability and protect against environmental elements.
- Choose a suitable location with a level, debris-free area to facilitate easy installation and long-term use.

WALI Projector Mount Ceiling/Wall - Universal 3-in-1 Bracket with Extension Pole, Height Adjustable Holder for LCD/DLP Projectors, Supports up to 44lbs (PM-003-W), White
Compatibility: Universal Projector Mount Bracket for Both Ceiling and Wall Installation. Applicable to mounting holes distance between 8.9’’to...
As an affiliate, we earn on qualifying purchases.
Gathering Materials and Tools
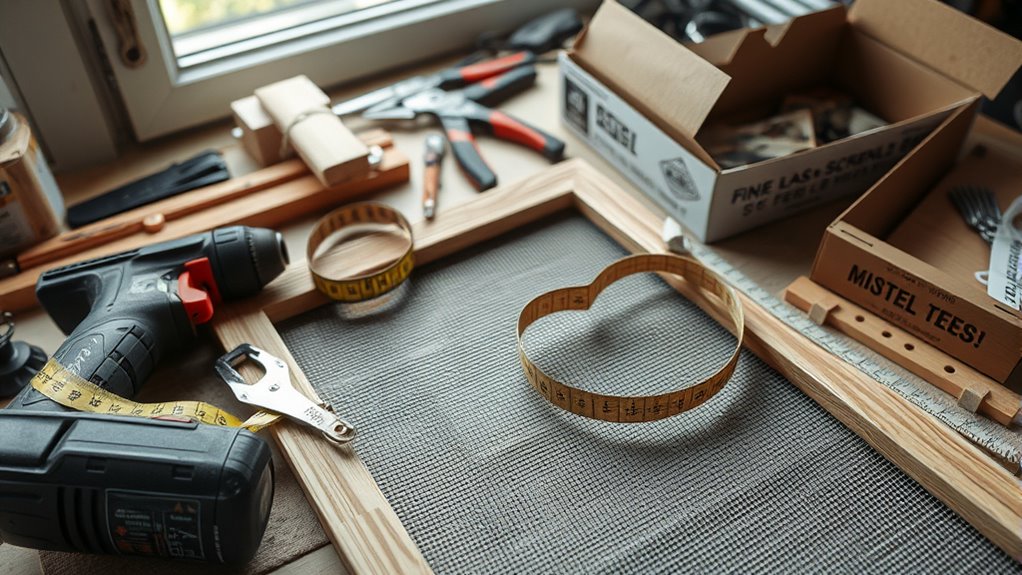
Before you start building your screen frame, it’s important to gather all the necessary materials and tools. Begin with a tools overview: you’ll need a saw, screwdriver, measuring tape, and a square for precise construction. The right tools make the process smoother and more accurate. Next, focus on material selection; choose sturdy, lightweight materials like wood or aluminum for the frame. Consider the environment where the screen will hang to determine the best option. Make sure to have enough material to account for any mistakes or adjustments. Having all your tools and materials ready saves time and prevents interruptions. Double-check your list before proceeding to ensure you have everything needed for a successful build. Proper preparation sets a solid foundation for your project. Additionally, understanding the family dynamics involved can help ensure your project aligns with your specific needs and space considerations.

REHOSEUP Projector Stand, 33LB Load Bearing & 22-55" Height Adjustable, for Projector/Laptop/DJ Gear, Outdoor/Office/Studio - Stable Base (Black)
Adjustable Tripod Stand:Heavy-duty tripod stand can quickly and easily adjust the height .Tray adjustment of 360°.It can be...
As an affiliate, we earn on qualifying purchases.
Measuring and Cutting the Frame Pieces
How do you make certain your screen frame fits perfectly? It all starts with measuring accuracy. Use a reliable ruler or tape measure to get precise dimensions for each frame side. Double-check your measurements before cutting to avoid mistakes. When cutting, employ proper techniques such as using a sharp saw and cutting steadily to ensure straight, clean edges. Mark your measurements clearly on the material, and consider adding a small extra quarter-inch if you want some wiggle room during assembly. Keep your work surface stable and follow your marks carefully. Avoid rushing; patience ensures accurate cuts. Remember, accurate measuring and proper cutting techniques are essential to building a sturdy, well-fitting screen frame that looks professional and functions perfectly. Paying attention to exfoliation techniques can also improve the overall appearance of the finished frame.
Amazon Product B07CXF452P
As an affiliate, we earn on qualifying purchases.
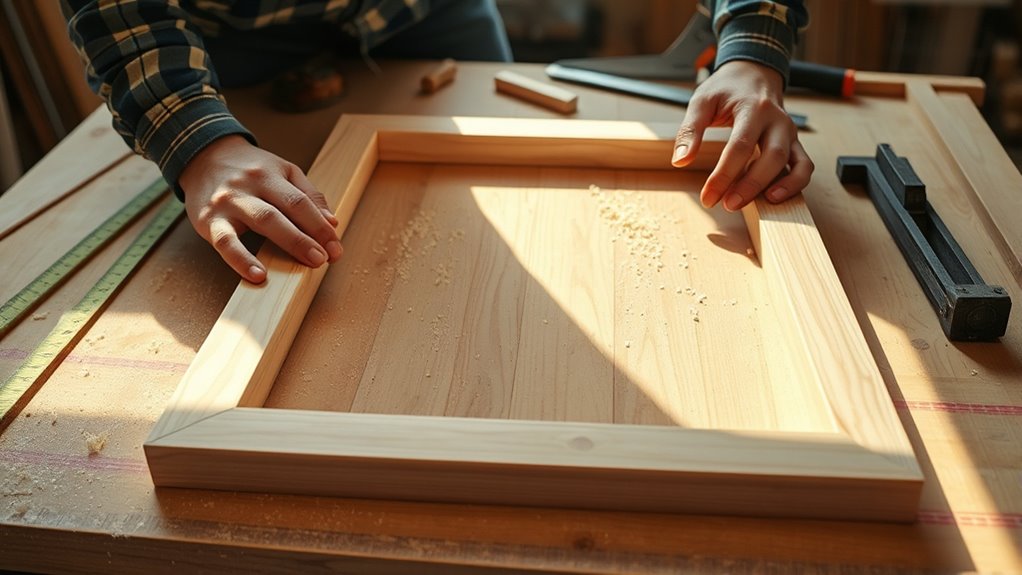
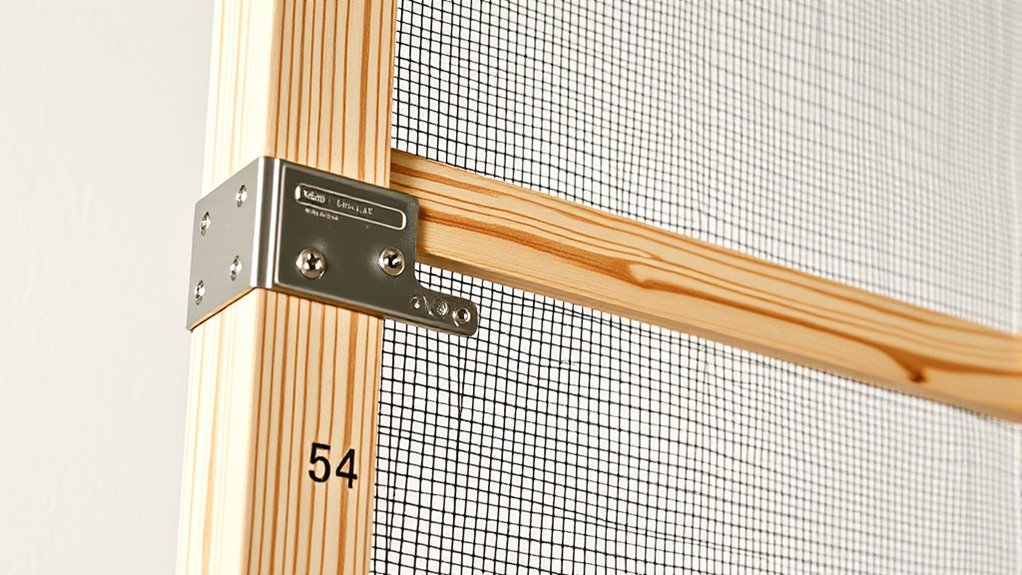
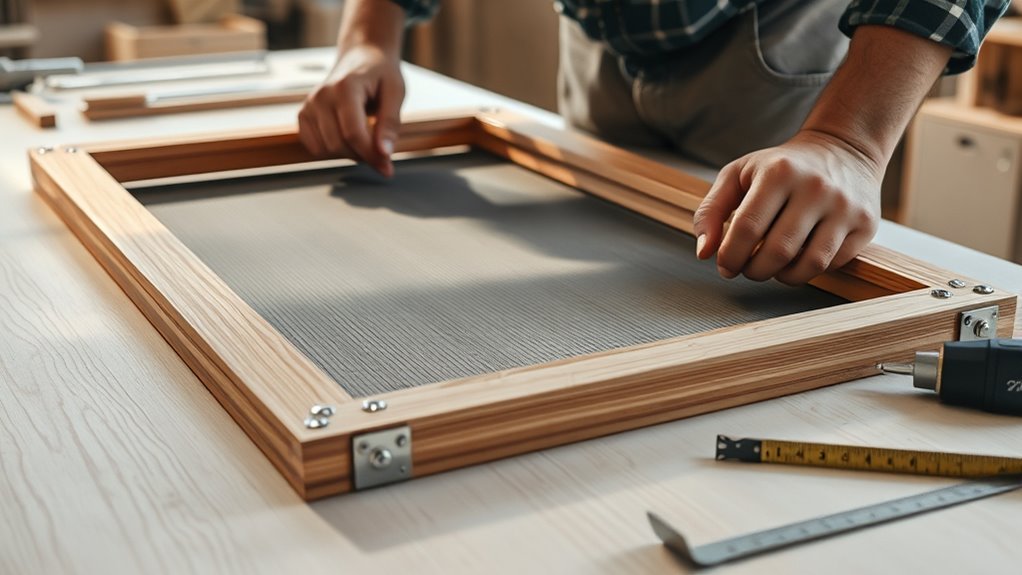
Assembling the Frame Structure

To assemble the frame structure, start by aligning the cut pieces on a flat, stable surface. Ensure the corners are flush for ideal frame stability. Use clamps or corner brackets to hold the pieces in place. For joint reinforcement, apply wood glue and secure with corner braces or screws. Proper joint reinforcement prevents wobbling and maintains shape. To visualize:
| Step | Action |
|---|---|
| 1 | Position pieces at right angles |
| 2 | Apply wood glue at joints |
| 3 | Clamp or brace corners securely |
| 4 | Reinforce with screws or corner brackets |
| 5 | Check for frame stability and square |
This process creates a solid, durable frame ready for the screen mesh. Ensuring precise measurements during assembly enhances the overall structural integrity of your DIY screen. Proper assembly techniques ensure your DIY screen frame remains stable over time.

HISUNSING Projector Ceiling Mount with Extension Pole, Wall Projector Mount Height Adjustable, 3-in-1 Bracket for Most Projectors,Video, 44lb, Home & Office Installation (Black)
3-IN-1 PROJECTOR MOUNT SYSTEM: The projector mount effortlessly switch between flush ceiling, telescoping ceiling arm, or wall mount...
As an affiliate, we earn on qualifying purchases.
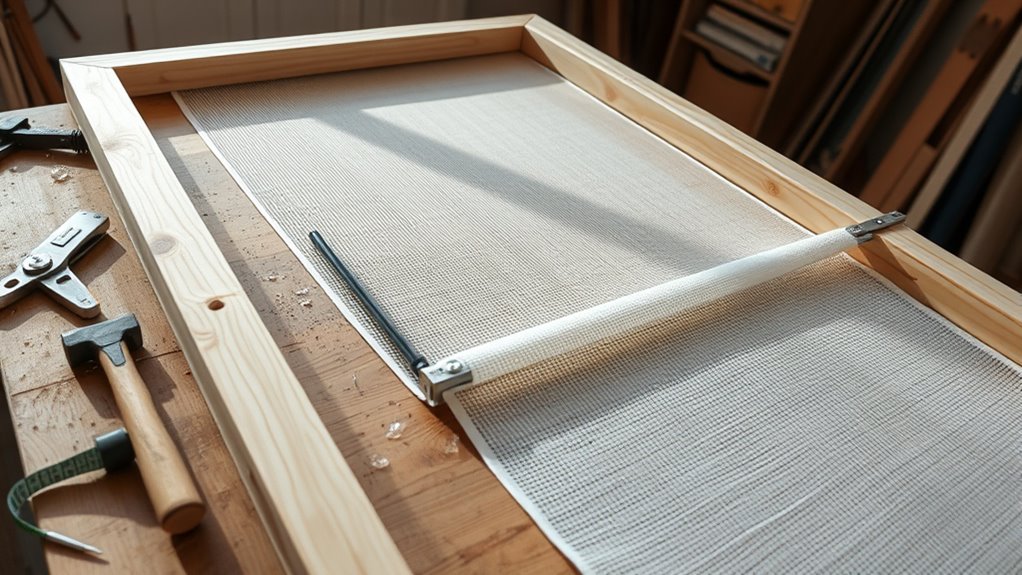
Securing the Screen Mesh
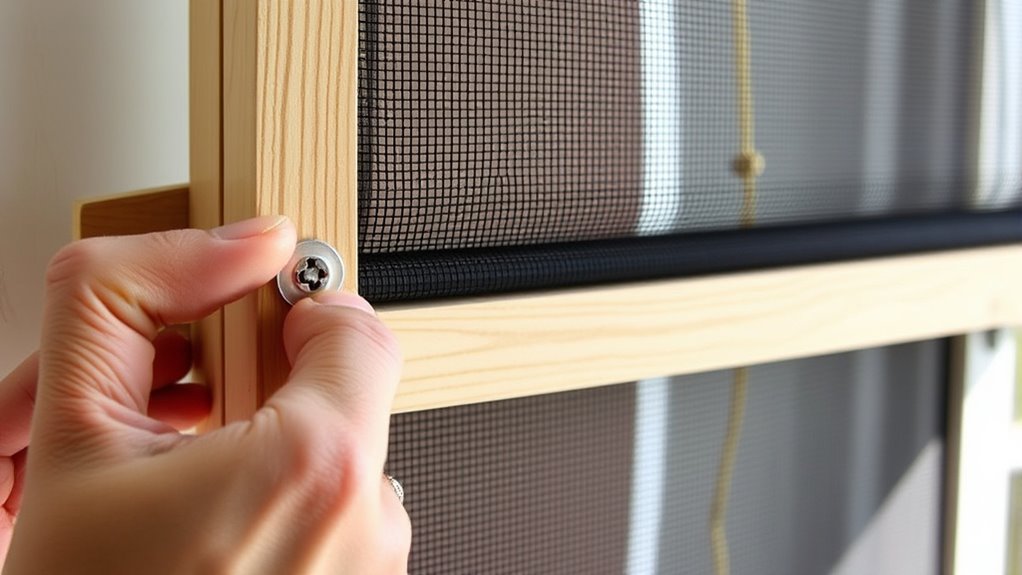
Securing the screen mesh to your frame is an essential step to guarantee a tight, wrinkle-free surface. Proper tension ensures the mesh stays flat and prevents sagging over time. To achieve this, focus on these key points:
- Start by unrolling the mesh over the frame, ensuring it’s centered and aligned.
- Attach the mesh using a spline or spline roller, applying even pressure to maintain consistent screen tension.
- Check mesh alignment frequently, adjusting as needed to avoid wrinkles or slack spots.
- Incorporating mindful techniques during installation can help maintain creative focus and ensure a professional finish.
Maintaining proper screen tension and mesh alignment is crucial for a professional finish. Tightening the mesh evenly prevents wrinkles, while correct alignment ensures your screen will function smoothly. Take your time to secure the mesh carefully for the best results.
Finishing Touches and Reinforcement
To guarantee your screen frame lasts, you need to secure the joints tightly and add protective coatings to prevent damage. Reinforcing the frame with staples helps keep everything sturdy and in place. These finishing touches make a big difference in the durability and appearance of your finished project. Incorporating anti-aging effects can also help the frame maintain a fresh look over time.
Secure Frame Joints
Ensuring your frame joints are secure is essential for building a stable and durable screen frame. Proper joint reinforcement prevents wobbling and maintains shape. To strengthen your joints, consider these steps:
- Use corner bracing to add extra support at each corner, preventing shifting.
- Apply joint reinforcement by gluing and nailing or screwing the joints tightly.
- Check for gaps or looseness, then reinforce as needed with additional fasteners or clamps.
- Incorporate structural integrity practices to ensure the overall stability of your frame.
Apply Protective Coatings
Applying protective coatings is a crucial step that not only enhances the appearance of your screen frame but also reinforces its durability. A weatherproof finish shields your frame from moisture, preventing warping or rotting over time. An anti UV coating helps protect the material from sun damage, keeping the frame looking fresh longer. Use a brush or spray to evenly apply your chosen coating, making sure to cover all surfaces thoroughly. Allow the finish to dry completely before handling or installing the screen. These coatings provide an extra layer of protection against the elements, ensuring your DIY screen frame lasts season after season. Remember, a well-applied protective layer is key to maintaining both the functionality and aesthetic appeal of your finished project. Regular use of protective coatings can also help preserve the integrity of the material over time.
Reinforce With Staples
Once you’ve finished assembling your screen frame and applying protective coatings, reinforcing it with staples is a simple yet effective step to guarantee everything stays securely in place. Using a staple gun, you can easily add reinforcement techniques to strengthen the frame and prevent any sagging or loosening over time. To do this effectively:
- Space staples evenly along all edges for uniform support.
- Focus on corners to ensure stability and prevent separation.
- Apply extra staples where the frame may experience stress or movement.
This process not only secures the screen fabric but also enhances the overall durability of your frame. Reinforcing with staples is a quick, cost-effective method to ensure your DIY screen frame remains sturdy and long-lasting.
Installing the Screen Frame in Your Space
Before installing your screen frame, make sure the space is clean and ready for setup. Position the frame carefully, ensuring it fits snugly in the designated area. Then, secure the frame firmly to keep it stable and avoid shifting during use. Proper installation practices help prevent common causes of failure and ensure long-lasting performance.
Preparing the Installation Area
To guarantee a smooth installation, start by selecting a clean, level space where you plan to install your screen frame. This ensures proper fit and stability. Consider these factors:
- Weather considerations: Choose an area protected from harsh elements, such as direct sunlight or heavy rain, to prevent warping or damage.
- Pest prevention: Ensure the space is free of debris or gaps that pests could use to enter or nest.
- Accessibility: Pick a location with enough room for you to work comfortably and maneuver tools easily.
- Proper preparation: Ensuring your space is leveled and cleared beforehand can significantly reduce the likelihood of future adjustments or repairs.
Clearing the area and verifying its level helps avoid future issues. Preparing your space with these points in mind makes the installation quicker and more effective.
Securing the Frame Properly
Securing the frame properly is essential to make certain the screen stays in place and remains durable over time. Start by choosing the right adhesive options, such as weather-resistant caulk or outdoor-rated glue, to guarantee longevity. Apply the adhesive along the frame’s edges where it contacts the mounting surface, pressing firmly to establish a strong bond. To enhance durability, incorporate weatherproofing techniques like sealing gaps and applying protective coatings. These measures prevent water infiltration and damage from the elements, especially if your setup is outdoors. Make sure the frame is level and secure during installation. Properly secured and weatherproofed, your screen will stay taut, intact, and resistant to the elements, providing a long-lasting, effective barrier in your space.
Frequently Asked Questions
Can I Build a Custom-Sized Screen Frame for Unusual Window Shapes?
Yes, you can build a custom-sized screen frame for unusual window shapes. Just take precise custom measurements, so your frame fits perfectly. Use flexible materials like aluminum or PVC, which are easy to cut and shape to odd angles. With the right tools and patience, you can create a tailored screen frame that matches your unique window, ensuring a snug fit and effective protection from bugs.
What Types of Screen Mesh Are Best for Different Weather Conditions?
For different weather conditions, choose screen mesh based on mesh durability and rust resistance. In humid or rainy areas, aluminum or fiberglass screens are best because they resist rust and corrosion. For windy or storm-prone regions, opt for stainless steel mesh since it offers high durability. If you face intense sun, consider PVC-coated screens that resist UV damage. Picking the right mesh guarantees your screen stays intact longer, regardless of the weather.
How Do I Prevent the Frame From Warping Over Time?
To prevent your frame from warping over time, you should focus on proper material selection and frame reinforcement. Choose weather-resistant materials like aluminum or treated wood, which resist warping. Reinforce the frame with corner braces or additional supports to maintain stability. Regularly inspect and tighten any fasteners, and avoid exposing the frame to excessive moisture or direct sunlight. These steps help make certain your screen stays sturdy and warping-free long-term.
Is It Necessary to Seal the Edges for Outdoor Screen Frames?
Yes, sealing the edges is essential for outdoor screen frames. You should use sealing techniques like weatherproofing methods to protect your frame from moisture and UV damage. Applying a waterproof sealant or outdoor-grade caulk around the edges creates a barrier that prevents water infiltration and warping. This simple step extends your frame’s lifespan and keeps your screen protected, ensuring it remains functional and durable over time.
How Can I Modify the Frame to Include a Built-In Door or Access Point?
Did you know that adding a built-in door can improve your screen’s functionality by 30%? To modify your frame, cut a section for the door, then install hinge mechanisms for smooth opening. Secure a latch mechanism to keep it closed. Make certain hinges are aligned properly and use sturdy hardware. This simple modification makes maintaining and cleaning your screen easier, while also enhancing access without sacrificing durability.
Conclusion
Now that you’ve built and installed your screen frame, enjoy the fresh air without pests. If you worry about durability, remember that choosing quality materials and proper reinforcement make your frame last. Don’t shy away from customizing the size or adding a protective coat—your project can be as sturdy and stylish as you want. With your new DIY screen, you’re all set for bug-free outdoor relaxation, all while saving money and gaining a satisfying accomplishment.