To design a dedicated home theater for projector use, focus on optimizing acoustics with bass traps and acoustic panels to minimize echoes and improve sound clarity. Arrange your seating for comfortable viewing, ensuring clear sightlines and proper distance from the screen. controlling lighting with blackout curtains or dimmable lights will reduce glare and enhance picture quality. Pay attention to layout, minimizing cable clutter and positioning equipment for accessibility. If you keep exploring, you’ll discover more key tips for creating an immersive viewing environment.
Key Takeaways
- Optimize acoustics with bass traps and acoustic panels to reduce reflections and ensure clear audio.
- Plan seating arrangements with proper sightlines and tiered options for unobstructed viewing.
- Incorporate blackout curtains and indirect lighting to prevent glare and enhance picture quality.
- Strategically position the projector, screen, and audio components for balanced sound and visuals.
- Maintain an organized layout with minimal cables and ample space for easy access and comfort.
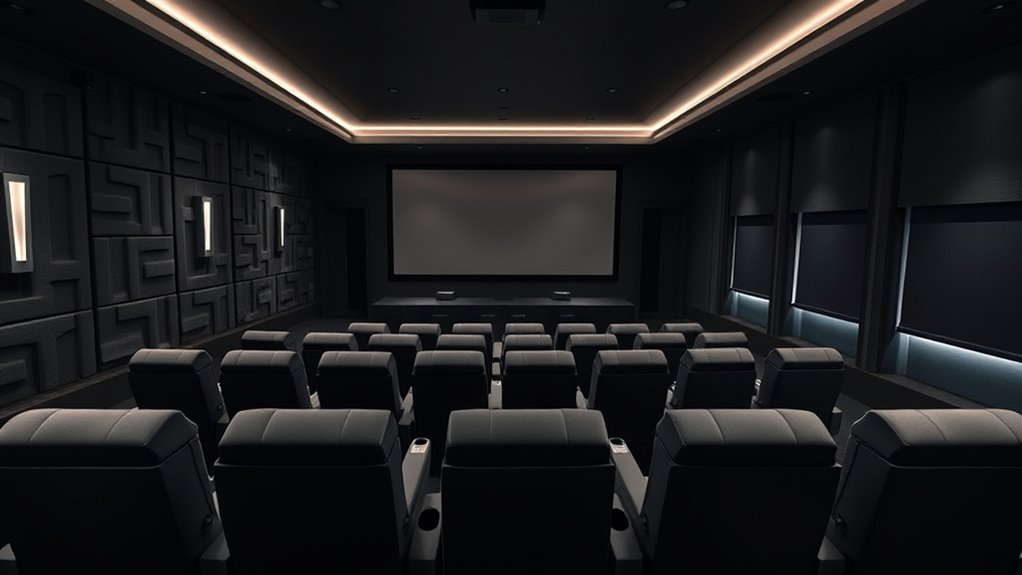
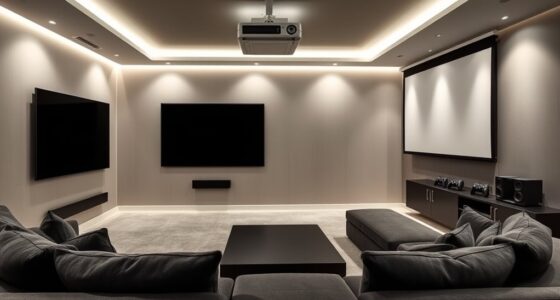
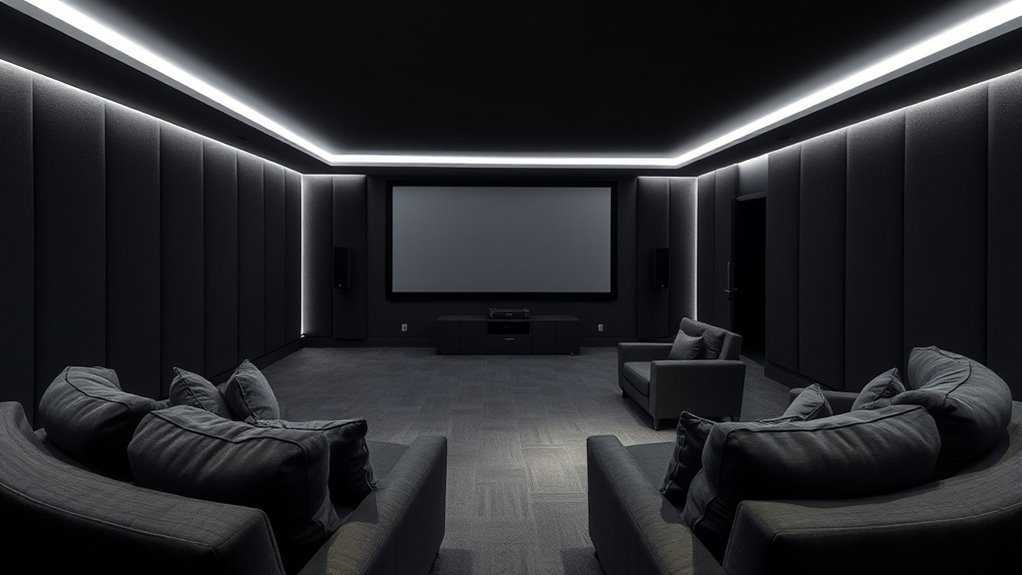
Creating the perfect home theater begins with careful planning and thoughtful design. When setting up a dedicated room for projector use, your focus should be on creating an environment that delivers immersive visuals and crisp sound. One of the first steps is considering how to enhance the acoustics of your space. Acoustic treatments are essential for minimizing sound reflections, echoes, and background noise that can distract from your viewing experience. Installing bass traps, acoustic panels, or diffusers on walls and ceilings helps control sound quality, ensuring clear dialogue and vibrant audio. Proper acoustic treatment can make a significant difference, transforming your room into a true home theater. Additionally, selecting materials with good sound absorption properties can further improve the overall acoustic environment.
Enhance your home theater with acoustic treatments to create immersive visuals and crisp, clear sound.
Next, you need to pay attention to your seating arrangements. How you position your seats impacts both comfort and viewing angles. You want seats that are comfortable for long viewing sessions and arranged to give everyone a clear line of sight to the projector screen. Typically, placing seats slightly below or at the same level as the screen offers the best viewing experience. Keep in mind that spacing is vital; seats should be positioned to avoid any obstruction of the screen and to allow for an ideal viewing distance, usually about 1.5 to 2.5 times the diagonal size of your screen. If you’re designing a multi-row setup, consider tiered seating or risers to ensure that even those in the back have an unobstructed view.
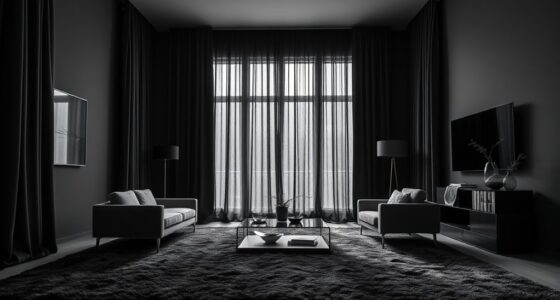
Lighting also plays an important role in creating the ideal projector room. You’ll want to incorporate blackout curtains or dimmable lighting options to eliminate glare and reflections on the screen. Avoid placing light fixtures directly behind or in front of the projector, as ambient light can wash out the picture quality. Instead, focus on indirect lighting that can be adjusted based on your needs. Using lighting control systems can help optimize the lighting environment for different viewing scenarios.
Finally, think about the overall layout and space utilization. Leave enough room for easy access to seating and equipment, and consider the placement of your projector, audio components, and screen to minimize cable clutter and maximize aesthetics. Remember, a well-designed home theater isn’t just about the latest tech; it’s about creating an environment where sound and picture come together harmoniously. By carefully planning your acoustic treatments and seating arrangements, you’ll be well on your way to crafting a dedicated space that offers an authentic, theater-like experience right in your home.

Official Licensed Google TV Smart Projector, HAPPRUN 4K UHD Home Theater with Dolby Sound, Wi-Fi & Bluetooth, Built-in Streaming Apps, Compatible with Games Consoles & Smartphone, Indoor & Outdoor Use
[ Built-in Official Licensed Google TV ] - Without additional equipment, the smart projector can directly access Netflix,...
As an affiliate, we earn on qualifying purchases.
Frequently Asked Questions
What Is the Ideal Room Size for a Home Theater Projector?
You should aim for a room size of at least 12×15 feet to comfortably accommodate a projector screen size of 100 inches or more. This space allows ideal room acoustics and prevents image distortion. Make sure your room has enough distance between the projector and screen for proper focus, and consider soundproofing to enhance acoustics. A larger room enhances viewing comfort and ensures your projector’s full potential.
How Can I Prevent Light Reflection on the Projection Screen?
Did you know that poor lighting control causes 80% of image glare issues in home theaters? To prevent light reflection on your projection screen, invest in blackout curtains or shades to block ambient light. Use surface treatments like matte paint on walls and ceiling to reduce reflections. Additionally, incorporate lighting control systems so you can adjust lights during screenings, ensuring a glare-free, immersive viewing experience.
What Type of Soundproofing Is Recommended for a Home Theater?
To soundproof your home theater, you should install acoustic panels on the walls to absorb sound and reduce noise leakage. Adding mass loaded vinyl to walls or ceilings provides an extra barrier, blocking sound transmission. Combining these materials guarantees better soundproofing, so your movie experience isn’t disturbed by outside noise and your sound system’s sound doesn’t bother others. This combination creates an immersive and private home theater environment.
How Do I Choose the Best Projector Placement for Optimal Image Quality?
To select the most suitable projector placement, start by considering your room’s size and your preferred viewing angle. Use projector mounting to secure it at the ideal height and distance from the screen. Then, perform screen calibration to guarantee the image is sharp, bright, and properly aligned. Keep the projector centered and avoid obstructions, which helps maintain image quality and reduces distortion for an immersive viewing experience.
What Are Common Electrical Considerations for a Dedicated Home Theater Room?
Imagine you’re installing your projector, and suddenly a power surge hits; without proper electrical considerations, your equipment could be damaged. You should make certain your theater room has a dedicated power circuit to prevent overloads and provide stable power. Additionally, install surge protection devices to guard against voltage spikes. These measures help maintain consistent performance and protect your investment, giving you peace of mind during movie nights.
![Projector-4K with WiFi and Bluetooth:[60W Dolby Audio/AI Auto Focus/Official Licensed Apps], Outdoor-Projector with Smart OS 2.0 ,ONOAYO ONO5Pro 2.0 Smart Movie Projector for Indoor/Outdoor](https://m.media-amazon.com/images/I/41fylkjOTIL._SL500_.jpg)
Projector-4K with WiFi and Bluetooth:[60W Dolby Audio/AI Auto Focus/Official Licensed Apps], Outdoor-Projector with Smart OS 2.0 ,ONOAYO ONO5Pro 2.0 Smart Movie Projector for Indoor/Outdoor
[Hear the Difference–Hollywood-Grade Dual 60W Dolby Audio] Why spend $500 on a TV + soundbar or settle for...
As an affiliate, we earn on qualifying purchases.
Conclusion
As you step into your dedicated home theater, the soft glow of the projector casts a warm, inviting glow across the darkened room. Every detail, from plush seats to soundproof walls, creates an immersive escape where you can lose yourself in your favorite films. With thoughtful design, your space becomes a sanctuary of cinematic magic, transforming ordinary nights into extraordinary experiences. Now, sit back, relax, and enjoy the breathtaking world you’ve crafted right at home.

HAPPRUN 2500 ANSI Lumens Outdoor Projector with Built-in Streaming Apps, 4K Decoding Resolution, Dolby Audio, WiFi 6 and Bluetooth 5.2 for Indoor and Outdoor Home Theater
[ Built-in Streaming System ] – No extra equipment needed. This smart projector gives you direct access to...
As an affiliate, we earn on qualifying purchases.
ViewSonic PX701-4K UHD 4K Projector with 3200 Lumens, 240Hz, 4.2ms, HDR, Auto Keystone, Dual HDMI for Home Theater
4K Home Theater Projector: UHD (3840x2160p) 4K resolution with a 1.5-1.6 throw ratio and 3,200 ANSI lumens perfect...
As an affiliate, we earn on qualifying purchases.