
If you’re new to ceiling cable management, start by planning your layout carefully. Measure your space, identify obstacles, and decide on the best routes for your cables. Gather the right tools and materials like conduit, clips, and cable ties. Secure supports firmly, run cables neatly, and conceal excess wiring for a professional look. With proper steps, you’ll create a safe, organized ceiling setup. Keep going to discover detailed tips for flawless cable management.
Key Takeaways
- Plan your cable routes carefully, marking pathways and attachment points to ensure a neat, safe installation.
- Select durable materials, supports, and tools suitable for ceiling cable management to ensure safety and longevity.
- Secure cables using appropriate supports and fasteners, maintaining organized bundles and preventing sagging.
- Manage excess cable length by bundling, hiding, or trimming to keep the ceiling tidy and safe.
- Finish with concealment solutions like cable covers or clips to create a professional, clutter-free appearance.

Kshioe Motorized Projector Screen with Remote Control, No Wrinkles, Without Dents, HD Screen, for Home Theater Office Classroom TV Usage (92inch 16:9)
Perfect visual enjoyment: 16: 9 Projectorscreen format and diagonal 92" offers 80" x 45" viewing area with optimal...
As an affiliate, we earn on qualifying purchases.
Assessing Your Ceiling Space and Planning Your Layout
Before you begin installing cable management systems on your ceiling, it’s vital to assess your space carefully. Start by measuring your ceiling height to determine the best route for your cables and whether additional supports are needed. Check for existing structures like beams, ducts, or light fixtures that could interfere with your plan. These elements influence where you can run cables and how discreetly you can hide them. Take note of any slopes or irregularities, as they can affect your layout. Planning ahead helps you avoid surprises during installation and guarantees a tidy, professional finish. A thorough assessment allows you to choose the right pathways, supporting structures, and concealment methods, making the entire process smoother and more efficient.

DINAH 120 Inch Electric Projector Screen with Remote, Automatic Air Indoor Drop Down, Motorized 4K 3D HD Projection for Movies
Large 120-inch screen: The DINAH electric projector screen is an ideal choice for movie enthusiasts and professionals alike,...
As an affiliate, we earn on qualifying purchases.
Choosing the Right Materials and Tools for Your Project
Selecting the right materials and tools is essential to ensuring your ceiling cable management project is successful and looks professional. Start with durable cable insulation to protect your wires from damage and electrical issues. Choose high-quality clips, brackets, and conduit that suit your ceiling type and cable load. A cable labeling system is also crucial; it helps you identify each wire easily during installation and future maintenance, preventing confusion. Use wire strippers, pliers, and a drill to handle tasks efficiently. Having the correct tools minimizes errors and saves time. Make sure all components are rated for your specific project requirements, and double-check compatibility. Proper materials and tools set a solid foundation for a clean, safe, and organized ceiling cable setup. Additionally, understanding the design aesthetics of your space can help you select cable management solutions that blend seamlessly with your ceiling’s style.

Mdbebbron 120 inch Projector Screen 16:9 Foldable Anti-Crease Portable Projector Movies Screens for Home Theater Outdoor Indoor Support Double Sided Projection
CONVENIENT TO STORAGE AND CARRY : Compact one-piece,lightweight and folding design. You can fold the projector screen in...
As an affiliate, we earn on qualifying purchases.
Preparing the Area and Marking Your Cable Routes
Start by clearing your workspace to guarantee safety and easy access. Next, plan your cable pathways to keep everything organized and neat. Finally, mark attachment points on the ceiling to guide your installation and prevent mistakes. Incorporating a proper layout ensures your cables are routed efficiently and safely.
Clear Workspace Setup
Creating a clear workspace is essential for a smooth ceiling cable management process. Start by decluttering the area to prevent accidents and make your work easier. Next, gather all necessary tools and materials, like cables, markers, and safety gear. Finally, consider wireless alternatives where possible, reducing clutter and simplifying installation. This setup helps you focus on aesthetics considerations, ensuring your cables stay neat and unobtrusive. Mark your routes accurately on the ceiling, using painter’s tape or a pencil, to visualize cable paths before installation. A well-prepared workspace minimizes errors and saves time, making the entire process more efficient. Remember, a tidy area encourages safer work habits and results in a cleaner, more professional-looking ceiling setup. Additionally, understanding cable routing techniques can significantly improve the overall appearance and safety of your project.
Plan Cable Pathways
With your workspace cleared and tools ready, it’s time to plan the cable pathways. Start by visualizing the most efficient cable routing from your power source to devices. Consider the ceiling layout and identify the safest routes that avoid obstacles or areas with high foot traffic. Use a pencil or painter’s tape to mark where you plan to run the cables, ensuring they stay clear of electrical fixtures or structural elements. Pay attention to safety considerations, such as avoiding sharp edges or areas prone to moisture. Keep the cable pathways as direct as possible to minimize slack and clutter. Proper planning now will make installation smoother and reduce the risk of accidents later. Clear markings will guide you and ensure your ceiling cables are neatly and safely routed. Utilizing proper cable management techniques can further enhance safety and organization during installation.
Mark Attachment Points
Before attaching the cables, you need to mark the precise points where they will be secured to the ceiling. This step guarantees your cable management stays neat and secure. Focus on identifying suitable mounting points that support the weight and prevent sagging. To do this effectively:
- Measure and mark the straight cable routes, keeping them tidy and organized.
- Identify and mark mounting points aligned with your cable pathways for secure cable attachment.
- Use a level to ensure markings are straight, maintaining a professional look.

Mdbebbron 150 inch Projection Screen 16:9 Foldable Anti-Crease Portable Projector Movies Screen for Office Home Theater Indoor Outdoor Support Double Sided Projection
CONVENIENT TO STORAGE AND CARRY - Compact one-piece,lightweight and folding design. You can fold the screen in small...
As an affiliate, we earn on qualifying purchases.
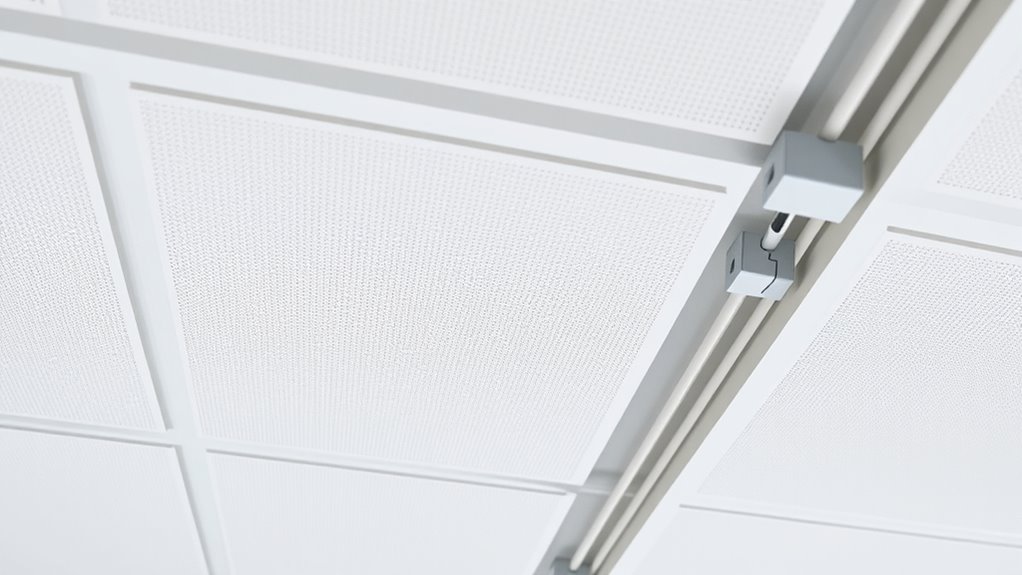
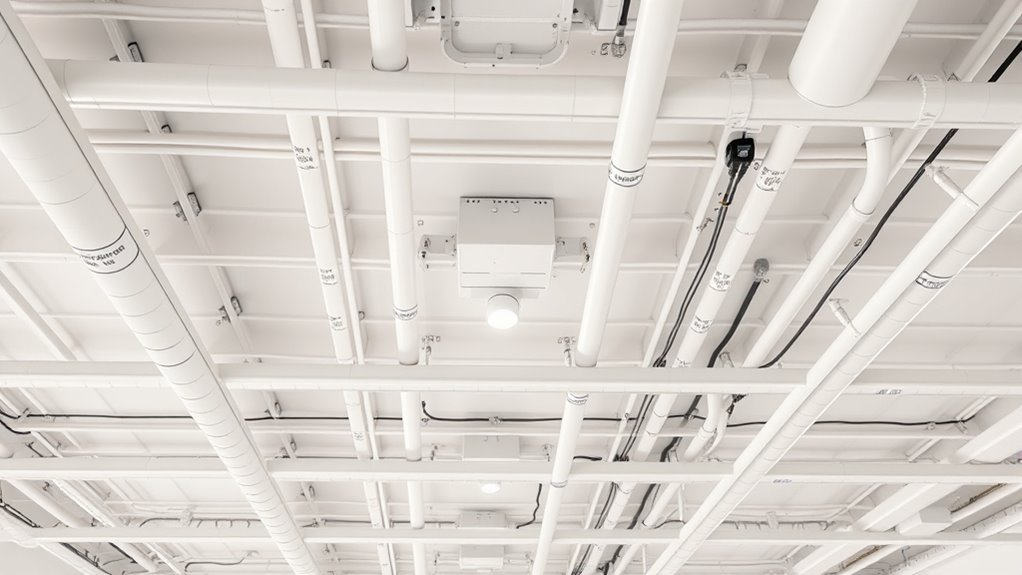
Installing Conduits, Trays, or Channels for Cable Support
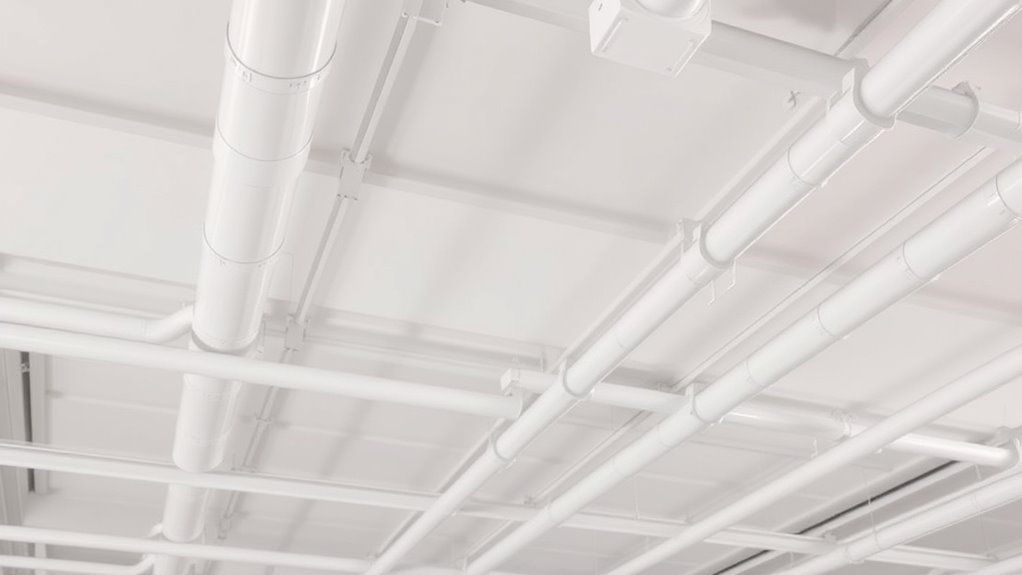
Installing conduits, trays, or channels is an essential step in supporting ceiling cables securely and neatly. First, choose the right conduit types, such as flexible or rigid, based on your space and cable needs. Rigid conduits offer durability, while flexible options make bending around obstacles easier. When installing trays, use proper tray installation techniques, ensuring they’re securely fastened and evenly spaced for weight distribution. Secure all supports to ceiling joists or sturdy structures to prevent sagging or movement. Use appropriate fasteners and brackets, and double-check measurements before drilling. Proper installation not only keeps cables organized but also protects them from damage. Take your time to ensure everything is level and well-secured for a professional, safe ceiling cable setup. Additionally, understanding types of cables and their specific requirements can help prevent future issues.
Running and Securing Cables Safely and Neatly
To run cables safely and neatly, you need proper supports that keep them in place without sagging. Conceal any excess length to maintain a clean look and prevent hazards. Secure the cables firmly with the right fasteners to guarantee they stay organized and safe over time. For those interested in vehicle modification, understanding Kia Tuning options can also inspire creative ways to enhance your vehicle’s performance and style.
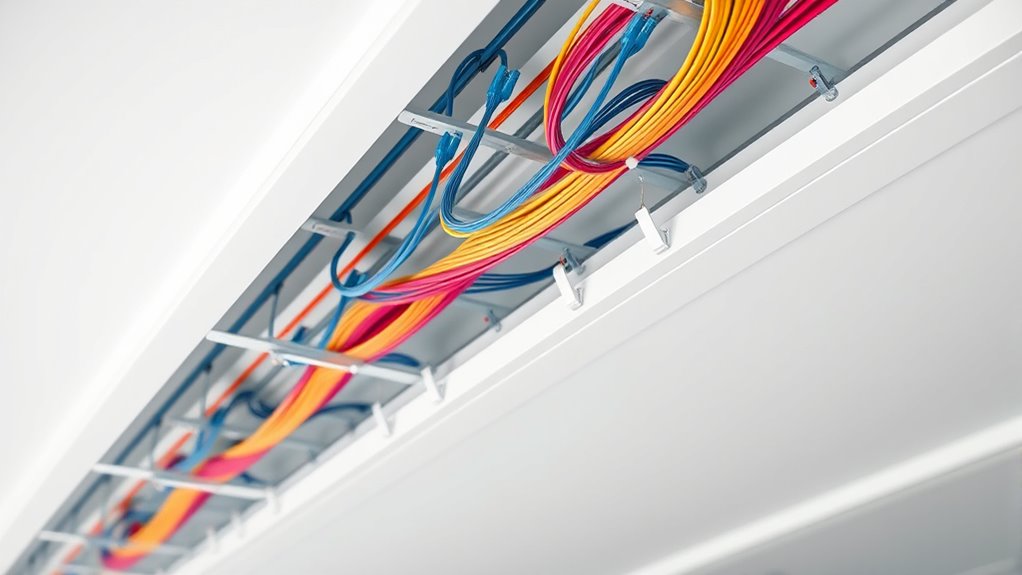
Proper Cable Supports
Proper cable supports are essential for running and securing cables safely and neatly along ceilings. They prevent sagging, damage, and hazards. Use these key supports:
- Wire supports: Attach these directly to the ceiling to hold cables securely without bending or stressing the wires.
- Cable brackets: Use brackets to hold bundles of cables in place, keeping everything organized and preventing movement.
- Cable ties and clips: Secure cables to supports, ensuring they stay neat and prevent accidental disconnections.
Always choose supports rated for the cable weight and type you’re installing. Proper placement, like every 3 to 4 feet, helps maintain a clean, safe, and professional-looking setup. Incorporating Vetted products can also ensure durability and safety in your cable management.
Concealing Excess Lengths
When cables are longer than needed, they can create clutter and pose safety risks if not managed properly. Cable concealment is essential for a neat and safe ceiling setup. To manage excess length, start by measuring the exact cable length needed, avoiding unnecessary slack. Use cable ties or clips to bundle excess cables neatly along ceiling supports, keeping them out of sight and preventing tangles. Consider running surplus cable along the sides or behind fixtures, then securing it discreetly. If possible, trim excess cable carefully, ensuring you leave enough slack for adjustments. Proper excess length management not only improves the appearance of your ceiling but also reduces tripping hazards and damage risks. Always prioritize safe handling and secure fastening to maintain a tidy, professional look. Additionally, understanding cable management techniques can help you optimize the safety and aesthetics of your ceiling setup.
Securing With Fasteners
Securing cables with fasteners is essential for maintaining a neat and safe ceiling setup. Proper fastener types and mounting techniques keep cables organized and prevent hazards. Here are three key tips:
- Choose the right fastener types, such as zip ties, cable clips, or adhesive mounts, based on your ceiling material and cable weight.
- Use appropriate mounting techniques, ensuring fasteners are spaced evenly—about every 12-24 inches—to prevent sagging.
- Always secure cables firmly but avoid overtightening, which can damage cables or fasteners.
- Incorporating proper cable management practices can further enhance safety and organization in your ceiling setup.
Finishing Touches: Concealing and Organizing Cables for a Clean Look

To achieve a polished ceiling setup, concealing and organizing cables is essential. Cable concealment improves cable aesthetics, making your ceiling look tidy and professional. Use cable covers or trunking to hide exposed wires, ensuring they blend seamlessly with your ceiling design. Velcro straps or cable clips help organize loose cables, preventing tangles and maintaining a clean appearance. For a seamless look, consider running cables along edges or behind fixtures, minimizing visible clutter. If your cables are long, coil and secure excess lengths neatly out of sight. These finishing touches not only enhance the visual appeal but also reduce hazards. Taking the time to hide and organize cables ensures your ceiling setup looks sleek, safe, and well-crafted—a perfect finish for your project.
Frequently Asked Questions
How Do I Prevent Electrical Hazards During Ceiling Cable Installation?
To prevent electrical hazards during ceiling cable installation, always prioritize fire safety by using properly insulated cables. Verify your cables have adequate cable insulation to avoid short circuits or sparks. Turn off the power before starting, and double-check connections. Use the correct tools and follow safety guidelines. Regularly inspect your work for damaged insulation or exposed wires, reducing the risk of electrical fires and keeping your space safe.
What Are the Best Practices for Cable Weight Distribution?
To guarantee proper cable weight distribution, you should regularly check cable tension and avoid sagging. Use support brackets strategically placed along the ceiling to evenly distribute the weight and prevent stress on any single point. Secure cables firmly but gently to prevent shifting or damage. Proper support and tension management help maintain a safe, organized, and long-lasting cable installation for your ceiling.
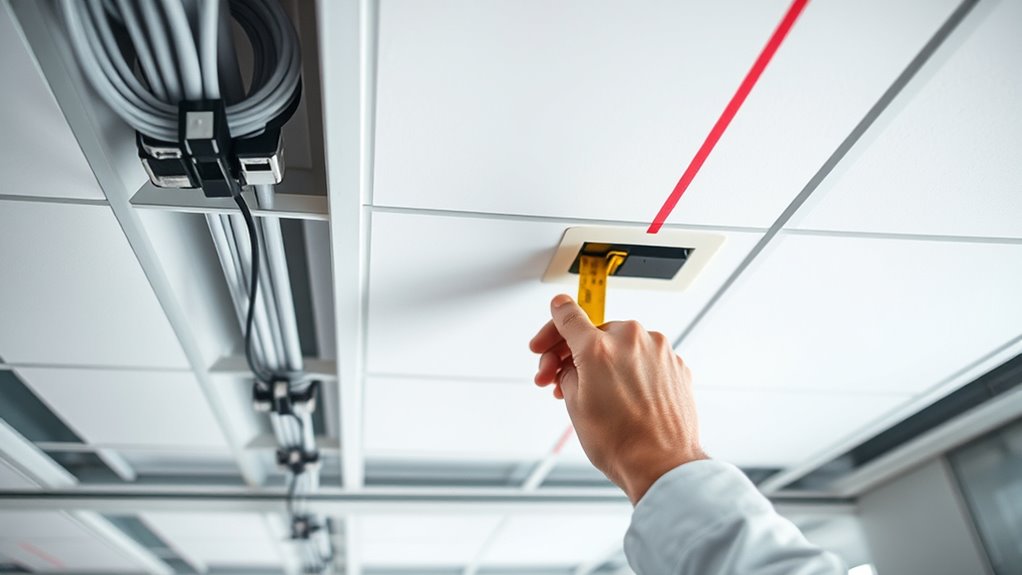
How Can I Access Cables After Installation for Future Maintenance?
Imagine opening a discreet access point in your ceiling, revealing neatly labeled cables that you can swiftly identify. To guarantee easy future maintenance, install accessible access points at strategic spots and label your cables clearly during installation. These labels act like a map, guiding you effortlessly through the maze of wires. With organized access points and proper labeling, you’ll save time and prevent headaches when troubleshooting or upgrading your ceiling cables.
Are There Specific Codes or Regulations I Should Follow?
You should always follow local building permits and electrical codes when managing cables in ceilings. Check with your city’s building department to see if you need a permit before starting. Comply with electrical codes that specify cable types, support, and spacing requirements. Doing so ensures your installation is safe, compliant, and easy to access later for maintenance or upgrades. Ignoring these regulations can lead to fines or safety hazards.
What Are Common Mistakes to Avoid in Ceiling Cable Management?
Avoid letting your cables become a tangled jungle, which creates cable clutter and makes future adjustments a nightmare. Poor labeling can turn your project into a maze of confusion, wasting time and risking mistakes. Don’t rush; plan your layout carefully, secure cables properly, and use consistent labeling. By steering clear of these pitfalls, you’ll keep your ceiling tidy, safe, and easy to maintain, transforming chaos into a sleek, professional finish.
Conclusion
Think of your ceiling as a blank canvas, ready to be transformed into a sleek, organized masterpiece. With careful planning and the right tools, you’re the artist shaping a tidy, efficient space. Every cable hidden and secured is like a brushstroke, bringing clarity and order to your home. So, step back, admire your work, and know that with patience and skill, you’ve crafted a ceiling that’s as neat and polished as a gallery exhibit.