To match your projector’s brightness to your screen size, start by considering your room’s lighting conditions—brighter rooms need higher brightness settings, while darker spaces require lower levels. Adjust the projector incrementally, sitting at your typical viewing distance, and watch for image clarity with key details. Larger screens generally need more lumens to stay clear, so tweak accordingly. Regularly check and fine-tune settings as conditions evolve—if you want more tips, keep exploring.
Key Takeaways
- Consider the screen size and ambient lighting to determine the necessary projector lumens for adequate brightness.
- Use calibration charts or test patterns to fine-tune brightness settings for your specific screen size.
- Adjust brightness incrementally while observing image clarity and detail preservation at your typical viewing distance.
- Match higher brightness levels with larger screens in bright environments, and lower levels for smaller screens or darker rooms.
- Regularly re-evaluate and adjust brightness as environment or screen size changes to maintain optimal image quality.

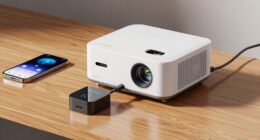
Matching your projector’s brightness to your environment is vital for achieving a clear, vibrant image. When you’re setting up your projector, it’s not just about plugging it in and hoping for the best. Proper adjustment techniques are essential to guarantee your image isn’t washed out or too dim, especially when considering your screen size. Brightness calibration involves fine-tuning the projector’s output to match the ambient light and the size of your screen, creating a balanced picture that’s easy on the eyes and visually appealing.
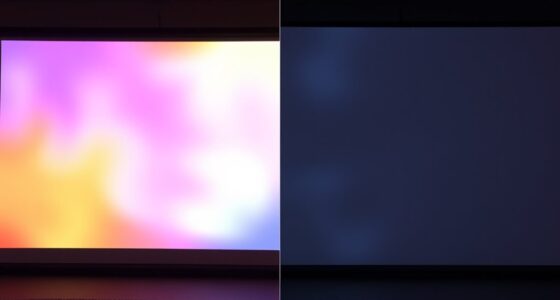
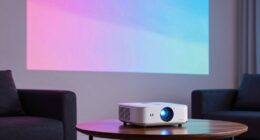
To start, you need to assess your environment’s lighting conditions. If your room is bright with lots of natural light, you’ll want a higher brightness setting to compensate for the ambient illumination. Conversely, in a darker room, lowering the brightness can help prevent the image from looking overly harsh or washed out. Use your projector’s menu to access the brightness adjustment controls, and make small changes while observing how the image responds. The goal is to find a sweet spot where details are visible without the image appearing overly intense or dull.
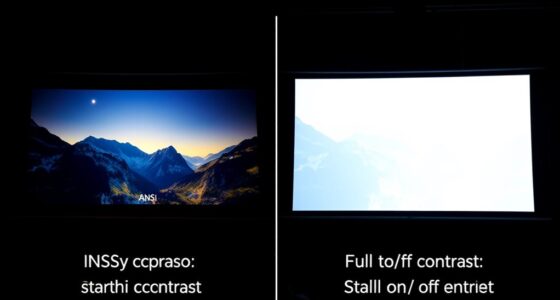
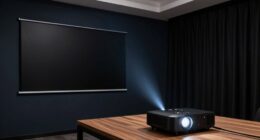
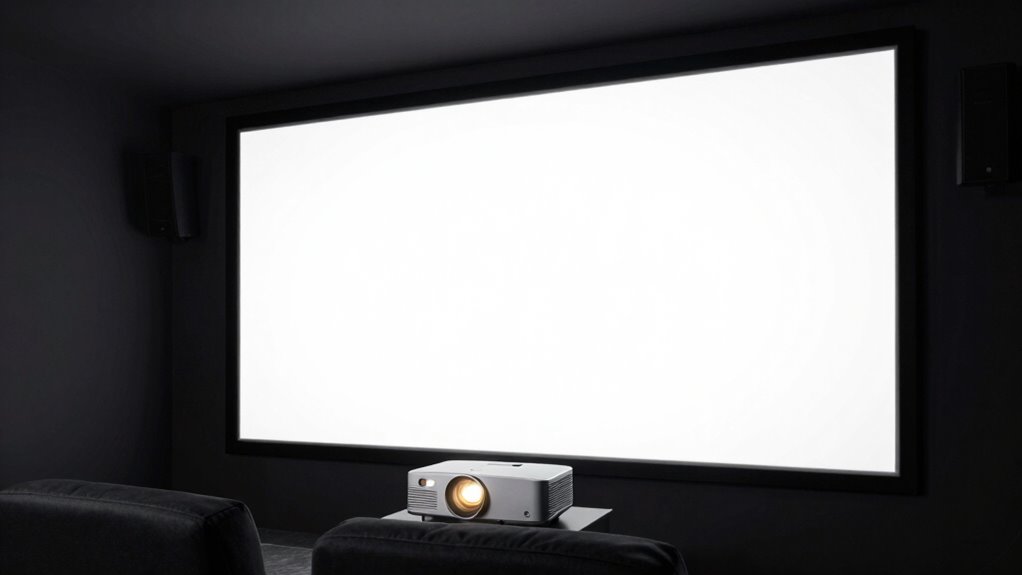
Brightness calibration isn’t a one-and-done process. It requires iterative adjustment techniques to get it just right. Begin by setting your projector to a neutral brightness level, then sit at your typical viewing distance. Look at key details in the image—are they clear, or do they seem lost or overly bright? Adjust the brightness incrementally, giving your eyes a moment to adapt before making the next change. Remember, larger screens often need higher brightness levels to maintain clarity, while smaller screens can function well with lower settings, avoiding eye strain and image washout. Additionally, test patterns or calibration charts** can be very helpful in precisely identifying the best brightness for your specific setup. Regularly checking and adjusting your projector’s settings can also help maintain optimal image quality, especially as your environment or screen size changes. Incorporating contrast ratio considerations can further enhance the overall image quality, especially in dark scenes. In some cases, understanding the lumens** output of your projector can provide a clearer baseline for setting the appropriate brightness level.
Ultimately, matching your projector’s brightness to your environment through these adjustment techniques guarantees a crisp, vibrant image that doesn’t cause fatigue or frustration. Regularly revisit your brightness calibration, especially if you change the room’s lighting or switch to a different screen size. This proactive approach ensures your viewing experience remains perfect, no matter the setting.

Artibetter Lens Test Chart Color Calibration Card Lens Focus Adjustment Chart Color Wheel CCTV Camera Calibration Tool Testing Card for Monitoring Systems
Paper imaging: makes cameras deliver crisp and clear images, enhancing the of monitoring systems.
As an affiliate, we earn on qualifying purchases.
As an affiliate, we earn on qualifying purchases.
Frequently Asked Questions
Can Ambient Light Affect Optimal Projector Brightness?
Yes, ambient light can affect your ideal projector brightness. When there’s more light in the room, you’ll need a brighter projector to maintain color accuracy and clear images, especially on screens with higher resolution. If you don’t match brightness to ambient conditions, your picture may appear washed out or dull. Adjusting your projector’s brightness ensures vibrant colors, sharp details, and an immersive viewing experience regardless of room lighting.
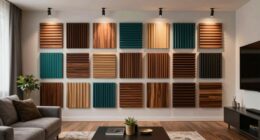
How Does Screen Material Impact Brightness Requirements?
Your screen material can turn your setup into a visual battlefield! Reflective surfaces like glossy screens amplify brightness, making images pop like fireworks. Matte screens absorb light, demanding a powerhouse projector to keep visuals vibrant. The right screen material directly impacts brightness needs—glossy for high brilliance, matte for softer, glare-free images. Choosing wisely guarantees your projector’s brightness hits the mark, avoiding dull or washed-out displays that make you regret your setup.
What Is the Ideal Brightness for Outdoor Projectors?
For outdoor projectors, aim for at least 3,000 lumens to guarantee clear images amidst ambient light. To boost your viewing experience, prioritize image enhancement features that improve brightness and contrast, especially in darker environments. Color accuracy is also vital, so choose a projector with good color reproduction capabilities. This combination guarantees vibrant, sharp images that remain vivid even outdoors, providing an ideal viewing experience without regrets.
Does Projector Placement Influence Perceived Brightness?
Your projector placement dramatically influences perceived brightness, almost as if you’re controlling a magic switch. Proper placement enhances image enhancement and color accuracy, making the picture pop vividly. When you position your projector correctly, it minimizes shadows and glare, ensuring the brightness feels natural rather than washed out. So, yes, where you place it matters—think of it as fine-tuning your visual experience for maximum impact.
How Often Should I Calibrate My Projector’s Brightness?
You should calibrate your projector’s brightness every few months or whenever you notice color accuracy or lens focus issues. Regular calibration guarantees ideal image quality, maintaining accurate colors and sharpness. When adjusting brightness, pay attention to how it affects color accuracy and lens focus, as these factors influence overall picture clarity. This routine helps prevent image degradation over time, keeping your viewing experience consistently vibrant and sharp.

HAPPRUN 2500 ANSI Lumens Outdoor Projector with Built-in Streaming Apps, 4K Decoding Resolution, Dolby Audio, WiFi 6 and Bluetooth 5.2 for Indoor and Outdoor Home Theater
[ Built-in Streaming System ] – No extra equipment needed. This smart projector gives you direct access to…
As an affiliate, we earn on qualifying purchases.
As an affiliate, we earn on qualifying purchases.
Conclusion
Think of choosing projector brightness like tuning a musical instrument. When you match the right level, everything harmonizes perfectly, creating a clear, vibrant performance. If you’re too bright or too dim, the melody gets lost. By carefully matching your projector’s brightness to your screen size and environment, you guarantee your visual experience hits all the right notes. When you get it just right, your movies and presentations will always shine, leaving your audience captivated and satisfied.

Ambient Light Sensor Replace 25713063 Fit for GMC Sierra Silverado Yukon Chevrolet Suburban Tahoe Cadillac CTS Escalade SRX Buick Allure Enclave, Only for 4 Prong, not for 2 Prong
Wide Compatibility: Fit for Buick Enclave Lacrosse Lesabre Rainier 2002-2012, fit for Cadillac CTS Deville DTS Escalade Seville…
As an affiliate, we earn on qualifying purchases.
As an affiliate, we earn on qualifying purchases.

Original Replacement Remote Control for HY320/300Pro Projector & Gimbal 3/5 – Universal Compatible with Magcubic/Xgody/Aubor/Maypug/HIPPUS/Mentech/LYNCAST Projectors, Infrared IR Remote with Buttons
✪【Precise Compatibility】 "Designed EXCLUSIVELY for HY300Pro Projector & Gimbal 3/5 models, 100% signal sync with Magcubic/Xgody/Aubor/Maypug/HIPPUS/Mentech/LYNCAST systems. ★Avoid…
As an affiliate, we earn on qualifying purchases.
As an affiliate, we earn on qualifying purchases.