Use this guide to choose and set up a 4K projector for home theater viewing. You will check whether your room suits projection, compare projector features, select a screen, place and connect the equipment, and adjust the image and sound. It is for readers who can connect home electronics but have not planned a projector setup before. Allow 2–4 hours for installation and initial tuning; choosing equipment may take longer.

Get business pricing on your home office setup
- Business-only prices and quantity discounts
- Tax-exempt purchasing
- Multiple users, one account, clear invoices

Optoma UHZ36 4K UHD Laser HDR Home Theater Projector – Black
- ✔ Resolution: 3840 x 2160 (4K UHD)
- ✔ Brightness: 3500 lumens
- ✔ HDR: Supported

Smart 4K Projector with Google TV Stick, WiFi 6, Bluetooth 5.2, 3000 ANSI Lumens, Auto Lens Cover, Portable Outdoor Movie Project…
- ✔ Native resolution: 1920 x 1080
- ✔ Maximum display resolution: 1920 x 1080 pixels
- ✔ 4K: 4K decoding

X9 Pro 4K Smart Projector with VIDAA OS, 920 ANSI Lumens, Dolby Audio, and AI Auto-Focus
- ✔ Resolution: Native 1080p with 4K decoding
- ✔ Brightness: 920 ANSI lumens (ISO, as listed)
- ✔ Color gamut: 130% NTSC
Difficulty: Intermediate | Time: 2–4 hours for setup; allow extra time for research and room changes
What You’ll Need
Tools & Materials:
- Tape measure
- Projector and compatible screen, or a clear plan for purchasing them
- HDMI cable rated for the required resolution and refresh rate
- Source device such as a streaming player, game console, or receiver
- Mounting hardware suitable for the projector and ceiling or shelf
- Screwdriver and, for ceiling installation, a drill and stud finder
- Level and a helper for lifting and positioning the projector
Knowledge:
- Basic use of a tape measure and hand tools
- How to connect HDMI devices and select inputs
- Basic familiarity with the room’s electrical outlets and seating
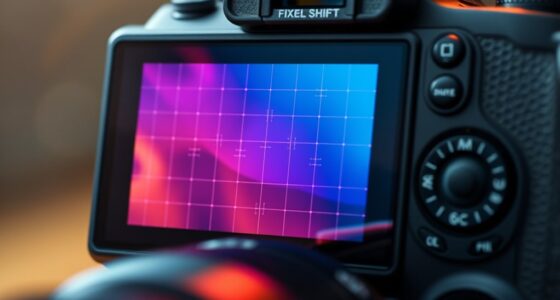
Check the projector’s installation manual for throw distance, ventilation clearance, mount requirements, supported resolution, and lens shift range before buying or drilling. Confirm that the screen size fits the wall and that the seating distance suits your viewing preference. Projectors vary: some use native 4K panels, while others use pixel shifting to display a 4K image. Compare measured image quality, brightness, features, and price rather than relying on the 4K label alone.
Optoma UHZ36 4K UHD Laser HDR Home Theater Projector – Black
The Optoma UHZ36 earns the top spot because it is the only projector here specified to display 3840 x 2160 native 4K UHD. That distinction is central to a roundup about 4K home theater: the X9 Pro and portable Google TV model can decode 4K material, but their stated output tops out at 1920 x 1080. For viewers investing in high-resolution films, the Optoma is the straightforward fit.Its laser light source is rated for up to 30,000 hours, reducing the need to plan around frequent lamp replacement. The listed 3500 lumens and HDR support also make it the most theater-oriented combination on paper. Filmmaker Mode is intended to preserve the director’s original presentation, which may appeal to viewers who prioritize film playback over a pile of built-in convenience features.There are real compromises. The 10.4-pound unit is less spontaneous to move than the portable Google TV model, and its built-in 15W speaker is more basic than the X9 Pro’s dual 20W Dolby Audio system. The product details also list HDMI, USB and RCA, but no integrated streaming platform. We should plan on a separate streaming device and, for fuller sound, an external audio system. Choose it for the image; the other two make a simpler all-in-one entertainment setup.
Pros:
- Native 3840 x 2160 4K UHD image
- Laser light source rated for up to 30,000 hours
- HDR support and Filmmaker Mode
- Broad stated image-size and throw-distance ranges
Cons:
- Built-in 15W speaker is less substantial than the X9 Pro’s dual 20W audio
- No built-in streaming platform is specified
- At 10.4 pounds, it is less convenient to move than the portable model
Best for: Home theater viewers who want native 4K resolution, HDR support and a long-life laser light source.
Not ideal for: Buyers who need built-in streaming, powerful onboard audio or an especially lightweight projector for frequent relocation.
Bottom line: For a dedicated theater where displayed 4K detail comes first, the Optoma UHZ36 is the strongest match in this comparison.
“For a dedicated theater where displayed 4K detail comes first, the Optoma UHZ36 is the strongest match in this comparison.”
Smart 4K Projector with Google TV Stick, WiFi 6, Bluetooth 5.2, 3000 ANSI Lumens, Auto Lens Cover, Portable Outdoor Movie Project…
The portable Google TV projector is the practical pick for households that value streaming access and flexible placement more than native 4K detail. Its bundled Google TV stick offers access to a broad app selection and voice control without requiring another streaming box, while the 3000 ANSI lumen claim is the highest stated ANSI figure in this group. For mixed-use viewing, occasional outdoor films or a room that is not fully light-controlled, that combination is appealing on paper.Its 1080p native resolution sets a firm limit, however. The projector can decode 4K content, but the maximum stated display resolution is 1920 x 1080. Compared with the Optoma, it gives up the detail that makes a native 4K theater compelling; compared with the X9 Pro, it claims much greater brightness and adds the Google TV stick, but does not list the same dual 20W Dolby speakers or VIDAA and HomeKit integration.AI autofocus, keystone correction, digital zoom and a rotating stand help adapt the image when there is no permanent installation. That flexibility is useful, though digital adjustments and an all-direction stand do not turn a portable 1080p model into a fixed-room 4K projector. Buyers should also verify the supplied stick and setup suit their preferred services. This is the best value-oriented role for flexible streaming, but the “4K” label needs careful reading.
Pros:
- Bundled Google TV stick with broad app access and voice control
- 3000 ANSI lumens stated brightness
- AI autofocus, keystone correction and digital zoom
- Portable form with rotating stand and tripod compatibility
Cons:
- Native and maximum stated display resolution are both 1080p
- Built-in audio specifications are not provided
- Portable setup offers less of a dedicated theater fit than the Optoma
Best for: Viewers who want an adaptable projector for streaming, casual home viewing and occasional outdoor use.
Not ideal for: Movie enthusiasts seeking a native 4K picture or buyers who want the strongest listed built-in speaker setup.
Bottom line: Pick this model for flexible streaming and a high stated brightness figure, provided 1080p display resolution meets your expectations.
“Pick this model for flexible streaming and a high stated brightness figure, provided 1080p display resolution meets your expectations.”
X9 Pro 4K Smart Projector with VIDAA OS, 920 ANSI Lumens, Dolby Audio, and AI Auto-Focus
The X9 Pro is the most complete self-contained setup for viewers who want streaming and sound built into the projector. Its VIDAA OS comes with preloaded apps and more than 1,000 live TV channels, while dual 20W Dolby Audio speakers promise a more substantial onboard sound system than the Optoma’s 15W speaker. Wi-Fi 6, Bluetooth 5.4 and HDMI ARC add useful ways to connect devices and route audio.Those conveniences do not change its picture category: the X9 Pro has native 1080p resolution with 4K decoding. The Optoma is the better choice when preserving 4K detail is the priority, and the portable Google TV projector lists a higher brightness figure. With 920 ANSI lumens, the X9 Pro is better suited to a dim or dark viewing space than a room with substantial ambient light.Where it can win is ease of setup and an integrated smart-home experience. AI autofocus, 6D keystone correction and obstacle avoidance are designed to reduce manual adjustments, and AirPlay 2 and HomeKit support suit Apple households. The claimed ad-free, no-data-tracking VIDAA experience may also appeal to privacy-minded buyers. Consider this model if smart features and built-in audio matter more than native 4K; skip it if the main reason for buying is a genuinely 4K image or daytime viewing.
Pros:
- VIDAA OS with preloaded streaming apps and live TV channels
- Dual 20W speakers with Dolby Audio
- AI autofocus, 6D keystone and obstacle avoidance
- Wi-Fi 6, Bluetooth 5.4, AirPlay 2 and HomeKit support
Cons:
- Native resolution is 1080p; 4K content is decoded rather than displayed natively
- 920 ANSI lumens may struggle in well-lit rooms
- Less suitable for a resolution-first theater than the Optoma
Best for: Apple households and viewers who want built-in streaming, robust onboard audio and automated setup in a dark room.
Not ideal for: Buyers who need native 4K resolution or expect strong results in a bright living room.
Bottom line: The X9 Pro makes sense as an easy-to-set-up smart projector with strong onboard audio, as long as 1080p is enough for your theater.
“The X9 Pro makes sense as an easy-to-set-up smart projector with strong onboard audio, as long as 1080p is enough for your theater.”
As an Amazon Associate we earn from qualifying purchases.
Before You Start
Plan the room before fixing equipment in place. Measure the distance from the planned projector position to the screen, the available screen width, and the height of the lens. Use the manufacturer’s throw-distance calculator for the exact model; a projector may not fill your chosen screen from the position your room allows. Keep the lens within its stated lens shift range. Digital keystone correction can make a skewed image fit, but it may reduce detail, so use physical alignment and lens shift first.
Check ambient light at the times you plan to watch. Dark rooms make it easier to see contrast and shadow detail; a brighter room may call for a brighter projector and a screen designed for that environment. Do not block the projector’s air vents or route cables where people can trip over them. If the ceiling structure, electrical work, or mounting point is uncertain, have a qualified installer check it before attaching the projector.
Step-by-Step Instructions
Step 1: Measure the room and plan the screen
Choose the wall or screen location, then measure the maximum width and height the image can occupy without covering speakers, outlets, doors, or other equipment. Decide where viewers will sit and note the projector’s likely position. Check the room in its usual viewing light, including lamps and light from windows. Use the chosen projector’s throw calculator to confirm that the projector can create your desired image size from that position.
Tip:A larger image is not automatically better: it can look dimmer, and viewers may need to move their eyes more to follow action. Pick a size that suits both the projector’s light output and your seating distance.
Check: You have recorded a screen size, viewing location, and projector position that fit the room and the model’s specified throw range.
Step 2: Compare projectors for your room
Compare models by their actual resolution approach, brightness, contrast, lens controls, noise, inputs, and warranty. Check whether each unit supports the sources you plan to use, such as 4K HDR content, the desired refresh rate, and any gaming features you need. Read the manual or manufacturer specifications for lens shift, zoom range, throw distance, and operating noise. If possible, view the projector in a room with lighting similar to yours; showroom modes and conditions can make comparisons misleading.
Tip:Brightness ratings may be measured under different conditions. Look for independent measurements or a return policy, and check reviews that describe the tested picture mode.
Check: Your selected model supports your intended sources and can produce the planned image size from the planned position.
Step 3: Choose a screen and mounting approach
Select a screen size that matches your measurements. Choose a fixed frame for a dedicated room, a retractable screen when the wall must serve other uses, or a suitable smooth, neutral wall if you are testing the setup before buying a screen. Check screen gain and material against the projector’s brightness and room lighting. Decide whether the projector will sit on a stable shelf or use a ceiling mount rated for its weight and compatible with its mounting points.
Tip:Do not assume a high-gain or ambient-light-rejecting screen suits every projector or seating arrangement. Check its recommended viewing angle and use case.
Check: The screen fits its location, and the planned mount or shelf can support the projector without blocking ventilation.
Step 4: Install the screen and position the projector
Install the screen according to its instructions, using appropriate wall fixings. For a ceiling mount, locate a structural support, confirm the mount’s load rating and fastener requirements, and follow the projector and mount manuals. Have a helper support the projector during installation. Position the lens at the correct distance and height for the screen, then point it squarely toward the screen. Leave the required clearance around air intakes and exhaust vents.
Tip:Do not attach a projector to drywall alone unless the mounting system specifically supports that installation. Keep power and signal cables clear of hot exhaust air and walkways.
Check: The screen is secure, the projector is stable, and its lens is aimed at the screen without obstructing airflow.
Step 5: Connect the source and audio equipment
Connect the streaming player, console, or other source to the projector or to your receiver using an HDMI cable rated for the signal you intend to send. If audio will run through a receiver or sound system, follow the equipment manuals to connect the source and route video to the projector. Select the correct HDMI input on each device. Turn the devices on and check for a picture before concealing cables or fastening them permanently.
Tip:Long HDMI runs can be unreliable, especially with high-bandwidth 4K signals. If a long cable produces dropouts, use a cable or signal extender rated for your resolution, refresh rate, and distance.
Check: The selected source appears on screen, and audio plays through the intended speakers.
Step 6: Align the image and focus it
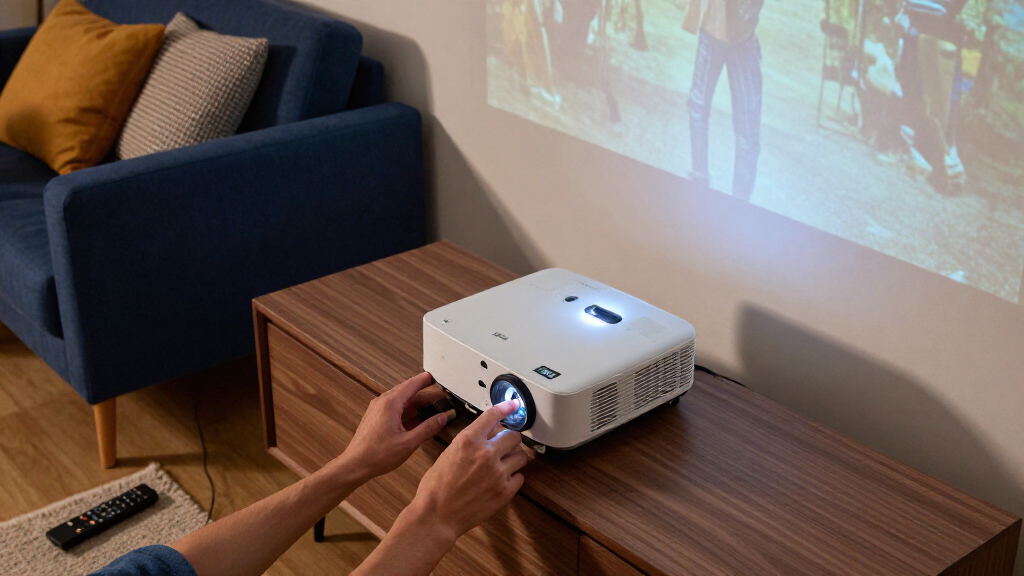
Display a grid or a screen with clear straight edges. Adjust the projector’s physical position, zoom, and lens shift to fill the screen while keeping the image square. Use the focus control to make fine text and grid lines crisp at the center and corners. If the image is tilted, correct the projector’s level or position before using digital keystone correction. Make small adjustments and recheck focus after changing zoom or lens controls.
Tip:Some lenses have a focus field that is not perfectly uniform. Aim for sharpness across the image without using digital processing that noticeably softens the picture.
Check: The image sits within the screen borders, straight lines look square, and text or grid lines are clearly focused.
Step 7: Set picture, source, and sound settings
Choose a picture mode intended for movies or cinema, then adjust brightness, contrast, color, and sharpness using a calibration pattern or a trusted setup guide for your model. Avoid extreme values and turn off motion processing or noise reduction if it creates artifacts you dislike. Set the source device to output a resolution and refresh rate supported by both the projector and your content. Enable HDR only when the source and projector support the same HDR format, then play a known HDR title to check the result. Set audio delay if dialogue does not match lip movement.
Tip:Projector lamp or laser modes can change brightness, fan noise, and service life. Choose a mode that keeps the image visible while staying comfortable in your room.
Check: A familiar film scene has natural-looking skin tones and visible shadow detail, the source reports a supported signal, and dialogue matches the picture.
Common Mistakes to Avoid
- Buying a projector before checking its throw distance and lens shift. — Use the exact model’s calculator and manual with your measured room dimensions before purchasing or mounting it.
- Choosing a screen that is too large for the projector’s light output or the room. — Match screen size and material to brightness, ambient light, seating distance, and the manufacturer’s guidance.
- Using keystone correction to compensate for poor placement. — Square the projector to the screen and use lens shift where available; reserve digital correction for small remaining errors.
- Hiding cables before confirming that the full signal works. — Test picture, resolution, HDR, refresh rate, and audio with the intended source before securing cables permanently.
Troubleshooting
Problem: The projector shows “no signal” or a blank screen.
Solution: Confirm that the source is on, choose the matching input, and reseat both ends of the HDMI cable. Test with a shorter certified cable. Set the source to a resolution and refresh rate supported by the projector, then reconnect the devices.
Problem: The picture has dropouts, sparkles, or intermittent black screens.
Solution: Replace or shorten the HDMI cable, bypass adapters and splitters, and check that every device in the signal path supports the selected 4K format and bandwidth. For a long run, use a suitable active cable or rated extender.
Problem: The image looks dim or washed out.
Solution: Darken the room, check that the lens and screen are clean, and select an appropriate picture or light output mode. Confirm that HDR is not enabled in a way the projector handles poorly. Recheck that the screen material suits the room and projector.
Problem: The image is blurry at the edges or visibly trapezoidal.
Solution: Reposition and level the projector so the lens faces the screen squarely, then adjust zoom and lens shift and refocus. Check the manual’s placement limits; do not rely on strong keystone correction to correct a large angle.
What Success Looks Like
The completed setup displays a focused image within the screen borders, with straight edges and no obvious geometric distortion. A 4K source plays at a supported resolution and refresh rate, familiar scenes look balanced for the room’s lighting, and audio comes from the intended speakers in sync with the picture. The projector remains stable, ventilated, and quiet enough for comfortable viewing.
Next Steps
Watch a full film or a variety of familiar scenes from your usual seats, then make small picture adjustments if highlights, dark scenes, or skin tones look wrong. Secure and label cables after confirming reliable playback. Clean the lens and air filters only as directed in the manual, and track lamp or filter service intervals for your model. Recheck focus and alignment if the projector or screen is moved.
Frequently Asked Questions
Does every 4K projector use a native 4K panel?
No. Some projectors use native 4K imaging chips; others use pixel shifting to display a 4K signal. Check the manufacturer’s specifications and independent reviews to learn how a particular model renders detail.
How bright should a home theater projector be?
It depends on screen size, screen material, picture mode, and room light. A dark dedicated room can use less light output than a room with open windows or lamps. Compare independent brightness measurements when available and judge the image in conditions close to your own.
Can I project directly onto a painted wall?
Yes, if the wall is smooth, flat, and a neutral color. Texture, uneven paint, and color casts can affect sharpness and color. A screen provides a more consistent surface and can improve the viewing result.
Why does my 4K source display a lower resolution?
The source, HDMI cable, receiver, adapter, or projector may limit the signal. Check every device in the chain, select a supported output format, and connect the source directly to the projector to identify where the limit occurs.