
A projector works by using a powerful light source, like LED or laser, to send light through or off an internal image source such as LCD panels or DLP chips. The light then passes through high-quality lenses that focus and correct the image, ensuring sharpness and brightness. Digital processing adjusts colors, contrast, and resolution to produce vibrant visuals. Proper surface choice and image alignment are key, and exploring further reveals how all these elements combine for stunning projections.
Key Takeaways
- Projectors use a light source, such as lamps or lasers, to project images onto a surface through optical components.
- Light passes through or reflects off an image source like LCD panels or DLP chips to generate visuals.
- The lens system, including quality coatings and focus mechanisms, directs and sharpens the projected image.
- Digital signal processing adjusts color, brightness, and contrast for vibrant and accurate visuals.
- Proper surface selection and ambient light management enhance image clarity and overall projection quality.

Official Licensed Google TV Smart Projector, HAPPRUN 4K UHD Home Theater with Dolby Sound, Wi-Fi & Bluetooth, Built-in Streaming Apps, Compatible with Games Consoles & Smartphone, Indoor & Outdoor Use
[ Built-in Official Licensed Google TV ] – Without additional equipment, the smart projector can directly access Netflix,…
As an affiliate, we earn on qualifying purchases.
As an affiliate, we earn on qualifying purchases.
The Role of Light in Projector Functionality
Have you ever wondered how a projector creates a clear, bright image on a screen? Light plays a vital role in this process. Ambient lighting can greatly affect the image quality, so controlling it helps guarantee your projector’s output is sharp and vivid. When placing your projector, consider the room’s lighting conditions—bright rooms require more powerful light sources or darker surroundings. Proper projector placement also minimizes shadows and glare, enhancing image clarity. Positioning the projector at the correct distance and angle ensures the light reaches the screen evenly, preventing distortion or dimness. By managing ambient lighting and carefully choosing the right placement, you optimize the projector’s ability to produce a bright, detailed image that stands out, no matter the environment. Additionally, understanding local traditions related to interior design can help in selecting the optimal room setup for better projection quality.

ViewSonic PA503HD 4000 Lumens High DLP Brightness Projector with 1.1x Optical Zoom, USB, and HDMI inputs for Home and Office
High Brightness DLP Lamp FHD Projector: Full HD (1920x1080p) resolution with a 1.4-1.6 throw ratio and 4,000 ANSI…
As an affiliate, we earn on qualifying purchases.
As an affiliate, we earn on qualifying purchases.
Types of Light Sources Used in Projectors

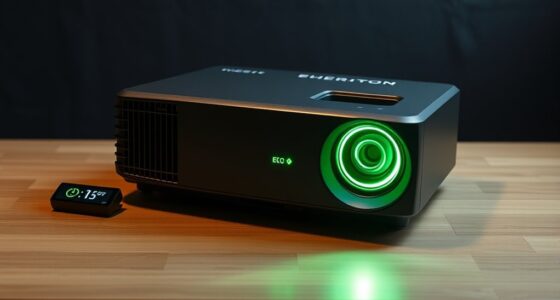
Did you know that the type of light source inside a projector directly impacts its brightness, color accuracy, and overall performance? There are various light source types, each with its own advantages and limitations. Common projector lamp options include traditional UHP (ultra-high-performance) lamps, which are bright and affordable but have a limited lifespan. LED light sources offer longer durability, lower heat, and vibrant colors, making them popular for portable models. Laser projectors provide high brightness, excellent color stability, and an extended lifespan, ideal for large venues. Your choice of projector lamp options depends on your needs, whether it’s for home theater, business presentations, or large-scale events. Understanding these light source types helps you select the right projector for ideal visual quality.
ViewSonic PA503HD 4000 Lumens High DLP Brightness Projector with 1.1x Optical Zoom, USB, and HDMI inputs for Home and Office
High Brightness DLP Lamp FHD Projector: Full HD (1920x1080p) resolution with a 1.4-1.6 throw ratio and 4,000 ANSI…
As an affiliate, we earn on qualifying purchases.
As an affiliate, we earn on qualifying purchases.
How Digital Signals Are Converted Into Visuals

When digital signals reach your projector, they are processed through digital signal processing techniques that prepare the data for display. Image rendering techniques then translate these signals into visual patterns, adjusting for clarity and detail. Finally, color and brightness controls make certain the visuals look vibrant and consistent across the projected image.
Digital Signal Processing
How do digital signals transform into the images you see on a screen? Digital signal processing plays a vital role. First, it converts raw data into visual information suitable for display. Second, it enhances image quality by adjusting contrast, color, and sharpness, guaranteeing clarity. Third, it prepares the signals for specific projection methods, such as laser projection or holographic displays. These processes enable projectors to produce vibrant visuals with precision. In laser projection, digital signals control laser beams to create crisp images on surfaces. For holographic displays, they generate three-dimensional visuals that appear to float in space. Proper digital processing ensures that the final output is accurate, vivid, and engaging, bringing digital signals seamlessly into the visual domain you experience.
Image Rendering Techniques
Digital signals are transformed into visuals through a variety of rendering techniques that interpret raw data into perceivable images. Laser alignment guarantees precise positioning of the laser beams, creating accurate and sharp images on the screen. Sound integration synchronizes audio cues with visual outputs, enhancing the viewer’s experience and ensuring that visuals match the intended timing. These techniques process digital signals into pixel data, which the projector then constructs into detailed images. By fine-tuning laser alignment, the projector maintains image stability and clarity, while sound integration ensures multimedia content remains cohesive. Additionally, understanding emotional support can help in managing stress related to technical issues and maintaining a positive viewing experience. Together, these methods allow the projector to convert complex digital information into seamless, high-quality visuals that engage and inform viewers effectively.
Color and Brightness Control
Color and brightness control are essential processes that transform digital signals into vivid, well-balanced images on the screen. These adjustments guarantee your visuals stay clear despite ambient lighting conditions or projector placement. To achieve this, projectors use:
- Color calibration, which fine-tunes color accuracy for natural hues.
- Brightness adjustment, optimizing light output based on room lighting.
- Contrast management, balancing dark and light areas for clarity.

Mdbebbron 120 inch Projector Screen 16:9 Foldable Anti-Crease Portable Projector Movies Screens for Home Theater Outdoor Indoor Support Double Sided Projection
CONVENIENT TO STORAGE AND CARRY : Compact one-piece,lightweight and folding design. You can fold the projector screen in…
As an affiliate, we earn on qualifying purchases.
As an affiliate, we earn on qualifying purchases.
The Importance of Color Processing and Enhancement
You’ll notice that accurate colors make the image more lifelike and engaging. Techniques like color calibration guarantee the hues stay true to the original, while brightness and contrast adjustments help highlight details. Understanding these processes lets you optimize your projector’s performance for the best viewing experience. Incorporating color processing techniques from modern technology ensures the visuals are vibrant and accurate.
Color Accuracy Techniques
Have you ever noticed how some projected images look dull or off-tone, even when the source is accurate? That’s where color accuracy techniques come into play. Proper color calibration guarantees your projector displays true-to-life colors. To achieve this, you should:
- Use a calibration tool to adjust color balance and gamma settings.
- Perform color grading to fine-tune hues for consistency across different media.
- Regularly update the projector’s firmware and calibration profiles for ongoing precision.
- Understanding the color gamut supported by your projector helps optimize its color reproduction capabilities.
These steps help maintain accurate color reproduction, making images vibrant and true to the original. By focusing on color calibration and consistent color grading, you ensure your projector delivers crisp, lifelike visuals, elevating your viewing experience without distortions or dullness.
Brightness & Contrast Adjustment
Adjusting brightness and contrast is essential for enhancing image quality because these settings directly influence how vivid and detailed your projected image appears. When ambient lighting is bright, increasing brightness helps prevent the image from looking washed out. Conversely, in darker environments, lowering brightness reduces eye strain and improves clarity. Contrast adjustment sharpens the difference between light and dark areas, making images more dynamic. Most projectors feature an intuitive user interface, allowing you to tweak these settings easily. Proper calibration guarantees your display remains vibrant and crisp, regardless of lighting conditions. Additionally, understanding light, lens & processing principles can help you fine-tune your projector for optimal performance. By fine-tuning brightness and contrast, you optimize image quality, making your viewing experience more immersive and enjoyable, whether in a dim room or a well-lit space.
Lens Systems and Their Impact on Image Quality
The quality of a projector’s image largely depends on its lens system, which focuses and directs light onto the screen. A well-designed lens minimizes issues like lens distortion, ensuring straight lines stay straight. It also benefits from optical coatings that reduce glare and improve contrast by filtering unwanted reflections. Here are three key points:
- Lens quality directly affects sharpness and clarity across the entire image.
- Proper coatings enhance brightness and contrast by reducing light loss.
- Advanced lens systems correct distortions, maintaining image integrity from corner to corner.
- Vibrational alignment in lens systems can further optimize image stability and focus, contributing to a clearer overall picture.
Focusing and Zooming Mechanisms in Projectors

You can adjust a projector’s focus using mechanical techniques or digital features, depending on the model. Some projectors offer manual lens adjustments, while others use digital zoom to change the image size without moving the device. Understanding these methods helps you achieve a sharp, clear picture every time. Additionally, proper calibration and understanding of lens adjustments can improve image clarity and overall viewing experience.
Lens Adjustment Methods
Lens adjustment methods in projectors enable you to fine-tune the image quality by changing focus and zoom levels. Proper adjustment ensures sharpness and clarity, especially when dealing with lens correction and focal length variations. To achieve superior image quality, you can:
- Use manual focus rings or knobs to refine focus, ensuring the projected image is crisp.
- Adjust the zoom lens to change the focal length, allowing you to resize the image without moving the projector.
- Utilize built-in lens shift features to correct image placement and alignment, compensating for lens distortion or off-center projection.
- Understanding lens tuning techniques helps in achieving optimal image projection and maintaining picture quality.
These methods help you optimize the picture, making sure the image remains clear and correctly proportioned, no matter the setup or environment.
Digital Zoom Features
Digital zoom features in projectors offer a convenient way to adjust image size without physically moving the device or altering the lens settings. This function uses digital processing to enlarge a portion of the projected image, providing image magnification. When you activate digital zoom, the projector crops the central part of the original image and enlarges it to fill the screen, maintaining the overall display size. This process allows you to focus on specific details or fit the image into your desired space, even if the projector isn’t perfectly aligned. Unlike optical zoom, digital zoom relies on software to magnify the image, which can sometimes reduce clarity. Nonetheless, it’s a useful feature for quick adjustments, especially when physical zooming isn’t practical or possible.
Mechanical Focus Techniques
Mechanical focus techniques in projectors rely on physical components to adjust image clarity and size. You perform manual adjustments to fine-tune the focus, ensuring a sharp picture. Typically, this involves turning a focus ring or knob on the projector body. Here’s how it works:
- You rotate the focus ring to move the lens closer or farther from the image sensor.
- The lens shifts position, changing the focal distance and sharpening the picture.
- Manual adjustment allows precise control, giving you a clear and crisp image on your screen.
- This method is especially useful in scenarios where Mazda Tuning automatic focus isn’t available, providing you with direct control over image clarity, making setup quick and straightforward.
The Role of Image Resolution and Pixel Mapping
Understanding image resolution and pixel mapping is essential because they determine how sharp and detailed the projected image appears. Higher resolution enhances clarity by increasing pixel density, making images crisper. Pixel mapping aligns each pixel from your source to specific points on the projection surface, ensuring accurate display. Proper mapping prevents distortion and maintains image integrity. To visualize resolution, consider this table:
| Pixel Count | Image Clarity | Effect on Projection |
|---|---|---|
| 720p | Moderate | Suitable for casual viewing |
| 1080p | Clear | Common for HD content |
| 4K | Sharp | Detailed, large screens |
| 8K | Ultra-sharp | Future-proof, high detail |
Resolution enhancement improves image quality, while pixel mapping guarantees proper alignment, maximizing your viewing experience. Additionally, understanding image resolution helps you select the appropriate projector for your needs.
Projection Surfaces and Image Reflection

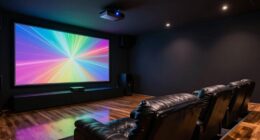
The quality of your projected image heavily depends on the surface it reflects off. The right projection surface guarantees sharp, clear image reflection. First, smooth, matte surfaces like white walls or specialized screens minimize glare and provide even reflection. Second, the color of the surface influences brightness—white or light gray enhances brightness, while darker surfaces absorb light and reduce clarity. Third, size matters; larger surfaces allow for bigger images but require even, flat areas to prevent distortion. When choosing a projection surface, prioritize matte finishes to avoid unwanted reflections and maintain image sharpness. Keep in mind that uneven or glossy surfaces can distort image reflection, reducing clarity. Proper surface selection is essential for an ideal viewing experience from your projector.
Modern Innovations in Projection Technology

Recent advancements in projection technology have notably enhanced image quality and user experience. Augmented reality projects digital content directly onto your environment, blending virtual images seamlessly with real-world scenes. This innovation allows for interactive experiences in education, gaming, and training, making information more engaging. Additionally, holographic displays have made significant progress, enabling three-dimensional images to appear floating in space without glasses. These displays are now brighter, more detailed, and more stable, opening new possibilities for entertainment, advertising, and communication. By leveraging laser projection and sophisticated processing, modern projectors can produce stunning visuals that feel almost lifelike. These innovations are transforming how you interact with visual content, providing more immersive and realistic experiences than ever before.
Practical Applications of Projectors in Daily Life
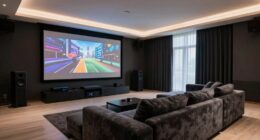
Ever wonder how projectors have become a common tool in everyday life? They’re widely used because of their versatility. Here are some practical applications:
- Home entertainment – project movies or games onto a wall, but remember to manage ambient light for a clear picture.
- Business presentations – display slides in meetings, requiring regular projector maintenance to guarantee sharp images.
- Educational settings – teachers use projectors for lessons, where controlling ambient light helps improve visibility.
In all cases, maintaining your projector is key to peak performance. Reducing ambient light or using curtains can enhance image quality, while routine projector maintenance keeps it running smoothly. Whether for work, learning, or entertainment, projectors make daily life more engaging and interactive.
Frequently Asked Questions
How Do Projectors Adjust Image Size Without Losing Quality?
You can adjust the image size on a projector through projection scaling, which enlarges or reduces the image without compromising quality. Modern projectors also use image distortion correction to maintain clarity and sharpness, even when changing size or angle. By fine-tuning these settings, you guarantee the picture remains clear and proportionate, giving you a seamless viewing experience without sacrificing image detail or introducing distortion.
What Are the Differences Between LCD and DLP Projectors?
Think of LCD and DLP projectors as artists with different palettes. LCD projectors use liquid crystal displays for vibrant, sharp images with excellent color accuracy and higher projector resolution. DLP projectors rely on tiny mirrors to produce smooth, fast-moving visuals, often with deeper contrast. LCDs tend to be brighter and more color-accurate, while DLPs excel in motion clarity. Choose based on whether vivid colors or sharp motion matters most to you.
How Does Ambient Light Affect Projector Image Visibility?
Ambient lighting considerably impacts your projector’s image visibility. When there’s too much ambient light, it washes out the screen, making the image appear dull and hard to see. To improve visibility, you should increase your projector’s screen brightness or reduce ambient lighting in the room. Using blackout curtains or turning off lights helps, ensuring your projected image remains clear and vibrant for a better viewing experience.
Can Projectors Display 3D Images or Videos?
Yes, you can display 3D images or videos with a projector. To achieve this, you need a 3D-capable projector and compatible 3D content. You’ll wear 3D glasses to enhance depth perception, making the images appear more lifelike and immersive. This setup allows you to experience 3D projection, creating a sense of depth that enhances your viewing experience, perfect for movies, presentations, or gaming.
What Maintenance Is Required to Ensure Long-Term Projector Performance?
You need to keep your projector in top shape by performing simple maintenance tasks. Regularly replace the lamp before it burns out completely—failing to do so could dim your display dramatically. Don’t forget to clean or replace the air filters; clogged filters can cause overheating and damage. These small actions keep your projector performing flawlessly, ensuring crisp images and a long lifespan, so your investment stays bright and vibrant for years to come.
Conclusion
As you explore the world of projectors, you’ll discover how they subtly transform light and technology into mesmerizing images. With each innovation, they become more seamless companions in your daily life, enriching your experiences. By understanding their inner workings, you gain a deeper appreciation for their quiet magic. Ultimately, projectors gently enhance your surroundings, turning everyday moments into vivid memories without a fuss, making every viewing feel like a special, effortless encounter.