
To modify white balance for natural skin tones, start by selecting a preset that matches your lighting condition, like daylight or tungsten. Use a gray card or calibration tools for accurate color reference, and fine-tune the Kelvin temperature if needed. Keep your camera settings steady and shoot in RAW for flexibility in post-processing. Monitoring skin tones with live view helps ensure authenticity. For more precise control and troubleshooting tips, explore additional techniques to master white balance adjustment.
Key Takeaways
- Use a gray card or calibration tool to set an accurate white balance reference in-camera or during editing.
- Select preset white balance modes (like daylight or tungsten) matching your lighting conditions for natural skin tones.
- Manually adjust the Kelvin temperature to warm or cool skin tones as needed for more precise control.
- Shoot in RAW format to refine white balance and skin tones during post-processing for optimal accuracy.
- Continuously monitor skin tones with live view and histograms to make real-time adjustments for natural results.

Anwenk Grey White Balance Card 18% Exposure Photography Custom Calibration Camera Checker for DSLR and Film
Neutral 18% Grey / Gray Card with matte finish for scratch resistant. Non reflective and waterproof.
As an affiliate, we earn on qualifying purchases.
As an affiliate, we earn on qualifying purchases.
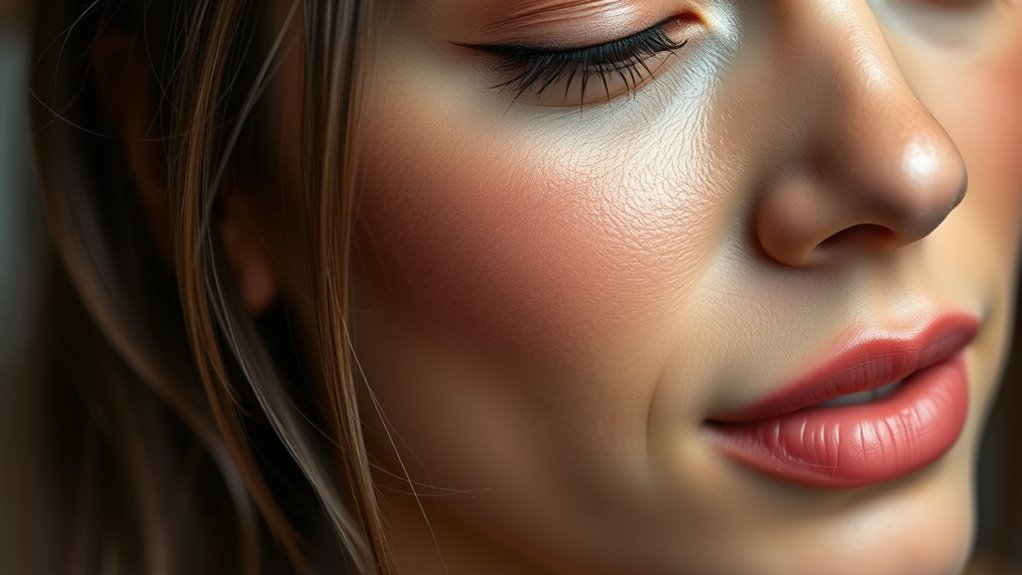
Understanding White Balance and Its Impact on Skin Tones

Understanding white balance is essential because it directly affects how skin tones appear in your photos. When you adjust the white balance, you’re controlling the color temperature, which influences whether your images look warm, cool, or neutral. A proper setting ensures that skin tones are accurate and natural, preventing unwanted color casts that can make skin look too yellow, blue, or green. If the color temperature isn’t correct, your photos may appear unrealistic or unflattering. By mastering white balance, you can consistently capture true-to-life skin tones, no matter the lighting conditions. Proper white balance adjustment helps you achieve more consistent and professional results across different environments. This control allows your images to look more professional and visually appealing. Ultimately, understanding how white balance impacts color temperature and skin tone accuracy is key to achieving stunning, natural-looking photographs.

Klein Tools TI250 Rechargeable Thermal Imaging Camera, Camera Displays Over 19,200 Pixels with 3 Color Palettes, High / Low Temperature Points
HIGH RESOLUTION: Thermal Imager with over 19,200 pixels enables accurate troubleshooting of hot and cold spots for comprehensive…
As an affiliate, we earn on qualifying purchases.
As an affiliate, we earn on qualifying purchases.
Recognizing Different Lighting Conditions and Their Effects

Recognizing different lighting conditions is key to capturing accurate colors and natural skin tones. The light source and its color temperature dramatically influence how skin appears in photos. To identify these conditions, consider these factors:
- Indoor lighting often has a warm or yellowish hue, affecting color temperature.
- Daylight varies from warm during sunrise or sunset to neutral midday light.
- Artificial light sources, like fluorescent or LED lights, can cast cool or greenish tones.
- Mixed lighting combines multiple light sources, creating inconsistent color temperatures.
Understanding these different lighting conditions helps you adjust your white balance accordingly, ensuring your images reflect true skin tones. Recognizing the light source and its color temperature allows you to make precise adjustments for natural results.
![Corel AfterShot Pro 3 | RAW Photo Editing Software [PC/Mac Key Card]](https://m.media-amazon.com/images/I/51cHkSe5ByL._SL500_.jpg)
Corel AfterShot Pro 3 | RAW Photo Editing Software [PC/Mac Key Card]
Non-destructive photo editing: Manage and edit your RAW photos with this powerful and ultra-fast photo editor
As an affiliate, we earn on qualifying purchases.
As an affiliate, we earn on qualifying purchases.
Using Preset White Balance Modes for Common Situations
Using preset white balance modes simplifies the process of matching your camera’s settings to common lighting conditions. These preset modes are designed to adjust the color temperature automatically, ensuring your photos have accurate and natural tones. For example, the daylight mode works well outdoors in direct sunlight, while tungsten mode is ideal for indoor scenes illuminated by incandescent bulbs. Using preset modes saves you time and effort, especially when you’re unsure of the exact lighting type. They provide quick, reliable adjustments for typical situations, helping your subjects look their best. By selecting the appropriate preset mode, you can maintain consistent color balance without fussing over manual settings, making it easier to achieve natural skin tones in various lighting environments. Additionally, understanding how white balance interacts with different lighting conditions can further improve your photo quality.

VILTROX DC-550 Pro 5.5 Inch Touchscreen Camera Field Monitor, 4K HDMI, 1200 nits, 160° Wide View Angle, Camera Monitor with Battery, Sunshade Hood, 3D Lut, Peaking Focus Assist, DC 12V Type-C 5V in
Professional Monitoring Software/Custom 3D LUT: The VILTROX DC-550 Pro camera video monitor has lots of professional monitoring functions,…
As an affiliate, we earn on qualifying purchases.
As an affiliate, we earn on qualifying purchases.
Customizing White Balance Settings for Precise Color Accuracy

To achieve the most accurate colors in your photos, customizing white balance settings allows you to fine-tune the camera’s color temperature beyond preset modes. This helps with precise color calibration, especially under varying ambient light conditions. To do this effectively:
- Adjust the Kelvin temperature manually for warmer or cooler tones.
- Use your camera’s custom white balance feature to sample the current ambient light.
- Observe how different settings affect skin tones and overall color accuracy.
- Make small tweaks until the colors appear natural and consistent.
- Understanding how white balance influences the overall tone can help optimize your color accuracy across different lighting scenarios.
Employing Gray Cards or Color Calibration Tools

Employing gray cards or color calibration tools is a highly effective way to guarantee accurate white balance and consistent colors across your images. A gray card provides a neutral reference point, allowing you to set precise white balance either in-camera or during post-processing. Using a gray card ensures that skin tones look natural and true to life. Color calibration tools, such as calibration targets or software, help you create a standardized color profile for your camera and monitor, maintaining color consistency across different shoots and devices. Incorporating these tools simplifies achieving accurate skin tones and eliminates color casts caused by varying lighting conditions. Proper use of calibration tools can help prevent color inaccuracies and ensure consistency in your images. With proper use, gray cards and calibration tools become essential for professional-quality results, providing a reliable foundation for natural, lifelike skin tones in your images.
Adjusting White Balance Manually in Post-Processing

When adjusting white balance manually in post-processing, you can select the correct color temperature to match your scene’s lighting. Using white balance tools helps you make precise adjustments quickly, ensuring your colors stay accurate. Don’t forget to fine-tune skin tones so they look natural and balanced. Properly managing color accuracy can significantly improve the overall quality of your photos.
Selecting Correct Color Temperature
Choosing the correct color temperature is essential for achieving natural-looking photos during post-processing. It influences how your skin tone appears and guarantees your images look realistic. To select the right color temperature, consider these steps:
- Analyze your photo’s lighting – identify whether it’s warm (golden hour) or cool (overcast).
- Adjust the temperature slider gradually, aiming for a neutral skin tone without oversaturation.
- Compare before and after to ensure the skin tone remains natural and consistent across the image.
- Use reference images of similar lighting conditions to guide your adjustments for accuracy.
- Remember that white balance settings can vary depending on the lighting environment, so fine-tuning is often necessary to achieve the most accurate skin tones.
Using White Balance Tools
Adjusting white balance manually in post-processing gives you precise control over the overall color tone of your photos. White balance tools allow you to modify the color temperature directly, shifting the image toward cooler or warmer tones. To achieve accurate results, you can use a gray card as a reference point; by sampling the gray card in your photo, you set a neutral baseline, ensuring that skin tones and other colors appear natural. Most editing software offers eyedropper tools for this purpose. Once you select the gray card area, the software automatically adjusts the white balance, refining the color temperature. This method helps correct color casts and ensures consistent, natural-looking skin tones across your images. Additionally, passive voice detection tools can assist in identifying and rewriting passive constructions, making your editing process more efficient and your instructions clearer.
Fine-tuning Skin Tones
After setting a baseline with white balance tools, fine-tuning skin tones in post-processing helps achieve a natural and flattering look. Adjusting the color temperature and skin tone calibration guarantees your subject’s skin appears realistic. To refine skin tones effectively:
- Use a targeted color temperature adjustment to warm or cool the skin as needed.
- Employ skin tone calibration sliders to match natural hues.
- Analyze the skin’s color balance and tweak until reds, yellows, and pinks look authentic.
- Zoom in to ensure subtle shifts enhance the subject without oversaturation.
- Pay attention to contrast ratio to ensure the skin tones stand out without losing detail in shadows or highlights.
These steps help you control how light interacts with the skin, making your images look more genuine. Fine-tuning skin tones is essential for achieving a polished, professional result that highlights your subject’s natural beauty.
Tips for Shooting in Mixed Lighting Environments

Shooting in mixed lighting environments can be tricky because different light sources often cast conflicting colors. To manage this, prioritize maintaining lighting consistency as much as possible. Adjust your camera’s white balance to compensate for varying color temperatures, or shoot in RAW to fine-tune later. Use gels or filters to match light sources or add a neutral gray card for reference. Here’s a quick guide:
| Light Source | Color Temperature | Best White Balance Setting |
|---|---|---|
| Incandescent | Warm (2700K) | Tungsten or Custom |
| Fluorescent | Cool (4000K) | Fluorescent preset |
| Daylight | Neutral (5500K) | Daylight setting |
| LED | Variable | Custom or Auto |
This approach helps you control color shifts, ensuring natural skin tones despite mixed lighting. Understanding color temperature is essential for achieving accurate white balance and natural-looking skin tones.
Monitoring Skin Tones During the Shoot With Live View

Using live view on your camera gives you real-time feedback on how your images will look, especially when working with mixed lighting. It allows you to monitor skin tones directly on the screen and adjust settings accordingly. Pay attention to the color temperature displayed in live view; a cooler or warmer tint can affect skin color accuracy. Use these tips to optimize your monitoring:
- Check skin tones frequently during the shoot to catch shifts early.
- Adjust the white balance or color temperature on your camera for natural skin tones.
- Use live view zoom-in features to scrutinize skin detail and color.
- Rely on the live view histogram to ensure proper exposure and color balance.
- Be aware that color accuracy can be influenced by the camera’s settings and lighting conditions, so verifying skin tones with a gray card or color checker can further improve results.
This approach helps you maintain consistent, natural-looking skin tones across your shots.
Creating a Consistent Color Profile Across Multiple Shots
Creating a consistent color profile across multiple shots guarantees your images have uniformity in tone and mood, making them look professional and cohesive. To achieve this, focus on maintaining color consistency throughout your shoot by using a fixed white balance setting or a custom calibration for each scene. Skin tone calibration is vital, so ensure your camera’s white balance matches the lighting conditions and remains steady across shots. Use a gray card or color checker to set a baseline, then apply these settings consistently. Shooting in RAW allows you to fine-tune color profiles during post-processing, reinforcing uniformity. By paying close attention to these details, your images will display natural skin tones and a harmonious overall look, no matter how many shots you take.
Troubleshooting Common White Balance Challenges

White balance challenges often arise when lighting conditions change unexpectedly or are inconsistent, causing color shifts that can detract from your images. To troubleshoot, start by evaluating the color temperature of your scene, as it impacts how warm or cool your photos appear. If auto white balance isn’t accurate, try switching to specific white balance presets like daylight, cloudy, or tungsten, which can better match your environment. Additionally, manually adjusting the Kelvin temperature setting allows for precise control. Keep an eye on the preview, and if colors still seem off, consider shooting in RAW to fine-tune white balance in post-processing. These steps help overcome common challenges and maintain natural skin tones.
Frequently Asked Questions
How Does White Balance Affect Overall Skin Tone Realism?
White balance directly impacts skin tone realism by controlling color temperature, which influences how natural your skin appears. When you adjust white balance correctly, you enhance skin tone accuracy, preventing unnatural hues like overly warm or cool tones. This ensures your photos reflect true skin colors, making subjects look authentic. So, always set your white balance properly to attain realistic skin tones and maintain color consistency across your images.
What Are Signs of Incorrect White Balance on Skin Tones?
Think of incorrect white balance as a painter’s brush slipping, creating unwanted color cast issues. You’ll notice skin tone distortion, with faces appearing unnaturally orange, blue, or green. These signs indicate your white balance is off, affecting the natural look. If your subject’s skin doesn’t match real-life hues or if colors seem unnatural, it’s a clear sign you need to correct the white balance for true-to-life skin tones.
Can White Balance Adjustments Enhance Diverse Skin Color Representation?
Yes, adjusting white balance can enhance diverse skin color representation by fine-tuning the color temperature for accurate skin tone portrayal. You can use white balance tools to correct color shifts, ensuring each skin tone looks natural and vibrant. By actively managing these settings, you create images that respect and celebrate diversity, making sure all skin tones are accurately represented and visually appealing across various lighting conditions.
How Do Different Camera Sensors Influence White Balance Accuracy?
Your camera sensor influences white balance accuracy through sensor calibration and color science. A well-calibrated sensor captures colors more precisely, ensuring natural skin tones. Different sensors interpret light differently, affecting how white balance adjusts colors. By understanding your camera’s sensor characteristics and how it handles color science, you can make more accurate white balance adjustments, resulting in realistic skin tones across various lighting conditions.
Is Automatic White Balance Reliable for Natural Skin Tone Capture?
Like a seasoned painter relying on a steady hand, you might wonder if auto settings deliver consistent color. Auto white balance can be reliable for natural skin tones, but it’s not foolproof. It adjusts quickly, offering convenience and decent color consistency in many situations. However, in tricky lighting, it may struggle, and manual adjustments might be needed. Trust your eye, and don’t hesitate to fine-tune for perfect results.
Conclusion
So, after all that fuss about perfecting white balance, it’s funny how we chase natural skin tones, only to realize that sometimes, a little tweak or a gray card isn’t the magic fix. Ironically, the more you control these settings, the more you see how unpredictable lighting can be. Embrace the challenge—after all, true color accuracy isn’t about perfection, but about capturing your subject’s authentic skin tone, imperfections and all.