
To avoid common mistakes in the sharpness vs noise calculator, you need to pay attention to proper resolution, ISO effects, and custom settings instead of relying on defaults. Use calibration tools for accurate adjustments and consider your final output medium to guarantee ideal results. Be cautious with noise reduction algorithms and avoid over-sharpening or over-reducing details. Want to master the balance? Keep exploring for expert tips that can elevate your images.
Key Takeaways
- Always calibrate your monitor to ensure accurate measurement of sharpness and noise levels.
- Avoid over-sharpening or excessive noise reduction, which can distort image details and textures.
- Use 100% zoom to accurately assess image sharpness and noise before finalizing edits.
- Match resolution settings to the intended output to prevent unnecessary noise or loss of detail.
- Balance ISO settings with lighting conditions to minimize noise without sacrificing image clarity.

datacolor Spyder – Monitor Calibrator for Graphic Designers, Photographers, and Content Creators, Shows You True Colors, Works on OLED Monitors & LED Screens, Easy-to-Use Color Calibration Tool
Color “Surprises” Are a Thing of the Past: Datacolor’s exclusive DevicePreview TM Beta feature simulates what your photos…
As an affiliate, we earn on qualifying purchases.
As an affiliate, we earn on qualifying purchases.
Overlooking the Importance of Proper Image Resolution
Even if you focus on sharpening and noise reduction, neglecting proper image resolution can undermine your results. Resolution oversight often leads to pixel misjudgment, where you underestimate the importance of capturing enough detail from the start. If your image resolution is too low, no amount of sharpening can recover lost detail, resulting in a blurry or pixelated photo. Conversely, overshooting resolution can cause unnecessary noise and file size issues. Understanding the balance is key. Don’t assume higher resolution always equals better quality; instead, match your resolution to your intended use. Proper resolution guarantees your image retains sharpness without exaggerating noise. Recognizing this relationship helps you avoid common pitfalls and makes your noise reduction and sharpening efforts more effective. Additionally, being aware of the effective pixel size can help optimize your image quality for specific applications.

Music Software Bundle for Recording, Editing, Beat Making & Production – DAW, VST Audio Plugins, Sounds for Mac & Windows PC
No Demos, No Subscriptions, it's All Yours for Life. Music Creator has all the tools you need to…
As an affiliate, we earn on qualifying purchases.
As an affiliate, we earn on qualifying purchases.
Ignoring the Impact of ISO Settings on Noise Levels
While selecting the right resolution is important, overlooking how ISO settings influence noise levels can sabotage your efforts. Higher ISO increases sensor sensitivity, which amplifies ISO noise, leading to grainy images. When you push ISO too high, noise becomes more prominent, reducing overall image quality. Many photographers neglect this relationship, assuming resolution alone determines sharpness, but ISO impacts noise independently. Understanding how ISO settings affect noise levels helps you balance exposure without sacrificing clarity. Lower ISO settings produce cleaner images with less noise, especially in bright conditions. Conversely, in low light, raising ISO is necessary but should be done cautiously to avoid excessive noise. Recognizing the role of ISO noise and sensor sensitivity ensures you optimize your camera settings for sharp, noise-free results. Additionally, advancements in sensor technology, such as AI-powered noise reduction, can help mitigate noise without sacrificing detail.

DSLR Cheat Sheet Photography Accessories Camera Accessories for Canon Nikon Sony Photography Gifts for Photographer Quick Reference Cards Guides Tips Settings Exposure Modes Composition And More 4×3in
Must-Have Camera Accessories for Photography: Includes 30 pages of the most useful photography tips, these 16 double-sided DSLR…
As an affiliate, we earn on qualifying purchases.
As an affiliate, we earn on qualifying purchases.
Using Default Settings Without Customization

Relying on your camera’s default settings can lead to subpar images because these presets are designed to suit a broad range of situations rather than your specific shooting conditions. Default settings often miss the nuances needed for ideal sharpness or noise control. By neglecting customization options, you limit your ability to fine-tune your images. Exploring these customization options helps you maximize image quality. Relying solely on default settings prevents you from tailoring your camera’s performance to your environment, leading to missed details and unnecessary noise. Personal adjustments are key to achieving the best sharpness versus noise balance. Additionally, understanding camera performance and how it can be optimized through settings adjustments can significantly improve your results.

Housoutil Camera Resolution Test Chart and Lens Focus Calibration Card, 40×30cm Image Quality Testing Tool for Monitor Adjustment and Photographic Calibration
Built to last: practical lens test drawing/camera lens calibration tool construction promise longevity, reducing replacements and providing more…
As an affiliate, we earn on qualifying purchases.
As an affiliate, we earn on qualifying purchases.
Relying Solely on Automatic Adjustments

Automatic adjustments may seem convenient, but they often don’t deliver ideal sharpness or noise control for your specific shooting conditions. Relying solely on default settings can lead to over- or under-sharpening and unnecessary noise. Auto adjustments tend to prioritize general scenarios, ignoring your unique environment. Instead, take control by customizing settings. This way, you optimize sharpness without amplifying noise or losing detail. Recognize that auto adjustments are just starting points, not the final solution. Adjustments based on your scene can drastically improve image quality. Remember, trusting default settings can limit your results. Fine-tuning manually ensures your images meet your expectations, especially in challenging conditions. Understanding image enhancement techniques can further help you achieve optimal results.
Neglecting the Relationship Between Sharpness and Noise

You need to recognize that increasing sharpness can also amplify noise, making it look like fine details. Overemphasizing sharpness risks highlighting unwanted grain instead of actual textures. Finding the right balance is essential to avoid confusing noise with real details. Additionally, understanding the impact of AI algorithms on image processing can help in achieving more accurate enhancements without introducing artifacts.
Balance Is Key
While pushing for maximum sharpness might seem ideal, ignoring the balance between sharpness and noise can backfire. Over-sharpening can introduce unwanted noise, making images look unnatural. To get the best results, consider these points:
- Use image stabilization to reduce blur without excessive sharpening.
- Adjust sharpness gradually to avoid noise amplification.
- Recognize that noise impacts color grading; too much noise hampers smooth edits.
- Balance sharpening with noise reduction tools for a cleaner look.
- Remember, a well-balanced image maintains detail without sacrificing quality.
- Always assess the clipping levels to prevent loss of detail in highlights and shadows.
Prioritizing this balance ensures your photos look crisp yet natural. Sharpness enhances details, but noise can ruin the overall quality. Finding the right equilibrium keeps your images professional and visually appealing.
Overemphasizing Sharpness Risks
Overemphasizing sharpness can lead to unintended noise, which often goes unnoticed until it’s too late. When you focus too much on increasing sharpness, you risk creating a false sense of detail while neglecting the impact on noise levels. Sharpness overemphasis can cause you to underestimate the amount of noise introduced, especially in low-light conditions or high-ISO settings. This noise underestimation can degrade overall image quality, making it appear overly harsh or grainy. Remember, sharpening enhances edges but also amplifies existing noise. If you ignore the relationship between sharpness and noise, you might end up with images that look overly processed or noisy, defeating the purpose of achieving crisp, clear results. Balance is essential to avoid these common pitfalls.
Noise Can Mimic Details
When sharpening images, it’s easy to mistake noise for actual detail, especially if you overlook how noise can resemble fine textures. Noise often appears as grain texture or sensor artifacts that mimic sharp details. If you don’t recognize this, you might over-sharpen and amplify these false signals. To avoid this mistake, consider these points:
- Noise can look like tiny, sharp-edged grain texture
- Sensor artifacts sometimes resemble fine lines or textures
- Over-sharpening can enhance noise, making it seem like detail
- Noise reduction before sharpening helps differentiate true details
- Comparing different areas can reveal if details are noise or real textures
- Being aware of sensor artifacts and their appearance can further improve your editing process
Understanding the relationship between sharpness and noise helps you prevent false details from misleading your edits.
Applying Excessive Sharpening That Amplifies Noise
Applying too much sharpening can lead to a significant increase in noise, especially in areas with low detail. This excess sharpness doesn’t just boost edges; it also amplifies grain enhancement, making noise more noticeable. You might notice a rougher texture or unwanted grain that distracts from your image’s overall quality. Over-sharpening can also diminish color vibrancy, causing colors to appear flat or overly harsh. Instead of improving your photo, excessive sharpening can create a noisy, unnatural look. To prevent this, use sharpening tools sparingly and adjust their strength carefully. Keep an eye on areas with smooth gradients or uniform colors, as they’re more prone to noise amplification. Balancing sharpness with noise control ensures your images stay crisp without sacrificing clarity or color integrity. Additionally, understanding Gold IRA options, like diversifying with precious metals, can help protect your investments from market volatility and inflation.
Underestimating the Role of Proper Lighting During Shooting

Proper lighting is fundamental to capturing sharp, high-quality images; neglecting it can lead to difficulties in post-processing and compromise overall image clarity. Good lighting considerations ensure your camera can focus accurately and reduce noise caused by high ISO settings. When lighting is insufficient, you may need longer exposures, which increase the risk of camera shake and subject movement, resulting in softness. Additionally, understanding Gold IRA Rollovers can help diversify your investment portfolio, providing a financial safety net that supports your long-term security. To avoid these issues, pay attention to:
Proper lighting is essential for sharp, clear images and easier post-processing.
- Ensuring adequate illumination for your scene
- Using diffused light to minimize harsh shadows
- Balancing ambient and artificial light sources
- Adjusting shutter speed to counteract subject movement
- Avoiding underexposure that forces high ISO use
Proper lighting helps maintain sharpness, reduces noise, and captures crisp details, making your images stand out.
Using Inadequate Noise Reduction Settings

Using inadequate noise reduction settings can lead to problems like losing important image details or creating a plastic, overly smooth look. If you set noise suppression too high, you risk sacrificing sharpness and making your photo look flat. Finding the right balance is essential to preserve sharpness without introducing unnecessary noise. Additionally, understanding the noise reduction settings can help you avoid common pitfalls and achieve professional-quality images.
Over-Reducing Image Detail
When noise reduction settings are set too aggressively, you risk over-reducing image detail, which can leave your photos looking smooth and unnatural. Excessive noise reduction can diminish important textures, making images appear flat and less sharp. To avoid this, focus on balancing noise reduction with preserving details. Be cautious during image sharpening, ensuring you don’t overdo it while reducing noise. Keep these tips in mind:
- Fine-tune noise reduction to retain natural textures
- Avoid excessive smoothing that blurs details
- Use adaptive noise reduction for better results
- Compare before and after sharpening to gauge changes
- Remember that over-reduction harms overall sharpness and clarity
Maintaining this balance ensures your photos retain their vibrancy while minimizing noise without sacrificing detail.
Excessive Noise Suppression
Excessive noise suppression occurs when you apply too little noise reduction, leaving your images plagued by visible grain and digital artifacts. This results in a noisy appearance, making details harder to distinguish. Instead, inadequate noise reduction can also hinder your image’s overall quality by affecting color saturation and grain enhancement. You might notice an uneven texture or loss of smoothness, especially in shadow areas. Balancing noise suppression is essential; too little leaves noise visible, too much causes detail loss. To help, consider these effects:
| Effect | Impact on Image | Best Practice |
|---|---|---|
| Grain Enhancement | Amplifies visible noise | Use moderate noise reduction |
| Color Saturation | Can diminish vibrancy | Adjust to preserve saturation |
| Digital Artifacts | Creates unwanted patterns | Avoid excessive suppression |
| Detail Loss | Softens fine textures | Find a balance to retain details |
Loss of Sharpness
Inadequate noise reduction can cause your images to lose sharpness and appear softer than intended. When noise profiling isn’t properly balanced, you risk dulling fine details and reducing overall clarity. This hampers sharpness enhancement efforts, making images less crisp. To avoid this, consider these points:
- Overlooking the importance of noise profiling to target specific noise types
- Applying too little noise reduction, sacrificing detail preservation
- Ignoring the balance between noise suppression and sharpness retention
- Using insufficient settings that blur fine textures and edges
- Relying solely on default noise reduction, missing opportunities for better sharpness
Adjusting noise reduction carefully ensures noise is minimized without sacrificing detail. Proper noise profiling helps optimize sharpness enhancement while maintaining image clarity.
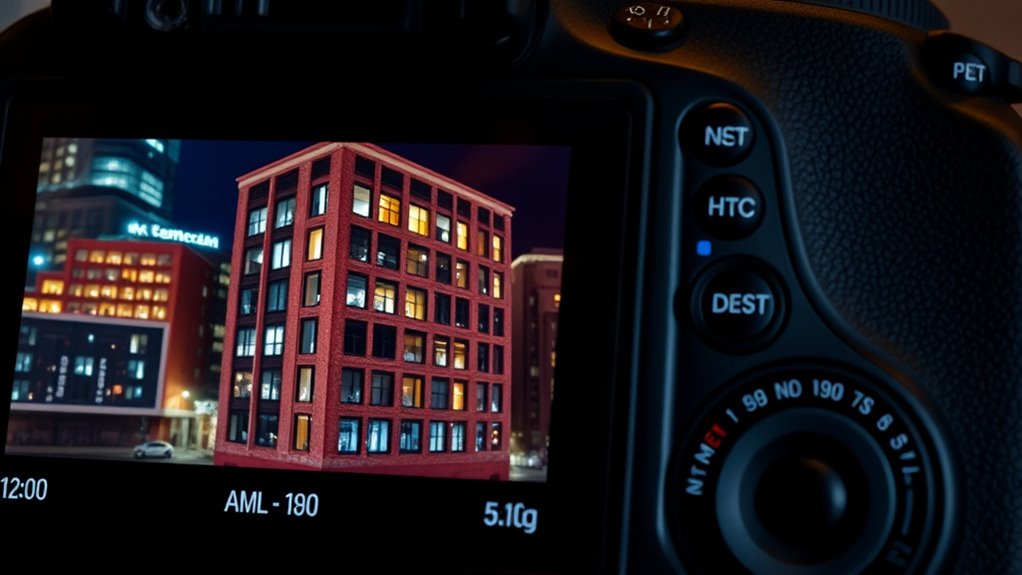
Failing to Preview Changes at 100% Zoom

Previewing your image at 100% zoom is crucial for accurately evaluating the impact of sharpness adjustments. Without proper zoom verification, you risk making decisions based on an inaccurate preview, leading to over-sharpened or under-sharpened results. When you view your image at actual size, you get a true sense of how the changes affect fine details and textures. This ensures your preview accuracy reflects real-world viewing conditions. Skipping this step can cause you to misjudge the appropriate sharpening level, ultimately compromising your image quality. Always zoom in to 100% to verify adjustments before finalizing. This practice helps you make precise, informed decisions, avoiding common mistakes that could diminish your image’s clarity or introduce unnecessary noise. Accurate zoom verification is key to mastering sharpness adjustments.
Ignoring the Subject’s Details When Adjusting Sharpness

When adjusting sharpness, it’s important to pay close attention to the specific details within your subject. Ignoring subject specificity can lead to over-sharpening areas that don’t need it, sacrificing detail preservation. To avoid this mistake, focus on key features like textures, edges, and fine patterns. Here are some tips:
Pay close attention to key details to prevent over-sharpening and preserve texture and edges effectively.
- Identify the main elements that define your subject’s clarity
- Avoid applying uniform sharpness across the entire image
- Use localized adjustments to enhance critical details
- Regularly preview at 100% zoom to see real impact
- Balance sharpness to prevent noise amplification in subtle areas
Over-Adjusting in Post-Processing Software

Over-adjusting settings in post-processing software is a common mistake that can quickly degrade your image quality. When you push sliders too far, you risk introducing artifacts, halos, and unnatural textures, making your photo look worse rather than better. This is a frequent editing pitfall that many photographers fall into, thinking more enhancement equals better results. However, excessive sharpening or noise reduction can compromise detail and create an overly processed look. Recognizing these post processing mistakes is essential to maintaining a natural, professional appearance. Instead of overcorrecting, focus on subtle adjustments that enhance the image without sacrificing authenticity. Remember, moderation is key—overdoing it can undo the very improvements you aim for, so always review changes carefully before finalizing your edits.
Choosing the Wrong Noise Reduction Algorithm for the Image

Using the wrong noise reduction algorithm can cause compatibility issues with your camera or software, leading to poor results. If you’re too aggressive, you might eliminate noise but also lose fine details that matter. Choosing the right algorithm is essential to balancing noise reduction and image sharpness.
Algorithm Compatibility Issues
Choosing the wrong noise reduction algorithm can substantially impact your image quality, causing either unnecessary loss of detail or persistent noise. Algorithm compatibility issues often arise from mismatched software capabilities and the specific algorithms used. If your software has limitations, it may not support advanced noise reduction techniques, leading to suboptimal results. To avoid this, consider:
- Checking if your software supports the intended algorithm
- Understanding the algorithm’s compatibility with your hardware
- Ensuring the algorithm aligns with your noise reduction goals
- Updating software to access new or improved algorithms
- Testing different algorithms to find the best fit for your image and software limits
Being aware of these factors helps you select the right noise reduction tools without hitting software limitations or compatibility issues.
Overaggressive Noise Suppression
Selecting a noise reduction algorithm that doesn’t match your image’s needs can lead to overaggressive suppression, where too much detail gets lost along with the noise. This often results in a flat, unnatural look, diminishing essential textures and fine details. When you prioritize noise removal over detail preservation, you risk removing subtle textures that contribute to the image’s realism. Some algorithms may also cause grain enhancement, making the image appear grainy or plasticky instead of smooth. To avoid this, choose algorithms that balance noise suppression with maintaining detail. Properly calibrated noise reduction preserves textures without sacrificing sharpness. Remember, the goal isn’t just noise removal but also retaining the image’s natural richness and detail, ensuring your photos look clear without losing their character.
Loss of Fine Details
Have you ever noticed that applying the wrong noise reduction algorithm can wipe out essential fine details in your images? Choosing the incorrect method can harm pixel integrity and reduce grain retention, making your photos look flat and artificial. To avoid this, select algorithms designed to balance noise suppression with detail preservation. Consider these points:
- Overly aggressive noise reduction blurs fine textures
- Poor algorithms remove important edges and details
- Excessive smoothing diminishes pixel integrity
- Inadequate noise control leaves grain visible
- Balancing noise reduction settings maintains grain retention and sharpness
Using the right algorithm helps preserve the subtle details that define your image’s quality. It ensures noise is reduced without sacrificing the natural texture or losing the fine details that make your photos stand out.
Not Considering the Final Output Medium

Ignoring the final output medium can lead to misguided adjustments in sharpness and noise levels. For example, a screen with proper display calibration requires different sharpening than a printed image. Printing considerations, such as paper type and ink absorption, impact how noise and sharpness appear.
| Output Medium | Calibration Needs | Impact on Sharpness/Noise |
|---|---|---|
| Digital Screen | Accurate display calibration | Brightness and contrast influence perceived sharpness |
| Inkjet Print | Color and exposure calibration | Paper texture affects noise visibility |
| Large Format | Color consistency and resolution | Sharpness must compensate for viewing distance |
Always tailor your adjustments based on the final medium to ensure your image maintains clarity and quality, whether viewed on screen or printed.
Disregarding the Effects of Compression and Export Settings

Ignoring compression and export settings can substantially reduce your image quality, even if your sharpness adjustments are perfect. These settings influence how much detail and noise are preserved or lost during the final export. Finding the right balance between sharpness and noise requires understanding how compression impacts your image and choosing appropriate export options.
Compression Impact on Quality
While compression is often associated with file size reduction, it can also subtly impact image quality beyond just storage concerns. Excessive compression can introduce artifacts or soften details, affecting sharpness and noise levels. This influence is especially noticeable if your sensor calibration isn’t perfect or lens distortion isn’t accounted for, leading to uneven sharpness across the image. Keep in mind:
- Over-compression can reduce fine details, increasing noise perception
- Loss of sharpness impacts the effectiveness of noise reduction techniques
- Compression artifacts may mimic noise, complicating noise management
- Proper sensor calibration ensures consistent sharpness after compression
- Correct lens distortion correction preserves image integrity during compression
Understanding these factors helps you maintain excellent quality, even when compression is necessary.
Export Settings Influence
Export settings can markedly influence the sharpness and noise levels in your final image, even if you set aside compression and other export options. Proper sensor calibration ensures your camera captures accurate data, reducing the need for aggressive noise reduction later. Exposure optimization during shooting helps maintain ideal detail and minimizes noise, which impacts how your image responds to export settings. When exporting, choose appropriate resolution and color profiles to preserve detail and avoid unnecessary noise amplification. Adjusting sharpness settings in your export process can enhance fine details, but overdoing it may introduce artifacts. Conversely, improper export choices can make noise more apparent or cause images to appear softer. Being mindful of these export parameters allows you to control how sharpness and noise manifest in your final image, independent of compression effects.
Balancing Sharpness and Noise
Finding the right balance between sharpness and noise requires careful judgment, as increasing one often affects the other. When adjusting image sharpening, you boost details but risk amplifying noise. Conversely, noise reduction smooths out grain but can soften important details. To strike a good balance, consider these tips:
- Use moderate image sharpening to enhance edges without overdoing it.
- Apply noise reduction carefully to preserve texture and detail.
- Preview changes at 100% zoom to assess real effects.
- Avoid excessive sharpening that introduces artifacts.
- Combine subtle noise reduction with targeted sharpening for clarity.
Skipping the Use of Calibration Tools for Accurate Editing
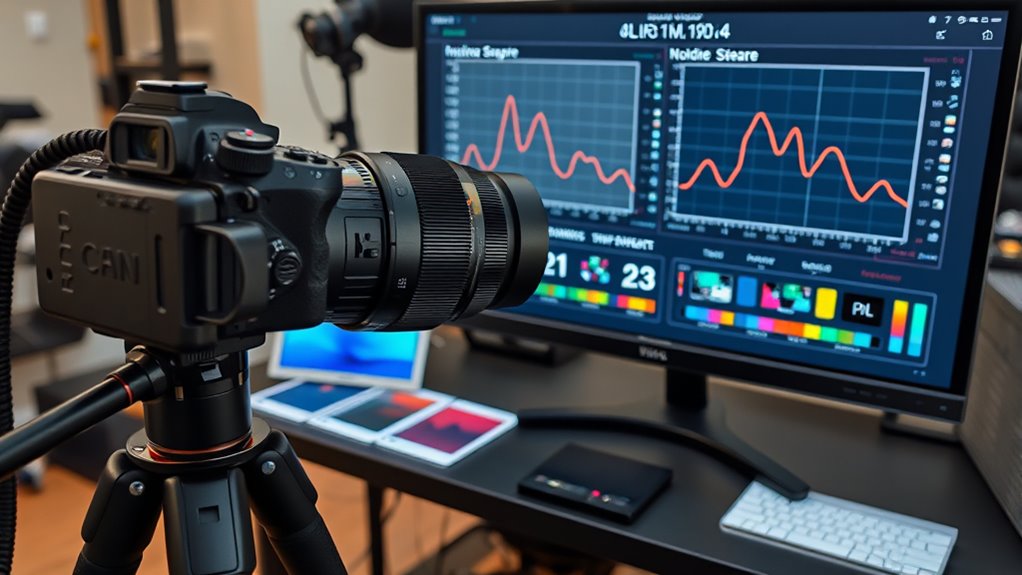
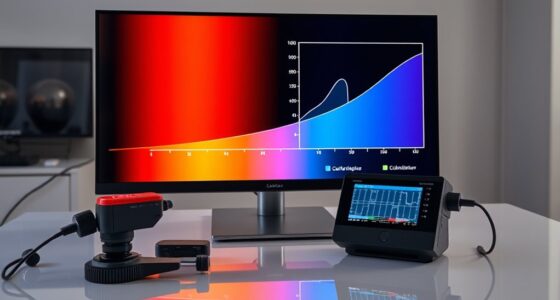
Skipping calibration tools can lead to inaccurate editing results, especially when trying to balance sharpness and noise. Calibration pitfalls often cause measurement inaccuracies, making it difficult to achieve consistent, true-to-source adjustments. Without proper calibration, your software may misjudge the levels of detail and noise present, resulting in over-sharpened images or excessive noise reduction. This can compromise image quality and lead to wasted time correcting errors later. Using calibration tools ensures your monitor displays accurate colors, brightness, and contrast, providing a reliable reference for editing. By neglecting these tools, you risk basing adjustments on faulty measurements, which hampers your ability to make precise, balanced edits. Always calibrate your setup to avoid measurement inaccuracies and ensure your sharpness and noise levels are accurately represented.
Frequently Asked Questions
How Does Monitor Calibration Affect Assessing Sharpness and Noise?
Monitor calibration directly impacts your ability to accurately assess sharpness and noise. When your display is properly calibrated, it guarantees true colors, consistent brightness, and accurate detail, making it easier to distinguish between actual image noise and fine sharpness. Without calibration, your display might misrepresent these elements, leading you to incorrect conclusions. Proper calibration guarantees display accuracy, so you can make precise judgments about image quality, sharpness, and noise levels.
Can Different Camera Brands Influence Noise and Sharpness Calibration?
Think of camera brands as different chefs, each with unique ingredients like sensor sensitivity and color accuracy. Yes, they influence noise and sharpness calibration because their sensors process light differently. You might notice some brands handle high ISO better, producing less noise, while others excel in capturing fine details. Understanding these differences helps you fine-tune your settings and avoid mistaken assumptions about your camera’s performance.
What Role Do Lens Quality and Focal Length Play in Noise and Sharpness?
Lens quality and focal length substantially impact noise and sharpness in your photos. High-quality lenses with superior lens characteristics deliver sharper images and reduce aberrations, especially at wider apertures. Longer focal lengths can magnify noise, making it more noticeable, while shorter focal lengths often produce sharper images across the frame. Choose lenses with ideal lens characteristics suited to your focal length to enhance overall image clarity and minimize noise artifacts.
How Do Specific Image Genres Require Different Noise-Sharpness Balance?
You might think all shots need perfect sharpness, but for genres like film or portraiture, a touch of noise or grain can add character. In low-light scenes, you often trade off sharpness for better dynamic range, creating a mood or atmosphere. So, embrace the film grain for authenticity, and adjust your noise-sharpness balance based on the genre’s emotional impact, not just technical perfection.
How Does Post-Processing Workflow Impact Final Noise and Sharpness Levels?
Your post-processing workflow directly impacts noise and sharpness levels. When you apply excessive image compression, you risk losing detail and introducing artifacts that reduce sharpness. Adjusting for sensor sensitivity helps manage noise, but overdoing it can make images look unnatural. Balancing sharpening and noise reduction during editing guarantees you preserve detail without amplifying noise, giving you a cleaner, sharper final image.
Conclusion
By avoiding these 15 common mistakes, you can master the sharpness vs noise balance and improve your images dramatically. Did you know that improper noise reduction can reduce detail by up to 30%? Don’t let avoidable errors hold you back—pay attention to resolution, settings, and calibration. With the right approach, you’ll produce sharper, cleaner images that truly stand out. Take control today and see the difference it makes!