To continue calibrating your projector’s color and brightness, start by adjusting the settings through the menu options, using test patterns or reference images to fine-tune color balance, contrast, and saturation. Regularly revisit these adjustments to maintain image quality over time, especially as bulb brightness diminishes or room conditions change. For precise results, patience is key. Keep exploring the process, and you’ll discover more tips to achieve *best* picture performance.
Key Takeaways
- Regularly revisit color and brightness settings using test patterns or reference images for optimal calibration.
- Use sliders or preset modes to fine-tune hue, saturation, contrast, and brightness for natural, balanced visuals.
- Compare projected images to color charts to ensure true-to-life color accuracy across different media.
- Adjust for ambient lighting conditions and consider bulb age to maintain consistent image quality over time.
- Be patient and make incremental adjustments, as manual calibration often yields better results than automatic settings.
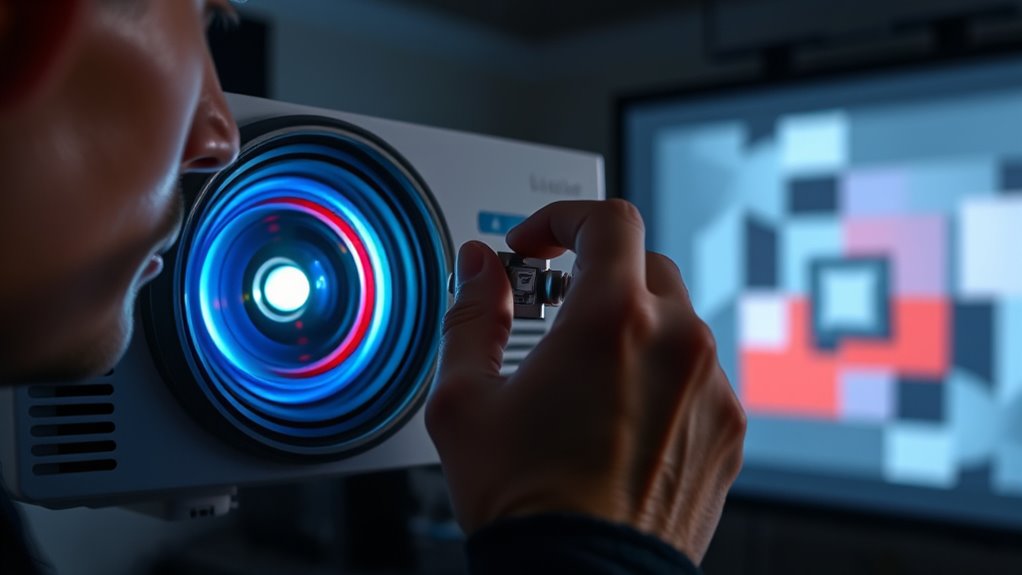
Have you ever struggled with blurry images or uneven colors when using your projector? If so, it’s likely that your device needs a proper calibration. Calibration is essential to guarantee your projector displays images with accurate color and ideal brightness. When done correctly, it transforms your viewing experience, making everything look vibrant, clear, and true to life. The first step in this process involves focusing on color accuracy, which guarantees that the colors you see on screen match their real-world counterparts. Achieving this requires adjusting the projector’s color settings so that skin tones, landscapes, and other visuals appear natural. If colors look dull, oversaturated, or washed out, it’s a sign that calibration is off. You can typically access color calibration options through your projector’s menu, where you’ll find sliders or preset modes designed to fine-tune hue, saturation, and contrast. Take your time to adjust these controls gradually, comparing the projected image to a reference image or color chart. This comparison helps you identify when the colors are as accurate as possible, avoiding overly warm or cool tones that distort your viewing experience. Proper calibration also involves understanding the importance of color management, which ensures consistent and true-to-life colors across different devices and media.
Alongside color accuracy, brightness adjustment plays a vital role in calibration. Proper brightness guarantees your images are vivid without washing out details or causing eye strain. If your projector’s brightness is too low, the picture may appear dull and difficult to see, especially in well-lit rooms. Conversely, if it’s too high, the image can become washed out, losing contrast and detail. To find the right balance, start by adjusting the brightness setting while viewing a test pattern or a scene with a wide range of light and dark elements. Your goal is to make dark scenes deep and rich without losing shadow details, while keeping bright scenes lively without blinding or overexposing. Many projectors also have an automatic brightness adjustment feature, which can be useful, but manual tweaks often yield better results. Remember, ambient lighting influences how you perceive brightness, so calibrate your projector in the environment where you’ll most often use it.
It’s worth noting that calibration isn’t a one-time task. Periodic adjustments help maintain image quality over time, especially as bulb brightness diminishes or as room conditions change. Whether you’re a casual user or a dedicated cinephile, taking the time to calibrate your projector’s color accuracy and brightness isn’t just about technical perfection; it’s about elevating your viewing experience and making every image look its best. With patience and careful tweaking, you’ll enjoy sharper, more vibrant images that truly stand out, bringing your content to life exactly as it was meant to be seen.

Official Licensed Google TV Smart Projector, HAPPRUN 4K UHD Home Theater with Dolby Sound, Wi-Fi & Bluetooth, Built-in Streaming Apps, Compatible with Games Consoles & Smartphone, Indoor & Outdoor Use
[ Built-in Official Licensed Google TV ] - Without additional equipment, the smart projector can directly access Netflix,...
As an affiliate, we earn on qualifying purchases.
Frequently Asked Questions
How Often Should I Recalibrate My Projector?
You should recalibrate your projector every 3 to 6 months to maintain color consistency and ideal image quality. Regular calibration ensures that colors stay accurate and brightness levels remain consistent, especially if you notice color shifts or dimming. Factors like ambient light, usage frequency, and projector age can affect calibration frequency. Staying on top of this helps your projector deliver the best picture possible, saving you time and frustration.
Can I Calibrate My Projector Without Professional Tools?
Imagine painting a masterpiece—can you do it with just your eyes? Yes, you can calibrate your projector without professional tools by performing a simple color test and brightness adjustment. Use a blank white screen for brightness, and view color test images to tweak your settings. While not perfect, this DIY approach helps improve picture quality, making your viewing experience more vibrant and accurate without needing specialized equipment.
What Are Common Signs That My Projector Needs Calibration?
You’ll notice if your projector needs calibration when colors look off or washed out, indicating poor color accuracy. If certain areas appear too bright or dim, it affects brightness consistency. Additionally, if images seem dull or overly vivid, calibration can fix these issues. Regularly checking for these signs helps guarantee your projector maintains ideal image quality, giving you clear, true-to-life visuals every time you use it.
How Does Room Lighting Affect Calibration Accuracy?
Room lighting, especially ambient light, markedly affects calibration accuracy. Bright or inconsistent lighting can wash out colors and reduce contrast, making it harder to achieve true color consistency. When calibrating, you should minimize ambient light to see your projected image clearly. This ensures you accurately adjust brightness and color settings, resulting in a more consistent and vibrant picture that matches your calibration targets, regardless of the lighting conditions in your room.
Is Calibration Different for 4K Projectors?
Did you know that 4K projectors often require different calibration settings? Yes, calibration for 4K resolution and higher color depth can be more complex because of the increased pixel count and richer color details. You need to adjust your projector’s settings carefully to guarantee sharp images and accurate colors. Whether you’re fine-tuning brightness or color balance, remember that higher resolution projectors demand more precise calibration for proper picture quality.
![Projector-4K with WiFi and Bluetooth:[3500 ANSI/60W Dolby Audio/Official Licensed Apps], Outdoor-Projector with Smart OS 2.0 & AI Auto Focus,ONOAYO ONO5Pro 2.0 Smart Movie Projector for Indoor/Outdoor](https://m.media-amazon.com/images/I/41fylkjOTIL._SL500_.jpg)
Projector-4K with WiFi and Bluetooth:[3500 ANSI/60W Dolby Audio/Official Licensed Apps], Outdoor-Projector with Smart OS 2.0 & AI Auto Focus,ONOAYO ONO5Pro 2.0 Smart Movie Projector for Indoor/Outdoor
[Hear the Difference–Hollywood-Grade Dual 60W Dolby Audio] Why spend $500 on a TV + soundbar or settle for...
As an affiliate, we earn on qualifying purchases.
Conclusion
Now that you’ve fine-tuned your projector’s color and brightness, you’re all set to enjoy a crisp, vibrant display. Remember, a well-calibrated projector can make all the difference between a good movie night and a fantastic one. Keep in mind, it’s not just a one-and-done task—you’ll want to revisit these settings periodically. After all, don’t put all your eggs in one basket; regular tweaks guarantee your projector stays in tip-top shape for every viewing.

HAPPRUN 2500 ANSI Lumens Outdoor Projector with Built-in Streaming Apps, 4K Decoding Resolution, Dolby Audio, WiFi 6 and Bluetooth 5.2 for Indoor and Outdoor Home Theater
[ Built-in Streaming System ] – No extra equipment needed. This smart projector gives you direct access to...
As an affiliate, we earn on qualifying purchases.
ViewSonic PX701-4K UHD 4K Projector with 3200 Lumens, 240Hz, 4.2ms, HDR, Auto Keystone, Dual HDMI for Home Theater
4K Home Theater Projector: UHD (3840x2160p) 4K resolution with a 1.5-1.6 throw ratio and 3,200 ANSI lumens perfect...
As an affiliate, we earn on qualifying purchases.