
For an ideal projector gaming setup with next-gen consoles, focus on balancing lighting and calibration. Use dimmable or indirect lights to prevent glare while enhancing image vibrancy. Fine-tune your projector’s focus, keystone, and color settings for sharp, vivid visuals. Combining these adjustments creates an immersive environment that boosts gameplay clarity and comfort. If you keep exploring, you’ll discover detailed tips to perfect your setup and elevate your gaming experience even further.
Key Takeaways
- Use adjustable, soft lighting to reduce glare and enhance projected image vibrancy during gaming sessions.
- Calibrate the projector’s focus, keystone, and color settings manually for sharp, accurate visuals.
- Incorporate AI-driven calibration tools to optimize image quality and reduce eye strain.
- Create an immersive environment by balancing lighting and calibration for seamless gameplay experience.
- Regularly tweak setup settings to maintain optimal image clarity, color accuracy, and overall gaming immersion.
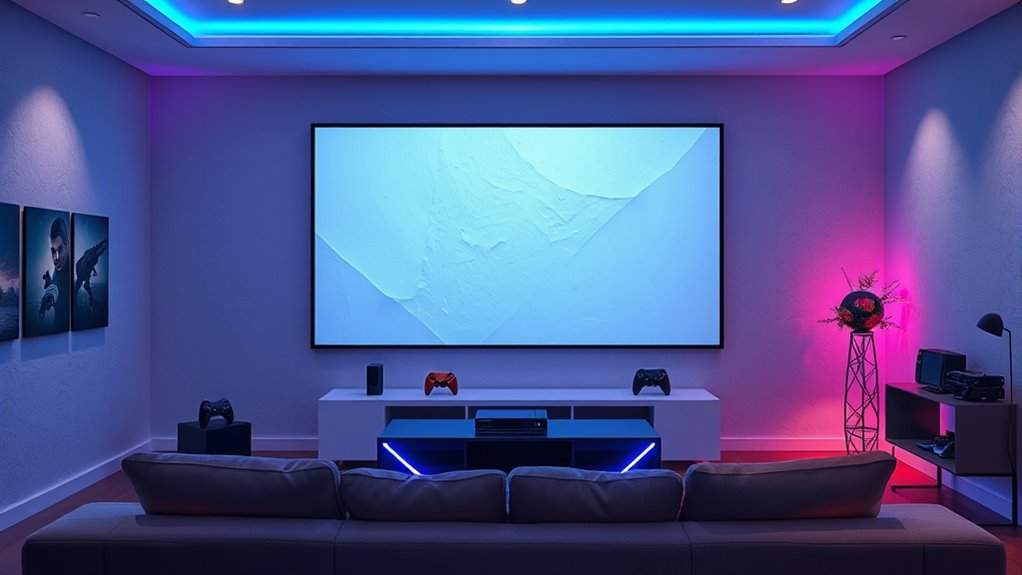
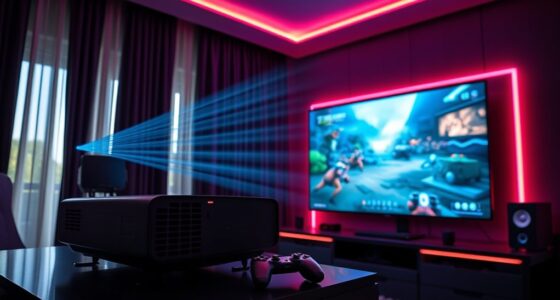
Are you ready to elevate your gaming experience with a projector setup? Creating the perfect gaming environment involves more than just hooking up your console; it’s about crafting an immersive experience that pulls you into the game world. To do this, you need to pay attention to your lighting ambiance. Bright, harsh lights can wash out your projected image, making it difficult to see details or enjoy the vibrant colors of your game. Instead, opt for softer, adjustable lighting that enhances your viewing experience without causing glare or reflections on the screen. Dimmable lights or indirect lighting options work best, allowing you to set the mood and reduce distractions, which is essential for long gaming sessions or competitive play. Balancing your lighting ambiance ensures that your projection remains vivid and crisp, giving you a more engaging and comfortable environment.
Screen calibration is another vital element that directly impacts your gaming quality. Proper calibration ensures that the projected image is sharp, colors are accurate, and the aspect ratio fits your screen perfectly. Start by adjusting the projector’s focus to eliminate blurriness, then tweak the keystone settings if your image appears trapezoidal or distorted. Most projectors have automatic calibration features, but manual adjustments often yield better results, especially if you’re aiming for professional-level clarity. Pay close attention to color settings—adjust contrast, brightness, and saturation to match your room’s lighting conditions and personal preferences. A well-calibrated screen minimizes eye strain and makes game details pop, whether you’re exploring vast open worlds or engaging in fast-paced combat. Additionally, integrating AI-powered calibration tools can further optimize your setup for the best visual performance. Remember, a well-calibrated screen not only improves visual quality but also helps you spot enemies or hidden items more easily, giving you a competitive edge.
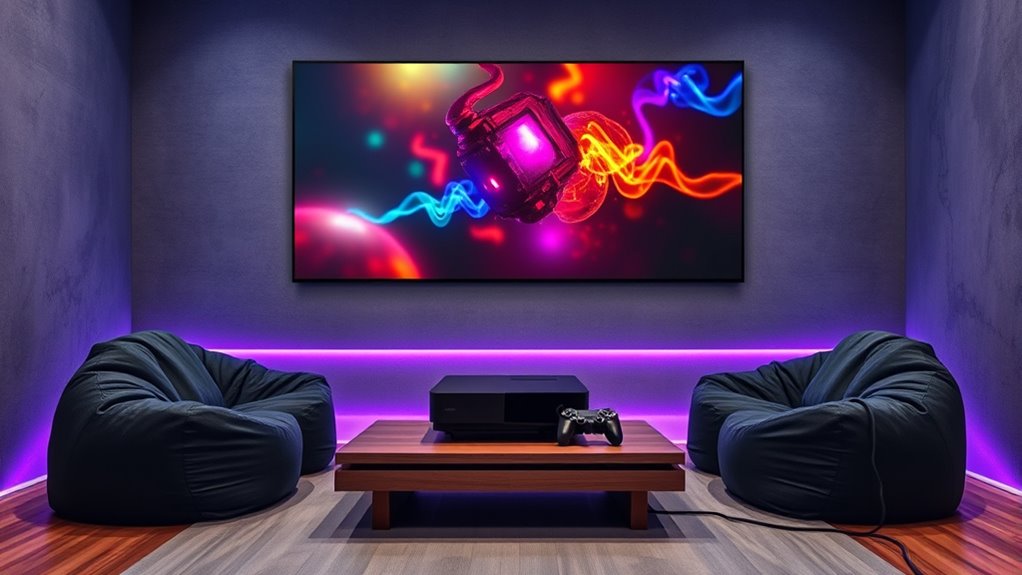
Combining an ideal lighting ambiance with precise screen calibration creates a seamless, immersive gaming environment. When your lighting is just right, and your image is sharp and true to color, you’ll notice a significant difference in how you experience your favorite games. It’s about setting the mood and fine-tuning your setup to match your space and gaming style. Take the time to experiment with different lighting levels and calibration settings until you find what works best for you. Once dialed in, your projector gaming setup transforms your living room into a personal theater, offering a next-gen experience that’s both visually stunning and incredibly engaging. With these elements optimized, you’re ready to enjoy your console games at a whole new level of immersion and excitement.

Northern Lights Projector, 2 Packs Rechargeable 16 Color Aurora Night Light Projector Ambient Lighting with Dimmable & Remote Control for Bedroom Kids Teen Girl Gift Room Decor
Dynamic Aurora Light Projector: This aurora glow lamp projects drifting northern lights onto your walls and ceiling, emitting…
As an affiliate, we earn on qualifying purchases.
As an affiliate, we earn on qualifying purchases.
Frequently Asked Questions
What Is the Optimal Room Size for Projector Gaming?
The ideal room size for projector gaming depends on your viewing distance and projector specs. Ideally, choose a room that’s at least 12×12 feet to comfortably accommodate a large screen and maintain a good viewing distance. You want enough space so you don’t strain your eyes or feel cramped. Larger rooms provide better immersion, but make sure your projector’s throw distance matches the room size for the best picture quality.
How Do I Prevent Screen Burn-In During Extended Gaming Sessions?
To prevent screen burn-in during extended gaming sessions, you should enable a screen saver that activates after periods of inactivity. Additionally, keep the refresh rate high, which helps reduce static image retention. Avoid leaving the same images on screen for too long, and consider adjusting contrast or brightness settings. Regularly changing visuals and using screen protection features can also markedly extend your projector’s lifespan and keep your gaming visuals crisp.
Can I Use a Projector Outdoors for Gaming?
Yes, you can use a projector outdoors for gaming, but you need to take into account outdoor lighting and projector placement. Choose a dark, shaded area or wait until it’s night to minimize ambient light that can wash out the image. Position the projector on a stable surface, facing the screen at the right height, and ensure it’s protected from weather elements. Proper placement and lighting control will give you the best gaming experience outside.
What Are the Best Sound Options for a Projector Gaming Setup?
You should opt for surround sound systems or wireless speakers to enhance your projector gaming setup. Surround sound creates an immersive experience, making you feel like you’re inside the game. Wireless speakers are convenient, easy to set up, and eliminate cable clutter. Pair high-quality wireless speakers with your projector for clear, dynamic audio that complements your gaming visuals, ensuring you stay fully immersed and enjoy a richer gaming experience.
How Do I Connect Multiple Consoles to One Projector?
To connect multiple consoles to one projector, you should use a multi input switch or an HDMI splitter. Connect each console’s HDMI cable to the switch or splitter, then connect the output to your projector. A multi input switch allows you to toggle between consoles easily, while an HDMI splitter duplicates the signal for simultaneous display. Make sure your devices support the switch or splitter for smooth gaming sessions.

DSLRKIT Lens Focus Calibration Tool Alignment Ruler Folding Card(Pack of 2)
This compact ruler allows you to determine if your lens is auto-focusing accurately as it should. It is…
As an affiliate, we earn on qualifying purchases.
As an affiliate, we earn on qualifying purchases.
Conclusion
Now that you’ve set up your projector gaming haven, you’re ready to step into a new domain—like a hero entering their own epic saga. With your console and projector working in harmony, every game becomes an adventure worth exploring. Remember, this isn’t just a setup; it’s your portal to endless worlds. So, embrace the journey ahead, and let your gaming nights shine brighter than ever before. The next level awaits—are you ready?

ANGSO-AUTO ADAS Calibration Professional Tool Kit with Radar Aiming Corner Reflector Target Include Stand Marked with 0-30cm Scale- Compatible with Honda, Toyota, Mazda, Kia, Ford, GM and Hyundai
【Includes Radar Aiming Corner Reflector Target with Stand 】 Features a 0-30cm scale for easy height adjustment, ensuring…
As an affiliate, we earn on qualifying purchases.
As an affiliate, we earn on qualifying purchases.

Elite Screens Projector Projection Screen Drape Kit Accessory Uniquely Designed for Yard Master 2/ Yard Master 2 WraithVeil® Dual Series 90″-135″ Models – Black Skirt, ZOMS2-DK
Adjustable Velcro attachments
As an affiliate, we earn on qualifying purchases.
As an affiliate, we earn on qualifying purchases.