To calibrate game brightness without losing details, begin by adjusting your monitor’s settings using in-game test patterns that display a range of shades and color gradients. Fine-tune brightness, contrast, and gamma carefully, ensuring dark scenes retain shadow detail and bright areas aren’t washed out. Use calibration tools like Windows’ display calibration for precision, and consider ambient lighting to avoid misjudgment. Keep refining your setup for vivid, balanced visuals—stay with us to master this process fully.
Key Takeaways
- Use in-game test patterns with gradients to adjust brightness for accurate shadow and highlight details.
- Calibrate monitor’s contrast and brightness gradually, comparing results with reference images under consistent lighting.
- Adjust gamma settings to fine-tune midtones, preserving details in dark and bright areas simultaneously.
- Verify calibration by viewing actual gameplay, ensuring shadows and highlights retain detail without washing out or crushing.
- Maintain consistent ambient lighting and avoid sudden light changes during calibration for reliable results.
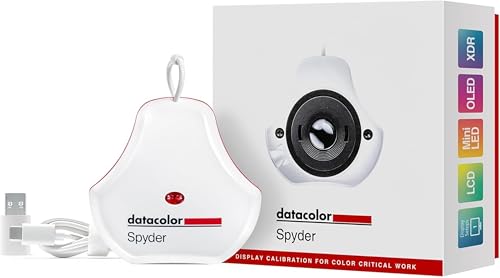
datacolor Spyder – Monitor Calibrator for Graphic Designers, Photographers, and Content Creators, Shows You True Colors, Works on OLED Monitors & LED Screens, Easy-to-Use Color Calibration Tool
Color “Surprises” Are a Thing of the Past: Datacolor’s exclusive DevicePreview TM Beta feature simulates what your photos…
As an affiliate, we earn on qualifying purchases.
As an affiliate, we earn on qualifying purchases.
Understanding Your Display Settings and Game Options
To effectively calibrate your game brightness, you first need to comprehend how your display settings and in-game options work together. Your display settings impact color accuracy and overall image quality, so adjusting brightness without considering these can lead to washed-out or overly dark visuals. Screen resolution also plays a role, as higher resolutions can reveal more detail, influencing your perception of brightness and contrast. Make sure your monitor’s color profile is properly calibrated for accurate color reproduction. Check your display’s brightness, contrast, and color settings before tweaking in-game options. Additionally, understanding how vetted products ensure safety and effectiveness can help you choose appropriate display calibration tools or settings. By understanding how these elements interact, you ensure that your adjustments enhance image clarity without sacrificing detail or realism. This foundation helps you achieve a balanced, immersive gaming experience.

LG 32GS60QC-B Ultragear 32-inch Curved Gaming Monitor QHD (2560×1440) 180Hz 1ms 1000R AMD FreeSync HDR10 HDMIx2 DisplayPort Borderless Design Black Stabilizer DAS Crosshair FPS Counter – Black
Ascend your game with the speed of UltraGear – Experience next-level QHD gaming performance.
As an affiliate, we earn on qualifying purchases.
As an affiliate, we earn on qualifying purchases.
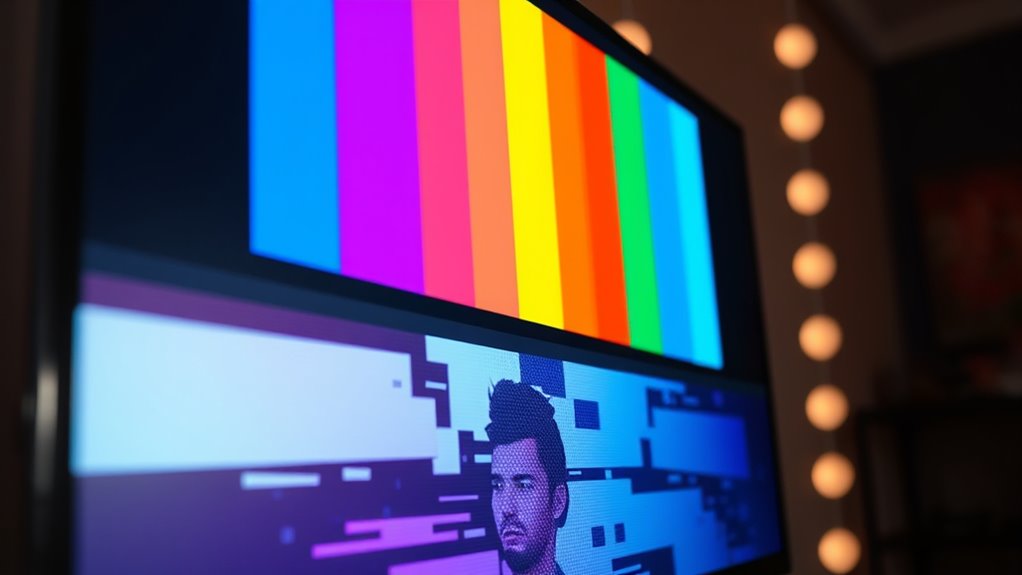
Using In-Game Test Patterns for Accurate Brightness Adjustment
Choosing the right test patterns is essential to accurately gauge your display’s brightness. Once you have the patterns, you need to interpret the levels correctly to guarantee ideal visibility. This process helps you fine-tune your settings for a balanced and immersive gaming experience. Knowing local laws and standards can also ensure your display settings meet regional viewing requirements and optimize your gaming environment.
Selecting Appropriate Test Patterns
Using in-game test patterns is essential for accurately calibrating your monitor’s brightness because they reflect real-world content more effectively than static images. When selecting test patterns, choose ones that display a range of shades and color gradients to reveal subtle details in dark and bright areas. Pay attention to patterns that help you judge the balance between contrast and brightness, ensuring colors appear natural. Adjust your monitor based on the test pattern, considering your room’s ambient lighting, which influences perception. Also, keep in mind the color temperature; a warmer or cooler setting can affect how you interpret brightness levels. The right test pattern should help you fine-tune your display for *ideal* clarity, ensuring you don’t lose details in shadows or highlights during gameplay. Additionally, understanding your device’s supported support hours can help you troubleshoot any calibration issues more efficiently.
Interpreting Brightness Levels
Ever wonder how to tell if your monitor’s brightness is truly calibrated for gaming? Using in-game test patterns helps you interpret brightness levels accurately. Focus on color accuracy to guarantee details aren’t lost in shadows or highlights. Ambient lighting can affect your perception, so adjust your environment first. To evaluate, compare the following:
| Brightness Level | Visual Cue |
|---|---|
| Too Low | Dark details blend into shadows |
| Proper | Details are visible but not washed out |
| Too High | Bright areas lack detail |
| Optimal | Balance of contrast and detail |
| Overexposed | Whites are blown out, losing info |
This approach guarantees your display maintains clarity and detail across different scenes, regardless of ambient lighting. Additionally, understanding contrast ratio helps in fine-tuning your display for the best visual performance.

Artibetter Lens Test Chart Color Calibration Card Lens Focus Adjustment Chart Color Wheel CCTV Camera Calibration Tool Testing Card for Monitoring Systems
Paper imaging: makes cameras deliver crisp and clear images, enhancing the of monitoring systems.
As an affiliate, we earn on qualifying purchases.
As an affiliate, we earn on qualifying purchases.
Calibrating Brightness With Windows or Console Calibration Tools
Calibrating your game brightness with Windows or console tools is a straightforward way to guarantee your display settings are refined for gaming. These tools help improve color accuracy, ensuring that in-game visuals appear as intended. To start, access the calibration options on your device—Windows’ Display Color Calibration or your console’s calibration menu. Make sure ambient lighting is consistent, as changing lighting conditions can affect how you perceive brightness. Follow the on-screen instructions to adjust sliders for brightness, contrast, and gamma, aiming for a balanced image that isn’t too dark or washed out. Proper calibration ensures you see details clearly in dark scenes and highlights, providing a better gaming experience without sacrificing visual fidelity. This method offers a quick, effective way to fine-tune your display for ideal gameplay.

Calibrite Display 123 Monitor Calibration Colorimeter for Photo Editing and Color Accurate Viewing, Easy 1 2 3 Software Workflow, USB C Connection, and Before and After Check, Supports 2 Displays
SPECIFICATIONS: Monitor calibration colorimeter with Easy 1 2 3 software workflow, USB C connection, compact body approx. 34mm…
As an affiliate, we earn on qualifying purchases.
As an affiliate, we earn on qualifying purchases.
Adjusting Contrast and Gamma for Better Visual Clarity
Adjusting contrast and gamma can considerably improve your game’s visual clarity by enhancing the distinction between light and dark areas. Proper contrast ensures that details in shadows and highlights stay visible, improving overall image quality. Adjusting gamma influences how mid-tone colors are displayed, directly affecting color accuracy and naturalness. When set correctly, gamma helps prevent images from appearing washed out or overly dark, making gameplay more comfortable for your eyes. This adjustment reduces eye strain and boosts immersion without sacrificing detail. Keep in mind that small tweaks can make a significant difference in visual clarity and comfort. Fine-tuning contrast and gamma together allows you to create a balanced, vibrant image tailored to your display and lighting environment, ensuring better visual clarity and reduced eye fatigue during extended play sessions. Additionally, understanding your display’s capabilities, such as headphone compatibility and sound calibration, can further enhance your overall gaming experience.
Tips for Fine-Tuning Brightness in Dark Scenes
To get dark scenes just right, you should adjust the brightness gradually, so you don’t overshoot the ideal level. Using reference images can help you compare and guarantee details aren’t lost in shadows. Following these tips ensures you enhance visibility without sacrificing overall picture quality. Additionally, understanding how juice cleansing can impact your health helps you make informed decisions about your dietary choices.
Adjust Brightness Gradually
When fine-tuning brightness during dark scenes, making small, incremental adjustments prevents overshooting your ideal setting. This approach allows you to better judge how your monitor calibration affects shadow details without losing clarity. Keep ambient lighting consistent as you tweak the brightness; fluctuating lighting can mislead your perception of the scene’s depth. Adjust gradually, pausing between changes to evaluate the impact. This careful method guarantees you don’t accidentally brighten or darken the scene too much, preserving details in shadows and highlights. Remember, patience is key—quick, large adjustments can be counterproductive. By fine-tuning slowly, you find a balanced brightness that enhances visibility without sacrificing important visual information. Regular calibration maintenance ensures your display remains accurate over time.
Use Reference Images
Using reference images can substantially improve your brightness fine-tuning process, especially in dark scenes. These images provide a concrete standard for color accuracy, helping you distinguish between true blacks and shadow details. When adjusting, compare your game’s visuals to the reference to guarantee dark areas aren’t overly crushed or washed out. Keep ambient lighting in mind, as it influences how you perceive brightness and contrast. Viewing the reference in similar lighting conditions helps you make more accurate adjustments. This method allows you to fine-tune your settings without losing vital details in shadows, maintaining a balanced, immersive experience. Additionally, understanding the Bedroom environment can help you create a comfortable and visually pleasing setup that enhances your overall gaming experience. By relying on reference images, you ensure your game’s brightness level aligns with intended visuals, enhancing both clarity and realism.
Verifying Your Settings With Real-Game Footage
Seeing how your game looks in real play is essential for accurate calibration. To verify your settings, observe actual game footage carefully. Focus on three key aspects:
Evaluating real gameplay ensures accurate calibration of colors, brightness, and detail.
- Are the colors vivid and true to life, ensuring good color accuracy?
- Is the brightness consistent across different areas, indicating proper screen uniformity?
- Do dark scenes retain detail without washing out or becoming too shadowy?
- Ensure that the overall image quality aligns with your expectations for a healthy and immersive gaming experience, considering the importance of proper image calibration for optimal visual performance.
Frequently Asked Questions
How Can I Prevent Color Washout During Brightness Calibration?
To prevent color washout during brightness calibration, you should adjust the contrast and brightness settings carefully while monitoring color accuracy. Use a calibration tool or test patterns to ensure your colors stay vibrant and true, avoiding over-brightening. Keep an eye on contrast preservation by balancing the brightness so whites remain bright without fading out colors. This way, you maintain both color accuracy and contrast, delivering a richer gaming experience.
What Tools Are Best for Calibration on OLED Screens?
Think of calibration tools as your eye’s best friend, helping you see true colors. For OLED screens, the best tools are professional calibration software like CalMAN or DisplayCAL, paired with a colorimeter such as the X-Rite i1Display Pro. These tools guarantee precise color accuracy by measuring and adjusting your display’s settings. They’re essential for achieving balanced brightness without sacrificing details, giving you a vivid, true-to-life gaming experience.
How Often Should I Recalibrate My Game Brightness Settings?
You should recalibrate your game brightness settings every few months to maintain brightness consistency. Regular calibration ensures your display stays accurate and prevents details from becoming washed out or too dark. If you notice significant changes in picture quality, like loss of detail or uneven lighting, it’s time to recalibrate sooner. Consistent calibration helps you enjoy ideal image quality and accurate visuals, enhancing your gaming experience.
Can Calibration Settings Improve Visibility in Competitive Gaming?
Think of calibration as sharpening your senses; it can considerably improve your visibility in competitive gaming. When you fine-tune for color accuracy and viewing angles, you gain clearer images and better contrast, giving you an edge. Proper calibration minimizes glare and dark spots, making enemies easier to spot. So yes, adjusting your settings isn’t just about visuals—it’s about transforming your entire gaming experience into a battlefield where you see every detail.
Are There Differences in Calibration Methods for PC and Console Displays?
Yes, there are differences in calibration methods for PC and console displays. You should focus on adjusting display contrast and using calibration software tailored to each device. PCs often allow more precise tweaks through software, while consoles typically rely on in-system settings. Always test your adjustments with calibration tools to guarantee your display shows details clearly without overexposing bright areas. This approach helps maintain ideal visibility across both platforms.
Conclusion
By carefully calibrating your brightness, you paint a vivid picture where every shadow and highlight tells its story. Imagine slipping into a dark game world, where details emerge seamlessly from the gloom, not lost to overexposure or darkness. When your settings are just right, you reveal a cinematic experience that feels alive and immersive. Think of it as tuning an instrument—when everything’s aligned, the game’s true beauty shines through, mesmerizing you at every turn.