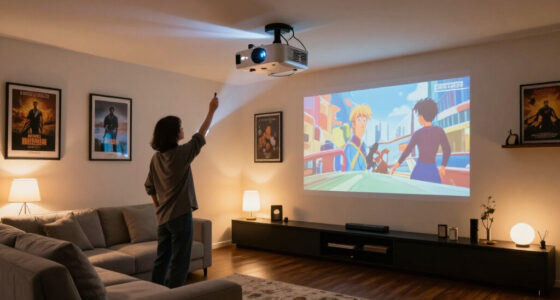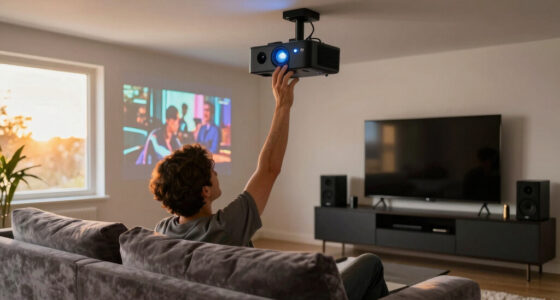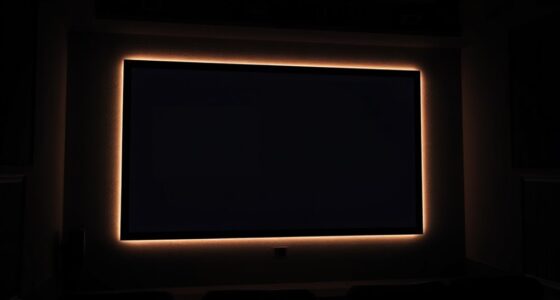
Use this guide to choose a 4K projector for a media room, place it, connect your video sources, and tune the picture. It is for people who have basic familiarity with a TV or home theater system but have not planned a projector installation. Allow 2-4 hours for measuring, setup, and calibration; mounting, cable runs, or room changes can take longer.

Get business pricing on your home office setup
- Business-only prices and quantity discounts
- Tax-exempt purchasing
- Multiple users, one account, clear invoices

Optoma UHZ36 4K UHD Laser HDR Home Theater Projector
- ✔ Native resolution: 3840 × 2160
- ✔ Display type: DLP
- ✔ Brightness: 3,500 lumens

ViewSonic LS901-4K 4K UHD Laser Projector
- ✔ Resolution: 3840 × 2160
- ✔ Brightness: 5,500 ANSI lumens
- ✔ Refresh rate: 240Hz
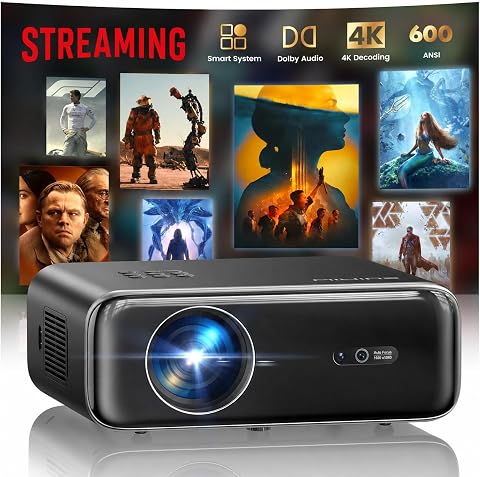
WiMiUS P62 Pro Smart Outdoor Projector, Native 1080p with 4K Support
- ✔ Native resolution: 1920 × 1080
- ✔ 4K support: Accepts 4K video; displays at native 1080p
- ✔ Brightness: 600 ANSI lumens
Difficulty: Intermediate | Time: 2-4 hours, plus any time needed for installation
What You’ll Need
Tools & Materials:
- Tape measure
- Projector and screen specifications
- Level and suitable mounting hardware, if ceiling mounting
- HDMI cables rated for the required signal length and resolution
- Video source such as a streaming device, game console, or disc player
- Remote controls for the projector and source
Knowledge:
- Basic use of HDMI devices and input selection
- Ability to measure the screen area and projector-to-screen distance
Check the projector manual for throw distance, lens shift range, ventilation clearance, supported refresh rates, and mounting details. Confirm the screen’s aspect ratio and usable image area before buying equipment. A model marketed as 4K may use different imaging methods; check its native resolution and supported 4K input formats if those details matter to you.
Optoma UHZ36 4K UHD Laser HDR Home Theater Projector
The Optoma UHZ36 takes the top spot because its core strengths align closely with a dedicated media room: native 4K UHD resolution, HDR support, and a viewing mode designed to preserve a film’s intended presentation. Its Filmmaker Mode preserves the original frame rate, color, and aspect ratio, giving movie-focused buyers a clear reason to favor it over the ViewSonic, whose supplied description emphasizes brightness, gaming speed, and installation flexibility instead.Placement options are practical for a home theater: it can sit on a tabletop or be ceiling mounted, and its listed throw range runs from 3.19 to 34.6 feet. That range may suit a variety of room layouts, although buyers should still check the required image size and placement against their own space. The laser light source is rated for up to 30,000 hours, which reduces the need for frequent lamp replacement. HDR and a stated 3,500 lumens round out a capable package, but the supplied specifications do not clarify ANSI measurement for that brightness figure.There are tradeoffs. The built-in 15-watt speaker is unlikely to stand in for a dedicated surround sound system, and the light source warranty is limited to one year or 20,000 hours, whichever comes first, despite the longer stated source life. Compared with WiMiUS, Optoma costs you the convenience of built-in streaming apps; compared with ViewSonic, it offers less listed brightness and lacks the same explicit lens-shift and optical-zoom details. Still, for buyers prioritizing true 4K movie presentation over all-in-one convenience, it is the strongest overall match.
Pros:
- Native 3840 × 2160 4K UHD resolution with HDR support.
- Filmmaker Mode preserves original frame rate, color, and aspect ratio.
- Laser light source rated for up to 30,000 hours.
- Supports tabletop or ceiling mounting and a broad listed throw-distance range.
Cons:
- The 15-watt built-in speaker may not suit buyers expecting room-filling theater audio.
- The light source warranty is limited to one year or 20,000 hours, whichever comes first.
- Built-in streaming apps are not listed.
Best for: Movie-focused buyers building a dedicated media room who want native 4K UHD, HDR, and a film-oriented viewing mode.
Not ideal for: People who need built-in streaming apps, a powerful included speaker system, or the highest listed brightness for a room with substantial ambient light.
Bottom line: We recommend the UHZ36 first for a dedicated media room where native 4K detail and film presentation matter more than built-in streaming or maximum brightness.
“We recommend the UHZ36 first for a dedicated media room where native 4K detail and film presentation matter more than built-in streaming or maximum brightness.”
ViewSonic LS901-4K 4K UHD Laser Projector
Where the Optoma leads with a film-oriented mode, the ViewSonic LS901-4K makes a different case: it lists 5,500 ANSI lumens, the highest brightness figure in this lineup, alongside native 4K UHD. That combination gives buyers more headroom when a media room cannot be kept fully dark. Brightness alone does not guarantee the best image in every room, but ViewSonic stands out for buyers who need a projector to adapt to varied lighting and placement conditions.Its installation features are unusually extensive among these three. A 1.7× optical zoom and lens shift offer more placement flexibility than the WiMiUS’s digital image adjustments, while 360-degree projection and horizontal and vertical keystone correction add options for less conventional setups. The 21:9 aspect-ratio support may also appeal to viewers who want a cinema-style image. At 240Hz with 4.2ms input lag, it has a clear motion and gaming advantage over the Optoma and WiMiUS based on their supplied specifications.The tradeoff is that the LS901-4K’s specification set leans toward brightness, gaming, and installation flexibility rather than the Optoma’s explicit film-preservation features. Its stated laser life is 20,000 hours, shorter than Optoma’s up-to-30,000-hour rating, and ceiling mounting may require a compatible mount and installation work. It is also listed as consuming 520 watts, something to account for in a room used for long viewing sessions. Buyers seeking the easiest casual setup may find WiMiUS’s auto focus and built-in apps more convenient, but they give up native 4K and substantial brightness.
Pros:
- Native 4K UHD resolution with 5,500 ANSI lumens of listed brightness.
- 1.7× optical zoom and lens shift support more flexible placement.
- 240Hz refresh rate and 4.2ms input lag suit fast-paced gaming.
- Supports HDR/HLG, 21:9 aspect ratio, and 360-degree projection.
Cons:
- Laser light source is rated for 20,000 hours, less than Optoma’s stated maximum.
- Ceiling mounting may require a compatible mount and installation.
- Listed power consumption is 520 watts.
Best for: Buyers with a room that cannot always be darkened, or those who value installation flexibility, wide-format viewing, and fast gaming response.
Not ideal for: Viewers focused primarily on film-oriented image modes, or anyone who wants a simple tabletop setup with built-in streaming and minimal installation planning.
Bottom line: Choose the LS901-4K over the Optoma when room brightness, installation range, and fast motion take priority over a specifically film-focused feature set.
“Choose the LS901-4K over the Optoma when room brightness, installation range, and fast motion take priority over a specifically film-focused feature set.”
WiMiUS P62 Pro Smart Outdoor Projector, Native 1080p with 4K Support
The WiMiUS P62 Pro is the easiest fit for a buyer who values convenience more than true 4K projection. It includes apps such as Prime Video and YouTube, Wi-Fi 6, Bluetooth 5.2, and automatic focus and image correction, so a viewer can get started without assembling a separate streaming chain. That makes it more self-contained than either the Optoma or ViewSonic as described here, both of which rely on connected sources for streaming.Its central limitation matters especially in a roundup about 4K projectors: it accepts 4K video but displays it at native 1920 × 1080 resolution. This is not equivalent to the Optoma and ViewSonic’s listed 3840 × 2160 output. At 600 ANSI lumens, it is also far below ViewSonic’s 5,500 ANSI lumens, so it makes more sense in a darkened room or for casual use than in a space where ambient light is difficult to control. Its auto keystone, obstacle avoidance, screen alignment, and 50–100% zoom help reduce setup friction, but they do not change the native resolution.Connectivity is a plus: dual HDMI and USB ports, HDMI ARC/CEC, AirPlay, Miracast, and two-way Bluetooth create several ways to connect devices or route audio. The dual 10-watt speakers with Dolby Audio are a useful built-in starting point, though buyers seeking a convincing theater experience should plan on external audio. Compared with the native 4K models, WiMiUS gives up image detail and brightness; compared with them, it asks less of the buyer’s setup and includes streaming apps. We place it third because convenience cannot overcome the resolution mismatch for a buyer specifically seeking a 4K media-room projector.
Pros:
- Built-in streaming apps reduce the need for a separate streaming device.
- Auto focus, keystone correction, obstacle avoidance, and screen alignment simplify setup.
- Dual HDMI and USB ports support multiple connected devices.
- Dual 10-watt speakers, Dolby Audio, and two-way Bluetooth add basic audio flexibility.
Cons:
- 4K video is displayed at native 1080p resolution.
- 600 ANSI lumens is substantially lower than ViewSonic’s listed brightness.
- A carrying case is not included.
Best for: Casual viewers who want built-in streaming, automatic setup adjustments, and broad device connectivity in a darkened room.
Not ideal for: Buyers who expect native 4K detail, need substantial brightness, or are building a dedicated high-performance home cinema.
Bottom line: Pick the P62 Pro for convenient, casual viewing when built-in apps and easy setup matter more than native 4K image detail.
“Pick the P62 Pro for convenient, casual viewing when built-in apps and easy setup matter more than native 4K image detail.”
As an Amazon Associate we earn from qualifying purchases.
Before You Start
Measure the room before choosing a projector. Mark the planned screen width, height, and viewing positions with painter’s tape. Check for windows, reflective surfaces, ceiling lights, and places where people or furniture could block the beam. A projector’s brightness rating does not guarantee a bright-looking image in a lit room; control ambient light and choose a screen suited to your room.
Do not mount the projector until you have checked its throw-distance range and lens offset. Digital keystone correction can make an image fit, but heavy correction reduces usable image detail. Plan to align the projector physically and use lens shift where available.
Step-by-Step Instructions
Step 1: Measure the screen and viewing distance
Measure the space available for the screen and the distance from the main seats to its surface. Choose a screen size that fits the wall and gives viewers a comfortable field of view. Check the projector manual’s recommended image-size and throw-distance range; use the manufacturer’s calculator if available. Measure from the projector lens to the screen, not from the back of the projector.
Tip:Account for the projector’s body depth, cable bend room, and ventilation clearance when checking whether it will fit at the planned location.
Check: You have a screen width and height, a viewing distance, and a projector position that falls within the specified throw range.
Step 2: Choose a projector for the room
Compare models using the room’s light conditions, screen size, installation distance, and intended sources. Check brightness, contrast performance, native resolution or pixel-shifting method, HDR support, input lag if gaming, and available lens shift. Confirm that the projector accepts the resolution, refresh rate, and HDR format your devices will send.
Tip:For a room that cannot be darkened, prioritize light control and a suitable screen along with projector brightness. More lumens alone may not produce better contrast.
Check: The selected projector fits the measured throw distance and supports the image formats and features your sources require.
Step 3: Prepare the room and screen
Install or position the screen at the planned height, keeping it flat and square to the room. Reduce light from windows and lamps, and use matte, neutral finishes around the screen when possible. Place seating so viewers have an unobstructed view and are not walking through the projector beam.
Tip:Test the seating and screen position before drilling or making permanent changes. A temporary projected image can help confirm height and size.
Check: The screen is secure, level, and visible from each seat, and the room’s main light sources are controlled.
Step 4: Position and align the projector
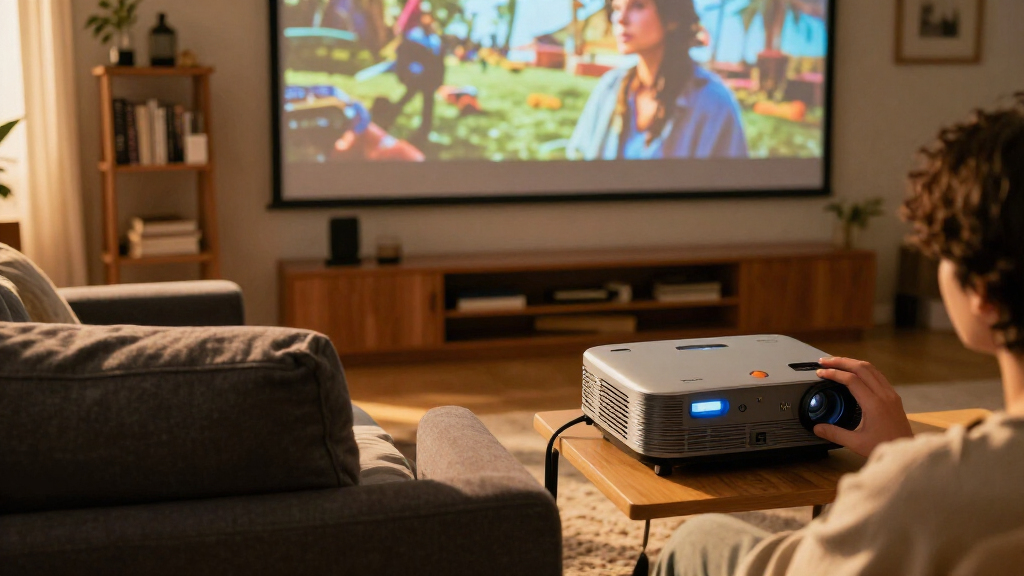
Place the projector on a stable surface or mount it using hardware approved for its weight and mounting points. Set the lens within the recommended distance and height, then center it on the screen. Adjust zoom and lens shift to fill the screen while keeping the image rectangular. Focus the image using fine text or a projector focus pattern.
Tip:Keep vents clear and follow the manual’s orientation and clearance rules. Avoid using keystone correction as the main alignment method.
Check: The projected image reaches the screen edges evenly, its sides are straight, and text appears sharp across the image.
Step 5: Connect sources and select the correct signal
Connect the streaming device, console, or player to an HDMI input on the projector or compatible receiver. Use cables rated for the resolution and refresh rate at the cable’s length. Turn on the devices, select the matching projector input, and set each source to output a supported 4K format. If using a receiver, check that it passes the required 4K, HDR, and refresh-rate signals.
Tip:For long cable runs, verify the cable’s stated distance and signal support before routing it through walls or ceilings.
Check: The projector displays the source, and its information screen or source settings show the expected resolution and refresh rate.
Step 6: Set the picture for your room
Select a picture mode intended for movies or accurate viewing, then set brightness, contrast, color, and sharpness using the projector’s basic setup patterns or a reliable calibration guide. Disable excessive motion smoothing if it changes the look of films. Set HDR mode to automatic or the mode recommended for the source, and compare a familiar dark scene and a bright scene.
Tip:Change one setting at a time and record the original values. Avoid raising sharpness until outlines look artificial or text develops halos.
Check: Dark scenes retain visible shadow detail, highlights do not wash out, and familiar content looks natural from the main seat.
Step 7: Check sound, controls, and daily operation
Route audio to the receiver or sound system, then verify that volume control and device switching work as intended. Test each source, the projector remote, and any control system. Save the chosen picture settings to the appropriate input or picture mode if the projector allows it.
Tip:Some projectors have limited built-in speakers or audio return options. Confirm the audio path before concealing cables or finalizing a receiver setup.
Check: Video and sound play together from every required source, and you can switch inputs without changing the installation.
Common Mistakes to Avoid
- Buying a projector before checking throw distance and lens shift. — Compare the exact room measurements with the model’s manual or throw calculator before purchase.
- Choosing a screen that is too large for the room’s light level or seating distance. — Mock up the screen size, review the projector’s brightness guidance, and test a sample image when possible.
- Using strong keystone correction to compensate for poor placement. — Center and square the projector physically, then use optical lens shift or zoom within the manual’s limits.
- Assuming every HDMI cable or receiver carries every 4K format. — Check the cable length rating and each device’s supported resolution, refresh rate, HDR format, and HDMI input mode.
Troubleshooting
Problem: The image does not fill the screen or looks trapezoidal.
Solution: Confirm the projector is at the correct throw distance and centered with the screen. Adjust placement, zoom, and lens shift; then check the source aspect ratio and the projector’s aspect setting.
Problem: The projector shows a blank screen or a lower resolution than expected.
Solution: Select the correct input, reseat both ends of the HDMI cable, and set the source to a format the projector supports. If a receiver is in the signal path, test a direct connection and check its HDMI settings.
Problem: The image looks dim or washed out.
Solution: Darken the room, check that the correct lamp or laser output mode is selected, and review HDR and picture mode settings. Confirm the screen type and size suit the room.
Problem: Text or the edges of the image look soft.
Solution: Refocus the projector and check that it is square to the screen. Clean the lens as the manual directs; if only one side is soft, adjust placement and lens alignment before using digital correction.
What Success Looks Like
The completed setup produces a sharp, rectangular image that fits the screen, shows the expected 4K signal from each source, and remains visible from the main seats under normal room lighting. Audio plays through the intended sound system, ventilation remains unobstructed, and switching sources works reliably.
Next Steps
Keep the projector manual and note the final throw distance, input settings, and picture adjustments. Clean the air filter and lens only as the manufacturer directs, and check lamp or laser maintenance guidance periodically. Revisit picture settings when you change the screen, room lighting, source devices, or cable path. Contact the manufacturer or a qualified installer if the mount is unstable, the image cannot be aligned within the lens limits, or signal dropouts persist after checking the cables and receiver.
Frequently Asked Questions
Does a 4K projector always show native 4K resolution?
No. Some projectors use native 4K imaging, while others shift pixels to display a 4K image. Check the manufacturer’s specifications and reviews for the model’s imaging method and supported input formats.
How far should a 4K projector sit from the screen?
It depends on the projector’s lens and the image size. Use the exact model’s throw-distance calculator or manual, measuring from the lens to the screen surface.
Can I use a projector in a room with windows?
Yes, though daylight reduces contrast and perceived image quality. Use blackout shades or curtains, limit direct light on the screen, and choose a projector and screen rated for the room’s conditions.
Do I need a special HDMI cable for 4K?
Choose a cable certified or rated for the required resolution, refresh rate, and HDR format at its length. Long runs may need a more capable cable; test it before hiding it in a wall or ceiling.