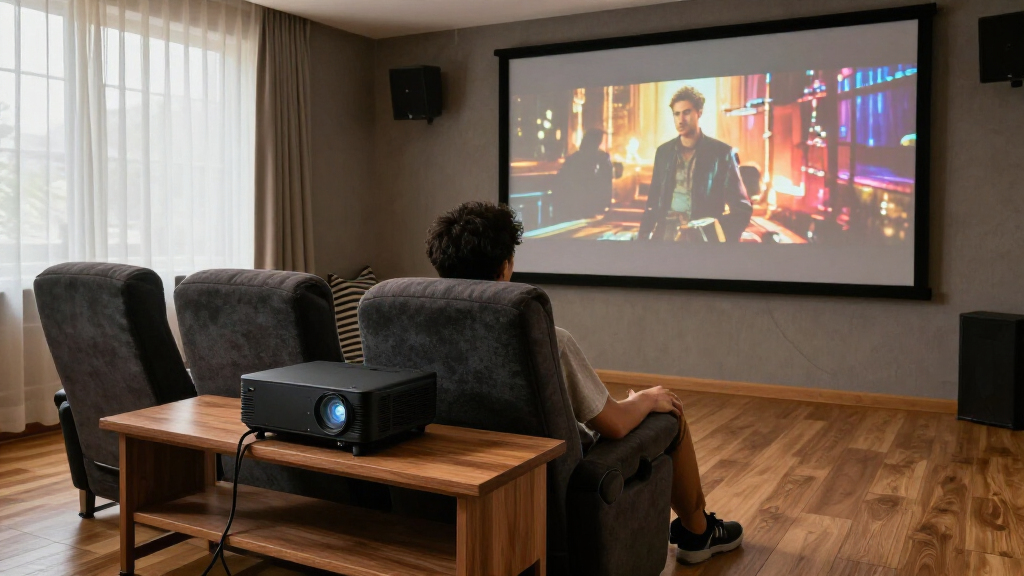
Use this guide to choose a 4K projector for a home theater, match it to your room and screen, and check the finished picture. It is for homeowners and renters who can measure a room and connect basic video equipment; no projector installation experience is needed. Allow 2-4 hours for research, placement, connections, and initial adjustments. A ceiling mount or a long cable run may add time.

Get business pricing on your home office setup
- Business-only prices and quantity discounts
- Tax-exempt purchasing
- Multiple users, one account, clear invoices

Optoma UHZ36 4K UHD Laser HDR Home Theater Projector
- ✔ Resolution: 3840 × 2160
- ✔ Display technology: DLP
- ✔ Brightness: 3,500 lumens

Epson Home Cinema 3800 4K PRO-UHD 3LCD Projector with HDR
- ✔ Projection technology: 3-chip 3LCD with pixel shifting
- ✔ Resolution: 3840 × 2160 (listed)
- ✔ Brightness: 3,000 lumens

Epson Home Cinema 5050UB 4K PRO-UHD 3-Chip 3LCD Projector
- ✔ Projection technology: 3-chip 3LCD with 4K PRO-UHD pixel shifting
- ✔ Resolution: Supplied details conflict: native 4096 × 2160; maximum display resolution listed as 1920 × 1080p
- ✔ Brightness: 2,600 lumens
Difficulty: Intermediate | Time: 2-4 hours for planning and setup
What You’ll Need
Tools & Materials:
- Tape measure
- A notebook or phone for recording room and screen measurements
- A 4K video source, such as a streaming device, game console, or disc player
- A suitable HDMI cable rated for the distance and signal format you plan to use
- The projector manual and, if mounting, the correct mount and fasteners
Knowledge:
- Basic familiarity with HDMI connections and video sources
- Ability to measure the distance between the intended projector position and screen
Decide whether the projector will sit on a shelf or table, or hang from a ceiling. Check the room’s available power and cable routes before you buy. If you plan to drill into a ceiling or wall, identify the framing and use mounting hardware rated for the projector’s weight. Do not suspend a projector from drywall alone.
Optoma UHZ36 4K UHD Laser HDR Home Theater Projector
For a home theater that is not reliably dark, the Optoma UHZ36 leads this comparison with a stated 3,500 lumens, the highest figure among these three, and a laser light source rated for up to 30,000 hours. That combination gives buyers more room to use a larger image without making darkness the only condition for movie night. It supports 4K UHD and HDR, while Filmmaker Mode is intended to preserve frame rate, color, and aspect ratio; PureMotion offers a separate option for smoothing motion.Compared with the two Epson models, the UHZ36 has the clearest brightness advantage on the supplied specifications, but it does not have their 3-chip 3LCD design or the 5050UB’s stated contrast ratio. Brightness alone does not settle image quality: room lighting, screen material, and viewing habits still matter. Its 15 W built-in speaker can help for basic playback, but a home theater will benefit from a dedicated audio system. Also consider the limited one-year light-source warranty, which is a meaningful counterweight to the long rated life. The UHZ36 makes the most sense when brightness and laser convenience outweigh those concerns.
Pros:
- Highest stated brightness in this group at 3,500 lumens.
- Laser light source is rated for up to 30,000 hours.
- Filmmaker Mode preserves the source’s frame rate, color, and aspect ratio.
- Supports tabletop and ceiling mounting.
Cons:
- Built-in 15 W speaker is modest for theater sound.
- Light-source coverage is limited to one year or 20,000 hours, whichever comes first.
- The supplied contrast figure is lower than the Epson 5050UB’s stated figure.
Best for: Movie and sports viewers who need a brighter image for a multipurpose room and want a laser light source.
Not ideal for: Buyers building a fully light-controlled theater who prioritize the highest stated contrast here or want a more substantial built-in audio option.
Bottom line: We rank the Optoma UHZ36 first for its combination of 4K UHD, the lineup’s highest stated brightness, and a long-life laser, provided buyers accept its warranty and audio limitations.
“We rank the Optoma UHZ36 first for its combination of 4K UHD, the lineup’s highest stated brightness, and a long-life laser, provided buyers accept its warranty and audio limitations.”
Epson Home Cinema 3800 4K PRO-UHD 3LCD Projector with HDR
The Epson Home Cinema 3800 is the practical pick when fitting the projector into the room is a major part of the decision. Its vertical and horizontal lens shift lets buyers adjust the projected image to the screen without relying only on moving or tilting the projector. That can simplify a tabletop setup or ceiling installation compared with a model whose listed specifications do not mention lens shift. Its 3-chip 3LCD design displays the full RGB color signal for each frame and avoids the rainbow effects associated with some single-chip DLP viewing.Its stated 3,000 lumens put it between the Optoma UHZ36 and Epson 5050UB, and it supports 10-bit HDR as well as 4K HDR at 60 Hz through HDMI 2.0. Dual 10 W speakers and Bluetooth provide convenient audio options, though dedicated speakers remain the better match for an immersive theater. Against the 5050UB, the 3800 emphasizes placement flexibility and built-in convenience over the higher stated contrast and more theater-focused positioning. One important detail needs checking before purchase: the provided minimum throw distance of 2.15 meters exceeds the maximum of 1.32 meters. Because those figures conflict, we would confirm the usable throw range from a reliable current specification before planning the room around it.
Pros:
- Horizontal and vertical lens shift help align the image with the screen.
- 3-chip 3LCD avoids rainbow effects and displays full RGB color for each frame.
- Supports 4K HDR at 60 Hz over HDMI 2.0.
- Includes dual 10 W speakers and Bluetooth for flexible basic audio.
Cons:
- The supplied minimum and maximum throw distances are reversed or otherwise inconsistent and need confirmation.
- Built-in speakers are limited compared with a dedicated theater audio setup.
- Its 3,000-lumen rating is below the Optoma UHZ36’s stated brightness.
Best for: Buyers who need lens shift for screen alignment and value built-in stereo or Bluetooth for a simpler system.
Not ideal for: Anyone who needs confirmed throw-distance planning from the supplied specs or is choosing primarily for the 5050UB’s stated contrast.
Bottom line: We recommend the Epson 3800 when lens shift and convenient built-in audio matter, after confirming its throw range and ensuring its brightness suits the room.
“We recommend the Epson 3800 when lens shift and convenient built-in audio matter, after confirming its throw range and ensuring its brightness suits the room.”
Epson Home Cinema 5050UB 4K PRO-UHD 3-Chip 3LCD Projector
In a room designed for movie watching, the Epson Home Cinema 5050UB is the contrast-focused alternative to the brighter Optoma UHZ36. Its three-chip 3LCD design avoids rainbowing, and it combines pixel shifting with image processing and full 10-bit HDR processing. The supplied contrast figure of up to 1,000,000:1 is the strongest listed here, making this the model to consider when a controlled room and image depth are more important than maximizing brightness.That focus comes with a tradeoff: its stated 2,600 lumens are the lowest of this group, so it is less suited to a room where lights remain on or ambient light competes with the screen. Compared with the Epson 3800, it is positioned around more deliberate theater viewing and a higher stated contrast figure; the 3800 instead offers named lens shift, Bluetooth, and built-in stereo in its supplied specs. Buyers should also resolve two specification questions before deciding. The provided resolution details conflict, listing a 4096 × 2160 native resolution and a maximum display resolution of 1920 × 1080p alongside 4K PRO-UHD pixel shifting. Additionally, full DCI-P3 and Rec.709 color spaces are listed only in Digital Cinema Mode, and HDR performance requires compatible third-party devices. This is a more specialized pick, and those details deserve confirmation for a planned setup.
Pros:
- Highest stated contrast ratio in this group, up to 1,000,000:1.
- 3-chip 3LCD avoids rainbow effects.
- Full 10-bit HDR processing and image processing with pixel shifting.
- Supports front, rear, or ceiling mounting.
Cons:
- Lowest stated brightness here at 2,600 lumens.
- Supplied native and maximum display resolution fields conflict and should be verified.
- Full DCI-P3 and Rec.709 color spaces are available only in Digital Cinema Mode.
Best for: Home theater buyers with good light control who prioritize 3LCD presentation, HDR processing, and the highest stated contrast in this comparison.
Not ideal for: Viewers using a bright multipurpose room or anyone who needs the supplied resolution fields to be clear without further confirmation.
Bottom line: We favor the 5050UB for a light-controlled theater where its contrast-oriented specification matters more than the brighter output of the Optoma.
“We favor the 5050UB for a light-controlled theater where its contrast-oriented specification matters more than the brighter output of the Optoma.”
As an Amazon Associate we earn from qualifying purchases.
Before You Start
Check the projector’s specifications and manual for its native resolution, supported input formats, throw ratio, lens shift, zoom range, and supported screen sizes. Product listings may use “4K” for different technologies. Confirm whether the projector displays a native 3840 × 2160 image or uses pixel shifting to produce a 4K image; either can suit a home theater, but the distinction helps you compare models accurately.
Set a budget that includes the screen, mount, cables, and any audio equipment you still need. A bright room, a very large screen, or daytime viewing calls for more light output than a dark room with a modest screen. Projector brightness ratings use different measurement methods, so compare them cautiously and look for independent reviews that describe real viewing conditions.
Step-by-Step Instructions
Step 1: Measure the room and viewing area
Measure the width and height of the wall or screen area, the seating distance, and the likely projector position. Note windows, lights, furniture, ceiling beams, and vents that may block the image or airflow. If you are replacing a television, measure the intended image area rather than assuming the largest available screen will suit your room.
Write down the largest screen size you can accommodate and the distance from the back of the room or shelf to the screen. Include space behind a ceiling-mounted projector for its body and cables.
Tip:Room light affects perceived contrast. Plan blackout curtains or dimmable lights if daytime use matters and the room has bright windows.
Check: You have written measurements for the screen area, seating distance, and at least one possible projector position.
Step 2: Choose a screen size and screen type
Select a screen size that fits the wall and works with your seating distance. A larger image can feel more cinematic, but it also spreads the projector’s light over more area and may make lower-quality video more noticeable. Check the projector maker’s recommended screen range, then compare it with your measurements.
Decide whether to project onto a dedicated screen or a smooth, matte, neutral-colored wall. A dedicated screen usually gives a more predictable surface. If you use a screen, choose a format that matches your main content and confirm where speakers and furniture will sit.
Tip:For a room with ambient light, consider whether a screen designed for that environment suits your setup. Confirm its viewing angle and compatibility with your projector before buying; specialized screens are not a universal fix for daylight.
Check: The planned screen fits the room, does not overlap obstacles, and gives viewers a comfortable sightline from their seats.
Step 3: Match the projector to the screen position
Use the manufacturer’s throw calculator or specification sheet to see whether the projector can create your chosen image size from the available distance. The throw ratio relates the lens-to-screen distance to image width; zoom range changes the permitted image size at a given distance. Check both the minimum and maximum distances for your screen size.
Confirm that the lens can sit at the required height and horizontal position. Look for lens shift if you need to move the image without tilting the projector. Keystone correction can reshape a skewed image, but use it sparingly because digital correction can reduce image detail.
Tip:Do not buy based on throw ratio alone. Check the exact screen size and lens position in the calculator, then allow room for the projector chassis and cable connections.
Check: The calculator shows that your chosen projector can fill the screen from the planned position, with its lens and chassis clear of obstructions.
Step 4: Compare image, noise, and connection features
Compare the shortlist using the features you will actually use: brightness, contrast performance, HDR support, lens controls, fan noise, and input compatibility. Check that the projector accepts the resolution and refresh rate your source needs. For gaming, verify supported refresh rates, input lag, and any variable refresh features you require.
Check the HDMI version and format support for your devices, such as HDR, copy protection, and the needed bandwidth. A port labeled HDMI does not guarantee support for every 4K format. Read the manual for port-specific limits, since some projectors reserve full bandwidth for one input.
Tip:Listen for fan noise in reviews and consider where the projector will sit relative to viewers. A quiet room can make fan sound more noticeable during quiet scenes.
Check: Your selected projector supports your intended screen placement and the video and gaming formats used by your sources.
Step 5: Install the projector and route cables
Place the projector temporarily at the calculated position and connect it to power and your source. Keep its intake and exhaust vents clear according to the manual. Check the projected image before drilling or fixing a permanent mount.
For a permanent installation, use the mount and fasteners specified for the ceiling or wall structure. Follow the manual’s orientation and clearance instructions, and route cables so they are supported and do not create a trip hazard. For long HDMI runs, use a cable or active solution rated for the signal format and distance; test it before closing cable channels or walls.
Tip:Projectors produce heat. Do not place them in a sealed cabinet unless the manual allows it and the cabinet has suitable ventilation.
Check: The projector stays securely in position, has open ventilation, and displays a stable signal over the installed cable route.
Step 6: Align the image and focus the lens
Turn on the projector and display a grid or menu with clear edges. Adjust the projector’s physical position and lens shift first, then use optical zoom to fill the screen. Focus the image and check the corners as well as the center.
Square the projector to the screen as much as possible. Avoid using digital keystone correction as a substitute for proper placement. If the image cannot be aligned with the available lens controls, recheck the throw distance, mounting height, and horizontal offset in the manual.
Tip:Small focus and alignment adjustments can be easier to judge from your normal seat. Let the projector warm up before making final focus adjustments if the manual recommends it.
Check: The image fills the screen without spilling onto nearby walls, and text or grid lines appear sharp across the image.
Step 7: Set the source and picture mode
Set your player or streaming device to output a supported 4K format, then select the correct projector input. Start with the projector’s cinema, film, or reference picture mode rather than a vivid mode. Adjust brightness, contrast, color, and HDR settings only as needed, using familiar content with dark and bright scenes.
Check that the source and projector agree on HDR and refresh-rate settings. If the image looks washed out or too dark, test another picture mode and confirm that HDR is being detected correctly before changing multiple controls.
Tip:Turn off aggressive motion smoothing if it makes films look unnatural. Keep changes small and note the original settings so you can restore them.
Check: The projector reports the expected input resolution and HDR status, and familiar scenes have visible shadow detail without washed-out highlights.
Common Mistakes to Avoid
- Buying a projector before checking throw distance and lens placement. — Use the model-specific calculator with your actual screen size and planned lens position before ordering.
- Choosing the biggest possible screen without considering room light or projector brightness. — Match screen size to seating and viewing conditions, and plan to control ambient light where possible.
- Using keystone correction to compensate for poor placement. — Position and square the projector first, then use lens shift and optical zoom; keep digital correction low.
- Assuming every HDMI cable or input supports every 4K format. — Check the source, projector port, and cable specifications for the resolution, refresh rate, and HDR format you plan to use.
Troubleshooting
Problem: The projected image is larger or smaller than the screen.
Solution: Recheck the throw distance and screen measurements. Use the optical zoom range or move the projector within the supported placement range; do not rely on keystone to resize the image.
Problem: The image is blurry at the edges after the center is focused.
Solution: Confirm that the projector faces the screen squarely and that the screen is flat. Check focus across the image and consult the manual for lens alignment limits. Reposition the projector if one corner remains soft.
Problem: The source shows no picture or drops the signal.
Solution: Select the correct input, reseat both HDMI connections, and try a shorter certified cable. Check that the source output format is supported by the specific projector port; lower the refresh rate temporarily to isolate a bandwidth problem.
Problem: The picture looks dull in a lit room.
Solution: Reduce room light with curtains or dimmers, use an appropriate picture mode, and confirm the image is not oversized for the available light output. If daytime viewing is essential, reconsider the screen and projector combination before making further adjustments.
What Success Looks Like
Your projector is securely placed with clear airflow, fills the screen evenly, and produces a sharp image from the center to the edges. The source sends a supported 4K signal, the projector recognizes the intended HDR or refresh-rate mode, and the picture remains comfortable to watch from your seats. Check a bright scene, a dark scene, and a detailed scene; you should see highlights, shadow detail, and readable fine edges without obvious cropping, signal drops, or distracting geometry.
Next Steps
Save the final picture settings and record the projector-to-screen distance so you can restore alignment after moving equipment. Keep vents clear and clean filters on the schedule in the manual. Recheck focus and image framing after a mount or screen shifts. If you add a new source, verify its output format and the HDMI port’s capabilities before troubleshooting the projector itself.
Frequently Asked Questions
Do I need a native 4K projector?
Not always. Native 4K and pixel-shifting projectors use different ways to present a 4K image. Compare reviews, price, lens quality, brightness, and your seating distance; resolution alone does not determine picture quality.
How far should a 4K projector sit from the screen?
It depends on the projector’s throw ratio, zoom range, and the image width. Use the manufacturer’s calculator for your exact model and screen size, then check that the lens position and projector body fit the room.
Can I use a white wall instead of a screen?
Yes, if the wall is smooth, flat, and a neutral matte color. A dedicated screen can provide a more consistent surface and may suit your light conditions better, but check compatibility before choosing a specialized screen.
Why does my 4K picture look soft?
Check focus, image alignment, source resolution, cable stability, and the quality of the content. Streaming compression, digital keystone correction, or a projector that is not square to the screen can reduce perceived sharpness.
Will a 4K projector work well in daylight?
Bright ambient light can reduce contrast and make the image look washed out. Curtains, dimmable lighting, a suitable screen, and a projector with enough real-world brightness can help, but a television may suit a consistently bright room better.