The quality of your projector images depends heavily on your room’s lighting, layout, and surface quality, even if the equipment is the same. Bright light, furniture placement, and textured walls can reduce clarity and vibrancy. Darker, well-controlled environments with smooth, matte surfaces help the images appear sharper and more vivid. Paying attention to these factors can make a big difference, and you’ll discover more ways to improve your setup as you explore further.
Key Takeaways
- Proper lighting control enhances image brightness and contrast, making projections appear clearer and more vivid.
- Correct projector and screen positioning reduces glare and distortion, improving image sharpness.
- Using smooth, matte, and darker surfaces minimizes reflections and enhances color vibrancy.
- Effective furniture placement prevents shadows and ambient light interference, boosting image clarity.
- Optimizing room layout and environment creates a controlled setting that maximizes projector performance.
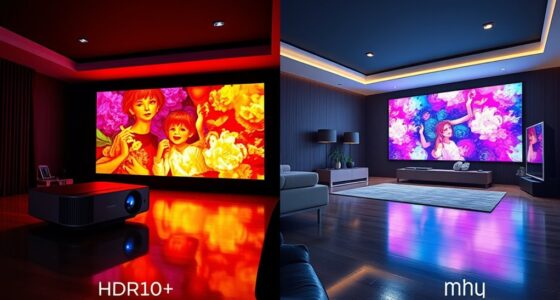
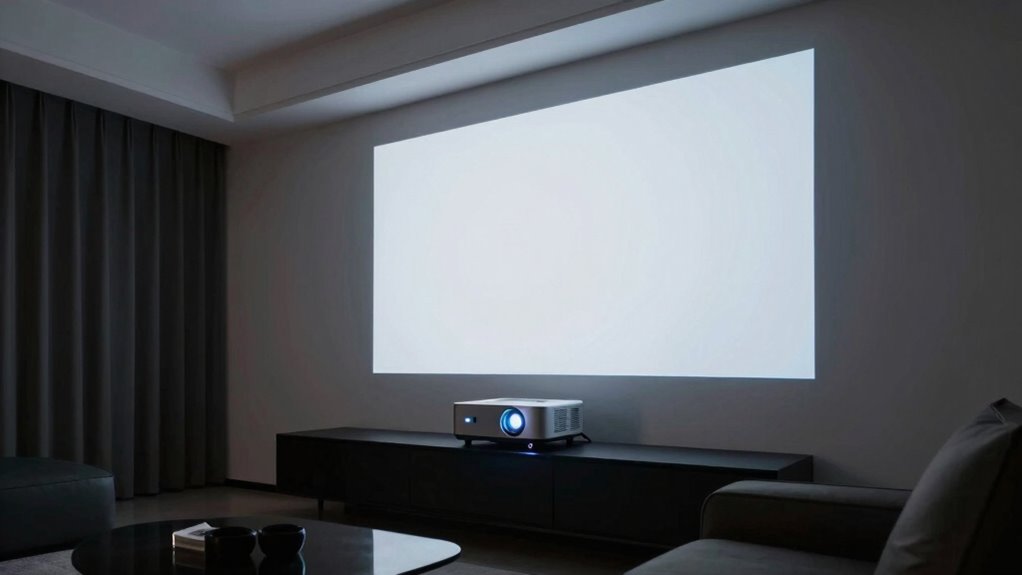
Even with identical projectors and screens, you might notice that images look sharper and more vibrant in some rooms than others. The difference often comes down to lighting conditions and room layout. Bright ambient light can wash out the projected image, making colors dull and details harder to see. If a room has large windows or strong overhead lighting, your projector’s brightness might not be enough to produce a clear picture. Conversely, in a darker room, the same projector can deliver a crisp, vivid image because there’s less competing light. To improve image quality, try dimming the lights or closing curtains during presentations or movie nights. This simple adjustment can make a significant difference in how vibrant and sharp your images appear.
Lighting conditions and room layout significantly impact projected image clarity and vibrancy.
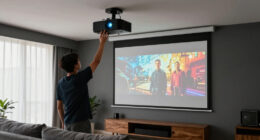
Room layout also plays a crucial role in how well your projector’s image turns out. The placement of furniture, screens, and light sources affects both the projection surface and how much ambient light reaches it. For example, if your seating area is directly under a bright lamp or window, the glare can distort the image, reducing contrast and clarity. Positioning your projector and screen away from direct light sources helps improve the overall quality. Additionally, the distance between the projector and the screen influences image sharpness. If you place the projector too close or too far from the wall, the picture may become distorted or blurry. Properly aligning the projector at the right height and distance ensures the image is focused and proportioned correctly.
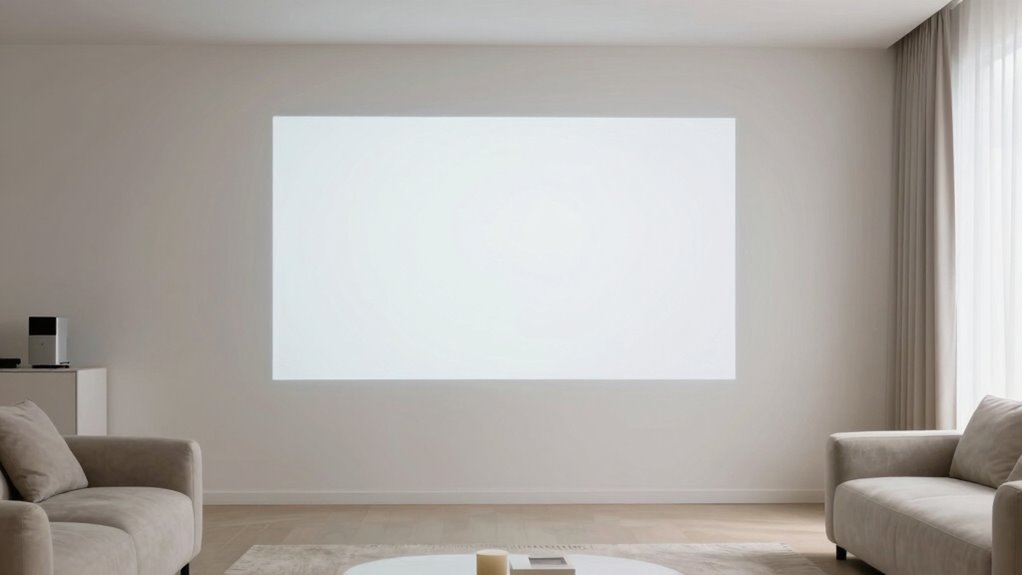
Another aspect of room layout is the surface on which you project. A smooth, matte wall or screen enhances image quality by minimizing reflections and glare. Darker walls can also boost contrast, making colors pop more vividly. Meanwhile, light-colored or textured surfaces can scatter light, dulling the image and reducing detail. Keep in mind that the angle of projection matters too. If you’re projecting at an awkward angle or onto an uneven surface, the picture can appear skewed or blurry. Adjusting the projector’s placement and ensuring it’s level will help produce a more professional-looking image. Proper projection surface selection is essential for achieving optimal image quality.
Furthermore, understanding how ambient light interacts with your projection setup can help you optimize your viewing environment. In essence, even if your projector and screen are exceptional, the environment around them matters just as much. The lighting conditions influence how much of the projected image you can see clearly, while the room layout determines how well the projector’s light interacts with surfaces and furniture. Creating a space with controlled lighting environment can drastically enhance your viewing experience. Also, considering factors like furniture placement can help prevent shadows and glare from interfering with the image. By controlling ambient light, arranging furniture thoughtfully, and positioning your projector correctly, you’ll maximize the full potential of your gear and enjoy sharper, more vibrant images every time.

Pyle 72-Inch Manual Pull Down Projector Screen, Matte White Projection Surface, Ceiling or Wall Mount Screen Projector with Auto-Lock & Black Border for Home Theater or Office (42.5" x 56.6")
SMOOTH PULL-DOWN OPERATION – This projector screen pull down system has an auto-locking mechanism that easily adjusts to…
As an affiliate, we earn on qualifying purchases.
As an affiliate, we earn on qualifying purchases.
Frequently Asked Questions
How Does Room Color Affect Projector Image Quality?
Room color considerably impacts your projector image quality by affecting color contrast and wall reflections. Light-colored walls can reflect more light, causing glare and washing out the image, while darker walls absorb excess light, enhancing contrast and clarity. To optimize your viewing experience, choose a room with neutral or dark walls, and minimize reflective surfaces. This setup helps your projector display sharper images with richer colors, making your viewing more enjoyable.
Can Ambient Noise Impact Viewing Experience?
Ambient noise can definitely impact your viewing experience, especially if sound interference disrupts focus. When loud sounds or echoes occur, they distract you from the visuals. Acoustic treatments, like foam panels or rugs, help absorb sound and reduce noise distractions, creating a more immersive environment. Coincidentally, a quieter room enhances both audio clarity and image perception, making your movie nights more enjoyable and engaging.
What Role Does Room Humidity Play?
Room humidity levels greatly influence your projector’s image quality because moisture impact can cause fluctuations in air density, affecting light transmission. When humidity is too high, moisture can create a haze or reduce contrast, making images look dull. Conversely, low humidity can lead to static buildup and dust, which also hampers clarity. Maintaining ideal humidity levels guarantees clearer images, smoother projection, and an overall better viewing experience.
How Does Seating Arrangement Influence Image Perception?
Seating arrangement greatly influences your image perception because proper viewer positioning and seating ergonomics guarantee you’re aligned with the projector’s ideal angle. When you sit directly in the center or at the right height, you experience less distortion and glare, making images appear clearer and more vibrant. Experimenting with your seating setup can reveal how small adjustments improve your viewing experience, proving the importance of strategic seating for the best projector image quality.
Do Wall Textures Affect Image Clarity?
Wall textures and finishes definitely impact your projector image clarity. Smooth wall finishes, like matte paint or flat sheen, help diffuse the light evenly, resulting in sharper images. Conversely, textured walls or glossy paint sheens can cause light reflections and distortions, reducing clarity. So, for the best picture, choose a flat or matte wall finish with minimal texture, ensuring your projector’s image remains crisp and vibrant across the room.

HERHOTER Galaxy Projector,Star Projector with Timer and Remote Control for Adults Bedroom Decoration, Party,Star Night Light
【Galaxy Projector】LED red, green, blue and stars, multiple color mix for your choice, project the star projector onto…
As an affiliate, we earn on qualifying purchases.
As an affiliate, we earn on qualifying purchases.
Conclusion
Think of your room as a canvas where light and space dance together. When the ambiance is just right—dim enough, with minimal glare and proper setup—the projector’s image blooms like a vibrant painting coming to life. Even with similar gear, the room’s vibe shapes the display’s magic. So, tweak the environment, and watch your space transform into a theater where images shine brighter, sharper, and more mesmerizing—turning everyday walls into a window to another world.

BAISHUN Projector Stand, Wall and Mini Ceiling Mount with 1/4-Inch Thread, 360-degree Rotation, Adjustable Tilt & Swivel, Foldable, Easy Setup Compatible with Most Projectors for Home, Office
Stable & Durable: High-quality metal, supports up to 4.4 lbs (2 kg), this wall mount delivers strong stability….
As an affiliate, we earn on qualifying purchases.
As an affiliate, we earn on qualifying purchases.

NothingProjector ALR Screen for Ultra Short Throw Projector, 95% Ambient Ceiling Light Rejecting, 120 inch, 4K/8K UHD, Active 3D, Fixed Frame 16:9, Wall Mount Anti Daylight UST, Black Series NothPJ
Fixed Frame 4K Ultra HD: This high-performance screen is tailor-made for HD and 4K Ultra Short Throw content….
As an affiliate, we earn on qualifying purchases.
As an affiliate, we earn on qualifying purchases.