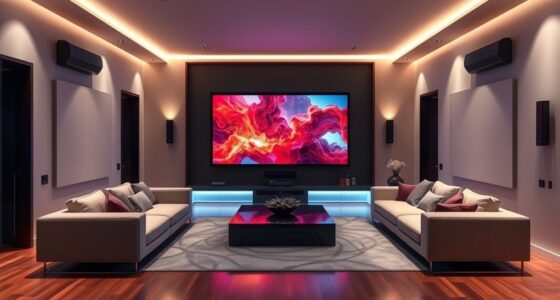
To set up a universal remote for your projector system, start by entering programming mode following your remote’s manual, then choose a code entry method such as manual input or auto-search. Make sure the remote supports your projector brand to avoid compatibility issues. Test each function like power and volume, and reprogram if needed. Proper setup simplifies control. Keep going, and you’ll discover detailed steps to make your system work perfectly.
Key Takeaways
- Enter programming mode on your universal remote using the designated buttons.
- Use auto-search or manually input device codes to find compatible projector settings.
- Test all projector functions after programming to ensure proper control.
- Confirm the remote supports your projector brand and model before setup.
- Program multiple devices carefully to control both the projector and other AV equipment seamlessly.
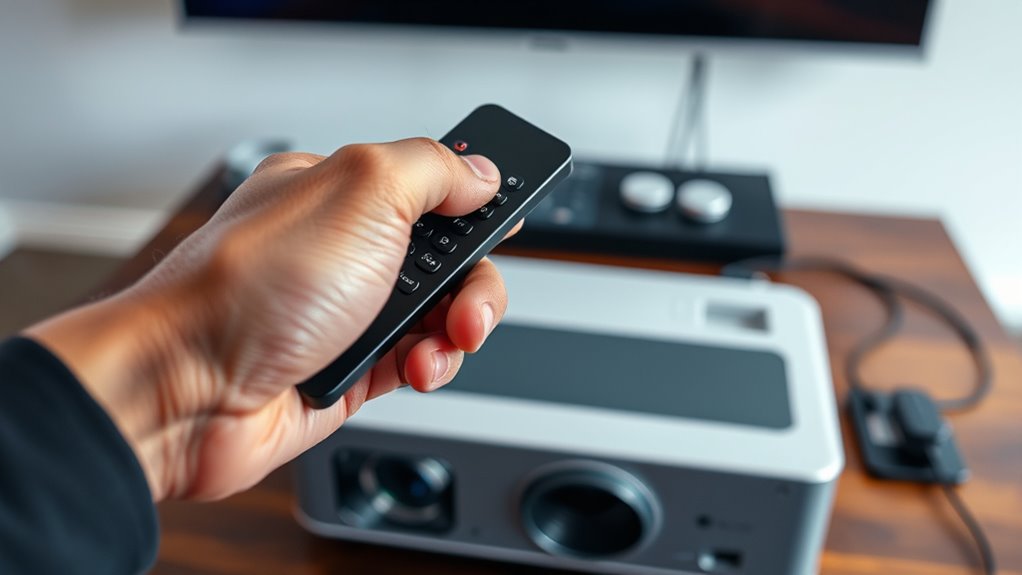
A universal remote for your projector system simplifies control by replacing multiple remotes with a single device. When you decide to set up your remote, the first step involves remote programming, which can seem intimidating at first, but it’s straightforward once you understand the process. Typically, you’ll need to turn on your universal remote and put it into programming mode, often by pressing a specific button or combination of buttons. Many remotes come with a code list or an auto-search feature that scans for compatible devices. You’ll either manually enter a code from the list or let the remote search through available options until it finds one that works with your projector. This process is vital because it guarantees your remote can communicate properly with your projector, allowing you to control power, input selection, and other functions seamlessly. Understanding remote compatibility is crucial, as not all remotes support every device model or brand.
A universal projector remote simplifies control by replacing multiple remotes through easy programming and compatibility checks.
Compatibility issues are a common concern during setup. Not all universal remotes support every projector brand or model, so it’s essential to verify compatibility before purchasing or attempting to program your remote. Some remotes are designed for broader compatibility, covering many brands, while others are more limited. If you encounter difficulties during remote programming, it might be due to compatibility issues. In such cases, you can consult the remote’s instruction manual or the manufacturer’s website to check whether your projector is supported. If your remote isn’t compatible, you might need to consider a different model that lists your projector brand among its supported devices or look for a universal remote with an extensive code database.
Once you’ve successfully programmed your remote, testing all functions confirms everything is working properly. Try turning the projector on and off, changing input sources, adjusting volume, and navigating menus. If some features don’t respond, you might need to repeat the programming process with different codes or perform an auto-search again. Keep in mind that some remotes allow for multiple device setups, meaning you can control your projector along with other devices like your sound system or Blu-ray player, further streamlining your entertainment experience.
Setting up a universal remote requires patience during remote programming and awareness of potential compatibility issues. By following the correct procedures and confirming device support, you’ll enjoy the convenience of controlling your projector with just one remote. Once configured properly, you won’t have to juggle multiple remotes or struggle with confusing button layouts. Instead, you’ll have a simple, efficient way to operate your projector system, making your viewing experience more enjoyable and less cluttered.

Original Replacement Remote Control for HY320/300Pro Projector & Gimbal 3/5 – Universal Compatible with Magcubic/Xgody/Aubor/Maypug/HIPPUS/Mentech/LYNCAST Projectors, Infrared IR Remote with Buttons
✪【Precise Compatibility】 "Designed EXCLUSIVELY for HY300Pro Projector & Gimbal 3/5 models, 100% signal sync with Magcubic/Xgody/Aubor/Maypug/HIPPUS/Mentech/LYNCAST systems. ★Avoid…
As an affiliate, we earn on qualifying purchases.
As an affiliate, we earn on qualifying purchases.
Frequently Asked Questions
Can I Program a Universal Remote Without the Original Remote?
Yes, you can program a universal remote without the original remote by using remote programming codes or auto-search functions. First, check your remote’s compatibility with your device to guarantee it supports your projector system. Then, follow the manual’s instructions to enter device codes or let the remote automatically search for the right one. This process allows you to control your projector without needing the original remote.
What Should I Do if the Remote Doesn’T Recognize My Projector?
Is your remote playing hard to get? First, try troubleshooting signals by replacing batteries and ensuring no obstructions. If it still doesn’t recognize your projector, you might need to re-pair the remote. Access the remote’s pairing mode, then follow your projector’s specific instructions. Sometimes, a simple reset or manual code input can do the trick, turning frustration into victory in your remote setup.
Are There Universal Remotes Compatible With All Projector Brands?
Not all universal remotes are compatible with every projector brand, but many offer wide brand coverage. Look for remotes labeled as having broad remote compatibility, which typically support multiple projector brands. Check the product specifications to verify it works with your specific brand. If you want the best chance of compatibility, choose a remote designed for extensive brand coverage, reducing the need for multiple remotes or complicated setup.
How Long Does It Typically Take to Set up a Universal Remote?
The programming process for a universal remote usually takes about 15 to 30 minutes, depending on the remote and your system. You’ll need to follow the setup instructions, which often involve entering codes or using auto-search features. The setup duration can be quicker if your remote has a learning function or if the device is already pre-programmed. Be patient, and you’ll have your projector system ready in no time.
Can I Control Multiple Devices With One Universal Remote?
Imagine your universal remote as a master key, opening doors to multiple devices. Yes, you can control several gadgets with one remote, thanks to its device compatibility. Just immerse yourself in remote programming, select each device’s code, and you’ll orchestrate your entertainment system effortlessly. With patience and a few clicks, your remote becomes a conductor, harmonizing your projector, TV, and sound system into one seamless symphony.
Original Replacement Remote Control for HY320/300Pro Projector & Gimbal 3/5 – Universal Compatible with Magcubic/Xgody/Aubor/Maypug/HIPPUS/Mentech/LYNCAST Projectors, Infrared IR Remote with Buttons
✪【Precise Compatibility】 "Designed EXCLUSIVELY for HY300Pro Projector & Gimbal 3/5 models, 100% signal sync with Magcubic/Xgody/Aubor/Maypug/HIPPUS/Mentech/LYNCAST systems. ★Avoid…
As an affiliate, we earn on qualifying purchases.
As an affiliate, we earn on qualifying purchases.
Conclusion
Now that you’ve set up your universal remote, controlling your projector system becomes as effortless as waving a magic wand. No more scrambling for multiple remotes or losing track of buttons—your perfect cinematic experience is just a press away. With your remote in hand, you’re the master of your entertainment universe, turning your space into a theater that shines brighter than a thousand suns. Get ready to sit back, relax, and enjoy the show like never before!

RCA 3-Device Palm-Sized Universal Remote, Long Range IR, Replaces Most Major Remote Brands, Designed for Comfort, RCR503BE
Controls Up To 3 Devices, Replaces and Consolidates Most Major Remote Brands, Simplifies Device Setup With Automatic, Manual…
As an affiliate, we earn on qualifying purchases.
As an affiliate, we earn on qualifying purchases.

Universal-TV-Remote-Control Compatible with Samsung/LG/Vizio/TCL/Hisense/Sony/Philips/Onn/Sharp/Element/Westinghouse/Sanyo/Emerson TV and More Brand Smart TVs
【Compatible Devices】Universal replacement remote control is compatible with TV brands for Samsung, LG, Vizio, Sony, Hisense, Onn, Sharp,…
As an affiliate, we earn on qualifying purchases.
As an affiliate, we earn on qualifying purchases.
![[Invitation] Galaxy Unpacked July 2026: A New Shape Unfolds](https://4kprojectorguide.com/wp-content/uploads/2026/07/invitation-galaxy-unpacked-july-2026-a-new-shape-unfolds-featured-260x140.jpg)