
To repair broken mount brackets safely, first assess the damage and gather the right tools and replacement parts. Before starting, make certain your work area is safe by removing hazards and wearing safety gear like gloves and goggles. Carefully remove the damaged bracket, then select a compatible, high-quality replacement. When installing, double-check alignment, tighten fasteners securely, and test stability before fully securing everything. Following these steps helps you avoid accidents and achieve a lasting repair—continue to learn how for detailed guidance.
Key Takeaways
- Assess the damage and determine if the bracket can be repaired or needs replacement before starting.
- Ensure the work area is safe by removing hazards and wearing appropriate safety gear.
- Carefully remove the damaged bracket, keeping hardware for reuse or selecting compatible replacements.
- Properly position, mark, and securely fasten the new bracket using suitable fasteners and tools.
- Test the stability of the mounted item before final tightening to confirm safe and secure repair.

2Pack N7192 Bi-Fold Door Repair Bracket Kit, Folding Closet Door Hardware for 1-3/8 Inch Wood Doors, Fits 7/16" Pivot Pin, Top or Bottom Mount Steel Brackets
Heavy-Duty Steel Brackets – Made from stamped steel for strong support and long-lasting durability, preventing door panel splits.
As an affiliate, we earn on qualifying purchases.
As an affiliate, we earn on qualifying purchases.
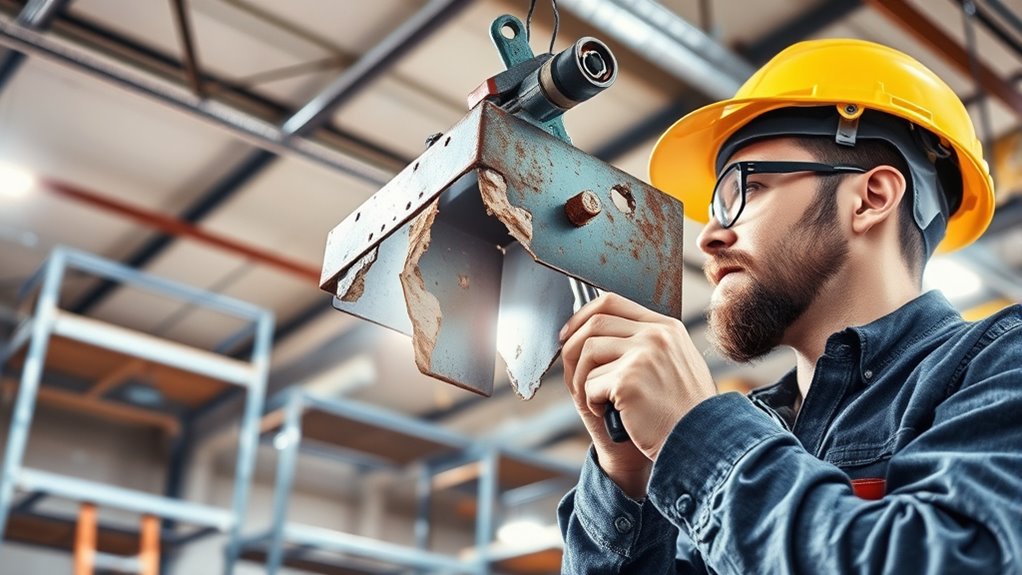
Assessing the Damage and Gathering Necessary Tools
Before you begin repairing the broken mount brackets, you need to assess the extent of the damage and gather the right tools. Start by identifying the mount bracket types involved—whether they’re wall-mounted, ceiling-mounted, or adjustable—so you can choose appropriate repair methods. Look for damage indicators such as cracks, bending, rust, or looseness, which reveal the severity of the issue. These signs help determine if the bracket is salvageable or needs replacement. Gather essential tools like a screwdriver, pliers, replacement brackets, and possibly a level or drill. Proper assessment ensures you understand what’s needed, preventing further damage and making the repair process smoother. Being thorough now saves you time and effort later. Additionally, understanding automation in business can help you choose the most effective repair techniques and tools.

VIVO Vertical VESA Extender Plate Bracket Kit Designed for Low VESA Pattern TV’s, Fits TV Ceiling Mounts, 2 Brackets, Black, MOUNT-AD165
VIVO Adapter Solutions – Please be sure and check the mount compatibility before ordering. These extenders are designed…
As an affiliate, we earn on qualifying purchases.
As an affiliate, we earn on qualifying purchases.
Ensuring Safety Before Starting Repairs
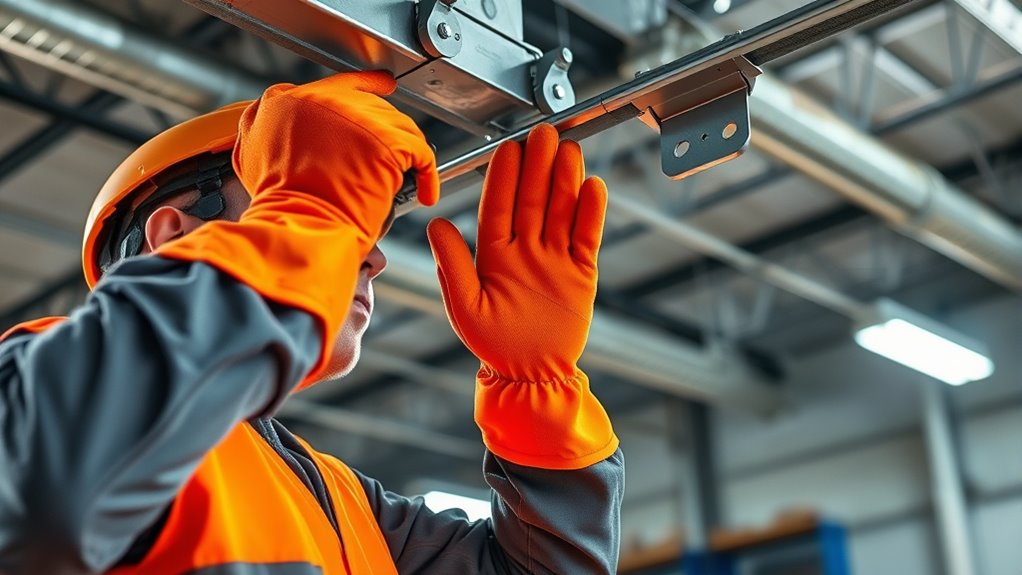
Before you begin repairs, make sure to carefully inspect your work area for hazards. Gather all necessary safety gear, like gloves and goggles, to protect yourself. Also, verify that the structure is stable enough to work on safely. Ensuring proper projector setup can help prevent accidents and facilitate easier repairs.
Inspect Work Area Carefully
To guarantee safety before beginning repairs, carefully inspect the work area for potential hazards. Look for electrical safety issues, such as exposed wires or faulty outlets, that could pose risks during your work. Check for environmental hazards like loose debris, water, or slippery surfaces that could cause falls or accidents. Remove clutter and secure loose objects to prevent trips or falls. Ensure proper lighting so you can see all hazards clearly. Be mindful of any nearby power sources or equipment that might accidentally activate. Taking these precautions helps you identify and mitigate risks before starting repairs, reducing the chance of injury or damage. Conducting a risk assessment can further help identify potential dangers specific to your work environment. A thorough inspection sets the foundation for a safe, efficient repair process.
Gather Necessary Safety Gear
Ensuring you have the right safety gear is essential for protecting yourself during repairs. You want to avoid injuries from debris, sharp tools, or accidental slips. Always wear safety goggles to shield your eyes from dust and flying particles. Work gloves protect your hands from sharp edges and rough surfaces. Here’s a quick list:
| Safety Gear | Purpose |
|---|---|
| Safety goggles | Protect eyes from debris |
| Work gloves | Guard hands against cuts |
| Dust mask | Prevent inhalation of dust |
| Sturdy footwear | Avoid foot injuries |
Using proper safety gear helps you stay safe and focused, reducing the risk of accidents. Always double-check your gear before starting repairs to ensure full protection. Additionally, understanding protective styling benefits can help you choose the safest options for your maintenance tasks.
Verify Structural Stability
Checking the structural stability of the mount bracket area is an essential step before starting any repairs. You need to assess whether the surrounding wall or support structure can handle the load capacity without risk of further damage or collapse. Examine the brackets and nearby surfaces for signs of wear, cracks, or looseness that could compromise the structural integrity. Use a level or plumb line to ensure proper alignment, and test the stability by gently applying pressure. If you notice any weakness or instability, avoid proceeding until repairs or reinforcement are completed. Verifying the load capacity and overall stability helps prevent accidents and guarantees your repair work is safe and effective. Prioritizing this step protects you and guarantees the longevity of the repaired mount. Additionally, understanding the structural integrity of the support area helps ensure that your repairs will last and prevent future issues.

DEWALT DPG82-11 Concealer Clear Anti-Fog Dual Mold Safety Goggle, Clear Lens, 1 Pair
DEWALT ToughCoat hard coated lens provides tough protection against scratches.
As an affiliate, we earn on qualifying purchases.
As an affiliate, we earn on qualifying purchases.
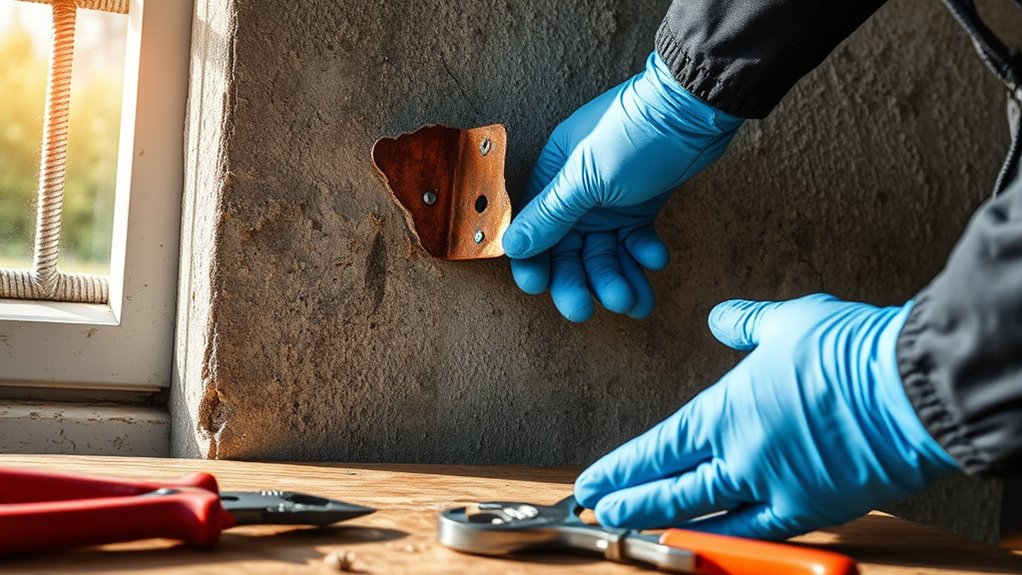
Removing the Damaged Mount Bracket
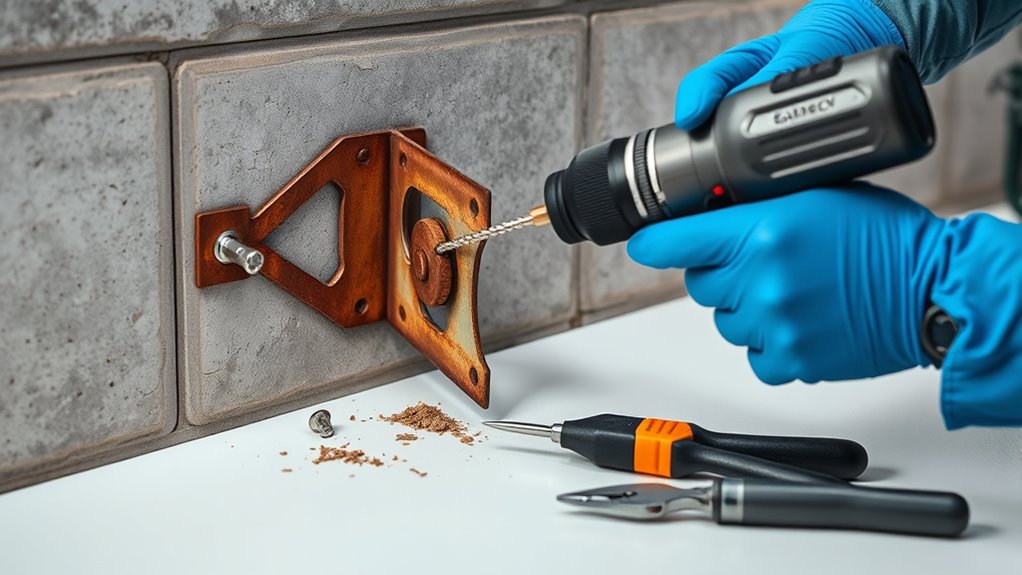
When removing a damaged mount bracket, start by disconnecting any attached components and preparing your workspace. This guarantees safety and makes the repair process smoother. Use a wrench or screwdriver to carefully loosen and remove bolts or screws securing the mount bracket. Keep track of all hardware for reinstallation. Be mindful of rust or corrosion that could complicate removal. To make the process easier, consider applying penetrating oil to stubborn bolts. Additionally, inspecting the integrity of the surrounding area helps identify potential issues that could affect the repair.

XIOOHXBS Electric Screwdriver 3.6V,Mini Cordless Power Screwdriver Set, Precision Bits with 250 RPM Powerful Motor,LED Lights,Portable Toolbox for Electronics Appliances Repairs
Precise Torque:This power screwdriver delivers 2 N.m of electric torque and 8 N.m of manual torque, providing precision…
As an affiliate, we earn on qualifying purchases.
As an affiliate, we earn on qualifying purchases.
Selecting the Correct Replacement Parts
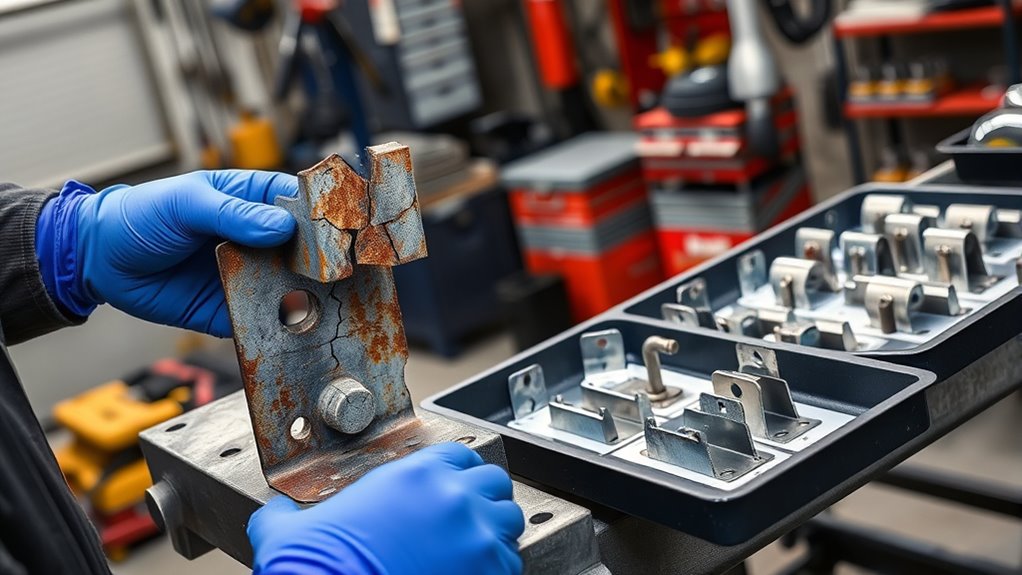
Choosing the right replacement parts is essential to guarantee your repair is durable and safe. First, verify material compatibility with your existing mount bracket and wall or surface. Using mismatched materials can compromise strength and lead to future damage. Check the manufacturer’s specifications to find the correct type and size of brackets and hardware. Cost considerations also play a role—while cheaper parts might seem appealing, investing in quality ensures longevity and safety. Avoid cutting corners by selecting inexpensive components that may wear out quickly or fail under stress. Carefully compare options, considering both durability and price. Additionally, material compatibility is crucial to prevent corrosion or failure over time. By choosing the correct parts that match your setup and fit your budget, you set a solid foundation for a successful, long-lasting repair.
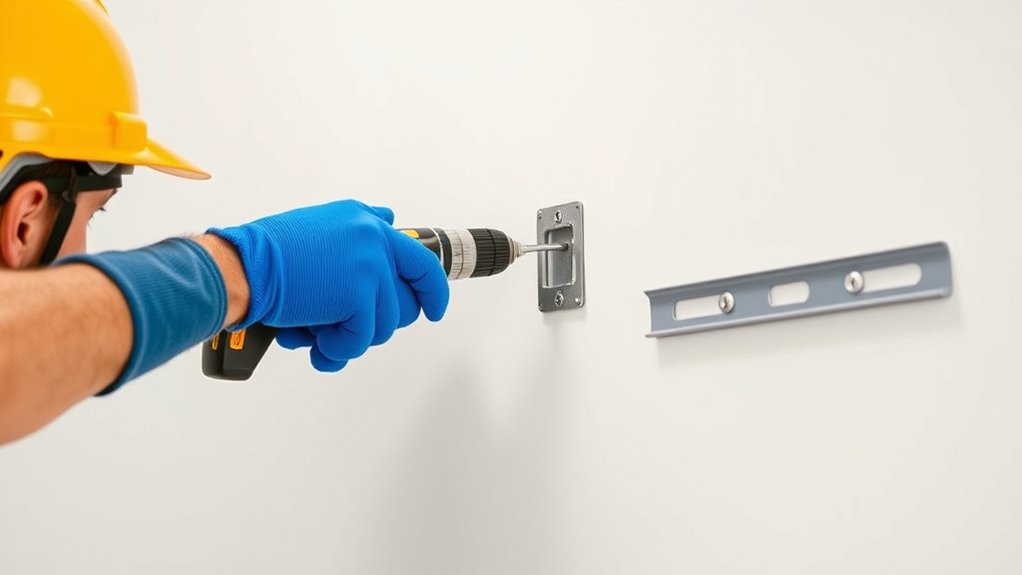
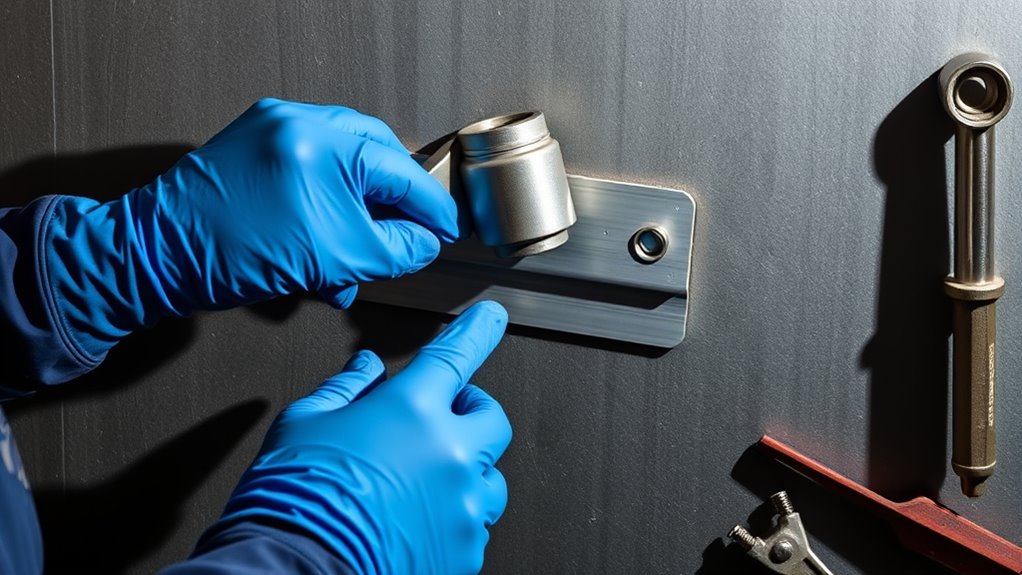
Properly Installing the New Mount Bracket
To guarantee your new mount bracket stays secure, start by verifying the mounting surface is strong and even. Next, carefully align the bracket so it sits correctly before attaching it. Finally, use the appropriate fasteners to firmly secure everything in place. Monitoring the installation process ensures that the bracket remains properly secured, reducing the risk of accidents or damage.
Secure Mounting Surface
Ensuring the mounting surface is secure is essential for a stable and safe installation. Before attaching your new mount bracket, check that the surface is solid, clean, and free of debris. Proper surface preparation guarantees the mounting surface can support the weight and prevent future issues. If the surface is damaged or uneven, repair it with appropriate materials to create a flat, sturdy base. Use a level to confirm the surface is even, which helps in aligning the bracket correctly. Consider using anchors or screws suited to your wall type for added support. A well-prepared surface reduces the risk of the bracket loosening or failing over time. Remember, a secure mounting surface is the foundation of a safe and effective repair. To ensure long-term stability, verify the self-watering plant pot system’s placement and support structure before finalizing the installation.
Aligning the Bracket Precisely
Properly aligning the mount bracket is essential for a secure and effective installation. Use precise alignment techniques to guarantee the bracket sits flush against the mounting surface. Start by placing the mount bracket in its intended position and checking for levelness with a spirit level. Mark the screw holes carefully, making sure they’re evenly spaced and aligned. Double-check the position before drilling to avoid misalignment. When attaching the bracket, tighten the fasteners gradually, ensuring it remains straight. Accurate alignment prevents future issues like uneven weight distribution or mounting failure. Take your time during this step, as proper positioning now guarantees the stability and safety of your mounted item. Correct alignment is key to a professional, long-lasting repair. Regularly assessing your workspace for clutter buildup ensures ongoing organization and safety.
Using Correct Fasteners
Choosing the right fasteners is essential to securing your mount bracket firmly in place. You need to select the correct fastener types to ensure safety and stability. Use mounting hardware that matches the weight and material of your surface. Proper fasteners prevent the bracket from loosening or falling.
Consider these tips:
- Use stainless steel or corrosion-resistant fasteners for durability.
- Match the fastener size and thread type to the mounting holes.
- Select appropriate anchors if mounting on drywall or hollow surfaces.
Ensuring you have the correct fastener types guarantees a secure fit and reduces the risk of damage. Always double-check that your hardware is rated for the load and compatible with your surface. Proper installation with the right mounting hardware is key to a safe, long-lasting repair.
Testing the Repair and Securing the Fixture
Before fully securing the fixture, it’s essential to test the repair to confirm everything is stable. Begin by gently applying pressure to check the mount bracket compatibility, ensuring it holds firmly without wobbling or shifting. Conduct fixture testing by lightly operating or moving the mounted item to observe its stability. If the bracket feels secure and the fixture remains steady, you can proceed to tighten all fasteners fully. If you notice any looseness or instability, re-evaluate your repair—perhaps the bracket isn’t compatible or needs additional reinforcement. Remember, testing the repair thoroughly helps prevent future issues and guarantees safety. Only after confirming that the mount bracket is compatible and the fixture testing shows no movement should you finalize the securing process.
Frequently Asked Questions
How Can I Prevent Future Damage to Mount Brackets?
To prevent future damage to your mount brackets, you should regularly perform mount bracket maintenance, inspecting for signs of wear or corrosion. Implement preventive measures like ensuring proper weight distribution and avoiding overloading. Keep the brackets clean and tight, and replace any worn or damaged parts promptly. Consistent inspections and proper maintenance help prolong the brackets’ lifespan, reducing the risk of unexpected failure and ensuring safety over time.
Are There Specific Safety Gear Recommendations for Bracket Repairs?
Imagine stepping into a battlefield where safety gear is your armor. When repairing brackets, you should wear personal protective equipment like gloves, goggles, and ear protection to shield against flying debris and sharp edges. Prioritize power tool safety by using eye protection and ensuring tools are in good condition. This armor keeps you safe, letting you focus on your task without fear of injury. Stay protected, stay vigilant.
What Are Signs of Hidden Structural Issues Affecting the Bracket?
You should look for signs of hidden structural issues like hairline cracks that aren’t visible at first glance, as well as rust corrosion around the bracket’s mounting area. These indicators suggest underlying damage that could weaken the support. Regularly inspect for discolored or flaky rust, and tap gently to detect any hollow sounds indicating internal cracks. Addressing these problems early helps prevent serious failure or accidents.
Can I Repair the Bracket if I Lack Some of the Tools?
Did you know about 60% of DIY repairs go wrong due to lacking proper tools? If you don’t have the necessary tools, it’s best to avoid attempting the repair yourself. Relying on tool alternatives can be risky and lead to poor results or safety hazards. Instead, consider borrowing tools, renting, or hiring a professional. Doing so guarantees your repair is safe, effective, and long-lasting, preventing potential mishaps.
How Long Should a Repaired Mount Bracket Last Under Normal Use?
A repaired mount bracket typically lasts several years under normal use, but its durability depends on the quality of the repair and how well you follow safety protocols. If you use proper materials and techniques, you’ll maximize repair longevity. Keep in mind that compromised mount durability may lead to earlier failure, so regularly inspect your repair and avoid overloading the bracket to ensure it remains dependable for years to come.
Conclusion
Now that you’ve carefully repaired your mount bracket, imagine the sturdy fixture standing tall again, a silent guardian safeguarding your space. By following each step, you’ve not only restored function but also built confidence in your skills. Remember, safety is your guiding star, illuminating every move. With patience and attention, you’ve transformed a broken piece into a reliable part of your home. Your effort has turned a potential mess into a masterpiece of DIY resilience.