To sharpen your projector image, start by ensuring it’s properly aligned and centered on the screen, adjusting the tripod or mounting to prevent keystone distortion. Use the focus ring to manually fine-tune sharpness, and check that the projector settings match the recommended resolution. Cleaning the lens with a soft cloth can also improve clarity. If you keep experiencing blurriness, there may be internal issues or settings to explore—continue to uncover more solutions.
Key Takeaways
- Ensure the projector is properly aligned and centered to prevent skewed images and improve focus.
- Clean the lens gently with a soft cloth and check for any dirt or smudges that cause blurriness.
- Adjust the focus ring manually to sharpen the image and fine-tune the lens position as needed.
- Match the projector’s display settings and resolution with recommended specifications for optimal clarity.
- Verify the projection distance and throw ratio to ensure the projector is positioned correctly for a crisp image.

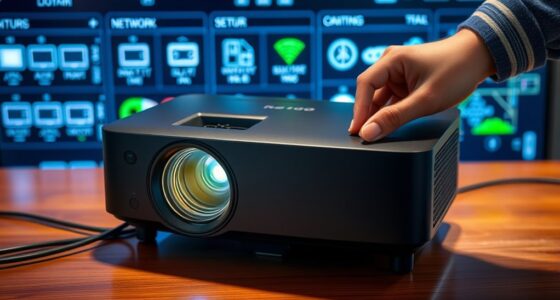
A blurry projector image can be frustrating, especially when you’re trying to enjoy a movie or deliver a presentation. The good news is that most issues with image sharpness can be fixed with a few simple adjustments. First, you should check the projection alignment. If your projector isn’t properly aligned with the screen, the image can appear distorted or blurry. Make sure the projector is square to the screen and that the lens is centered. Adjust the tripod or mounting bracket until the projector streams directly onto the screen without skewing or keystone distortion. Proper projection alignment ensures the image is evenly focused across the entire surface, reducing blurriness caused by misalignment.
Check projector alignment and adjust until the image is sharp and centered.
Next, think about the lens quality. A low-quality or dirty lens can considerably degrade image clarity. If your projector’s lens is dirty, carefully clean it with a soft, lint-free cloth. Avoid harsh chemicals that could damage the lens coating. If the lens itself is of poor quality, upgrading to a higher-quality lens or projector may yield better results, especially if you frequently use your projector for critical tasks like presentations or watching high-definition content. Also, check if your projector has adjustable focus. Sometimes, a simple turn of the focus ring can sharpen the image considerably. Take your time to find the perfect focus point, moving the lens slightly back and forth until the picture appears crisp.
Beyond these adjustments, make sure your projector is set to the appropriate resolution and display settings. Mismatched settings can cause images to appear blurry or pixelated. Consult your projector’s manual for recommended configurations, and consider updating your firmware if available. Additionally, examine the distance between the projector and the screen. If it’s too close or too far, the image may not focus correctly. Use the recommended throw distance specified in your projector’s manual for clarity.
Furthermore, consider the contrast ratio of your projector, as low contrast can also make images seem less sharp and detailed. Finally, if you’ve tried everything and the image still looks blurry, it might be time to think about a professional inspection. Internal lens issues, aging bulbs, or optical component misalignments can cause persistent blur. Addressing these problems early can save you frustration and ensure your projector delivers sharp, clear images every time. By paying attention to projection alignment, maintaining lens quality, and properly configuring your device, you’ll greatly improve image sharpness, making your viewing experience much more enjoyable.
Altura Photo Camera Cleaning Kit – Camera Photography Accessories (Air Blower, Brush, Pen, Lens Cleaner Spray, Microfiber Cleaning Cloths, Tissue Wipes) for Canon Nikon ZR Sigma Tamron Sony Pentax
Must-Have Camera Accessories for Every Photographer: This all-in-one camera cleaning kit is a must-have for all photographers. Designed…
As an affiliate, we earn on qualifying purchases.
As an affiliate, we earn on qualifying purchases.
Frequently Asked Questions
Can Projector Lens Cleaning Improve Image Clarity?
Yes, cleaning your projector lens can improve image clarity. Regular lens maintenance removes dust, smudges, and dirt that cause blurriness. Use a soft, lint-free cloth and proper lens cleaner to avoid scratches. Additionally, guarantee proper optical alignment of the projector components, as misalignment can also reduce image sharpness. By keeping the lens clean and maintaining correct optical alignment, you’ll enjoy clearer, sharper images with better focus.
Does Ambient Light Affect Projector Focus?
Ambient light can dramatically ruin your projector’s focus, making it nearly impossible to get a sharp image. Even a tiny bit of extra light can cause glare and wash out details, forcing you to constantly tweak the focus adjustment. To keep your picture crystal clear, minimize ambient light as much as possible and double-check your focus adjustment in the ideal, dim environment. This way, your projection stays sharp and vibrant.
How Often Should Projector Bulbs Be Replaced for Optimal Image?
You should replace your projector bulb based on its bulb lifespan, typically every 1,500 to 3,000 hours of use, depending on the model. Regularly checking your projector’s performance helps determine the ideal replacement frequency. If the image starts to dim or flicker, it’s time for a new bulb. Keeping track of hours used ensures you maintain a clear, bright picture and avoid unexpected outages.
Are There Specific Settings for Different Projection Surfaces?
Yes, you should adjust your projector settings based on the projection surface type. For smooth surfaces like white walls, use standard settings for brightness and contrast. For textured surfaces, like fabric or textured walls, lower the contrast and increase brightness to compensate for surface texture considerations. Experiment with these settings to find the most suitable image clarity, ensuring your projector adapts well to different surface textures for the best viewing experience.
Can Using a Projector Screen Enhance Image Sharpness?
Using a projector screen can definitely sharpen your image, as it provides a smooth, reflective surface that enhances clarity. The right screen material, like matte white or high-gain, makes a big difference. Think of it as seeing the world through clear glasses. Also, consider your viewing distance; sitting too close or too far can blur details. Adjust these factors, and you’ll find your image sharper and more vibrant.

【Built-in APPS & Electric Focusing & 210° Rotation】Mini Projector With Wifi And Bluetooth, 1080P Portable Projector, Movie Projector for Bedroom, Supports Smartphones/TV Stick/iPad/PS5/Laptop/HDMI/USB
【The Latest WIFI 6 Technology And Bluetooth 5.3】This projector with Wi-Fi and Bluetooth is equipped with the latest…
As an affiliate, we earn on qualifying purchases.
As an affiliate, we earn on qualifying purchases.
Conclusion
Now that you know how to sharpen your projector’s focus, you’re almost there. But just when you think everything’s perfect, a new challenge might appear—maybe a faint ghosting or unexpected distortion. Don’t worry; with a few more tweaks, you’ll master it all. The secret to crystal-clear images lies in your hands. Are you ready to unleash the full potential of your projector and see what’s truly possible? The next step awaits—dive in and discover it.

Kitclub Heat Press Laser Alignment System, Laser Positioning Tool for T-Shirt & Hat Press. Magnetic Guide for Sewing Machine, DTF, Sublimation. Perfect Placement for Printing & Quilting
Precise Cross Laser Positioning: Projects a clear red cross-line for perfect alignment for Quilting, DTF, sublimation, and heat…
As an affiliate, we earn on qualifying purchases.
As an affiliate, we earn on qualifying purchases.

4K Projector Built-in Google TV: 2500 ANSI/Auto Lens Cap & 4D Keystone/Auto Focus & AI Voice Control, Sovboi Smart Portable Projector with WiFi6 & Bluetooth, Outdoor Movie Proyector for Streaming Apps
【Smart Google TV Projector: Unlimited Apps, Zero Restrictions】Elevate your home theater with the Sovboi E30Max. Ditch the external…
As an affiliate, we earn on qualifying purchases.
As an affiliate, we earn on qualifying purchases.