To get the best image in your small room, you need careful calculations for projector placement. Measure your space, consider the throw ratio for the ideal distance, and choose a screen size that fits comfortably. Adjust the projector height and angle to minimize distortion, and use keystone correction wisely to avoid image blurriness. Keep obstructions and shadows in mind to ensure clear visuals. Continue exploring these steps to master your setup and enjoy a perfect projection.
Key Takeaways
- Use the projector’s throw ratio and screen size to accurately calculate the ideal distance for clear, sharp images.
- Measure room dimensions, including ceiling height and obstructions, to determine optimal projector placement.
- Consider room acoustics and furniture placement to minimize sound reflections and shadows that affect image quality.
- Adjust projector height and angle carefully, using keystone correction within limits to prevent image distortion.
- Ensure unobstructed line of sight and proper mounting to maximize image clarity and viewing comfort in small spaces.

Philoent【Google TV Included】Smart Mini Projector, Ultra Short Throw for Big Screen in Small Room, Auto Keystone Portable Proyector with WiFi Bluetooth, Support 4K Movie – Home Theater Bedroom Outdoor
🥇【Instant Full Google TV Access – No Setup Needed】 Experience the complete Google TV ecosystem directly, with no…
As an affiliate, we earn on qualifying purchases.
As an affiliate, we earn on qualifying purchases.
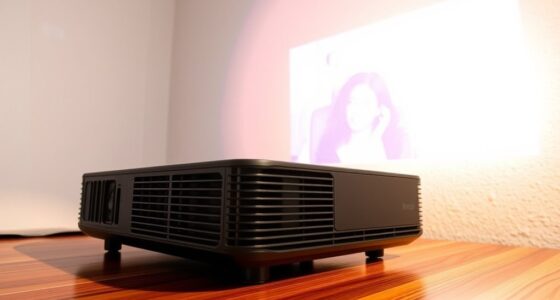
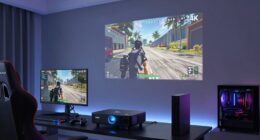
Determining the Optimal Throw Distance for Your Room

Determining the ideal throw distance for your room is essential to achieving a clear, well-sized image without distortion. Your choice depends heavily on your projector’s projection technology, as different models have varying throw ratios. For short-throw projectors, you’ll need to position the device much closer to the screen, which is perfect for small spaces. Conversely, long-throw projectors require more distance but can still fit in tight rooms if placed correctly. Additionally, room acoustics influence your setup; sound reflections and echoes can distract from your viewing experience. To optimize both image clarity and sound quality, measure your space carefully and select a projector with an appropriate throw ratio. This ensures your projection fits the room’s dimensions and enhances overall viewing comfort. Considering how the projector interacts with your room’s layout can also help prevent distortion and misalignment.

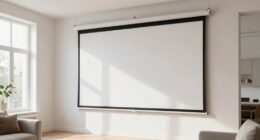
Elite Screens Manual B, 100-INCH Manual Pull Down Projector Screen Diagonal 16:9 Diag 4K 8K 3D Ultra HDR HD Ready Home Theater Movie Office Presentation, M100H
SIZE: 100-INCH Diag. 16:9 Aspect Ratio. View Size 49.2" H X 87.4" W. Overall Size 65.7" H X…
As an affiliate, we earn on qualifying purchases.
As an affiliate, we earn on qualifying purchases.
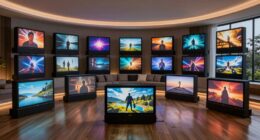
Calculating the Screen Size and Aspect Ratio

To achieve the perfect projection setup, you need to accurately calculate your screen size and aspect ratio. Your screen size depends on your room’s dimensions and how immersive you want your viewing experience. The aspect ratio determines the shape of the image, typically 16:9 for HDTVs or 4:3 for older models. Use the table below to help you select the right combination:
| Screen Size | Aspect Ratio |
|---|---|
| 100 inches | 16:9 |
| 120 inches | 16:9 |
| 80 inches | 4:3 |
| 100 inches | 4:3 |
Choosing the right screen size and aspect ratio guarantees your content fits perfectly without distortion or wasted space, optimizing your small room setup.
![[Compatible with Netflix & TOF Real-time Focus] Mini Projector with WiFi and Bluetooth, XuanPad Silver Smart Projector 4K Support, Dolby Audio & Keystone, 210° Rotatable Stand for Home](https://m.media-amazon.com/images/I/51-EGzGGSlL._SL500_.jpg)
[Compatible with Netflix & TOF Real-time Focus] Mini Projector with WiFi and Bluetooth, XuanPad Silver Smart Projector 4K Support, Dolby Audio & Keystone, 210° Rotatable Stand for Home
[Compatible with Netflix, Instant Access to Global Entertainment] The smart projector Compatible with Netflix & comes preloaded with…
As an affiliate, we earn on qualifying purchases.
As an affiliate, we earn on qualifying purchases.
Measuring the Available Space for Projector Placement
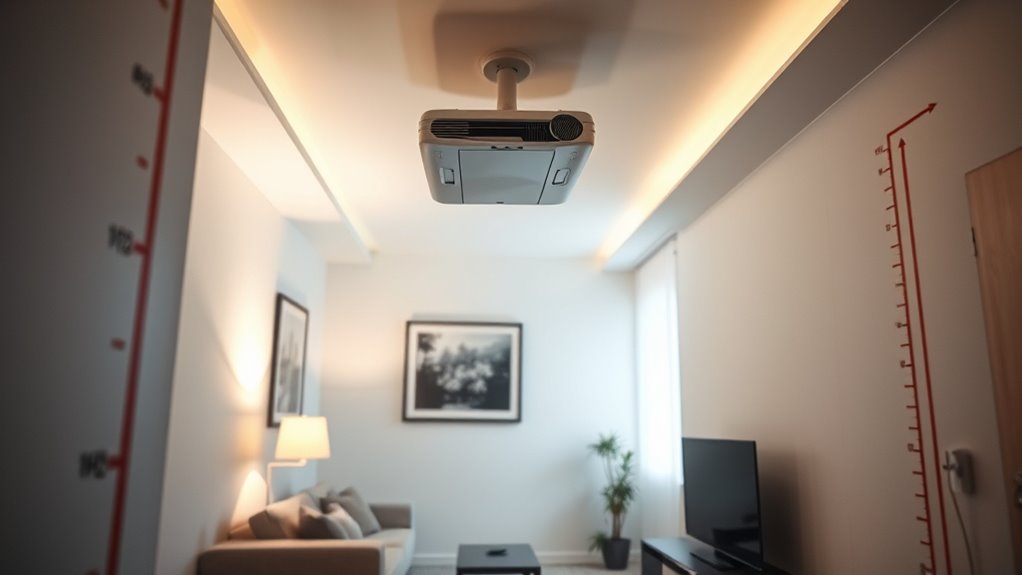
Before setting up your projector, you need to measure the available space between the projector’s intended placement and the screen area. Start by considering the ceiling height, as it influences where you can mount or place the projector. A higher ceiling provides more flexibility, but make sure there’s enough space for proper projection. Next, observe the wall color; a darker wall color reduces light reflection, improving image clarity. Measure the distance from the projector to the screen, accounting for any obstructions or furniture that might block the projection path. Keep in mind that small rooms often have limited space, so precise measurements are vital for the best placement. Taking these factors into account ensures your projector fits well and delivers the best possible image quality. Additionally, understanding the importance of proper projector placement can help you optimize your viewing experience and avoid common setup mistakes.

WALI Mini Foldable Projector Wall Mount with 360° Rotating Gimbal, Fully Adjustable Wall/Ceiling Mount Bracket for 1/4" M4 M6 Screw Projectors, Small Projector Holder up to 4.4lbs (1330LM-PM), Black
Projector Wall Mount: Supports Standard 1/4" (6mm/0.23-Inch) Screws For Projectors, Holds Up To 4.4Lbs, Fits Most Small Projectors…
As an affiliate, we earn on qualifying purchases.
As an affiliate, we earn on qualifying purchases.
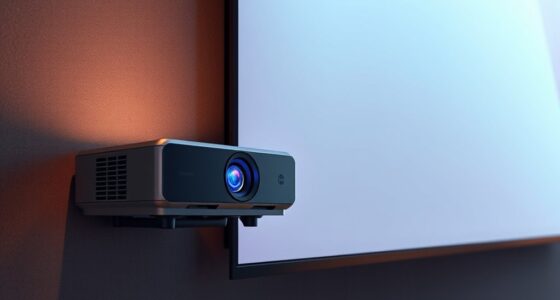
Using the Throw Ratio to Find the Correct Projector Distance

Once you’ve measured the space available for your projector, using the throw ratio helps you find the ideal distance from the projector to the screen. Projection technology varies, so understanding your projector’s throw ratio guarantees you position it correctly for a clear, sharp image. The throw ratio is a simple calculation: multiply the width of your screen by the ratio to get the most suitable distance. This is especially important in small rooms where space is limited. Proper placement also considers room acoustics; a closer projector minimizes sound distortion and echo issues. By accurately applying the throw ratio, you ensure your projector is neither too close nor too far, maximizing image quality and maintaining a comfortable viewing experience. Additionally, knowing the signs of spoilage in your equipment or setup can help maintain optimal performance over time.
Adjusting the Projector Height for a Perfect Image Alignment

To get a clear, sharp image, you need to adjust your projector’s height properly. Find the best mounting height that keeps the image centered and aligned vertically. Small tweaks can make a big difference in achieving perfect picture quality. Additionally, considering the contrast ratio of your projector can help ensure that dark scenes appear detailed and vibrant, enhancing your overall viewing experience.
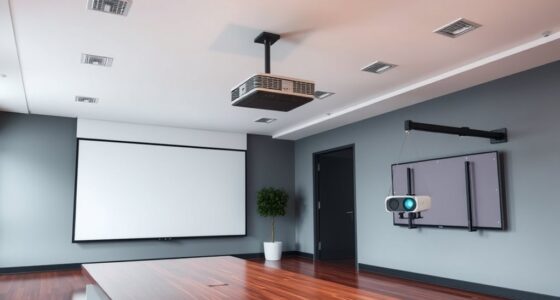
Optimal Mounting Height
Finding the right mounting height for your projector is essential to achieving a perfectly aligned image. When wall mounting, consider your room’s ceiling height to determine the best position. Ideally, the projector should be mounted at a height that aligns the lens with the center of your screen or slightly above it, depending on your throw distance and lens shift capabilities. Measure carefully to avoid tilting or keystone distortion. If your ceiling is high, use a sturdy mount that allows precise adjustments. Keep in mind that mounting too low or too high can affect image quality and ease of setup. Adjusting the height guarantees a clean, professional look and minimizes the need for future corrections. Proper placement makes a significant difference in your viewing experience. UST projector rankings by throw, brightness, color accuracy, and input lag can help inform your mounting decisions for optimal performance.
Ensuring Image Vertical Alignment
Adjusting the projector’s height is key to achieving a perfectly aligned, distortion-free image. Proper vertical alignment ensures your picture isn’t trapezoidal or crooked. Whether you choose ceiling mounting or wall mounting, follow these steps:
- Measure the ideal lens height based on your screen size and projector throw ratio.
- Adjust the ceiling mount or wall mount to match this height, ensuring the projector’s lens is level with the top or center of your screen.
- Use keystone correction sparingly to fine-tune the image, but rely primarily on height adjustments for accuracy.
- Utilizing calculation tools or apps can help determine the correct height and positioning for your specific setup, reducing trial and error.
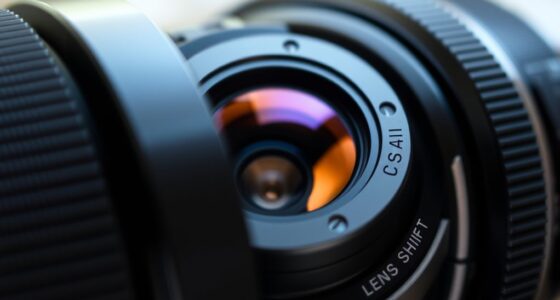
Setting the Projector Angle to Minimize Distortion

Making sure the projector is angled correctly is crucial for minimizing distortion and achieving a clear, square image. The best angle depends on your projector’s lens types and the projection surface materials. Different lens types, like standard, short-throw, or ultra-short-throw, have unique throw ratios that influence how you position your projector. Additionally, the surface material—whether matte or glossy—affects how light is reflected and can impact distortion. To set the right angle, start by aligning the projector so its lens is perpendicular to the center of the screen, avoiding skewed images. Use a level or built-in projector alignment tools to fine-tune the tilt. Properly adjusting the angle ensures minimal keystone effect and keeps your picture geometrically accurate.
Considering Keystone Correction and Its Impact on Placement

Keystone correction helps you fix distorted images when your projector isn’t perfectly aligned, but it has its limits. Overusing it can reduce image quality and sharpness, so you should consider how it affects your setup. Luckily, understanding its impact can give you more flexibility in placing your projector precisely where it works best. Being aware of image distortion caused by keystone correction can help you make better placement decisions and maintain optimal picture quality.
Keystone Correction Limits
While keystone correction can help straighten distorted images caused by off-center projector placement, it has its limitations that can impact your setup. Overusing keystone correction may introduce new issues, such as reduced image quality or unnatural proportions. Keep in mind:
- Excessive correction can cause image blurriness.
- There’s a limit to how much keystone correction can fix severe angle issues.
- Large adjustments may lead to pixelation or loss of sharpness.
- Understanding celebrity lifestyle insights can help you better plan your space and avoid unnecessary corrections.
These limitations mean you shouldn’t rely solely on keystone correction to fix significant placement problems. Instead, aim for minimal correction, positioning your projector as close to ideal as possible. This approach ensures better image quality and avoids unwanted image distortion.
Image Distortion Effects
When you use keystone correction to fix distorted images caused by off-center projector placement, you may inadvertently introduce new image distortion effects. Keystone correction adjusts the image shape but can cause blurriness or pixelation, especially with certain lens types. The distortion impact varies depending on your projection surface, whether it’s a matte wall or a textured screen. Additionally, customer reviews highlight that the choice of projector features can influence how well the correction works and the overall image quality.
Placement Flexibility Gains
Adjusting for image distortion with keystone correction can substantially expand your placement options. This feature allows you to project at angles or from unconventional locations without sacrificing image quality. Here are three key benefits:
- Greater Flexibility: You’re not limited to perfect center alignment, making it easier to find space in small rooms.
- Optimized Room Acoustics: By adjusting projection angles, you can minimize sound reflections, enhancing audio clarity.
- Enhanced Projection Technology Use: Keystone correction compensates for off-axis placement, enabling better use of room dimensions without compromising image sharpness.
This flexibility means you can position your projector more freely, even in tight spaces, without worrying about distortion or poor room acoustics. It makes small room setups much simpler and more effective.
Accounting for Shadows and Obstructions in Small Spaces

Shadows and obstructions can substantially impact your projector’s image quality in small rooms, making it essential to plan carefully. To minimize disruptions, position your projector where ambient lighting won’t cast glare and avoid objects blocking the lens. Consider how furniture and fixtures might cast shadows during viewing times. Acoustic treatment can also help by reducing sound reflections that draw attention away from the image, making it easier to focus despite potential obstructions. Keep pathways clear and choose a mounting spot that avoids interference from light sources or obstructions. Small rooms often amplify shadow issues, so prioritizing a clean, unobstructed line of sight will ensure your image remains sharp and vibrant. Proper planning helps you enjoy a seamless viewing experience without constant adjustments.
Fine-Tuning Focus and Zoom Settings for Clarity

Ensuring your projector is properly focused and zoomed is key to achieving a sharp, clear image in a small room. Start with lens calibration to guarantee the optics are aligned correctly. Then, perform focus adjustment by moving the projector closer or farther from the screen until the image is crisp. Adjust the zoom to fit the image within the screen boundaries without distortion.
Proper focus and zoom adjustments are essential for a sharp, clear image in small rooms.
Here are 3 essential steps:
- Fine-tune lens calibration for ideal image clarity.
- Use focus adjustment to sharpen the picture.
- Modify zoom settings to fill the screen properly.
Taking these steps guarantees your projector delivers maximum clarity, making your viewing experience enjoyable and professional.
Frequently Asked Questions
How Does Room Color Affect Projector Image Quality?
Room color greatly impacts your projector image quality by affecting color contrast and brightness. Light-colored walls reflect more light, making images appear dull, while dark walls enhance contrast and vibrancy. Wall texture also plays a role; smooth surfaces provide clearer images, whereas textured walls can distort or blur projections. To optimize your viewing experience, choose darker, matte walls and smooth surfaces for the best image quality.
What Safety Considerations Are Important for Small Room Setups?
You should prioritize safety when setting up your small room. Make certain your projector wattage isn’t too high to prevent overheating, which could cause hazards. Keep speaker placement away from electrical outlets and cords to avoid tripping or electrical issues. Secure all cables and wires to prevent accidents. Adequate ventilation is essential to avoid overheating, and make sure the setup doesn’t block emergency exits or pathways for safe, comfortable use.
Can Ceiling Mounting Improve Projection in Small Spaces?
Ceiling mounting can improve projection in small spaces by providing better image stability and saving floor space. Make sure your ceiling height accommodates the projector’s throw distance, preventing image distortion. Mounting offers flexibility in positioning, allowing you to optimize the projection angle for clearer visuals. Plus, it keeps your setup neat and reduces the risk of accidental bumps, making it a smart choice for small rooms.
How Do Ambient Light Conditions Influence Placement Decisions?
Ambient light considerably impacts your placement strategy because excessive light can wash out the projection, reducing visibility. To counter this, position your projector away from windows or light sources, or choose a location with controlled lighting. Use blackout curtains or dimmable lights to improve image clarity. Adjusting your placement based on ambient light conditions ensures ideal picture quality, making your viewing experience clearer and more vibrant.
What Maintenance Tips Optimize Projector Lifespan in Tight Spaces?
Did you know that regular maintenance can extend your projector’s lifespan by up to 50%? To keep it in top shape in tight spaces, regularly clean the projector bulb and ensure the cooling system isn’t blocked. Dust buildup can cause overheating, so give it a gentle wipe and check filters frequently. Proper cooling and bulb care prevent premature failures, helping your projector run smoothly and last longer.
Conclusion
Did you know that improper projector placement can reduce image clarity by up to 30%? By carefully calculating throw distance, adjusting height, and considering obstructions, you guarantee a crisp, immersive picture even in small rooms. Remember, taking the time to fine-tune focus and settings makes all the difference. With these quick tips, you’ll maximize your space and enjoy a stunning viewing experience without the need for larger rooms or expensive setups.