
Installing projectors in old houses can be tricky due to delicate walls, historic features, and limited electrical access. You’ll need to choose non-invasive mounting options like adhesive or ceiling brackets and plan wiring carefully to avoid damage. Using wireless projectors and blackout curtains helps improve image quality without altering the charm of your space. Want to discover more about balancing modern tech with preservation? Keep exploring for effective solutions.
Key Takeaways
- Use adhesive or tension mounts and ceiling brackets to avoid damaging delicate walls and preserve architectural details.
- Opt for lightweight, freestanding screens and wireless projectors to minimize invasive installation and wiring.
- Upgrade electrical systems and run cables through existing conduits to ensure safety and maintain historic aesthetics.
- Install dimmable lighting and blackout curtains to improve image quality while respecting the building’s original features.
- Choose compact, unobtrusive equipment and plan installation carefully to balance modern tech needs with historic preservation.

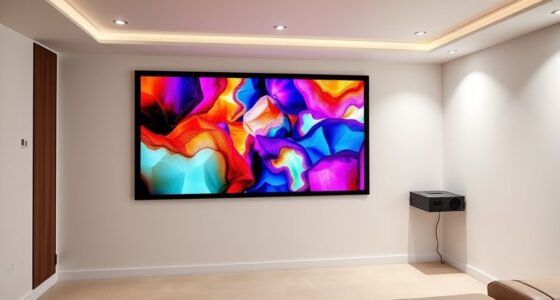
Installing projectors in old houses can be a rewarding challenge that combines modern technology with historic architecture. When you take on this task, you’re balancing the desire to enjoy a state-of-the-art viewing experience with the importance of respecting the building’s historical preservation. Old houses often feature delicate plaster walls, antique woodwork, and unique architectural details that require careful planning to avoid damage. Your goal is to integrate modern technology seamlessly, ensuring that the projector setup enhances the space without compromising its historic charm. This means selecting equipment that’s compact and unobtrusive, and devising installation methods that preserve the integrity of the structure.
Integrating projectors into historic homes requires careful planning to preserve charm while embracing modern technology.
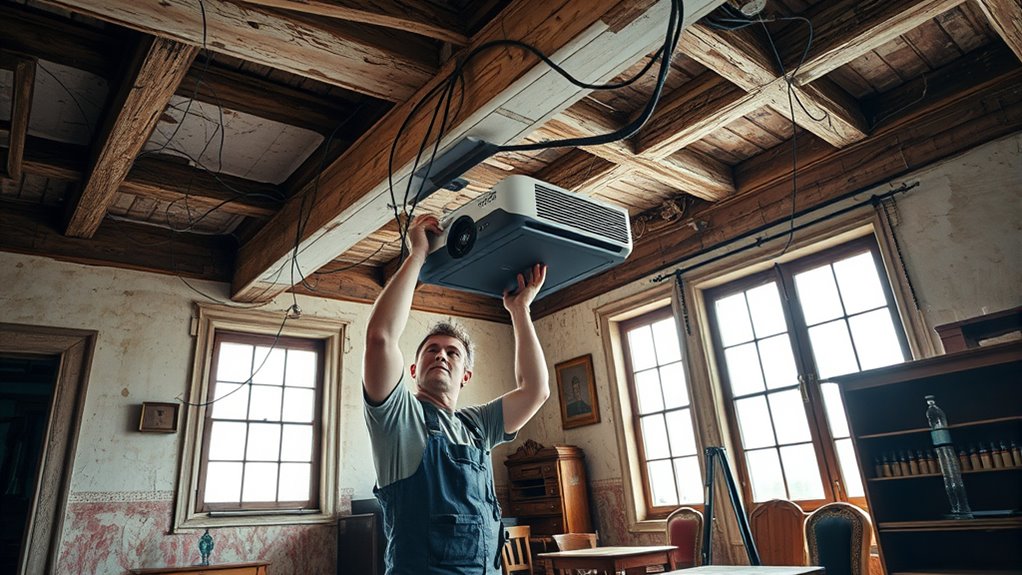
One of the primary challenges is finding suitable mounting solutions that won’t leave permanent marks or damage the walls. Traditional methods, like drilling into plaster or historic brick, can be risky and may undermine the building’s integrity. Instead, you might consider using adhesive mounts or tension-mounted brackets that attach securely without causing harm. Alternatively, you can explore ceiling-mount options that utilize existing structural features or lightweight, freestanding projection screens that can be moved easily. When you work with these solutions, you’re actively engaging in a process of blending cutting-edge technology with a respect for the building’s original design, maintaining its historical value.
Another key consideration is wiring. Old houses often lack the modern electrical infrastructure needed for high-powered projectors. You’ll need to upgrade or adapt the electrical system carefully, ensuring compliance with safety standards while minimizing visible cables. Running wires through existing conduits or attaching them along moldings can keep the setup tidy and less intrusive. Wireless projectors can also be a practical alternative, reducing the need for extensive wiring and allowing for flexible placement. Using wireless tech not only simplifies installation but also preserves the aesthetic integrity of the space, aligning with your goal of honoring the building’s historical preservation. Additionally, considering the contrast ratio of your projector can significantly impact the viewing experience in spaces with uneven lighting.
Lighting control is another essential aspect. Old houses tend to have uneven lighting and limited outlets, so you’ll want to optimize the environment for projector use. Installing dimmable switches or blackout curtains can enhance image quality and viewing comfort. When you approach this with modern technology, you’re creating a functional, immersive experience while respecting the house’s original features. Each step involves careful planning, but the result is a harmonious blend of history and innovation. By thoughtfully integrating these elements, you turn a challenging installation into a satisfying achievement that celebrates both the past and present.

【Official Licensed Google TV】4K Smart Projector with WiFi and Bluetooth, VOPLLS Outdoor Projectors with Dolby/Auto Focus, Portable Movie Phone Wireless Gaming Wifi Proyector for Bedroom/Home/Celling
【Google TV Entertainment Hub: Your All-in-One Streaming Center】 Enjoy instant access to vast streaming content with zero setup—the…
As an affiliate, we earn on qualifying purchases.
As an affiliate, we earn on qualifying purchases.
Frequently Asked Questions
How Do I Hide Projector Wires in Antique Walls?
To hide projector wires in antique walls, you can use cabinet concealment techniques and smart cable management. Install a discreet conduit or raceway along the wall or ceiling to hide the cables, ensuring they blend with the decor. You might also run wires behind crown molding or inside wall cavities if accessible. These methods keep your space tidy and preserve the vintage aesthetic, while maintaining easy access to the projector.
What Are the Best Projector Models for Uneven Surfaces?
You should consider projectors with advanced projection technology like short-throw or ultra-short-throw models, which adapt well to uneven surfaces. Look for ceiling mounting options that allow flexible adjustments, so you can align the image properly despite irregularities. Brands like Epson or BenQ offer models with keystone correction and lens shift features, making them ideal for uneven surfaces in older houses. These tools help guarantee a clear, aligned image even on challenging walls.
How Can I Prevent Damage to Historic Paint During Installation?
To prevent damage to historic paint during installation, you should use preservation techniques like gentle handling and minimal contact. Apply paint-safe adhesives designed specifically for delicate surfaces, ensuring they won’t cause peeling or discoloration. Before installation, test these adhesives on a small, hidden area. Carefully follow manufacturer instructions, and consider consulting a preservation specialist to maintain the integrity of the historic paint while securely installing your projector.
Are There Wireless Options Suitable for Old House Setups?
Think of your old house as a delicate garden needing gentle touch. Wireless streaming and Bluetooth connectivity are like friendly bees, buzzing quietly without disturbing the historic blooms. These options allow you to connect projectors seamlessly, avoiding intrusive wires that might harm vintage walls or paint. With modern wireless solutions, you can enjoy crisp visuals without risking damage, turning your historic space into a tech-savvy yet respectful showcase.
How to Ensure Optimal Projector Alignment in Irregular Ceilings?
To guarantee ideal projector alignment on irregular ceilings, start by measuring the ceiling’s height and angles carefully. Use precise alignment tools like laser levels and adjustable mounts to position the projector accurately. Mark key points with a pencil to guide installation. Double-check the projection angle and focus before finalizing. This approach helps compensate for uneven surfaces and achieves clear, centered images in your old house setup.

Projector Shelf for Wall No Drilling, 15.75" x 7.87" Wooden Shelf Holds Up to 33 lb, Perfect for Projector, Xbox, PS5, DVD Player, Under TV Floating Shelf
【Dimensions】Measuring 15.75" x 7.87", this projector shelf comfortably accommodates Xbox, PlayStation 5, TV remote, projector, and more.
As an affiliate, we earn on qualifying purchases.
As an affiliate, we earn on qualifying purchases.
Conclusion
As you step back and admire your work, you realize that installing projectors in old houses is like stitching new threads into a vintage quilt—challenging yet rewarding. Every crack and creak whispers stories of the past, reminding you that blending old charm with modern tech requires patience and ingenuity. With each hurdle overcome, you’ve woven a seamless tapestry of tradition and innovation, turning an aged house into a mesmerizing new stage for your cinematic dreams.

Portable Projector Screen with Stand Outdoor: Camping Projection Screen 80 inch 4K Movie Screen for Home Backyard Indoor 16:9 HD Night
【Convenient to Carry】The portable projector screen made by lightweight but sturdy aluminum, More suitable for outdoor, indoor, backyard…
As an affiliate, we earn on qualifying purchases.
As an affiliate, we earn on qualifying purchases.

Tubicen LED Wall Sconces Set of 2 Dimmable Home Theater Sconces Beam-Adjustable Up and Down Wall Lights Indoor 6W Black Round Small Wall Sconces for Living Room Bedroom Hallway Stairs Hardwired
【Eye-Catching Accent Wall Light】The Tubicen modern wall sconce blends sleek, contemporary design with exceptional functionality. Its sophisticated up…
As an affiliate, we earn on qualifying purchases.
As an affiliate, we earn on qualifying purchases.