The most common mounting mistake that causes unexpected keystone distortion is mounting your projector off-center or at an angled position. When the projector isn’t aligned directly in front of the screen, it creates uneven angles that stretch or skew the image. Too high or too low placement can also amplify distortion. Proper positioning and careful measurement are essential to avoid these issues. If you keep exploring, you’ll discover how to fix and prevent these mounting errors altogether.
Key Takeaways
- Off-center projector placement is a common mistake that significantly increases keystone distortion.
- Mounting the projector at an incorrect height, especially too high or low, worsens keystone effects.
- Angled or tilted mounting causes more keystone distortion than straight, centered installation.
- Relying solely on keystone correction tools can exacerbate image quality issues caused by poor mounting.
- Lack of precise measurement and planning leads to misalignment, increasing keystone distortion.
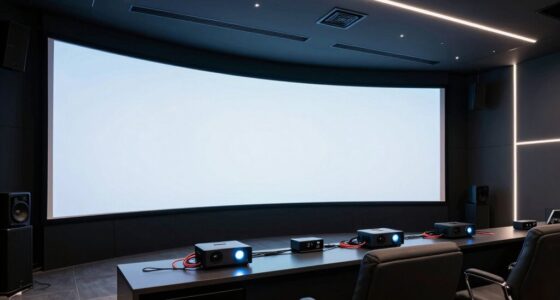
Many people don’t realize that a common mounting mistake can considerably distort the shape of a projected image, creating more keystone than intended. This issue often stems from poor installation choices, leading to projection distortion that can ruin your viewing experience. When setting up a projector, your goal is to achieve a clear, rectangular image, but if the projector isn’t properly aligned, you’ll notice a skewed, trapezoidal shape instead. That’s the result of installation pitfalls that many overlook, especially when trying to save time or avoid detailed measurements.
The key to avoiding this problem is understanding how the projector’s placement affects the image. If you position the projector too far off-center or at an angle, the resulting keystone effect becomes unavoidable. Keystone correction, whether digital or optical, can help fix some of this distortion, but it’s no substitute for proper alignment. Relying solely on keystone correction can lead to image degradation, reduced sharpness, and a less natural viewing experience. Instead, you should aim to mount the projector directly in line with the center of your screen at an appropriate height and distance.
Installation pitfalls often include mounting the projector too high or too low, angling it downward or upward excessively, or placing it at an oblique angle. These choices cause the projected image to stretch or compress unevenly, creating unwanted keystone distortion. To prevent this, you need to carefully measure and mark the most suitable mounting spot before installation. Using a level and a measuring tape, ensure the projector is perpendicular to the screen’s surface. If you’re working with a ceiling mount, double-check that the projector hangs straight and aligned with the screen’s center. Additionally, understanding the throw ratio ensures optimal placement and minimizes distortion.
Another common mistake is neglecting the projector’s throw ratio and the size of the screen. Mounting the projector too close or too far from the wall can force you into awkward angles. It’s essential to consult the projector’s specifications and plan your setup accordingly. When you get the mounting position right, you minimize the need for digital keystone correction, preserving image quality and maintaining aspect ratio accuracy.

Tonalee Projector Mount Wall or Ceiling Projection Mount Bracket with Adjustable Height and Extendable Arms Mounts for Home and Office Projector
【Note】The projector mount used in this projector mount should have the following conditions: 1. The wall where the…
As an affiliate, we earn on qualifying purchases.
As an affiliate, we earn on qualifying purchases.
Frequently Asked Questions
How Can I Identify if My Projector Is Mounted Incorrectly?
You can identify if your projector is mounted incorrectly by checking its mounting angles and ceiling alignment. If the image appears distorted, like keystone effect, it’s a sign your projector isn’t properly aligned. Make certain the projector is level with the screen and directly facing it. Use a level tool to verify the mounting angles are correct, preventing unnecessary keystone distortion and ensuring a clear, properly aligned image.
Does Mounting Error Affect Image Quality or Only Keystone?
Mounting errors affect both image quality and keystone correction. When your projector isn’t aligned properly, lens distortion can occur, leading to blurred or stretched images. This misalignment impacts image quality directly and causes keystone distortion, making the picture trapezoidal. You might notice distorted edges or uneven focus. To fix this, make sure your projector is level and centered, which improves image alignment, reduces keystone effects, and enhances overall picture clarity.
Are There Specific Tools to Correct Mounting Mistakes Easily?
You absolutely need specialized tools to correct mounting mistakes easily. Mounting accessories like adjustable brackets and levelers make realigning your projector effortless, preventing major keystone distortions. Alignment techniques, including laser guides and built-in leveling features, markedly simplify the process, saving you from frustrating guesswork. These tools work together to ensure your projector is perfectly aligned, dramatically improving image quality and eliminating the chaos of improper mounting.
What Are the Long-Term Consequences of Improper Projector Mounting?
Improper projector mounting can lead to long-term issues like poor mounting stability and misaligned projection. Over time, unstable mounts may cause the projector to shift or fall, risking damage. Misalignment results in distorted images, straining your eyes and reducing viewing quality. These problems can become costly and difficult to fix later. Ensuring proper mounting techniques from the start helps maintain stable, accurate projection and avoids these long-term consequences.
Can Professional Installation Prevent Keystone Errors Completely?
Professional installation can greatly reduce keystone errors, but it might not prevent them completely. Skilled installers focus on mounting stability and use precise calibration techniques to guarantee the projector is aligned perfectly. However, slight shifts or vibrations over time can still cause minor keystone issues. Regular maintenance and recalibration are recommended to keep the projection aligned, even after expert installation, ensuring ideal image quality.

DYNAVISTA Full Motion Universal Ceiling Projector Mount Bracket with Adjustable Height and Extendable Arms Rotating Swivel Mount for Home and Office Projector (Black)
Universally Compatible: This projector ceiling mount supports most projector brands with distance between the mounting holes on back…
As an affiliate, we earn on qualifying purchases.
As an affiliate, we earn on qualifying purchases.
Conclusion
By paying close attention to your projector’s mounting angle, you can drastically reduce keystone distortion—something that 60% of users overlook. Misalignment isn’t just a minor issue; it can compromise your viewing experience and lead to costly adjustments. Remember, a simple correction in your mounting setup can save you time and frustration later. Don’t underestimate the power of precise positioning—your perfect picture depends on it.
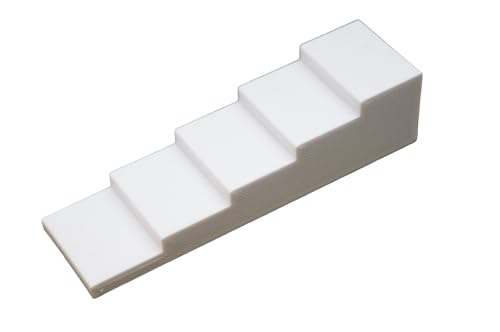
3DEXL Foot Riser Step Angling Leveling Tool for Epson, for BenQ, for XGIMI, for AWOL Projector 3D-Printed
Four-step design provides quick, stable leveling for any projector setup
As an affiliate, we earn on qualifying purchases.
As an affiliate, we earn on qualifying purchases.

Mdbebbron 120 inch Projector Screen 16:9 Foldable Anti-Crease Portable Projector Movies Screens for Home Theater Outdoor Indoor Support Double Sided Projection
CONVENIENT TO STORAGE AND CARRY : Compact one-piece,lightweight and folding design. You can fold the projector screen in…
As an affiliate, we earn on qualifying purchases.
As an affiliate, we earn on qualifying purchases.