To project effectively on sloped walls or ceilings, secure a sturdy, adjustable mount that allows precise positioning. Use your projector’s keystone correction and lens shift features to fix distortions and align images properly. Control ambient lighting and opt for matte surfaces to enhance clarity. Proper placement and calibration are key to achieving a sharp, distortion-free display. If you keep exploring, you’ll discover more tips to master angled projection setups seamlessly.
Key Takeaways
- Use adjustable mounting brackets for secure, flexible projector positioning on sloped surfaces.
- Employ keystone correction and lens shift features to counteract distortion from angled projections.
- Control ambient lighting and choose matte surfaces to enhance image clarity on inclined surfaces.
- Select projectors with high resolution and brightness to improve image quality and compensate for surface angles.
- Carefully calibrate and reposition the projector regularly to maintain image accuracy on sloped walls or ceilings.
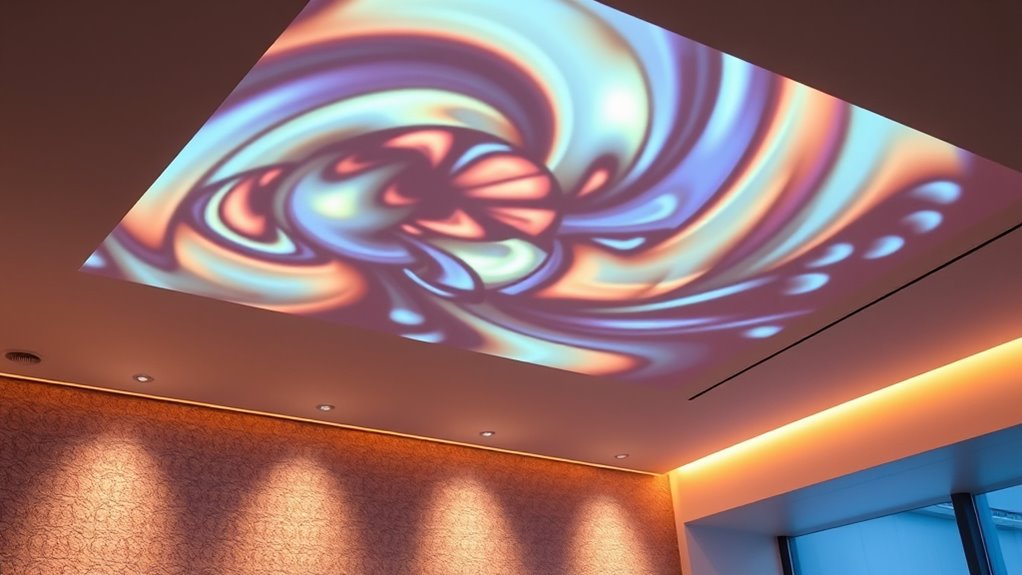
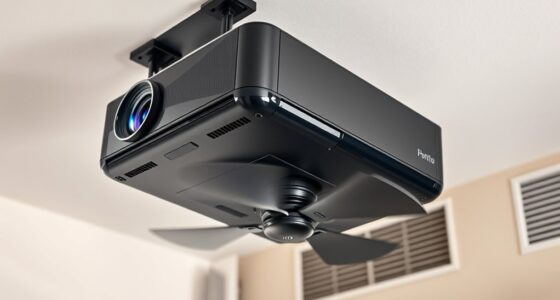
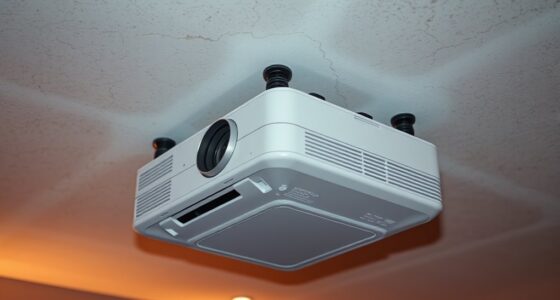
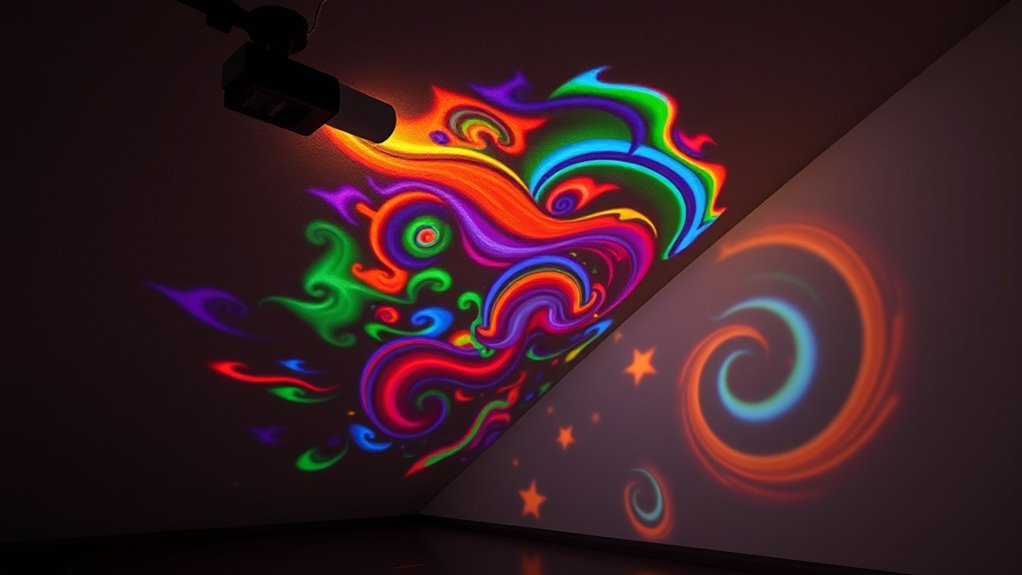
Angled projection surfaces are specialized display areas designed to present images or information at an incline, offering improved visibility and engagement. When you set out to use projectors on sloped walls or ceilings, you quickly realize that installation challenges are a key hurdle. Securing the projector in the right position can be tricky, especially when aiming for a clean, distortion-free image. Mounting brackets need to be sturdy enough to hold the projector securely at an angle, but they also must be adjustable to fine-tune positioning. You’ll need to consider the slope’s angle, space constraints, and the projector’s throw distance to find the essential setup. Improper mounting can lead to skewed images, uneven focus, or even damage to the equipment, so careful planning is vital.
Securely mount projectors at angles to ensure clear, distortion-free images on inclined surfaces.
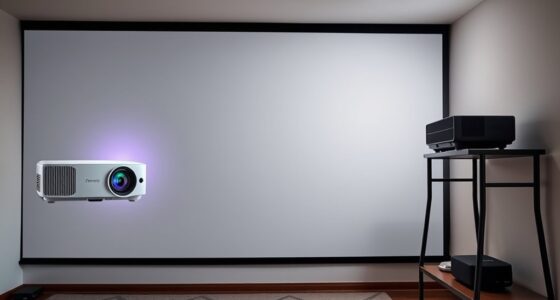
Once you’ve installed the projector, calibration techniques become pivotal to guarantee your display looks perfect. Angled surfaces tend to introduce keystone distortion, where images appear trapezoidal rather than rectangular. To fix this, you’ll use calibration adjustments built into most projectors, such as keystone correction and lens shift. These features allow you to manipulate the image digitally, aligning it properly on the inclined surface. You might also need to manually adjust the projector’s position or use software calibration tools to fine-tune the image further. The key is to make small, incremental changes, checking the image regularly to avoid over-correction, which can cause blurriness or other distortions.
Lighting conditions pose another challenge when projecting onto angled surfaces. Ambient light can wash out the image, especially if the surface is located in a brightly lit room. You might need to control the environment by dimming lights or using blackout curtains. Additionally, the surface material matters; matte finishes reduce glare and reflections, enhancing image clarity. If the surface is uneven or textured, it can impact image quality, requiring you to adjust focus and calibration more carefully.
Furthermore, when working with angled projection surfaces, you should consider the projector’s resolution and brightness capabilities. Higher resolution and lumens help compensate for distortions and ambient light, ensuring your image remains sharp and visible. Regular maintenance and recalibration might be necessary if the projector is moved or if environmental conditions change. With patience and precision, you can overcome installation challenges and leverage calibration techniques to deliver stunning visuals on sloped walls or ceilings. Proper projector placement guarantees your angled projection surface becomes a dynamic, engaging display that captures attention and enhances your environment.
adjustable projector mounting bracket
As an affiliate, we earn on qualifying purchases.
As an affiliate, we earn on qualifying purchases.
Frequently Asked Questions
How Do I Align a Projector on Irregularly Shaped Surfaces?
To align a projector on irregularly shaped surfaces, first assess the projection surface curvature to understand how it distorts the image. Use alignment adjustment techniques like keystone correction, lens shift, or digital warping to fine-tune the image. Position your projector carefully, experimenting with angles and distances, then adjust settings until the projected image fits the surface seamlessly. Regularly check and refine these adjustments for ideal display quality.
What Are the Best Mounting Options for Sloped Ceilings?
Mounting a projector on a sloped ceiling might seem tricky, but you can simplify it with the right tools. Use sturdy ceiling mounts designed for angled surfaces or adjustable mounting brackets that accommodate slopes. These options help you secure your projector firmly while maintaining proper alignment. You’ll want mounts that offer flexibility, ensuring your projector stays steady and projects clearly despite the incline, making setup both easier and more reliable.
Can Angled Projection Surfaces Affect Image Clarity or Brightness?
Yes, angled projection surfaces can affect image clarity. You might notice image distortion because the projector’s light isn’t hitting the surface evenly, causing warping or skewing. Brightness reduction can also occur, as light may reflect unevenly or be absorbed by the slope, decreasing overall image brightness. To minimize these issues, consider using a high-quality lens or adjusting your projector’s settings for better alignment and focus.
Are There Specific Projector Models Suited for Angled or Sloped Surfaces?
You might be surprised, but yes, some projectors are better suited for angled or sloped surfaces. Look for models with advanced projector lens selection and built-in keystone correction, which help maintain image clarity despite the incline. These features minimize distortion and brightness loss, ensuring your projection stays sharp and vibrant. Choosing the right projector with these capabilities transforms tricky angles into seamless displays, making your setup both impressive and reliable.
How Do Ambient Light Conditions Impact Projections on Angled Walls?
Ambient light considerably impacts your projection quality on angled walls. Bright surroundings wash out images, reducing contrast and clarity, especially on sloped surfaces. To maintain sharp visuals, you should dim ambient light or use high-lumen projectors designed for well-lit environments. Proper lighting control ensures your projections remain vibrant and detailed, even on angled surfaces, enhancing your viewing experience without sacrificing image quality.

Auto Keystone Correction Portable Projector, 4K/ 200 ANSI Smart Projector with 2.4/5G WiFi,
1080P/4K Decoding: Supports 1080P resolution for stunning visuals.Powered by advanced LED technology and a uniform illumination method,our projector…
As an affiliate, we earn on qualifying purchases.
As an affiliate, we earn on qualifying purchases.
Conclusion
Using projectors on sloped walls or ceilings transforms your space into a dynamic visual environment. Did you know that angled projection surfaces can increase viewer engagement by up to 30% compared to flat surfaces? This innovative approach not only enhances visual impact but also maximizes your projector’s potential. So, next time you plan a presentation or immersive experience, consider the power of angled surfaces — they’re a game-changer for enthralling your audience.
matte projection screen for sloped walls
As an affiliate, we earn on qualifying purchases.
As an affiliate, we earn on qualifying purchases.
![Projector-4K with WiFi and Bluetooth:[3000 ANSI/40W Dolby Audio/Official Licensed Apps], Outdoor-Projector with Smart OS 2.0 & AI Auto Focus,ONOAYO ONO5Pro 2.0 Smart Movie Projector for Indoor/Outdoor](https://m.media-amazon.com/images/I/411TCiwZ0EL._SL500_.jpg)
Projector-4K with WiFi and Bluetooth:[3000 ANSI/40W Dolby Audio/Official Licensed Apps], Outdoor-Projector with Smart OS 2.0 & AI Auto Focus,ONOAYO ONO5Pro 2.0 Smart Movie Projector for Indoor/Outdoor
[Hear the Difference–Hollywood-Grade Dual 40W Dolby Audio] Why spend $500 on a TV + soundbar or settle for…
As an affiliate, we earn on qualifying purchases.
As an affiliate, we earn on qualifying purchases.