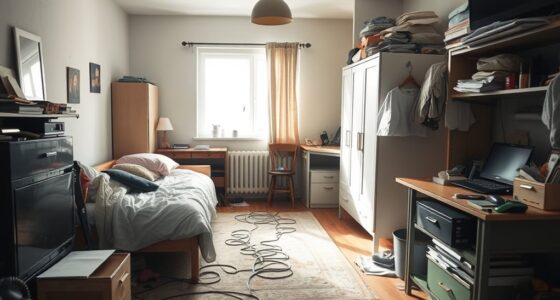
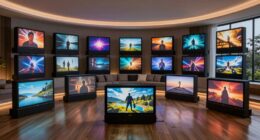
To set up your projector in a small room, choose a screen size that fits comfortably without crowding the space, typically around 100 inches for limited rooms. Use space-saving furniture and opt for ceiling or wall mounts to keep things tidy. Position your projector along the room’s length and align it properly to avoid distortions. Careful planning and precise adjustments guarantee a clear, centered image—keep exploring for more tips to perfect your setup.
Key Takeaways
- Use ceiling mounts or wall brackets to save space and keep the area uncluttered.
- Choose a projector with lens shift or zoom features for flexible positioning.
- Select a screen size suitable for your room’s dimensions to avoid distortion.
- Opt for space-saving furniture that doesn’t obstruct the projector or viewing area.
- Ensure precise alignment and stable mounting to maintain image quality and prevent keystone distortion.

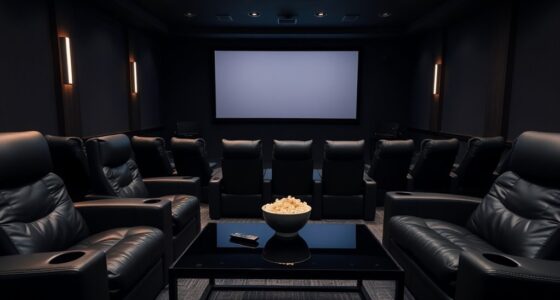
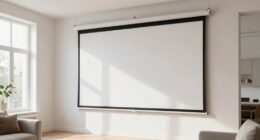
Setting up a projector in a small room can be a straightforward process if you plan carefully. The key is to make smart choices about your screen size and mounting options to maximize space without sacrificing picture quality. When selecting a screen size, think about how close you’ll be to the wall or screen. In tight spaces, larger screens might seem appealing, but if you’re too close, the image can become distorted or overwhelming. Measure your room carefully and opt for a size that fits comfortably within your viewing distance. Typically, a 100-inch screen works well for small rooms, but you might need to go smaller depending on your space constraints. Remember, a smaller screen isn’t a compromise; it guarantees a more immersive experience without crowding your room. To enhance your setup, consider space-saving furniture options that keep your room open and functional.
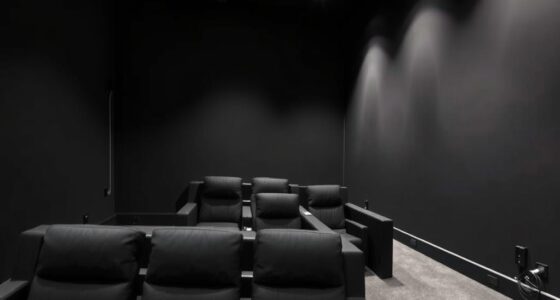
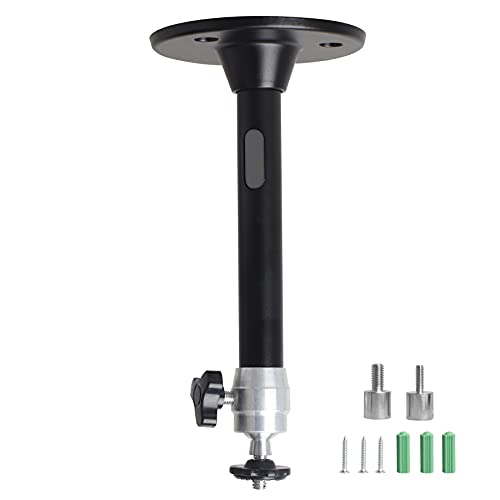
Mounting options are vital when working with limited space. Fixed mounts offer a clean, unobtrusive look, attaching securely to the ceiling or wall, freeing up floor space. Ceiling mounts are often the best choice for small rooms because they keep the projector out of the way and reduce clutter. When choosing a ceiling mount, make sure it’s compatible with your projector’s weight and mounting pattern. If ceiling mounting isn’t an option, consider a sturdy shelf or wall bracket that allows you to position the projector at the correct distance from the screen. No matter what mounting option you choose, guarantee the projector is stable and aligned properly to avoid keystone distortion and image skew. Adjustments should be simple and precise, so you get a sharp, centered picture every time.
Placement is another critical factor. Position your projector along the room’s length to avoid obstructing your view or blocking airflow. If you’re using a ceiling mount, ensure the projector is aligned with the center of your screen. If you opt for a tabletop setup, keep the projector on a solid, level surface at the right distance, but be mindful of how much space it consumes. In small rooms, projectors with flexible lens shift or zoom features can be invaluable, allowing you to fine-tune the image size and positioning without moving the entire unit. Whichever mounting method you choose, always test the setup before finalizing your installation to make sure your screen size fits comfortably within the room while maintaining top-notch image clarity. With thoughtful planning, you can set up your projector to deliver a fantastic viewing experience even in tight spaces.
YiePhiot Mini Ceiling Wall Projector Mount Stand Compatible with QKK, DR.J, DBPOWER, Anker, VANKYO, AAXA, Jinhoo, PVO, TMY, AuKing and Most Other Mini Projector (175mm, Black)
Universal Mount: The Universal Projector Mount is compatible with most mini projectors, including CLOKOWE, HAPPRUN, ELEPHAS, NICPOW and…
As an affiliate, we earn on qualifying purchases.
As an affiliate, we earn on qualifying purchases.
Frequently Asked Questions
Can I Use a Portable Projector for Small Room Setups?
Yes, you can absolutely use portable projectors for small room setups. They’re designed to be compact and easy to move, making them perfect for tight spaces. You’ll find that portable projectors offer flexible placement options and quick setup, so you can enjoy your movies or presentations without hassle. Just make certain the projector’s brightness and throw distance suit your room size for the best viewing experience.
What’s the Best Distance to Place the Projector From the Wall?
You should place your projector about 6 to 10 feet from the wall for the best image. Keep in mind the projection angle to avoid distortion, especially in tight spaces. A flat, smooth wall reflects light evenly, so avoid textured walls that can distort the image. Adjust the distance based on your projector’s throw ratio and make sure it’s aligned properly to prevent skewed or blurry pictures.
How Do I Reduce Glare and Reflections in a Tight Space?
To reduce glare and reflections in a tight space, you should opt for a screen with matte coatings that diffuse light and minimize glare. Control ambient lighting by dimming or turning off nearby lights and using blackout curtains if possible. Position the projector away from direct light sources and angles that cause reflections. This setup makes certain clearer images and less distraction, enhancing your viewing experience even in small, cluttered rooms.
Are Short-Throw Projectors Suitable for Small Rooms?
Yes, short-throw projectors are ideal for small rooms because they reduce projection angle issues and fit into tight spaces easily. They can be mounted on walls or placed on furniture, offering flexible mounting options. This minimizes glare and reflections, enhancing image quality. Plus, their short throw distance helps you avoid shadows and crowding, making them perfect for small rooms with limited space.
How Can I Improve Sound Quality Without Taking up Extra Space?
Your sound quality can improve dramatically with smart speaker placement and sound enhancement. Position compact speakers close to your viewing area, ideally at ear level, to maximize clarity without clutter. Use sound enhancement features like equalizers or bass boosters on your devices. Consider wall-mounted or bookshelf speakers to save space while boosting audio. This setup creates an immersive experience, turning your small room into a concert hall without sacrificing precious space.

Philoent【Google TV Included】Smart Mini Projector, Ultra Short Throw for Big Screen in Small Room, Auto Keystone Portable Proyector with WiFi Bluetooth, Support 4K Movie – Home Theater Bedroom Outdoor
🥇【Instant Full Google TV Access – No Setup Needed】 Experience the complete Google TV ecosystem directly, with no…
As an affiliate, we earn on qualifying purchases.
As an affiliate, we earn on qualifying purchases.
Conclusion
Now that you’ve mastered setting up your projector in a tiny room, you’re practically transforming your space into a cinematic universe. With just a few clever adjustments, you’ve turned a cramped corner into a giant screen paradise—so immersive, it’s like stepping into another dimension. No matter how tight the squeeze, your setup now defies physics and logic, making every movie night feel like a blockbuster event. Get ready to impress everyone—you’ve truly conquered the art of small-space projection!

XGIMI HORIZON 20 4K RGB Triple Laser Home Projector, 3200 ISO Lumens, Google TV with Licensed Netflix, Optical Zoom & Lens Shift, IMAX Enhanced, Dolby Vision, 300" Display, 240Hz, 1ms Input Lag
Powered by RGB Triple Laser: The X-Master RGB triple laser engine delivers 3200 ISO lumens and a 100,000:1…
As an affiliate, we earn on qualifying purchases.
As an affiliate, we earn on qualifying purchases.

60 Inch Projector Screen, OKEDUO 4K 16:9 HD Portable Projection Movie Screen, Anti-Crease Indoor Outdoor, Simple Install, Easy Carrying Projection Screen for Camping, RVing, Outdoor Theater Nights
[Portable Design]: 60-inch foldable outdoor projector screen with a black backing, straight edges, foldable, washable, and wrinkle-free -…
As an affiliate, we earn on qualifying purchases.
As an affiliate, we earn on qualifying purchases.