
To test your projector’s uniformity and color consistency, first set up in a controlled environment with minimal ambient light and use calibration tools or test patterns. Display clear, high-quality patterns to check for brightness uniformity, color accuracy, and any fading or patches. Adjust settings accordingly to correct inconsistencies. Regular maintenance and environmental adjustments help maintain performance. Keep exploring these steps for detailed techniques that guarantee your projector looks its best every time.
Key Takeaways
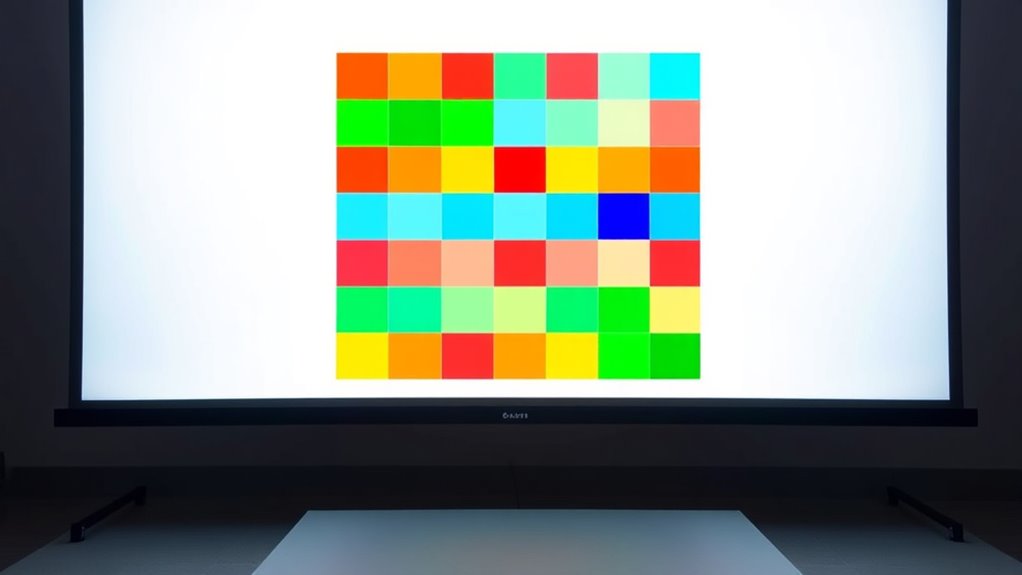
- Use standardized test patterns to evaluate brightness, contrast, and color uniformity across different areas of the projected image.
- Conduct color gamut and color uniformity analyses with calibration tools to detect hue shifts and inconsistencies.
- Measure luminance at multiple points on the screen to identify brightness variations and ensure even illumination.
- Regularly calibrate the projector with professional software to maintain accurate color reproduction and uniformity.
- Minimize ambient lighting during testing to improve pattern visibility and get precise assessments of uniformity and color consistency.

VGA SVGA XGA Signal Generator Display Testing Tool with Multiple Resolution Modes for CRT LCD Monitor Fit for HDTV Projector Screen Color Pattern Testing, LCD Display Tester
[COMPLETE SIGNAL GENERATOR SET] This portable signal generator includes a USB cable and is designed to work with…
As an affiliate, we earn on qualifying purchases.
As an affiliate, we earn on qualifying purchases.
Preparing Your Testing Environment and Tools
To guarantee accurate testing of your projector’s uniformity and color consistency, it’s essential to prepare a controlled environment and gather the right tools. Start by setting up in a dimly lit, dust-free space with minimal ambient light interference. Use calibration techniques to ensure your display settings are standardized before testing. Regular maintenance routines, like cleaning lenses and filters, help prevent skewed results caused by dirt or smudges. Invest in a high-quality test pattern generator or color calibration tool to evaluate color accuracy accurately. Keep a calibration log to track adjustments over time. Properly preparing your environment and tools ensures consistent, reliable results, making it easier to identify issues and maintain optimal projector performance. This foundation is vital for effective uniformity and color testing. Additionally, staying informed about emerging AI in Education technologies can help you leverage new tools for more precise calibration and testing processes.

datacolor SpyderPro Monitor Calibration Tool: Ensures Accurate Color When Viewing and Editing Photos & Videos
ACHIEVE TRUE COLOR – Ensures your monitor displays colors accurately, critical for photography, design, and video editing, with…
As an affiliate, we earn on qualifying purchases.
As an affiliate, we earn on qualifying purchases.
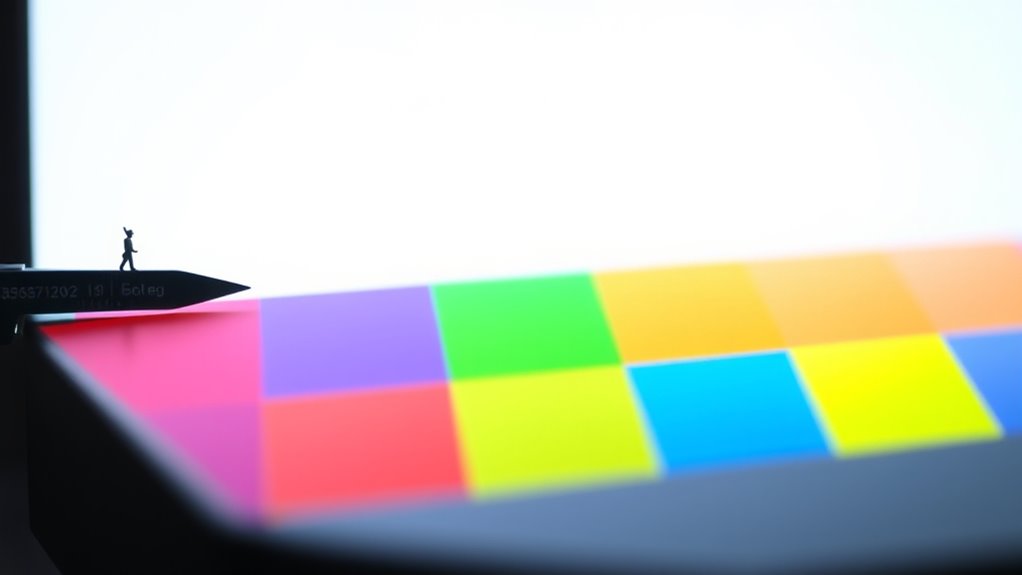
Conducting a Basic Uniformity Test With Test Patterns
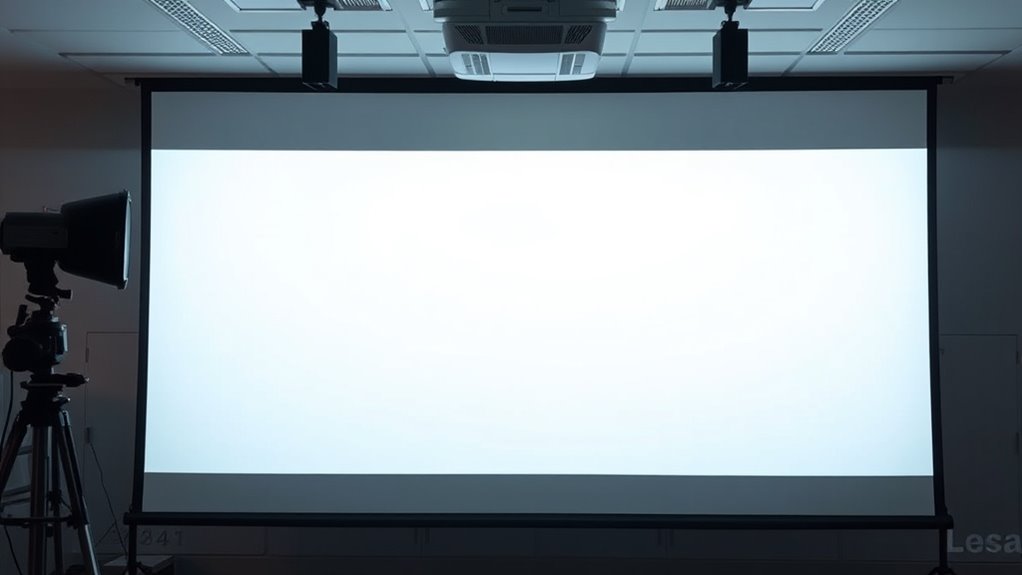
Start by displaying the test pattern clearly on your screen to get an accurate view of the projector’s output. As you assess brightness uniformity, look for any areas that appear noticeably darker or lighter. This simple step helps identify uneven brightness across the projected image. Remember to take your time and compare different sections of the image for a comprehensive evaluation of the projector’s performance to ensure accurate assessment.
Display Test Pattern Clearly
When conducting a basic uniformity test with test patterns, displaying the pattern clearly is essential. To achieve this, verify your projector’s calibration settings are optimized for accurate color and contrast. Adjust these settings so the test pattern appears sharp and well-defined. Minimize ambient lighting in the room, as excessive light can wash out the pattern and obscure details. Use a dark or dim environment to improve visibility and contrast, making it easier to spot any inconsistencies. Position the projector at the correct distance and angle to avoid distortion. Before starting the test, double-check that your test pattern is fully visible without cropping or blurring. Clear display of the pattern allows you to accurately assess uniformity and identify areas needing adjustment.
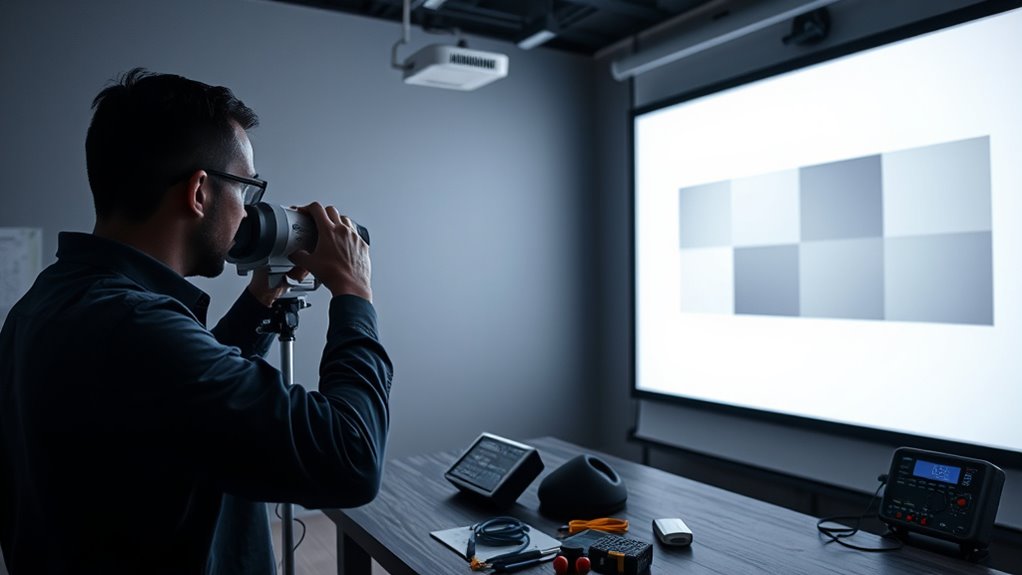
Assess Brightness Uniformity
Evaluating brightness uniformity is an essential step in ensuring your projector displays consistent light output across the entire image. To start, set up your projector in a controlled environment, minimizing ambient lighting that can skew results. Use a test pattern with varying shades of gray or a white screen to identify uneven brightness areas. Proper projector placement is key; position it directly in front of the screen and at the recommended distance for ideal light distribution. Turn off any lights in the room and avoid reflective surfaces that could affect perceived brightness. Observe the image carefully, noting any dark or bright spots. This basic uniformity test helps you determine if your projector’s brightness is consistent across the entire image, paving the way for further calibration if needed. Additionally, understanding the importance of color consistency can help ensure accurate color reproduction and overall image quality.
projector uniformity test patterns
As an affiliate, we earn on qualifying purchases.
As an affiliate, we earn on qualifying purchases.
Assessing Brightness and Contrast Across the Screen

Evaluating brightness and contrast across the screen is essential to guarantee uniform image quality. First, verify your ambient lighting is controlled, as it can influence perceived brightness and contrast. Use calibration software to analyze different areas of the projected image, paying attention to variations in luminance. The software can help you identify inconsistencies by providing precise measurements at multiple points on the screen. Adjust your projector’s settings accordingly, focusing on maintaining balanced contrast levels across the entire surface. Consistent brightness and contrast ensure that details are visible regardless of where viewers sit. Regular testing with calibration tools and controlled lighting conditions will help you achieve a uniform, high-quality projection that looks great from all angles. Additionally, understanding color accuracy and its impact on overall image quality can help you fine-tune your setup for a more immersive viewing experience.
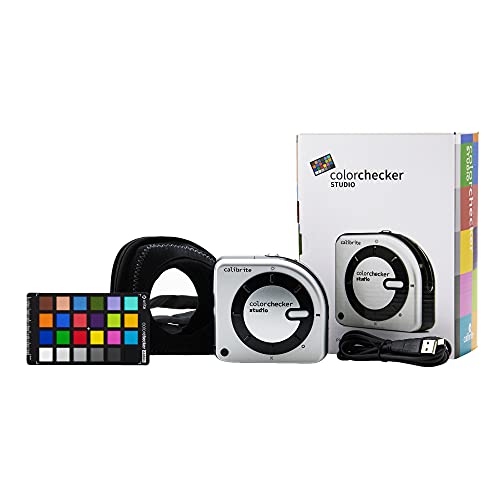
Calibrite ColorChecker Studio Spectrophotometer for Complete Color Management for Display, Projector, Printer and Scanner Profiling Software, w/ColorChecker Classic Mini for Custom Camera Profiling
SPECIFICATIONS: All in one spectrophotometer for camera to print color control, supports monitor display and projector profiling plus…
As an affiliate, we earn on qualifying purchases.
As an affiliate, we earn on qualifying purchases.
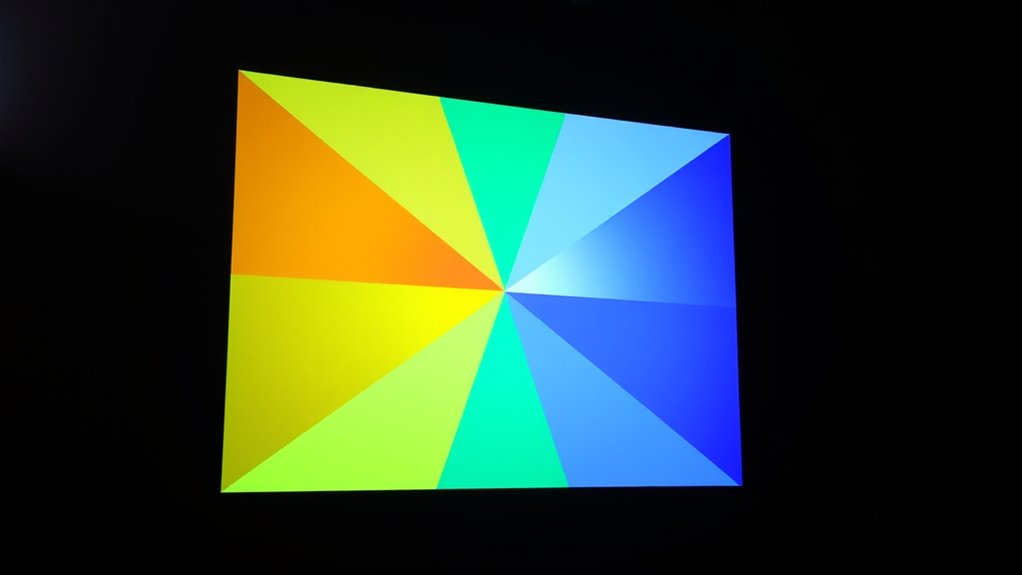
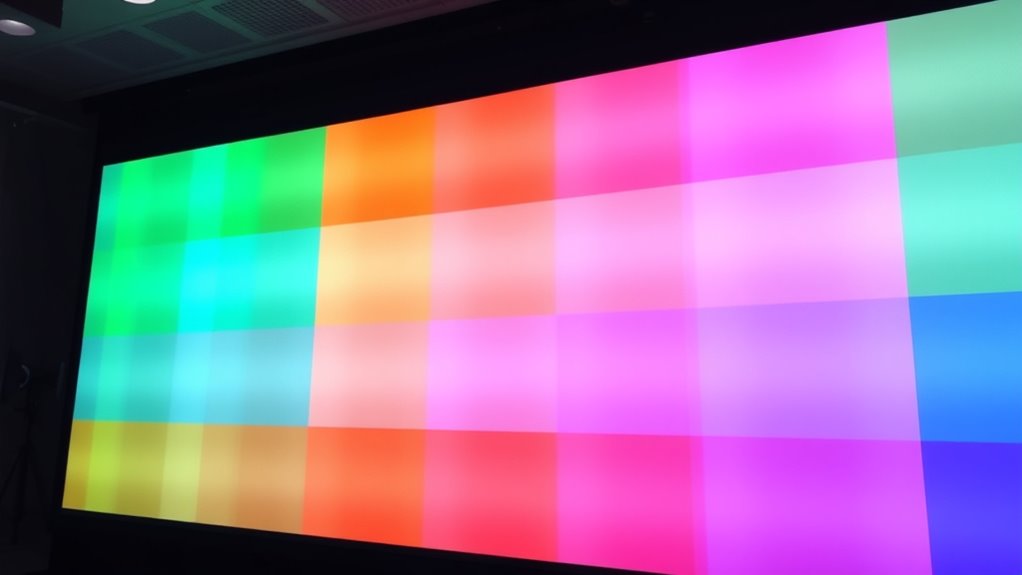
Checking for Color Accuracy and Consistency
To guarantee your projector displays accurate colors, you should perform a color gamut analysis to compare its range to industry standards. Conduct color uniformity tests across the screen to identify any inconsistencies or shifts in hue. These checks help verify that your projector maintains consistent and true-to-life colors throughout your viewing experience. Additionally, monitoring for color consistency over time can help detect fading or color shifts that may require calibration.
Color Gamut Analysis
Evaluating the projector’s color gamut involves measuring how accurately it reproduces a wide range of colors. To do this, start with proper color calibration, adjusting settings to match industry standards. This guarantees your projector displays colors as intended. Next, perform gamut mapping to compare the displayed colors against a reference color space, such as sRGB or DCI-P3. Use specialized software or test patterns to identify any shifts or gaps in the color spectrum. A broad, well-covered gamut indicates good color accuracy, while gaps reveal areas needing calibration. Consistent color reproduction across different content and brightness levels confirms your projector maintains color fidelity. Regularly conducting these tests helps you spot deviations early and fine-tune your projector for peak visual performance. Incorporating color management tools can further enhance your calibration process for more precise results.
Color Uniformity Tests
Ensuring color uniformity involves systematically checking how consistently your projector displays colors across the entire image. To do this, you should perform tests under controlled lighting conditions, as ambient light can affect perceived color accuracy. Use calibration techniques to adjust your projector’s settings, guaranteeing that colors remain consistent from corner to corner. Display a solid color test pattern, such as a gray or white screen, and observe for any color shifts or uneven patches. Compare different areas of the image to identify inconsistencies. Adjust the projector’s color settings if needed, and repeat the test to confirm improvements. Accurate color uniformity ensures your projected image maintains true colors, providing a professional and visually appealing display. Additionally, understanding how color consistency impacts overall image quality can help you achieve a more precise calibration.
Identifying and Addressing Common Issues
When testing projector uniformity and color consistency, you may encounter common issues that can affect image quality. Uneven brightness, color patches, or faded areas often indicate calibration problems or aging components. To address these, start with calibration techniques that adjust color balance and brightness levels precisely. Regular maintenance routines, such as cleaning filters, checking lamp hours, and inspecting for dust or dirt, help prevent performance issues. If problems persist, consider recalibrating the projector or replacing worn parts. Addressing these issues promptly ensures consistent image quality and prolongs your projector’s lifespan. Staying proactive with calibration and maintenance routines minimizes disruptions and helps you achieve ideal, uniform visuals every time. Additionally, understanding the importance of proper Kia Tuning can help in maintaining optimal performance and appearance of your vehicle.
Fine-Tuning Your Projector for Optimal Performance
To achieve the best image quality, you need to fine-tune your projector by making precise adjustments to its settings. Start with projection calibration to ensure proper alignment, focus, and aspect ratio. This helps eliminate distortions and guarantees a sharp, clear image. Next, consider ambient lighting; controlling the room’s brightness can considerably enhance image contrast and color accuracy. Dim or block excess light to prevent glare and washout, allowing your projector’s colors to appear vibrant and consistent. Adjust brightness, contrast, and color temperature settings based on your environment and content. Regular calibration and attention to ambient lighting conditions ensure your projector performs at its peak, delivering a more uniform and true-to-life picture. Proper fine-tuning results in a superior viewing experience.
Frequently Asked Questions
How Often Should I Perform Projector Uniformity Tests?
You should perform projector uniformity tests at least once every 3 to 6 months as part of your regular projector maintenance. Regular calibration frequency guarantees consistent image quality and prevents color inconsistency. If you notice discoloration or uneven brightness, conduct tests sooner. Consistent testing helps catch issues early, maintaining peak performance and extending your projector’s lifespan. Make testing a routine part of your maintenance schedule for the best results.
What Are the Signs of Poor Color Consistency?
Like a chameleon struggling to match its surroundings, poor color consistency shows signs such as color shifting and brightness variation across the projected image. You might notice areas where colors appear washed out or overly saturated, or where hues change unexpectedly. These signs indicate your projector isn’t delivering uniform color performance, leading to inconsistent visuals. Regularly checking for these issues helps make certain your images stay vibrant and true to life.
Can Ambient Light Affect Test Results?
Yes, ambient light can affect your test results. When there’s too much ambient light, it reduces the contrast and makes color differences harder to see, which lowers test accuracy. To guarantee precise testing of projector uniformity and color consistency, you should perform your tests in a controlled environment with minimal ambient light. This way, you get more reliable and consistent results, helping you identify issues accurately.
Is It Necessary to Recalibrate After Moving the Projector?
Moving your projector is like shifting a mighty ship; recalibration is absolutely essential. When you change its position, projection angles and lamp brightness can shift dramatically, throwing off color accuracy and uniformity. You need to recalibrate to confirm consistent image quality, as even small adjustments in placement can cause big differences. Don’t skip this step—your projection’s brilliance hinges on it after every move, no matter how minor.
What Tools Are Best for Measuring Projector Color Accuracy?
You should use specialized measurement tools like a colorimeter or spectrophotometer for accurate projector color calibration. These tools precisely measure color accuracy, helping you identify discrepancies and adjust settings accordingly. A colorimeter is ideal for quick calibration, while a spectrophotometer offers more detailed readings. Regularly using these measurement tools guarantees consistent color reproduction, maintaining the best image quality across different viewing sessions.
Conclusion
By regularly testing your projector’s uniformity and color consistency, you guarantee it performs at its best. Use test patterns and your eyes to spot issues early, and don’t forget to fine-tune as needed. Remember, a stitch in time saves nine—addressing problems now keeps your viewing experience smooth and vibrant. With proper care, your projector will deliver stunning visuals that truly shine.