To guarantee your modern projector delivers seamless 3D, you need to master key calculations for alignment, frame rates, and synchronization. Properly aligning images, matching frame rates, and calibrating shutter glasses prevent ghosting and flickering. Also, adjusting for ideal screen and lens positioning enhances depth perception. These calculations are crucial for a clear, comfortable 3D experience. Keep going to learn more essential tips and techniques to perfect your setup.
Key Takeaways
- Ensure projector’s refresh rate matches 3D content for smooth, flicker-free viewing.
- Calculate optimal parallax and depth settings to achieve realistic 3D effects.
- Verify polarization alignment to prevent ghosting and color shifts during 3D projection.
- Regularly calibrate projector geometry to maintain accurate image overlap and alignment.
- Synchronize shutter glasses timing precisely with the projector’s frame rate for clear 3D perception.
ADAS Calibration Dynamic ACC Positioning Tool for Eyeball Unit, Angso-auto Angle Leveling Tool Accessory for Auto
The ANGSO-AUTO leveling tool is designed to be powered by 2* AAA 1.5 V batteries (Please note that…
As an affiliate, we earn on qualifying purchases.
As an affiliate, we earn on qualifying purchases.
Understanding the Basics of 3D Projection Geometry

To grasp how 3D projection works in modern projectors, it’s essential to understand the basic geometry behind it. 3D projection relies on creating two slightly different images—one for each eye—that are combined to produce a sense of depth. Polarization techniques are commonly used to separate these images, allowing each eye to see only its designated picture. The projector displays 3D content formats designed specifically for this purpose, such as side-by-side or frame-packed formats, which help synchronize the images with your glasses. These formats ensure that the images align correctly with the polarization method, providing a seamless 3D experience. Additionally, understanding the specific projection geometry involved is key to appreciating how modern projectors deliver immersive 3D visuals with clarity and precision.

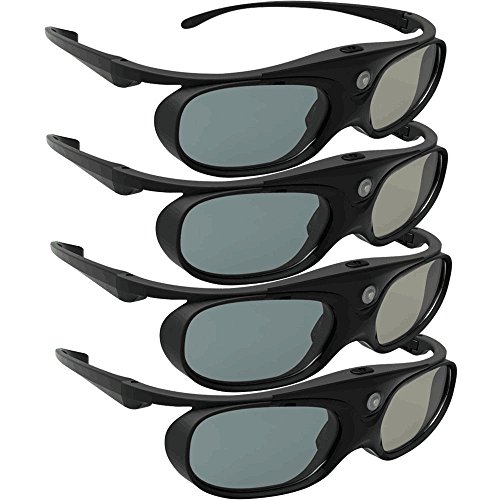
4 Pack Passive Circular Polarized RealD 3D Glasses for Cinema and Passive 3D TVs Projectors, Note: Does Not Work with Active 3D TVs Projectors
4x Polarized Passive 3D Glasses for Passive Polarized 3D TVs Projectors RealD Cinema!
As an affiliate, we earn on qualifying purchases.
As an affiliate, we earn on qualifying purchases.
Calculating Frame Rates for Stereoscopic Display

Calculating the correct frame rates for stereoscopic display is essential to ensuring a smooth and comfortable 3D viewing experience. To achieve this, you need to consider the projector’s refresh rate, the use of polarized filters, and spectral bandwidth. Higher frame rates reduce flicker and eye strain, especially when polarized filters are involved, as they affect light intensity and color separation. Proper calculation ensures each eye receives the appropriate images without overlap or ghosting. Adjusting for spectral bandwidth helps maintain image clarity and color accuracy. Here’s a quick reference: Vetted – Grobal World
| Parameter | Consideration |
|---|---|
| Frame Rate | Must match projector’s refresh rate |
| Polarized Filters | Affect light intensity and spectral bandwidth |
| Spectral Bandwidth | Ensures proper color separation |
| Frame Doubling | Necessary for active 3D systems |
| Viewer Comfort | Minimize flicker and eye fatigue |

Valerion 100-inch Fixed Frame Projector Screen, 1.3 dB Gain, 80% PQE, 4K/8K Ultra HD, 3D Wall Mount Projector Screen, Works with Long Throw, Short Throw & Ultra Short Throw Projectors
Matte White Screen with 1.3 Gain:Provides enhanced brightness and contrast for superior image quality, ensuring vivid and clear…
As an affiliate, we earn on qualifying purchases.
As an affiliate, we earn on qualifying purchases.
Synchronization of Shutter Glasses and Projector Timing

To enjoy seamless 3D visuals, you need to guarantee your shutter glasses and projector are perfectly synchronized. Proper shutter timing alignment prevents ghosting and flickering, delivering a clear image. Frame rate synchronization is essential to keep both devices working in harmony for an ideal viewing experience. Additionally, understanding the refresh rates of your projector and glasses ensures optimal performance and minimizes artifacts during 3D playback.
Shutter Timing Alignment
Ensuring precise shutter timing alignment is essential for delivering seamless 3D experiences with modern projectors. Proper polarization alignment ensures that each shutter glass filter matches the corresponding projected image, preventing ghosting and cross-talk. You should verify that the projector’s timing perfectly synchronizes with the shutter glasses, so each eye only sees its intended frame. During calibration, pay close attention to color calibration as well, since misaligned shutters can cause color shifts or dimming. Adjusting the shutter glasses’ timing to match the projector’s refresh rate and ensuring consistent polarization alignment helps maintain image clarity and immersion. When these elements are correctly aligned, you’ll achieve smooth, comfortable 3D viewing without flicker or visual artifacts. Additionally, wall organization systems can be employed behind the scenes to keep all calibration tools and accessories neatly arranged, simplifying maintenance and setup.
Frame Rate Synchronization
Aligning the frame rate of your projector with the shutter glasses is key to delivering smooth 3D images. Proper frame rate synchronization prevents flicker and ghosting, ensuring a seamless viewing experience. To achieve this, start with glasses calibration, adjusting the shutter glasses to match your projector’s refresh rate precisely. This calibration minimizes latency and guarantees each eye receives the correct image at the right time. Additionally, maintaining ideal projector brightness helps improve overall 3D clarity, making synchronization more effective. When the projector’s output and glasses timing are in sync, you’ll notice sharper images and reduced strain. Remember, frame rate synchronization isn’t a one-time setup; regularly verify settings to keep your 3D experience smooth and immersive.
DLP Link 3D Glasses, ELEPHAS 144Hz Rechargeable Active Shutter Eyewear for Most DLP-Link 3D Projectors- Acer, ViewSonic, BenQ Vivitek, Optoma, Panasonic, Dell, Viewsonic (4 Pack)
Next generation super fast 144Hz refresh rate, ahead of other 120Hz or 96Hz product's level.
As an affiliate, we earn on qualifying purchases.
As an affiliate, we earn on qualifying purchases.
Determining Optimal Screen and Lens Alignment

Getting your screen size right is the first step to a great 3D experience, so make sure you accurately calculate what fits your space. Proper lens positioning is essential for minimizing distortion and ensuring the image stays sharp across the entire screen. Regularly check your alignment to catch any shifts that could affect image quality and 3D effect. Additionally, considering factors like Kia Tuning options can help optimize your projector’s performance and tailor the setup to your specific needs.
Screen Size Calculation
Calculating the ideal screen size is essential for achieving the best viewing experience with your projector. To do this, consider your room size, seating distance, and projector capabilities. Properly aligned projection angles ensure the image fits comfortably without distortion. When working with polarization filters, keep in mind that larger screens may require adjustments to maintain maximum polarization and prevent ghosting or reduced 3D clarity. Measure the distance from your projector to the screen carefully, ensuring the lens is positioned for even illumination and minimal keystone correction. Remember, a screen that’s too large or misaligned can cause image degradation, especially in 3D viewing. Additionally, understanding the Law of Attraction principles can help you visualize and manifest the ideal setup for your space. By accurately calculating your optimal screen size and ensuring correct alignment, you’ll maximize your projector’s 3D performance and viewer comfort.
Lens Positioning Tips
Proper lens positioning is key to achieving a sharp, evenly illuminated image and guaranteeing your 3D experience is immersive and comfortable. To do this, you must minimize lens distortion and correct light refraction issues that can blur or misalign the projected image. Start by adjusting the projector’s height and angle so the lens is centered directly in front of the screen, avoiding skewed images. Keep the lens parallel to the screen to reduce distortion and ensure consistent focus across the entire surface. Use keystone correction sparingly, as excessive adjustments can introduce artifacts. Proper alignment also involves checking the lens’s position relative to the projector’s optical axis, which helps prevent light refraction from causing image warping or color fringing. Precise positioning guarantees clarity and ideal 3D depth.
Alignment Accuracy Checks
To guarantee your 3D projection is sharp and correctly aligned, you need to perform accurate alignment checks regularly. Start by ensuring the projector’s lens and screen are perfectly aligned to avoid distortion of the polarized filters used for 3D content. Misalignment can cause ghosting or double images, diminishing the 3D experience. Use test patterns designed for 3D projection to identify alignment issues quickly. Check that the polarized filters are correctly oriented and aligned with the projector’s light path, as even slight deviations can impact image quality. Adjust the projector’s position and lens tilt until the 3D images are crisp, with no visible ghosting or misalignment. Regularly verifying alignment helps maintain ideal 3D clarity and prevents discomfort during viewing sessions.
Adjusting for Parallax and Depth Perception

When using 3D projectors, adjusting for parallax and depth perception is crucial to guarantee a seamless viewing experience. You need to fine-tune the parallax settings based on depth cues, which are visual signals your brain uses to interpret spatial relationships. Proper viewer positioning is essential; sitting too close or unevenly can distort the depth effect, making objects appear misaligned or uncomfortable. To minimize discomfort and enhance realism, ensure the projector is calibrated so that the images for each eye align correctly, reflecting natural depth cues like convergence and accommodation. Regularly check the parallax offset and adjust accordingly, keeping in mind your viewing angle. Additionally, calibrating for projector alignment can significantly improve the accuracy of the depth perception. This careful calibration helps maintain accurate depth perception and prevents viewer fatigue during extended 3D sessions.
Troubleshooting Common 3D Projection Issues Through Calculations

Many common 3D projection issues can be identified and corrected through precise calculations. Start by checking cable compatibility; incompatible cables can cause flickering or image distortion. Next, verify color calibration to ensure accurate 3D rendering, as miscalibrated colors can cause ghosting or blurring. Additionally, consider alignment calculations to fix overlapping images or double vision. Key troubleshooting steps include:
Ensure proper cable compatibility, accurate color calibration, and precise alignment calculations for optimal 3D projection quality.
- Confirming the correct type of HDMI or 3D-specific cables are used
- Adjusting color calibration settings for balanced hues
- Recalculating projection angles and distances for proper image alignment
- Evaluating essential oils for visual comfort which may help reduce eye strain during prolonged viewing sessions
Frequently Asked Questions
How Does Ambient Light Affect 3D Projection Calculations?
Ambient light substantially impacts your 3D projection calculations by reducing contrast, which affects image clarity and depth perception. When there’s more ambient light, your projector needs higher brightness to maintain adequate contrast, making calculations more complex. You should account for ambient light levels to guarantee your projection remains vivid and immersive. Properly adjusting for ambient light helps optimize projection contrast, delivering a better 3D viewing experience.
What Is the Impact of Projector Distance on 3D Image Quality?
Your projector placement considerably impacts 3D image quality. When you position the projector at the right distance, you guarantee proper image scaling, preventing distortion or pixelation. Too close or too far, and the 3D effect weakens, reducing clarity and immersion. Adjusting the distance optimizes focus and alignment, delivering crisp, vibrant 3D visuals. Always measure and fine-tune your placement to maintain the best possible 3D experience.
How Do Different Screen Materials Influence 3D Depth Perception?
You’ll notice that screen materials with high reflectivity enhance 3D depth perception by brightening images, making them pop more vividly. Conversely, opaque materials can reduce perceived depth if they diminish light transmission. Choose a screen with ideal reflectivity and appropriate opacity to improve 3D image quality. A well-balanced material allows for clear, immersive 3D effects, ensuring you experience depth without sacrificing brightness or color accuracy.
Can Projector Lens Distortion Alter 3D Alignment Accuracy?
Think of lens distortion as a sneaky trickster that can mess with your 3D alignment accuracy. Yes, it can substantially alter how perfectly your images align, causing double images or blurred depth cues. When your projector’s lens isn’t properly calibrated, distortion shifts the 3D layers out of sync, undermining the immersive experience. To keep your 3D visuals sharp and aligned, regularly check and correct for lens distortion.
How Do Room Size and Shape Affect 3D Viewing Calculations?
Room size and shape notably impact your 3D viewing calculations. Larger or irregularly shaped rooms can cause issues with room acoustics, affecting sound quality and your overall experience. Your seating arrangement also plays a role, as it determines viewing angles and distance, which are vital for proper 3D alignment. To optimize 3D performance, consider these factors carefully to guarantee consistent image quality and immersive viewing.
Conclusion
Mastering these calculations is like tuning a finely crafted instrument—you’ll release seamless 3D experiences that leap off the screen. When you understand the geometry, timing, and alignment, you’re conducting a symphony of depth and clarity. Skip these steps, and your projection risks falling flat like a deflated balloon. So, embrace the numbers—they’re your secret recipe for transforming ordinary displays into immersive, jaw-dropping adventures that captivate every eye.