
To measure input delay with a camera test, you’ll need a high-speed camera, a stable setup, and a well-lit environment. Sync your camera with the display and input device using a trigger or software, then record the response time when you press a button or perform an action. Carefully analyze the footage to measure the lag between your input and the on-screen response. For detailed steps and tips, continue exploring to get precise results.
Key Takeaways
- Use a high-speed camera with adjustable calibration to record input and display responses accurately.
- Ensure consistent lighting and stable camera setup to clearly capture visual cues and hand movements.
- Synchronize input device activation with camera recording, possibly using trigger devices for precise timing.
- Analyze video frames to measure delay between input action and on-screen response, noting the exact timing gaps.
- Conduct multiple tests under identical conditions to verify consistency and improve measurement reliability.
Gathering the Necessary Equipment
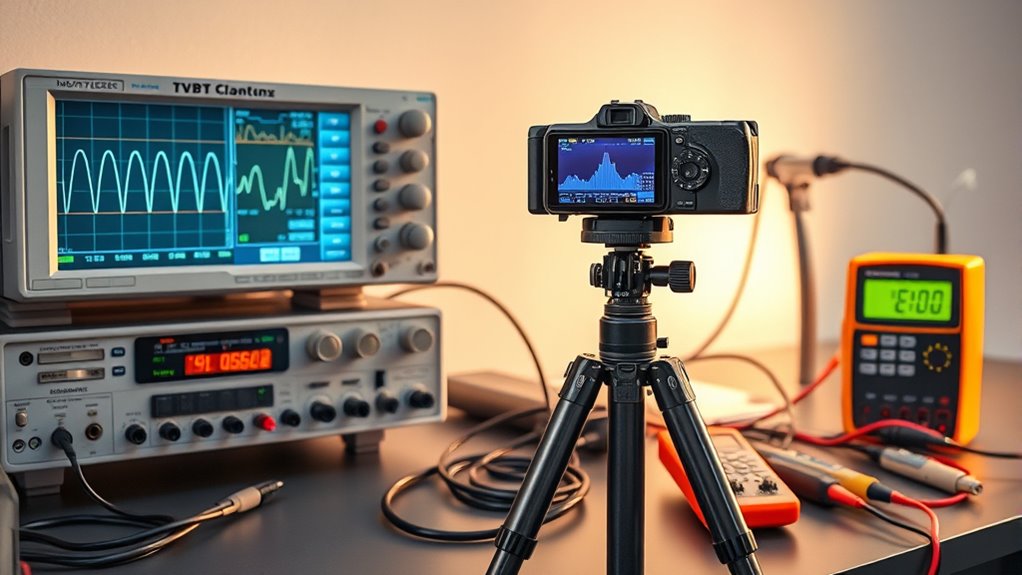
To accurately measure input delay, you need to gather the right equipment. Start with a high-speed camera capable of capturing fast response times, ideally with adjustable sensor calibration to guarantee precise timing. Proper lighting considerations are essential; consistent, flicker-free lighting helps reduce shadows and glare that could interfere with your measurements. Use a monitor with a known refresh rate and low input lag to ensure accurate results. A reliable trigger device or automated system can synchronize your camera with your input signals, minimizing human error. Additionally, consider a test pattern or a reflective surface to clearly observe input responses. Having the right combination of calibrated sensors and controlled lighting sets a solid foundation for precise, repeatable input delay measurements. Incorporating headphones with low latency capabilities can further improve the accuracy of audio-visual synchronization tests.
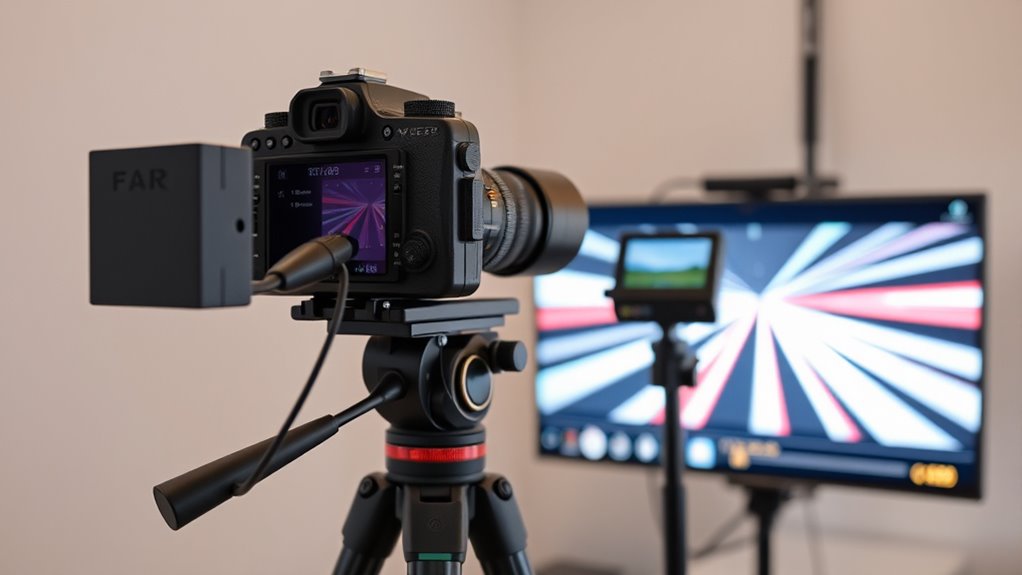
Setting Up Your Recording Environment

Creating an ideal recording environment is essential for capturing accurate input delay measurements. Start by optimizing lighting conditions to ensure your camera clearly captures the on-screen indicators and your hand movements without glare or shadows. Consistent, flicker-free lighting helps prevent flickering or exposure issues that could distort timing. Additionally, focus on maintaining proper audio synchronization if you plan to include sound cues or verbal instructions. Use a quiet space to minimize background noise that might interfere with visual cues. Keep your camera stable on a tripod or flat surface to avoid shaking, which can impact measurement accuracy. A controlled environment guarantees your recordings reflect true input delay, free from external distractions or inconsistencies. Proper camera setup also plays a crucial role in achieving precise measurements. This setup provides a solid foundation for precise, reliable results.
Configuring Your Display and Input Devices

Have you properly configured your display and input devices before measuring input delay? Ensuring your monitor is correctly calibrated is essential, so utilize calibration techniques to optimize color, brightness, and response time. Adjust your display settings through the monitor’s menu or specialized software tools to reduce latency and improve accuracy. For input devices like mice or controllers, check for firmware updates and set sensitivity preferences that match your testing environment. Disable any unnecessary features such as V-Sync or upscaling that might introduce additional delay. AI Security Proper configuration minimizes variables, giving you a more accurate measurement of your input delay and ensuring your results are reliable.
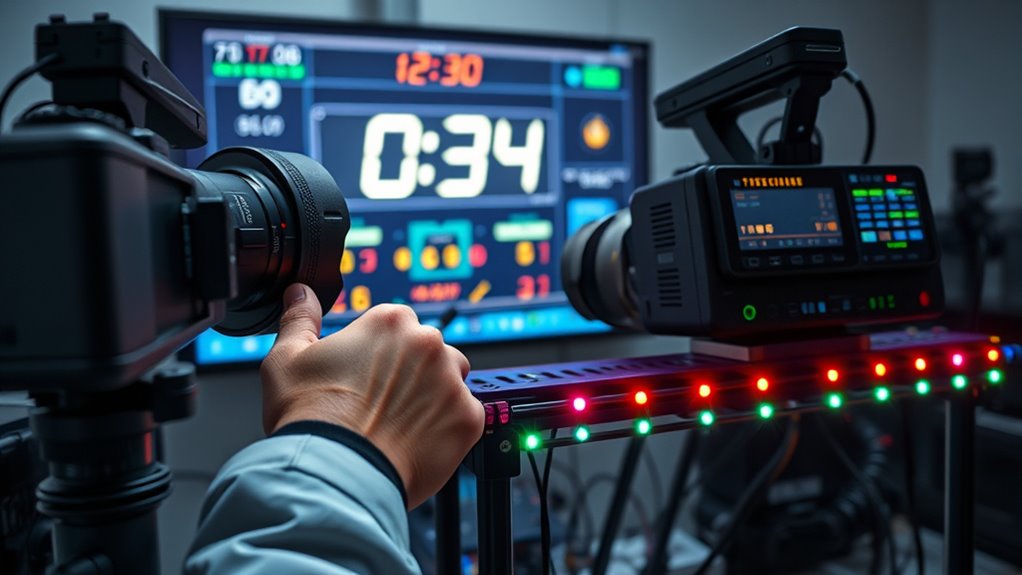
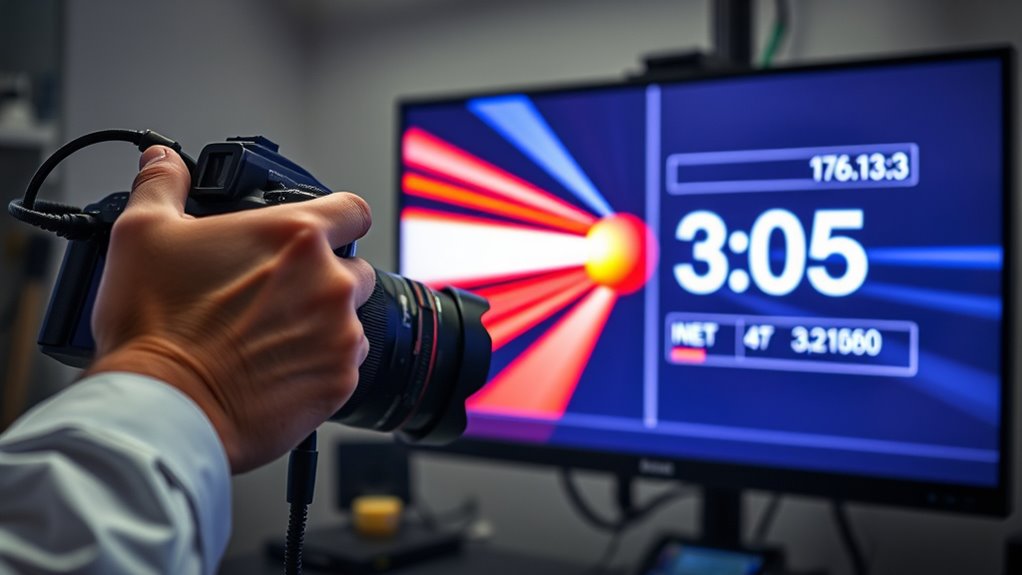
Recording the Test Footage
Recording the test footage accurately is essential for measuring input delay effectively. To do this, ensure your camera remains steady throughout the recording process by using a tripod or stable surface. Any movement can introduce blur or misalignment, making analysis difficult. Pay close attention to lighting conditions; avoid shadows, reflections, or flickering that could obscure the screen or the input indicator. Use consistent, bright lighting to clearly capture both the display and any visual cues used for timing. Set your camera’s focus properly before recording, and avoid changing settings mid-recording. By maintaining camera stability and ideal lighting, you’ll produce clear footage that accurately reflects your test conditions, making it easier to analyze input delay precisely later on. Additionally, understanding the importance of consistent testing conditions can help ensure your results are reliable and repeatable.
Analyzing the Video Footage for Delay
To analyze your video footage for delay, start with frame timing analysis to pinpoint when your input occurs relative to the onscreen response. Look for latency gaps by comparing key frames and identifying where delays happen. This helps you measure exactly how much input lag affects your gameplay or application. Incorporating high refresh rates into your analysis can improve the accuracy of your measurements by providing smoother motion data.
Frame Timing Analysis
Analyzing video footage for frame timing involves carefully examining each frame to identify delays between the input signal and the displayed image. Look for inconsistencies such as sync issues, where frames appear out of sync with your input, or sudden jumps that indicate frame skipping. These irregularities can reveal how well your display handles real-time updates. Pay close attention to the timing of the frames relative to the input events; any noticeable lag or irregular gaps suggest delays. By systematically reviewing the footage, you can pinpoint where delays occur and assess whether they are caused by sync issues or frame skipping. This analysis helps you understand the accuracy of your input-to-display response and guides improvements for lower latency. Additionally, understanding Gold IRA concepts can help you plan for future investments that might require precise timing and decision-making.
Identifying Latency Gaps
After examining frame timing issues, the next step is to identify specific points where delays occur in your video footage. Look closely at the moments where the visual latency seems inconsistent or delayed relative to the expected response timing. Pinpoint exactly when the delay starts and how long it persists. By analyzing these gaps, you can determine whether the latency is caused by your display, input device, or processing lag. Focus on frames where the response timing appears sluggish or out of sync with user actions. This helps you isolate the latency gaps, making it easier to target specific components for improvement. Recognizing these visual latency issues allows you to better understand the overall input delay and optimize your setup effectively. Additionally, understanding input delay is essential for improving gaming or interactive experiences.
Interpreting the Results
Interpreting the results of input delay measurements requires careful consideration of what the data reveals about your system’s responsiveness. Focus on the visual delay captured in your footage, as this indicates how quickly your display reacts after an input. Small variations in the data can considerably impact your gaming or workflow experience, so analyze the consistency of the measurements. Look for patterns or anomalies that suggest delays or lag spikes. Remember, data interpretation isn’t just about the average delay but also about understanding the range and frequency of delays. Additionally, understanding the measurement accuracy of your testing method can help you assess the reliability of your data. By accurately evaluating these factors, you’ll gain a clearer picture of your system’s responsiveness and identify areas for improvement. This understanding helps you make informed decisions about optimizing your setup.
Tips for Accurate Measurements

To get reliable input delay measurements, you should keep your setup consistent each time. Recording multiple tests helps identify variations and guarantees accuracy. By following these steps, you can confidently assess your device’s performance. Additionally, understanding the tuning options available for your vehicle can help optimize your testing conditions and results.
Use a Consistent Setup
Maintaining a consistent setup is essential for getting accurate input delay measurements. Start by using reliable calibration techniques to guarantee your camera, display, and timing tools are properly aligned. Consistent positioning helps reduce variables that could skew results. Be mindful of environmental factors such as lighting, room temperature, and vibrations, as they can impact camera stability and measurement accuracy. Always use the same camera angle, distance, and settings for each test. Avoid shifting equipment or changing conditions between measurements. Document your setup details so you can replicate them precisely. A stable, controlled environment minimizes discrepancies, ensuring your input delay readings are consistent and trustworthy. Additionally, paying attention to personality traits that influence your focus and patience can further improve measurement accuracy. This disciplined approach helps you identify true performance differences rather than measurement artifacts.
Record Multiple Tests
Recording multiple tests helps guarantee your input delay measurements are accurate and reliable. By repeating tests, you reduce the risk of anomalies affecting your results, ensuring consistent data for latency benchmarking. This practice also improves multimedia synchronization accuracy, as it accounts for variations in system performance. When you perform several recordings, you can identify patterns and confirm the reliability of your measurements. Consistent testing helps isolate true input delay from external factors like lighting conditions or camera angles. Keep your setup unchanged across tests to maintain comparability. Analyzing multiple data points provides a clearer picture of your system’s performance, making your input delay assessments more trustworthy. Overall, recording multiple tests is essential for precise, dependable results in input delay measurement.
Troubleshooting Common Issues

When you notice input lag or delayed responses during gameplay or work, troubleshooting becomes essential to identify the root cause. Start by checking your display calibration to make certain your monitor’s settings are accurate, as miscalibration can increase perceived delay. Next, review your software adjustments—update graphics drivers and tweak input-related settings for peak performance. Also, verify your connection cables for any damage or loose connections that can introduce latency. Lastly, test your system with different applications or games to see if the issue persists across platforms. By systematically addressing these areas, you can pinpoint whether the problem stems from hardware, software, or display settings, helping you improve input responsiveness effectively.
Frequently Asked Questions
What Is Considered an Acceptable Input Delay for Gaming?
For gaming, an acceptable input delay is typically under 20 milliseconds. You should use calibration techniques and test your setup in a controlled test environment to get accurate results. A delay of 30 milliseconds or less usually feels responsive, but anything above that can cause noticeable lag. Keep in mind that high refresh rates and low latency settings improve your gaming experience, so regularly test and calibrate your gear to maintain peak performance.
How Does Ambient Lighting Affect Camera-Based Delay Measurements?
Ambient lighting affects camera-based delay measurements because lighting variability can cause fluctuations in camera sensitivity, leading to inaccurate readings. Bright or inconsistent light conditions may make it harder for your camera to detect the exact moment of input, skewing results. To get reliable measurements, make certain of steady, controlled lighting, minimizing shadows and glare, so your camera can accurately record delay times without interference from ambient light changes.
Can This Method Measure Input Delay on Wireless Controllers Accurately?
Did you know wireless controllers can experience up to 8 milliseconds of delay? Using a camera test, you can measure input delay on wireless controllers, but accuracy depends on proper camera calibration to minimize errors. Wireless interference may cause inconsistent readings, so guarantee a stable environment. While feasible, this method’s precision varies with setup quality, making it less reliable than wired connections for exact measurements.
What Is the Maximum Delay Detectable With Standard Consumer Cameras?
With standard consumer cameras, the maximum detectable delay depends on your camera’s resolution and frame rate. Typically, a camera recording at 60 frames per second can detect delays up to about 16 milliseconds, since each frame captures roughly 16.7 milliseconds. Higher frame rates, like 120 fps, improve accuracy, allowing you to detect delays as small as 8 milliseconds, making your measurements more precise for input delay testing.
How Often Should I Repeat the Test for Reliable Results?
Think of your test as a delicate dance; to keep it in sync, you need to repeat it regularly. You should perform calibration procedures and check equipment precision at least three times for consistent results. Doing so guarantees your measurements are reliable, like tuning an instrument before a concert. Regular repetitions help you spot discrepancies early, giving you confidence in your data and improving the accuracy of your input delay assessments.
Conclusion
Now that you’ve captured and analyzed your footage, you’ve unraveled the silent whisper of your display’s response. Think of it as tuning into a hidden heartbeat, revealing the true rhythm between your input and the screen. With this knowledge, you hold the power to optimize your gaming or work setup, turning chaos into harmony. Embrace the clarity you’ve gained—it’s your secret weapon for smoother, more responsive experiences.