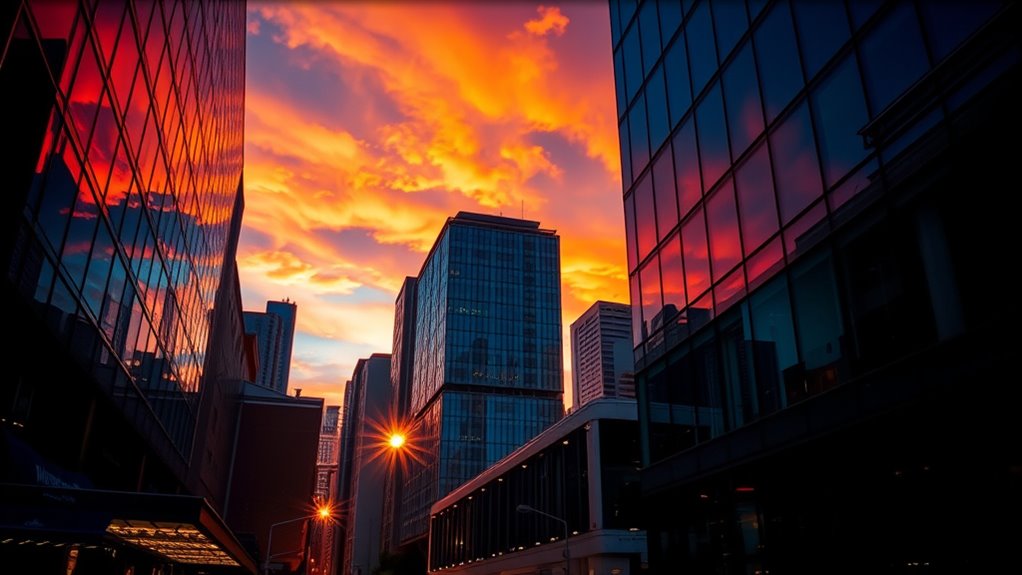
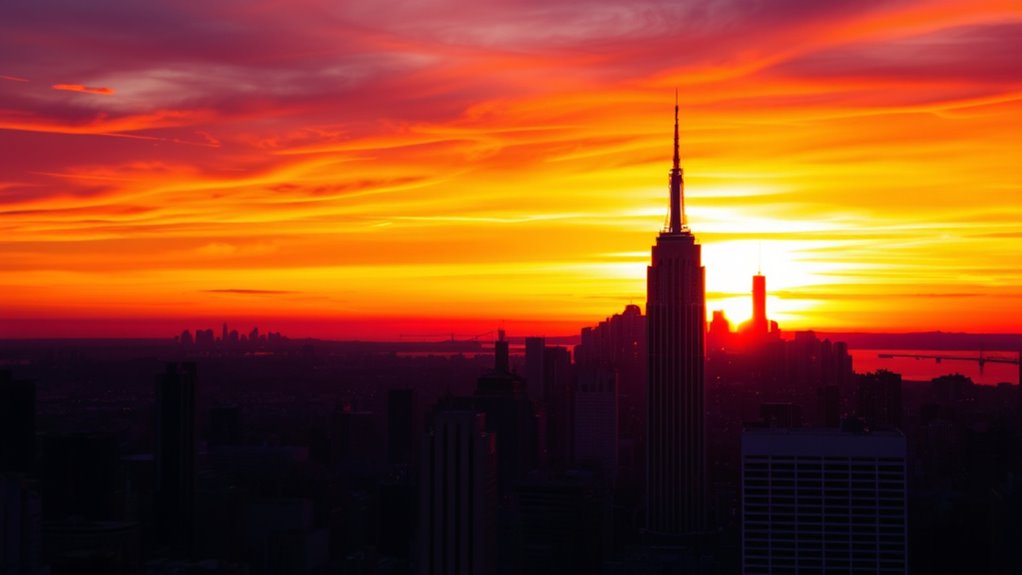
Balancing brightness and contrast is vital for creating compelling images. Increasing brightness makes details inside shadows more visible but risks washing out highlights and colors, leading to overexposure. Adjusting contrast adds depth and emphasis but can cause images to look unnatural if overdone. The key is finding a middle ground where shadows and highlights are balanced without sacrificing color fidelity. Keep experimenting with small tweaks, and you’ll discover how to master these tradeoffs effectively.
Key Takeaways
- Brightness adjusts overall lightness, while contrast emphasizes differences between shades; both must be balanced for natural images.
- Increasing brightness reveals details but risks overexposure; contrast enhances depth but can cause flatness if overdone.
- High contrast highlights elements but may cause eye strain; low contrast creates harmony but reduces visual impact.
- Proper calibration and subtle adjustments prevent over-editing, preserving image realism and avoiding washed-out or overly harsh results.
- Fine-tuning both settings together ensures optimal visual impact, depth, and tonal fidelity without sacrificing image quality.

Calibrite Display Pro HL Monitor Calibration Colorimeter for LCD Mini LED and OLED Displays, Measure up to 3000 Nits, PROFILER Software, USB C with Adapter, Validation/Color Uniformity Tools
SPECIFICATIONS: HL high luminance sensor colorimeter measures up to 3000 nits, calibrates and profiles LCD mini LED OLED…
As an affiliate, we earn on qualifying purchases.
As an affiliate, we earn on qualifying purchases.
Understanding the Basics of Brightness and Contrast
Brightness and contrast are fundamental concepts that determine how an image appears to your eyes. Brightness controls the overall lightness or darkness, while contrast affects the difference between the lightest and darkest parts. To fine-tune these, understanding color temperature is key—warm tones make images feel cozy, cool tones seem crisp. Gamma correction also plays a role; it adjusts how midtones are displayed, ensuring images aren’t washed out or overly dark. When you tweak brightness, you’re altering the entire tonal range, but contrast emphasizes differences between shades. Both settings work together to produce a balanced, visually appealing picture. Knowing how color temperature and gamma correction influence these parameters helps you make precise adjustments, so your images look natural and vibrant. Additionally, awareness of figurative language techniques, such as metaphors and imagery, can enhance your ability to interpret visual content more creatively and effectively.

TOUR BOX Elite Plus All-in-Creative Controller, Bluetooth Keyboard for Photo & Video Editing, Color Grading, Illustration, Works with Procreate, Adobe & Davinci, Cable Bag Included (Frost White)
SMART. CONTROL. ALL-IN-ONE. — Why relearn shortcuts for every software? TourBox Elite Plus redefines what a true creator’s…
As an affiliate, we earn on qualifying purchases.
As an affiliate, we earn on qualifying purchases.
How Brightness Affects Your Image
Your brightness setting directly impacts how clearly you see your image, especially in different lighting conditions. If it’s too high, overexposure can wash out details, while too low can make the image hard to distinguish. Finding the most suitable brightness ensures your image remains clear and vibrant without losing important details. Using professional equipment can help achieve more precise control over your display settings.
Brightness and Image Visibility
Have you ever noticed how increasing the brightness of an image can make details more visible, while lowering it can hide important elements? Brightness impacts how well you perceive details, but it works alongside factors like color temperature and gamma correction. Adjusting brightness without considering these can distort your image’s clarity. For example, too high brightness can wash out colors, reducing contrast and detail. Proper gamma correction ensures your brightness levels maintain natural tonal ranges. Here’s a quick comparison:
| Brightness Level | Effect on Visibility | Consideration |
|---|---|---|
| Low | Details hidden | Use with warm color temp |
| Moderate | Balanced clarity | Ideal for most images |
| High | Details washed out | Watch for overexposure |
Understanding these interactions helps you optimize image visibility effectively. Additionally, awareness of data privacy challenges is crucial when processing images with automated systems.
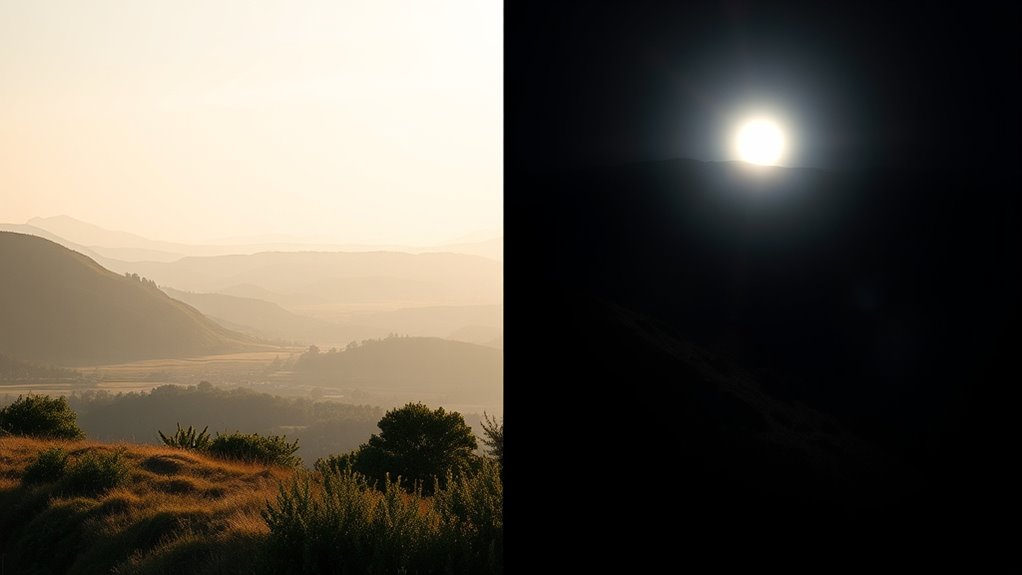
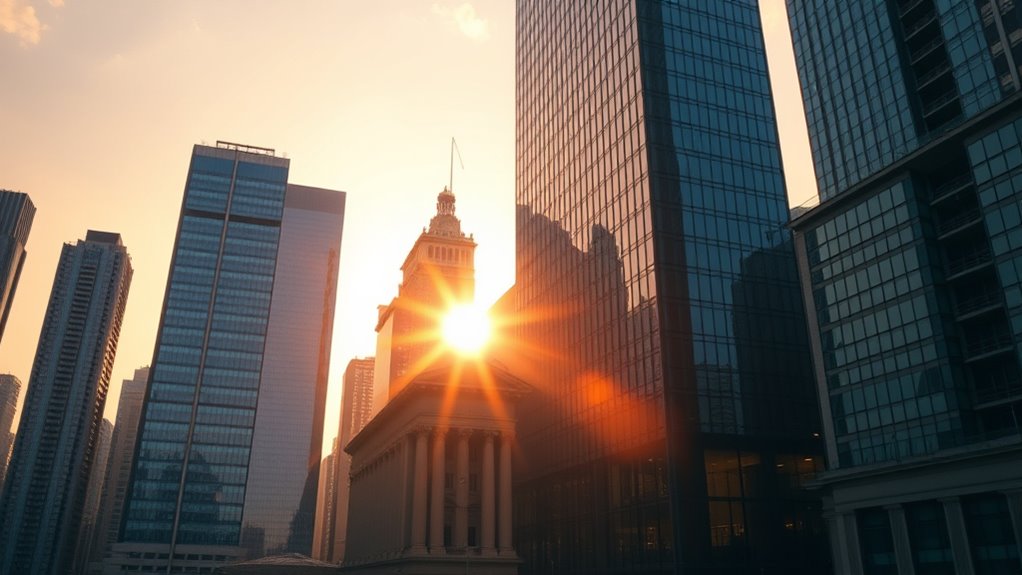
Overexposure Effects
When brightness levels are set too high, images can become overexposed, causing highlights to lose detail and appear washed out. Overexposure reduces color accuracy, making colors look faded or unnatural. It also amplifies sensor noise, especially in darker areas, which can degrade image quality. Brightened images often lose subtle tonal variations, making them appear flat and less dynamic. Overexposure can obscure important details in bright regions, making it harder to recover them later. Adjusting brightness too high risks sacrificing image fidelity, as the camera’s sensor struggles to handle extreme light levels. Proper brightness calibration is essential for maintaining image quality and ensuring that details in both shadows and highlights are preserved. To avoid these effects, keep brightness within a balanced range, ensuring highlights retain detail and colors stay true to life. This approach preserves image clarity and overall quality.
Optimal Brightness Settings
Adjusting brightness to ideal levels guarantees your images maintain detail, color accuracy, and visual impact. To achieve this, consider ambient lighting conditions—bright rooms may require higher brightness, while darker settings benefit from lower levels. Proper display calibration is essential; use calibration tools or settings to fine-tune your monitor’s brightness. Too high a setting can wash out details and cause eye strain, while too low can obscure shadows and reduce clarity. Aim for a balance where bright areas retain detail without sacrificing contrast or color vibrancy. Regularly reassess your display in different lighting environments to ensure consistent image quality. Being aware of visual perception principles helps optimize your display settings for the best viewing experience. Ultimately, perfect brightness enhances your viewing experience by preserving image integrity across various ambient lighting conditions.

CUNPU 27 Inch 4K 70Hz Monitor, UHD (3840 * 2160) IPS Ultra-Slim Bezel Monitor for Photo Video Editing, ΔE < 2, 100% DCI-P3, 1.07B+ Colors, PIP-PBP, Adaptive Sync, DP/HDMI, Black
SUPERIOR 4K IMAGE QUALITY: The CUNPU 4K monitor boasts a 27-inch display with four times the pixel density…
As an affiliate, we earn on qualifying purchases.
As an affiliate, we earn on qualifying purchases.
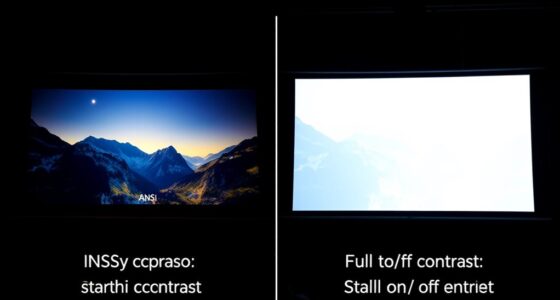
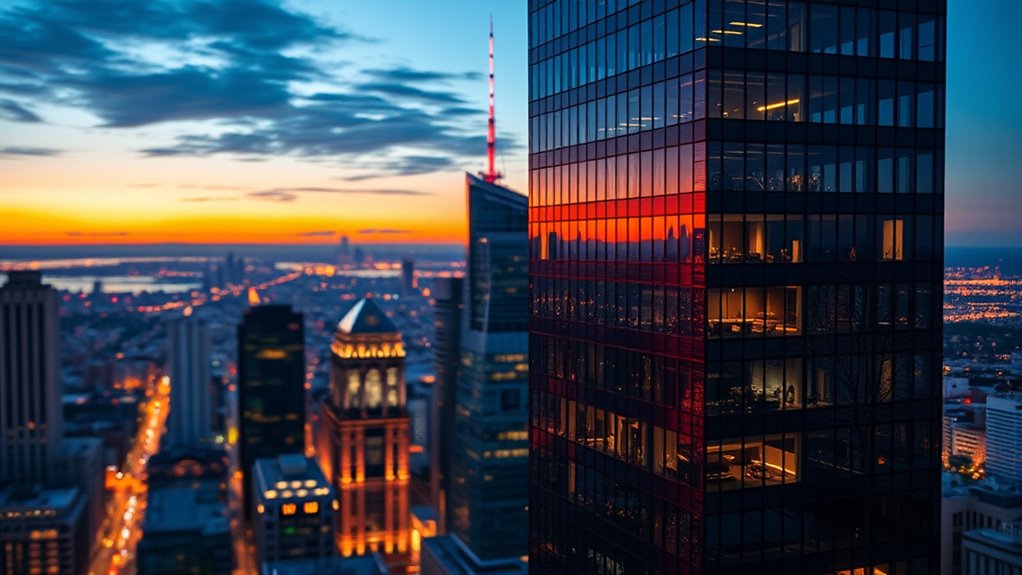
The Role of Contrast in Visual Impact
Why does contrast play such a crucial role in creating visual impact? It all ties back to color theory and how our visual perception processes differences. High contrast makes elements stand out, grabbing attention quickly, while low contrast creates a softer, more harmonious look. When you understand contrast, you influence how viewers interpret your message and evoke emotions. Strong contrast emphasizes shapes and details, guiding the eye effectively. Conversely, subtle contrast fosters mood and depth. By balancing contrast, you shape how viewers perceive your content’s importance and clarity. This understanding helps you craft visuals that are not only striking but also easy to interpret. Proper visual design principles ensure your visuals are both engaging and effective. Ultimately, contrast energizes your visuals, making them more compelling and memorable, based on fundamental principles of color theory and visual perception.
Pixel Perfect Camera Colour Correction Card – 4×6 for Photo and Video – Reference Tool Grey Card Target White Balance Exposure Temperature Colour Calibration Chart, Set of 2
QUANTITY: Set of 2, Printed on SmartFlex Synthetic Paper with a matt finish coating to avoid glare
As an affiliate, we earn on qualifying purchases.
As an affiliate, we earn on qualifying purchases.
Common Mistakes When Adjusting Brightness and Contrast

Many people overcorrect brightness levels, making images look unnatural or washed out. Ignoring the balance between brightness and contrast can lead to dull visuals that lack depth. Additionally, neglecting visual comfort may cause eye strain or discomfort during prolonged viewing. Incorporating proper lighting techniques can help create a more balanced and comfortable viewing experience.
Overcorrecting Brightness Levels
Overcorrecting brightness levels is a common mistake that can quickly ruin the overall look of your image. When you push brightness too high, details get washed out, and colors lose their vibrancy, affecting color saturation. Conversely, setting it too low makes the image dull and flat. This imbalance can also interfere with HDR effects, causing unnatural contrasts or blown-out highlights. Here’s a quick visual guide:
| Brightness Level | Effect on Image | Best Use Case |
|---|---|---|
| Too high | Washed out, loss of detail | Bright, sunny scenes |
| Too low | Dull, flat appearance | Low-light or moody shots |
| Balanced | Natural, detailed | Most general scenarios |
Avoid overcorrecting to maintain realistic, vibrant images. Proper adjustment of brightness can also enhance the overall image quality and ensure your photos look their best across different viewing devices.
Ignoring Contrast Balance
Adjusting brightness without paying attention to contrast can lead to images that look flat or unnatural. When you overlook contrast balance, you risk compromising color accuracy and the overall quality of your color grading. Without proper contrast, shadows may lose depth, and highlights can become overly harsh, reducing detail. This imbalance can cause colors to appear washed out or overly saturated, skewing your intended look. To avoid this, keep these points in mind:
- Maintain a balance between bright and dark tones for natural depth
- Adjust contrast to preserve color integrity during grading
- Recognize that high brightness with low contrast flattens images
- Use contrast to enhance the visual impact without distorting colors
- Proper contrast management is especially important in Kia Tuning, where visual clarity and color fidelity are essential for showcasing modifications
Focusing on contrast ensures your images retain accurate colors and a professional, polished appearance.
Neglecting Visual Comfort
Neglecting visual comfort when adjusting brightness and contrast can lead to images that strain your eyes or feel uncomfortable to look at. Poorly balanced settings disrupt color harmony, making visuals harsh or dull, which hampers artistic expression. When brightness is too high or contrast too extreme, details become hard to discern, causing eye fatigue over time. Always consider how your adjustments affect overall comfort; a balanced image enhances viewer engagement and supports the intended mood. Remember, comfort isn’t just about ease; it’s about creating an environment where your audience can appreciate your work without distraction or discomfort. Prioritize subtlety and harmony in your adjustments to ensure your images are pleasing and effective, allowing your artistic vision to shine without sacrificing viewer well-being.
Finding the Right Balance for Natural-Looking Photos

Achieving a natural-looking photo requires carefully balancing brightness and contrast so that the image appears realistic without losing detail or vibrancy. Proper color calibration ensures colors stay true to life, preventing unnatural hues. Adjusting sensor sensitivity helps capture accurate light levels, reducing the need for extreme edits. To find the right balance, consider these ideas:
- Use subtle contrast increases to enhance depth without flattening details
- Fine-tune brightness so shadows and highlights remain balanced
- Calibrate your monitor for consistent color accuracy
- Keep sensor sensitivity aligned with lighting conditions for true-to-life exposure
- Be aware of store hours and timing, as lighting conditions can vary depending on when photos are taken and the environment’s brightness.
When to Prioritize Brightness Over Contrast (and Vice Versa)
Ever wonder when to focus on brightness instead of contrast, or vice versa, to get the best results? If your goal is to highlight details or improve color saturation, adjusting brightness is key. Use brightness prioritization when images appear dull or lack vibrancy, especially in scenes with subtle color variations. Conversely, if your image needs more depth or sharper edges, contrast should take precedence.
| Scenario | Focus on |
|---|---|
| Colors look washed out | Brightness |
| Fine details need clarity | Sharpness enhancement |
| Colors are vivid but flat | Contrast |
Knowing when to tweak each setting helps enhance the overall image, ensuring it looks lively and clear without sacrificing naturalness.
Practical Tips for Fine-Tuning Your Image Settings
To fine-tune your image settings effectively, start by making small adjustments and observing their impact. Use histogram analysis to gauge exposure, contrast, and brightness, ensuring your image’s tonal range is balanced. When adjusting brightness and contrast, consider how these changes affect color grading, as subtle shifts can alter overall mood and harmony. Regularly compare before-and-after states to avoid over-editing. Keep these tips in mind:
Start with small adjustments and monitor their impact to achieve balanced, natural-looking images.
- Use histogram peaks to identify underexposure or overexposure
- Adjust contrast to enhance details without losing tonal balance
- Fine-tune brightness for overall lightness without washing out colors
- Continuously preview changes to maintain natural color grading
This method helps you achieve precise control, ensuring your final image is visually compelling and technically sound.
Recognizing Signs of Over-Editing and How to Avoid Them
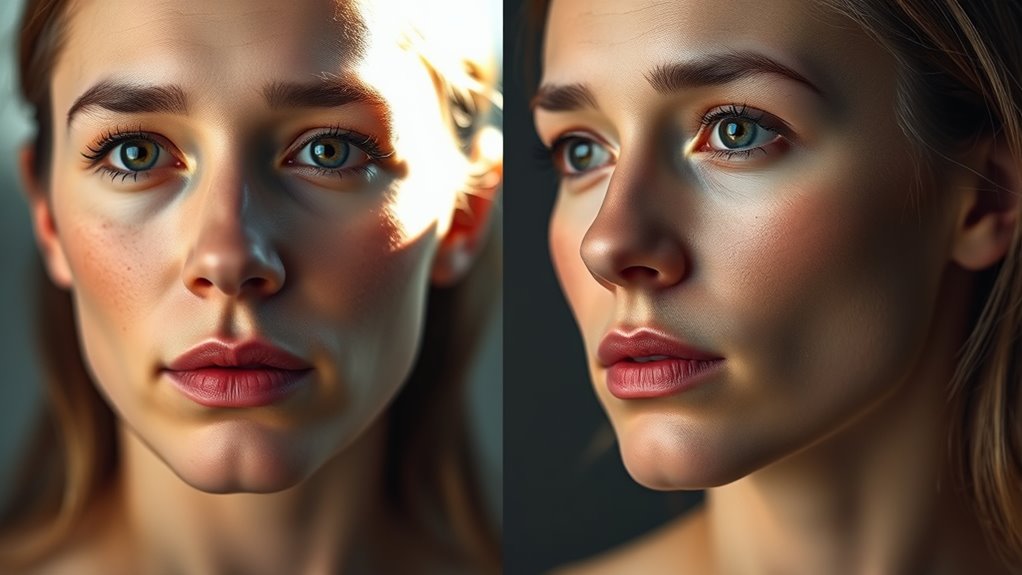
While fine-tuning your image settings is important, it’s equally essential to recognize when adjustments start to look unnatural. Over-editing often manifests through overly harsh color grading or exaggerated tone mapping, which can make images appear fake or unbalanced. Signs include unnatural skin tones, blown-out highlights, or overly muted shadows. Pay attention to inconsistent color shifts or unnatural progressions between light and dark areas. To avoid over-editing, step back periodically and compare your work with the original. Use subtle adjustments rather than drastic changes, and rely on visual cues to keep your image realistic. Remember, the goal is to enhance, not distort, the original scene. Staying mindful of these signs helps maintain natural-looking results and prevents your edits from becoming obvious or distracting.
Frequently Asked Questions
How Do Ambient Lighting Conditions Influence Brightness and Contrast Adjustments?
You should adjust brightness and contrast based on ambient lighting conditions to avoid glare and guarantee clarity. In bright environments, increase contrast and lower brightness to mitigate glare, while warmer color temperature adjustments can make screens more comfortable. Conversely, in dim settings, lower contrast and boost brightness for visibility. Always consider glare mitigation strategies and tweak color temperature adjustments to optimize your viewing experience, reducing eye strain and enhancing image quality.
Can Automatic Editing Tools Effectively Balance Brightness and Contrast?
Think of automatic editing tools as your digital magic wand, capable of balancing brightness and contrast effortlessly. They analyze your footage’s dynamic range and apply adjustments to enhance color grading, making images pop and shadows deepen. While they can handle basic tweaks, they might not capture your artistic vision perfectly. Trust them as a helpful starting point, but fine-tuning guarantees your visuals truly shine with personalized brilliance.
How Do Different Display Screens Affect Perceived Brightness and Contrast?
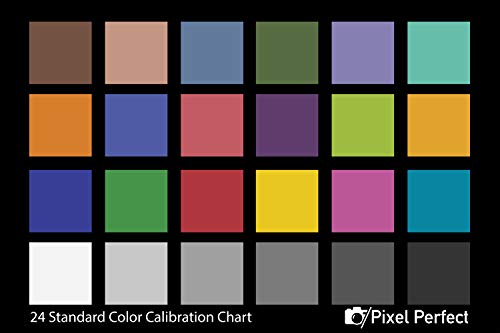
Different display screens affect your perceived brightness and contrast based on factors like color calibration and screen glare. A well-calibrated screen guarantees colors and brightness levels are accurate, making images appear more vibrant and balanced. However, screen glare can reduce contrast and make it harder to see details, especially in bright environments. To improve perception, calibrate your display regularly and minimize glare with anti-reflective coatings or proper lighting.
What Are the Psychological Effects of Overly High Contrast Images?
Overly high contrast images can create a jarring, intense visual experience that impacts your psychological state. You might feel alert yet overwhelmed, causing eye strain, increased visual fatigue, and discomfort. The stark difference in color saturation can make images seem harsh, possibly leading to fatigue and decreased focus over time. This heightened contrast may also evoke heightened emotions, making images feel aggressive or unsettling, affecting your overall mood and perception.
Are There Specific Genres or Styles That Require Unique Brightness and Contrast Settings?
You should adjust brightness and contrast based on the genre or style you’re working with. For film noir, you’ll want high contrast to emphasize shadows and mood. In high dynamic range (HDR) images, you can balance brightness and contrast to showcase details in both highlights and shadows. Tailoring these settings helps you create the desired atmosphere, whether it’s the dramatic tension of noir or vibrant clarity in HDR photography.
Conclusion
So, next time you tweak brightness and contrast, remember—getting it just right is an art, not a science. Ironically, the perfect balance often feels impossible, like chasing a mirage. But don’t stress; a little over- or under-adjustment won’t ruin your shot. Embrace the flaws, enjoy the process, and maybe, just maybe, your “imperfect” photo will stand out more than the perfectly balanced ones. After all, who wants boring perfection anyway?