To test your projector’s uniformity, start by displaying test patterns with gradients and color bars to spot any color shifts or patches. Check for brightness consistency across the entire screen, especially corners and edges, adjusting the projector’s position and settings as needed. Make certain the lens is clean and connections are secure, and minimize keystone correction to reduce distortion. Keep evaluating and fine-tuning with different test patterns to guarantee your image stays evenly illuminated and vibrant. If you want detailed steps, continue exploring further.
Key Takeaways
- Display test patterns with gradients and color bars to identify uneven brightness and color inconsistencies.
- Inspect corners and edges for brightness and color uniformity, adjusting projector position if needed.
- Use calibration tools or software to fine-tune color accuracy and brightness across the entire screen.
- Check and clean the projector lens regularly to ensure even light distribution.
- Verify all cable connections and environmental factors that may affect image uniformity.
Ensuring your projector displays an even image is essential for a professional and immersive viewing experience. When testing projector uniformity, you’re checking for consistent brightness, color, and focus across the entire screen. Small inconsistencies can distract viewers and diminish the overall quality of your display. To get started, it’s important to perform color calibration first. Proper color calibration ensures that the hues and shades are accurate and uniform, preventing color shifts or patches that can throw off the visual experience. Use a calibration tool or test pattern designed for projectors to check for color accuracy across the screen. If you notice areas that appear too warm, cool, or dull, adjust your projector’s color settings accordingly. Many projectors offer manual color calibration options, or you can use calibration software for more precise results.
Perform color calibration first to ensure accurate, uniform hues and shades across your projector display.
Next, examine the image for brightness uniformity. Pay special attention to the corners and edges, as these often show the most variation. If certain areas look dimmer or brighter than the center, you might need to adjust the projector’s lens or position to improve evenness. Keystone correction can help here by adjusting the image shape when the projector isn’t perfectly aligned with the screen. However, it’s important to avoid over-relying on keystone correction, as excessive use can distort the image quality and create unnatural proportions. Instead, aim to position your projector as orthogonally as possible to the screen to minimize the need for correction.
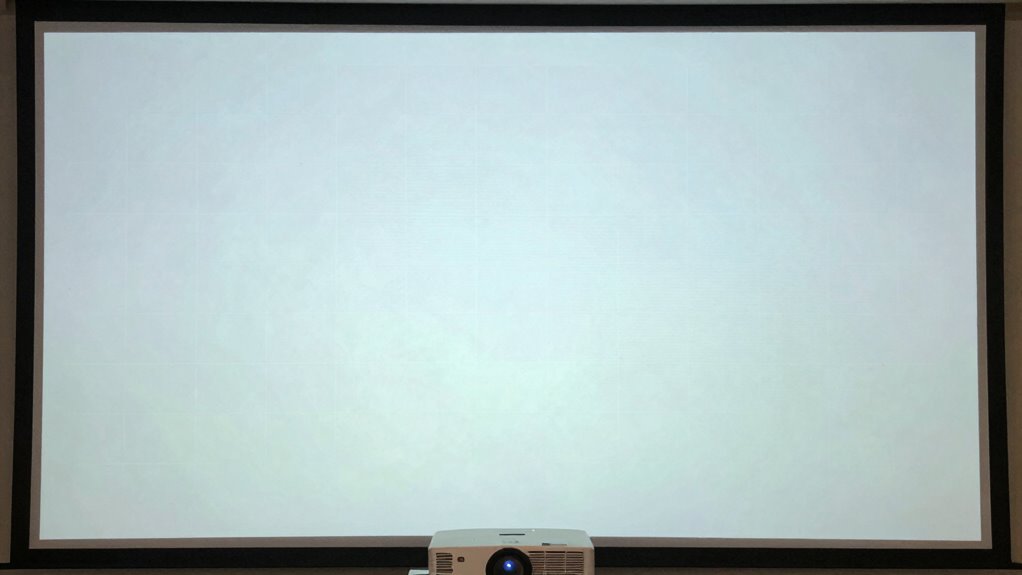
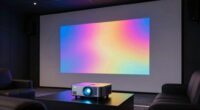
In addition to keystone correction, focus on ensuring your projector’s lens is clean and free of dust or smudges, which can cause uneven light distribution. Confirm that your projector is set to the correct resolution and aspect ratio, as mismatched settings can lead to distortions or uneven brightness. For more comprehensive testing, display test patterns that feature gradients and color bars. These patterns reveal subtle inconsistencies in color and brightness across the entire image. When you see uneven patches or color shifts, make incremental adjustments, repeating the test until the uniformity improves. Regularly checking for cable failures and ensuring all connections are secure can also prevent image issues that affect uniformity. Additionally, understanding the light source type and its aging process can help anticipate potential brightness variations over time. It’s also helpful to consider ambient lighting conditions, as they can influence perceived uniformity and overall image quality. To further enhance your setup, consider environmental factors such as ambient lighting, which can influence perceived uniformity and overall image quality. It’s also beneficial to evaluate the projector’s placement and angle, as these can significantly impact the uniformity of the projected image.
Finally, take your time to review the entire screen under different lighting conditions and from various angles. Projector uniformity isn’t just about the initial setup; it requires ongoing attention and fine-tuning. By carefully calibrating colors, making precise keystone corrections, and regularly inspecting the image, you can ensure a consistently high-quality display that impresses every viewer.

datacolor SpyderPro Monitor Calibration Tool: Ensures Accurate Color When Viewing and Editing Photos & Videos
ACHIEVE TRUE COLOR – Ensures your monitor displays colors accurately, critical for photography, design, and video editing, with…
As an affiliate, we earn on qualifying purchases.
As an affiliate, we earn on qualifying purchases.
Frequently Asked Questions
What Causes Non-Uniform Projector Images?
Non-uniform projector images often happen due to issues like poor color calibration, which causes inconsistent colors across the screen. Lens distortion can also lead to uneven image projection, especially at the edges. When these problems occur, you’ll notice areas that are brighter, darker, or have color inconsistencies. Regularly adjusting your projector’s color calibration and checking for lens distortion can help you achieve a more uniform, high-quality image.
How Often Should Projector Uniformity Be Tested?
Think of your projector as a painter’s canvas: regular checks keep the masterpiece vivid. You should test projector uniformity monthly, especially after color calibration or lens alignment. This guarantees consistent brightness and color across the screen. Keep an eye out for uneven patches or color shifts. Frequent testing preserves image quality, preventing small issues from becoming big problems, and keeps your visuals as vibrant and precise as the first day.
Can Projector Settings Fix Uniformity Issues?
Yes, adjusting projector settings can help fix uniformity issues. You should start with color calibration to guarantee consistent color output across the screen, then check lens alignment for proper image positioning. Fine-tuning these settings can improve the overall uniformity, reducing visible brightness or color inconsistencies. Regularly adjusting and calibrating your projector helps maintain ideal image quality and address any uniformity problems effectively.
Which Tools Are Best for Testing Projector Uniformity?
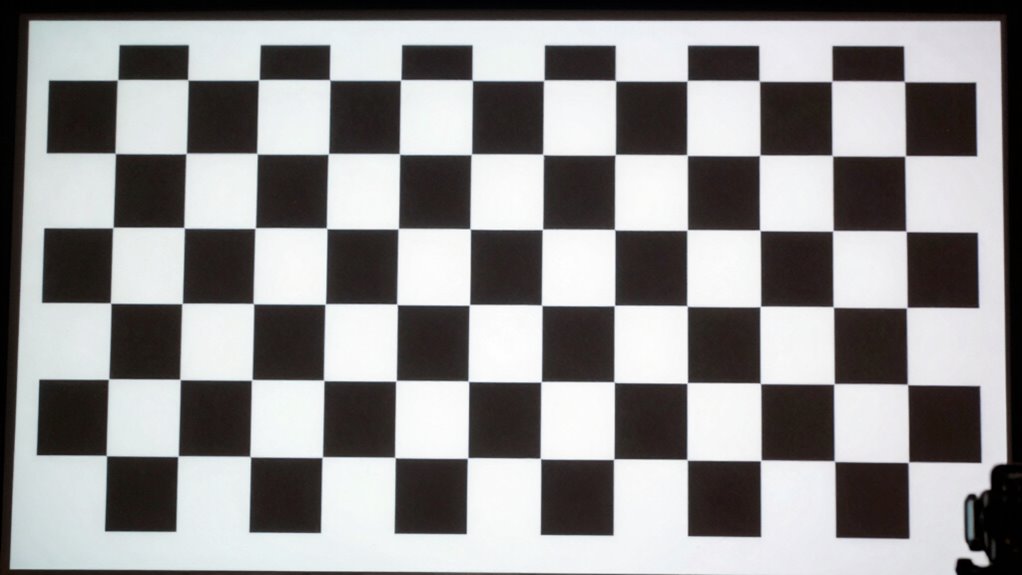
You should use calibration techniques and image analysis tools to test projector uniformity effectively. Color calibration charts or gray scale test patterns help identify inconsistencies, while software like CalMAN or SpyderX provides detailed image analysis. Don’t assume your eyes are enough—these tools reveal subtle issues. Investing in quality calibration tools guarantees accurate results, helping you fine-tune your projector for a perfectly uniform image across the entire screen.
Does Room Lighting Affect Projector Uniformity Testing?
Yes, room lighting, especially ambient light, can affect your projector uniformity testing. Bright ambient light reduces contrast and makes it harder to see color inconsistencies across the screen. To accurately assess color consistency and uniformity, you should perform tests in a dimly lit or dark environment. Managing ambient light ensures you get a true representation of how evenly your projector displays images, helping you identify any issues effectively.

Vision Chart Projector Optical Testing Instrument with 30 HD Charts and 35 Masks for Eyewear Fitting Reference
Optical Chart Projector: Designed for visual chart projection, optical equipment setup, and eyewear fitting reference.
As an affiliate, we earn on qualifying purchases.
As an affiliate, we earn on qualifying purchases.
Conclusion
By regularly testing your projector’s uniformity, you guarantee it performs with the precision of Da Vinci’s brushstrokes—every detail sharp and evenly illuminated. Like a seasoned artist examining their canvas, you’ll spot inconsistencies before they mar the masterpiece. Embrace this routine as your secret to perfection, transforming a simple projection into a work of art. Remember, the key to a flawless display lies in your vigilant eye and unwavering commitment to quality.
Altura Photo Camera Cleaning Kit – Lens Cleaner Spray, Brush & Blower
COMPLETE CAMERA CLEANING KIT: Our camera lens cleaning kit includes an alcohol & ammonia-free lens cleaner spray, cleaning…
As an affiliate, we earn on qualifying purchases.
As an affiliate, we earn on qualifying purchases.
projector brightness uniformity tester
As an affiliate, we earn on qualifying purchases.
As an affiliate, we earn on qualifying purchases.