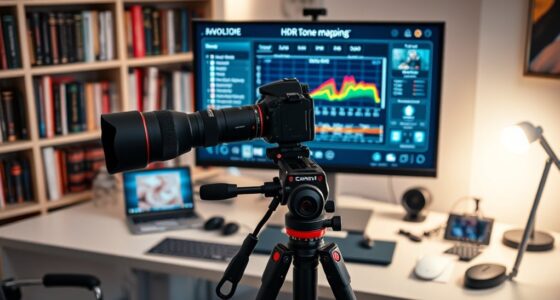

Your projector’s sharpness setting controls how clear and detailed your images appear by crisping up object edges. When adjusted correctly, it enhances contrast, reveals fine textures, and makes the picture look vibrant and natural. Too high, and images may look grainy or overly harsh; too low, and they can seem blurry or washed out. Fine-tuning these settings helps create sharper, more immersive visuals—if you want to know how to optimize them fully, keep exploring the details behind this adjustment.
Key Takeaways
- Sharpness controls the clarity and definition of object edges, making images appear more detailed and crisp.
- Proper settings enhance image depth and texture, creating a more immersive viewing experience.
- Over- or under-sharpening can cause images to look unnatural, grainy, or blurry.
- Sharpness works best when combined with color calibration and keystone correction for optimal picture quality.
- Adjusting sharpness ensures images are clear, vibrant, and accurately aligned without distortions.
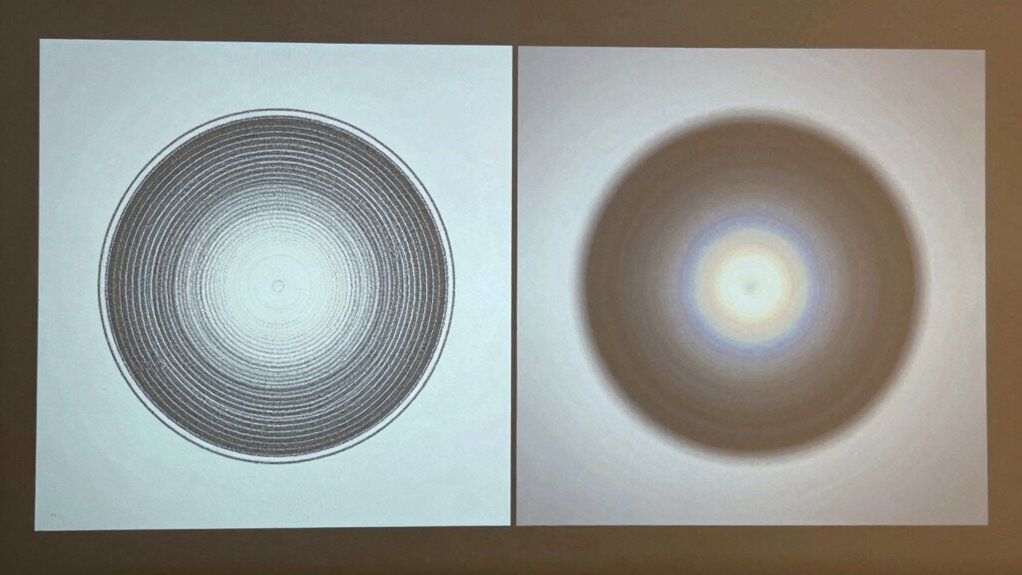
Adjusting your projector’s sharpness settings can considerably improve image clarity and detail, making your viewing experience more enjoyable. Sharpness controls how crisp and defined the edges of objects appear on the screen. When set correctly, it enhances the overall picture, highlighting details without creating harsh outlines or digital artifacts. However, setting it too high can result in a grainy or unnatural look, while too low can cause the image to look blurry or washed out. Finding the right balance helps your projector produce a clear, vibrant picture that matches your environment and content type.
Adjust sharpness to enhance detail without creating grainy or unnatural images for a clearer viewing experience.
Beyond sharpness, other adjustments like color calibration and keystone correction play essential roles in image quality. Color calibration ensures that colors appear natural and true to life, which complements good sharpness. When colors are off, even a sharp image can seem dull or overly saturated, reducing the overall visual impact. Proper calibration helps maintain consistent color tones across the entire picture, making scenes look more realistic and engaging. Combining sharpness with accurate color calibration results in a more balanced image, where details are crisp, and colors are vibrant and true to the source.
Keystone correction is another indispensable setting that influences image quality, especially when your projector isn’t perfectly aligned with the screen. If you notice a trapezoidal distortion—where the image leans or appears skewed—adjusting keystone correction can straighten it out. When the image is properly rectangular, the sharpness settings work more effectively, because your projector isn’t trying to compensate for distortions. When you understand how contrast ratio affects image depth, you can better optimize your projector’s settings for the best visual experience. Correcting keystone distortion also ensures that the edges of the image are sharp and clear, rather than fuzzy or warped. This alignment makes it easier to optimize sharpness without sacrificing image fidelity, especially when considering the screen size and viewing distance. Additionally, understanding how resolution impacts perceived image quality can help you choose the best settings for your specific projector model. To further refine your image, exploring lens shift options can help you achieve perfect alignment without compromising sharpness or image clarity.
In essence, these adjustments work together to optimize your viewing experience. When you fine-tune sharpness, color calibration, and keystone correction, you’re creating an environment where every detail pops, and the picture looks natural and balanced. Properly calibrated sharpness doesn’t just make things look clearer—it enhances the depth and texture of images, giving you a more immersive experience. Understanding the fundamentals of image quality can help you better grasp how each setting impacts overall visual fidelity. Overall, understanding what each setting does helps you achieve the best possible image quality, whether you’re watching movies, giving presentations, or gaming. When all three elements work in harmony, your projector delivers a sharp, vibrant, and distortion-free picture that truly elevates your viewing sessions.

LG CineBeam S PU615U 4K UHD Ultra Short Throw Smart Projector, Auto Screen Adjustment, up to 100” Projection, up to DCI-P3 154%, 450,000:1 Contrast, Speakers with Dolby Atmos, HDR10, HDMI, USB, HID
Ultra-Short Throw Display for a 4K Cinematic Experience – Get big-screen, 4K entertainment in small spaces with this…
As an affiliate, we earn on qualifying purchases.
As an affiliate, we earn on qualifying purchases.
Frequently Asked Questions
Can Sharpness Settings Affect Color Accuracy?
Yes, sharpness settings can affect color accuracy. When you adjust sharpness, it influences how detailed and crisp the image appears, which can sometimes distort colors if set too high. Proper color calibration and maintaining ideal image resolution are essential for accurate colors. By balancing sharpness, you guarantee that details are clear without compromising color fidelity, resulting in a more true-to-life and visually pleasing projection.
Do Sharpness Adjustments Impact Motion Clarity?
Sharpness settings considerably impact motion clarity, directly influencing your viewing experience. When you increase sharpness, you may reduce motion blur, making fast-moving images crisper. Conversely, excessive sharpening can cause image dithering, creating unwanted visual noise. Balancing sharpness helps maintain smooth motion while avoiding distracting artifacts. Adjusting carefully ensures your projector delivers clear, fluid visuals, making fast-paced scenes more enjoyable and less blurry.
Is There an Ideal Sharpness Level for Different Content Types?
Yes, the ideal sharpness level varies with content type. For movies, you want a softer sharpness to preserve natural resolution and avoid artifacts. For presentations or detailed images, slightly increased sharpness can enhance clarity. Proper projector calibration helps you find the right balance, ensuring sharpness complements resolution without introducing noise or halos. Adjust based on your viewing environment and content to optimize image quality.
How Does Ambient Lighting Influence Sharpness Perception?
Ambient light totally transforms how sharpness appears—it’s like turning a dim room into daylight! When there’s lots of ambient light, your eyes struggle with visual glare, making images seem blurrier or overly harsh. Bright surroundings wash out fine details, so you might need to boost sharpness settings or adjust the environment. Conversely, in darker rooms, sharpness shines, revealing crisp details without glare interference.
Can Over-Sharpening Cause Image Artifacts?
Yes, over-sharpening can cause image artifacts. When you increase sharpness excessively, edge enhancement amplifies the contrast along object borders, making them look unnaturally harsh. It can also lead to noise amplification, where graininess or pixelation becomes more prominent, reducing image clarity. To avoid these issues, adjust sharpness settings carefully, aiming for a natural look without exaggerating edges or noise, ensuring a better viewing experience.

Calibrite Display 123 Monitor Calibration Colorimeter for Photo Editing and Color Accurate Viewing, Easy 1 2 3 Software Workflow, USB C Connection, and Before and After Check, Supports 2 Displays
SPECIFICATIONS: Monitor calibration colorimeter with Easy 1 2 3 software workflow, USB C connection, compact body approx. 34mm…
As an affiliate, we earn on qualifying purchases.
As an affiliate, we earn on qualifying purchases.
Conclusion
By fine-tuning your projector’s sharpness, you’re fundamentally sculpting the clarity of your visual masterpiece, sharpening the fine details while avoiding the jagged edges of over-clarity. Think of it as tuning a musical instrument—striking the perfect balance transforms a blurred melody into a crisp, harmonious symphony. So, don’t be afraid to experiment; with each adjustment, you’re painting a clearer, more engaging picture that invites your eyes to wander and explore.

Boldever 3000 ANSI Google TV Smart Projector – 4K Projector with WiFi and Bluetooth, 20W HiFi Speakers Outdoor Movie Proyector, Auto Focus & Keystone Projector for Home Theater Indoor
[Official Google TV with 10,000+ Apps – Stream Netflix, YouTube & Live TV] Upgrade your viewing experience with…
As an affiliate, we earn on qualifying purchases.
As an affiliate, we earn on qualifying purchases.

Healifty High Definition Fresnel Lens 5.51X3.54 Inch Pmma Optical Lens for Projector Replacement Pack of 2 High Transmission Projector Fresnel for Optical Experiments
High Definition Fresnel Lens Performance: This 5.51 by 3.54 inch Fresnel lens offers enhanced image clarity and sharpness,…
As an affiliate, we earn on qualifying purchases.
As an affiliate, we earn on qualifying purchases.