
If your projector shows an upside-down or mirrored image, you can fix it by adjusting the settings or repositioning it. Access the menu on your projector and look for options like ‘Image Flip,’ ‘Projection Mode,’ or ‘Orientation,’ then select the correct setting. You might also need to physically turn or remount the projector if necessary. For detailed steps tailored to your model, keep exploring to learn more about achieving the perfect alignment.
Key Takeaways
- Access the projector’s menu and locate image flip or orientation settings to correct upside-down images.
- Use built-in keystone correction to digitally straighten and adjust the inverted display.
- Check mounting position; physically reposition or flip the projector if necessary for proper image orientation.
- Combine physical adjustments with menu settings for optimal correction and image alignment.
- Consult your user manual for model-specific instructions on adjusting image orientation and correction features.

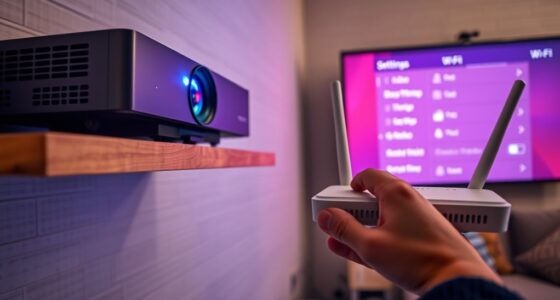
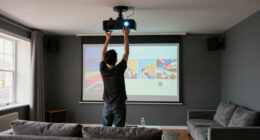
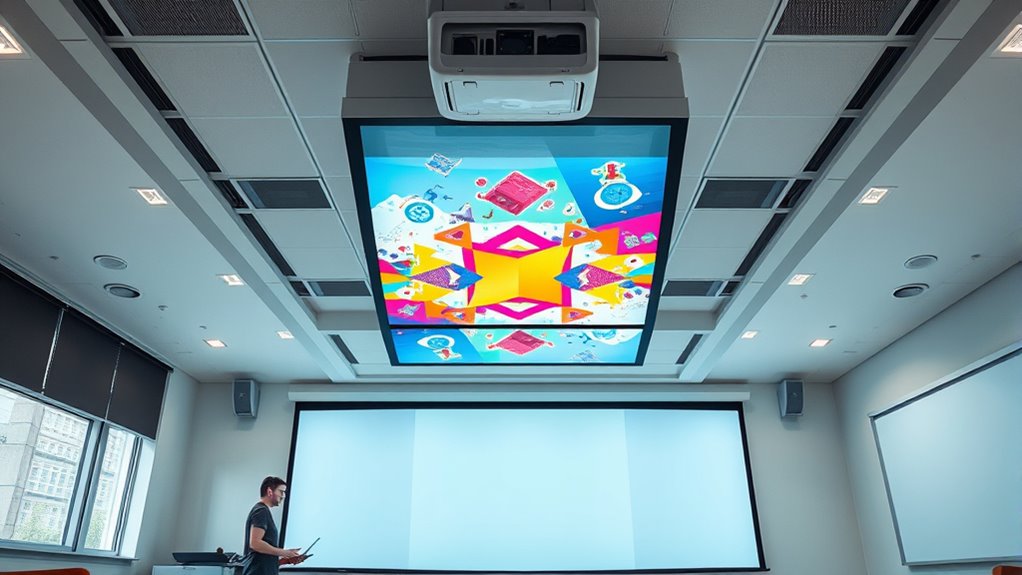
Have you ever turned on your projector only to find the image upside down? It’s a common issue that can be frustrating, especially when you’re enthusiastic to give a presentation or enjoy a movie. Luckily, fixing this problem is usually straightforward. The first thing to check is your projector’s settings and how it’s mounted. Your mounting options play a significant role in how the image is projected. For example, if you’ve mounted your projector on the ceiling or placed it at an unusual angle, the image might appear inverted. Many projectors have built-in options to adjust the image orientation, which can be accessed through the setup menu. Using these settings, you can change the image from upside down to the correct orientation without needing to reposition the projector physically. If you’re using a portable or tabletop setup, you might need to adjust the projector’s position or flip it to get the right image.
Another effective tool to correct upside-down images is keystone correction. Keystone correction lets you adjust the shape and alignment of the projected image digitally. When the projector is placed at an angle—like projecting onto a wall from the side—your image can appear skewed, distorted, or inverted. By activating keystone correction, you can straighten out the image, making it rectangular and properly oriented. Many projectors have both vertical and horizontal keystone correction, giving you the flexibility to fine-tune the image regardless of your setup. It’s a quick fix that saves you from readjusting the physical position of the projector or remounting it altogether. Additionally, understanding headphone compatibility can help you enjoy audio without disturbing others during adjustments. If your projector offers both mounting options and keystone correction, try combining these features for the best results. For instance, if your projector is ceiling-mounted but the image still appears upside down, first check the menu settings for an ‘image flip’ or ‘orientation’ option. If it’s not correct, use keystone correction to make minor adjustments. Conversely, if your projector is on a table but the image is upside down, you might need to physically flip or reposition the projector or use the menu options to rotate the image. Remember to consult your user manual, as the exact steps vary by model. Most projectors make this process simple, with straightforward menu navigation. Once you’ve corrected the image, you’ll be ready to enjoy clear, properly oriented displays without hassle.

XGIMI Elfin Flip Plus Portable Projector, Google TV with Licensed Netflix, 500 ISO Lumens, 1080P Resolution Home Projector, Build-in Adjustable Stand, Lightweight and Compact Design, Screen Adaption
Google TV with licensed Netflix: Enjoy the latest blockbusters and must-watch shows on your Elfin Flip Plus. No…
As an affiliate, we earn on qualifying purchases.
As an affiliate, we earn on qualifying purchases.
Frequently Asked Questions
Can Brightness Be Affected When Flipping the Projector Image?
Yes, flipping your projector image can affect its brightness. When you change the image orientation, you might need to adjust your projector calibration settings, which can impact overall image brightness. Improper calibration after flipping can make the image appear dimmer or uneven. To maintain peak brightness, make sure you recalibrate your projector after flipping the image, aligning settings like contrast and brightness for the best visual quality.
What Causes a Projector to Display a Mirrored Image Automatically?
Think of your projector as a mirror reflecting your intentions. It automatically displays a mirrored image when the lens shift or image flip setting is enabled, like a secret handshake between the device and its environment. This feature is designed to adapt to different mounting angles or screens. When you activate lens shift or choose an image flip, it causes the projector to mirror your image, ensuring it appears correctly on your display surface.
Are There Specific Projector Models More Prone to Upside-Down Images?
Some projector models are more prone to upside-down images due to their design and setup procedures. You’ll find that models with flexible model compatibility often require manual adjustments during setup, making it easier to accidentally misconfigure the image orientation. Check your projector’s manual for specific setup procedures to guarantee proper image alignment. Higher-end models typically include automatic correction features, reducing the chances of upside-down images, but always verify your model’s capabilities.
How Can I Prevent My Projector From Displaying Inverted Images in Future Setups?
To prevent your projector from displaying inverted images, start by checking and adjusting the calibration settings before installation. Use the projector’s menu to disable any upside-down or mirrored display options. Follow installation tips like mounting the projector correctly and aligning it with the screen. Double-check these settings during setup, and avoid repositioning the projector without re-calibrating, ensuring your image stays right-side up in future setups.
Does Adjusting Keystone Correction Impact Image Orientation?
Adjusting keystone correction primarily changes the shape of your image, not its orientation. While keystone settings straighten skewed images, they don’t affect image rotation or inversion. If you want to correct upside-down or mirrored displays, you need to access the projector’s menu and adjust the image rotation or flip settings directly. So, keystone correction impacts image shape, but for orientation, focus on image rotation controls.

Aurzen EAZZE D1 Smart Projector with WiFi and Bluetooth, Built-in APP, Auto Focus/Keystone, DoIby Audio 16W Speakers, Native 1080P, HDR10, Portable Mini Outdoor Movie Projector
Built-in Smart TV Operating System: The Aurzen EAZZE D1 smart projector comes with a built-in smart TV OS,…
As an affiliate, we earn on qualifying purchases.
As an affiliate, we earn on qualifying purchases.
Conclusion
When your projector’s image flips upside down, don’t panic—you’re just moments away from turning chaos into clarity. With a quick menu tweak or a simple keystroke, you’ll transform your wild, upside-down world into perfectly aligned brilliance faster than you can say “projection perfection.” Soon, you’ll be the hero who conquers the inverted abyss, bringing order to your display universe. No more upside-down adventures—just crystal-clear, perfectly oriented images ready to impress!

VIVO Electric Flip Down and Swivel Ceiling TV Mount for 37 to 70 inch Screens, Large Motorized Flat Ceiling VESA Mount, Holds up to 99 lbs, App and Voice Control, Black, MOUNT-E-FD75C-S
Flip-Down Swivel TV Mount: Fits 37” to 70” screens with VESA 200×100, 200×200, 300×200, 300×300, 400×200, 400×300, 400×400,…
As an affiliate, we earn on qualifying purchases.
As an affiliate, we earn on qualifying purchases.

【Built-in APPS & Electric Focusing & 210° Rotation】Mini Projector With Wifi And Bluetooth, 1080P Portable Projector, Movie Projector for Bedroom, Supports Smartphones/TV Stick/iPad/PS5/Laptop/HDMI/USB
【The Latest WIFI 6 Technology And Bluetooth 5.3】This projector with Wi-Fi and Bluetooth is equipped with the latest…
As an affiliate, we earn on qualifying purchases.
As an affiliate, we earn on qualifying purchases.