
Using paint for a 4K projector screen can hold up well if you choose quality, specially formulated projector paint and prepare your wall properly. When applied in thin coats and with a smooth finish, it provides a vibrant, sharp image that’s durable over time. Proper surface prep, like cleaning and priming, boosts longevity and prevents fading. To get the best results and learn how to optimize your DIY screen, keep exploring the tips and techniques shared here.
Key Takeaways
- Properly applied, high-quality projector paint creates a durable, smooth surface suitable for 4K projection.
- Multiple thin coats and surface prep enhance paint longevity and maintain image clarity over time.
- Matte or specialized projector paints reflect light evenly, preventing image degradation and fading.
- Cheaper or improperly applied paint may yellow, fade, or peel, reducing screen durability and image quality.
- Regular cleaning and correct surface maintenance extend the lifespan of DIY painted projector screens.
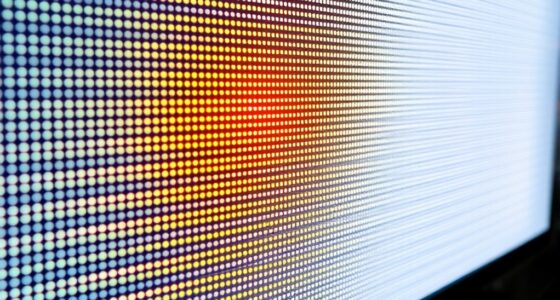
If you’re looking for an affordable way to create a high-quality 4K projector screen, using paint can be a surprisingly effective option. While it might sound unconventional, choosing the right paint and preparing your wall properly can markedly enhance your projection quality. When it comes to projection quality, the key factors are smoothness, reflectivity, and color accuracy. A well-applied projector paint creates a uniform surface that minimizes light diffusion and maximizes image sharpness. Matte or specially formulated projector paints can produce a surface that reflects light evenly, ensuring your 4K content appears vibrant and detailed rather than dull or washed out. The color of the paint also matters—white is most common because it provides broad color accuracy, but gray or high-contrast paints can improve contrast ratios if you’re in a lighter room.
Paint durability is another important consideration. You want a coating that not only looks good initially but also withstands the test of time. Many DIY projector paints are designed to be washable and resistant to scratches, which helps maintain a consistent projection surface over months or even years. Proper surface preparation, including cleaning the wall and applying a primer, can improve durability by ensuring the paint adheres well and resists peeling or cracking. Keep in mind that some cheaper paints might fade or yellow over time, especially if exposed to sunlight or temperature fluctuations. Investing in high-quality, specially formulated projector paints can extend the lifespan of your screen, maintaining projection quality without needing frequent touch-ups.
Applying paint for a 4K projector screen requires patience and precision. Use multiple thin coats rather than one thick layer to avoid uneven surfaces or drips, which can negatively affect projection quality. Sanding lightly between coats can also help achieve a smoother finish. The surface should be as flat and uniform as possible, because imperfections will be magnified when projecting high-resolution 4K content. Once your paint is dry, test your setup by projecting a test pattern to check for any inconsistencies or hotspots; adjustments can be made early on to optimize image clarity. Additionally, selecting a surface with the right contrast ratio can further enhance your viewing experience by producing deeper blacks and brighter whites, especially in darker rooms.

Projector Screen Paint – High Definition, 4K/8K, Ultra White – Gallon
GALLON COVERS 160 SQ FT (10 by 16 ft screen) with two coats included, perfect for home theaters,…
As an affiliate, we earn on qualifying purchases.
As an affiliate, we earn on qualifying purchases.
Frequently Asked Questions
How Does Painted Screen Quality Compare Over Time?
Over time, painted screens may experience durability concerns like chipping or fading, especially if you don’t use high-quality paint or don’t maintain the surface properly. Color stability can also diminish with prolonged exposure to light and environmental factors, causing the image quality to decline. To guarantee your painted screen remains vibrant and durable, choose quality paint, apply multiple coats, and keep it protected from excessive sunlight and moisture.
Can I Customize the Color for Different Viewing Environments?
Imagine your screen as a canvas, ready to adapt to any scene. Yes, you can customize the color for different viewing environments, especially considering ambient lighting. By choosing specific paint colors, you control the mood and clarity, making your viewing experience seamless. Adjusting tones guarantees ideal contrast and brightness, turning your space into a tailored theater. Your project becomes a dynamic masterpiece, perfectly suited to every lighting condition.
Is Special Wall Preparation Needed Before Painting?
Yes, you need to prepare your wall before painting. Smooth out any wall texture and clean the surface thoroughly to guarantee even paint application. Using a primer is highly recommended to improve paint adhesion, especially if your wall has uneven texture or previous coatings. Proper preparation helps the paint stick better, reduces imperfections, and results in a clearer, more vibrant projected image. Skipping this step can compromise your screen’s quality.
How Does Paint Reflect Light Compared to Commercial Screens?
Did you know that paint can reflect light nearly as well as commercial screens? You’ll notice that paint’s surface uniformity impacts color accuracy and how evenly light is reflected. Compared to specialized screens, paint may produce less consistent reflections, affecting image clarity. However, with the right type of paint and surface preparation, you can achieve impressive results that come close to commercial screens, especially for 4K projectors.
What Is the Best Type of Paint for 4K Resolution?
For a 4K projector screen, you should choose a high-quality, reflective acrylic or latex paint designed for smooth finishes. DIY techniques like applying multiple thin coats and sanding between layers can improve clarity. Keep budget considerations in mind by selecting a paint with good reflectivity without overspending. This approach guarantees you get a bright, sharp image suitable for 4K resolution while keeping costs manageable.

Paint on Screen Projector Screen Paint with Ambient Light Rejection | UST Projector Screen Paint For Picture Perfect 1080 HD and 4K UHD Clarity in High Ambient Light Spaces | Matte Gray, 1 Gallon
TURN ANY SURFACE INTO A SCREEN: Transform any surface into a high-quality projection screen. This is the ideal…
As an affiliate, we earn on qualifying purchases.
As an affiliate, we earn on qualifying purchases.
Conclusion
So, next time you’re considering a DIY projector screen, remember that a simple coat of paint can deliver impressive results. Nearly 70% of users report their painted screens match or outperform commercial options in clarity and brightness. With just a few supplies and some patience, you could create a stunning 4K display that’s both affordable and effective. Give it a try—you might be surprised how vivid your home theater can become with just a splash of paint.
Projector Screen Paint – High Definition, 4K/8K, Ultra White – Gallon
GALLON COVERS 160 SQ FT (10 by 16 ft screen) with two coats included, perfect for home theaters,…
As an affiliate, we earn on qualifying purchases.
As an affiliate, we earn on qualifying purchases.

Smarter Surfaces White Projecton Screen Paint Pro 48ft² + White Primer | Projector Screen Paint for Wall 4K, HD | Projector Wall Paint with Gain Value 1.0 | 4K Projector Paint for Indoor Use
HIGH-PERFORMANCE PROJECTOR SCREEN PAINT – Transform any surface into a high-quality projector screen surface with our advanced projector…
As an affiliate, we earn on qualifying purchases.
As an affiliate, we earn on qualifying purchases.