
Building a DIY riser for seating is a budget-friendly way to elevate your second-row viewers and improve your space. Use sturdy materials like plywood or hardwood for the platform, and add foam or upholstery batting for comfortable cushions. Secure all parts tightly for safety and consider non-slip pads to prevent shifting. With some basic tools and planning, you can create a functional, customized platform that looks great and lasts for years. Keep going to discover step-by-step tips to get started.
Key Takeaways
- Choose sturdy materials like plywood or hardwood for the platform to ensure stability and durability.
- Calculate the appropriate height and size to elevate second-row viewers comfortably without obstructing views.
- Secure all joints tightly and add non-slip pads to enhance safety and prevent movement during use.
- Incorporate cushioned layers with foam or batting for comfort, ensuring the surface is soft yet supportive.
- Customize the design with paint, fabric, or finishes to match your room decor and create an inviting seating area.

Ever wondered how to elevate your seating comfortably without spending a fortune? Building a DIY riser for seating is a practical solution that can instantly improve your viewing experience and add a touch of customization to your space. The key to making this project successful lies in understanding cushion comfort and choosing the right material selection. When creating your platform, you want your riser to feel sturdy yet comfortable, especially if you plan to use it frequently. Starting with cushion comfort, think about how you’ll sit on your riser. If it’s for long hours or frequent use, adding a cushioned top can make all the difference. You can use foam padding, memory foam, or even thick upholstery batting to create a soft surface. Cover it with a fabric of your choice—something durable and easy to clean—so it stays inviting over time. The cushion comfort aspect ensures that your riser isn’t just functional but also comfortable enough to encourage extended sitting without discomfort.
Material selection plays a vital role in the durability and overall look of your riser. For the platform itself, you’ll want to pick sturdy materials like plywood or hardwood. Plywood is lightweight, easy to work with, and readily available at hardware stores, making it an excellent choice for beginners. Hardwood, while more durable, can be heavier and pricier but offers a sleek, polished finish. When selecting materials, consider the weight capacity you’ll need and how much weight your riser will bear regularly. For the cushion layer, foam comes in various densities—higher density foam offers better support and lasts longer, making it ideal for seating risers. The covering fabric should be durable and resistant to wear, especially if the riser will see frequent use. Additionally, think about the aesthetic you want; choosing materials and finishes that match your room’s decor can make your DIY riser a seamless addition.
As you assemble your riser, ensure the base is stable and level. Secure all joints tightly, and add non-slip pads or feet to prevent movement during use. When attaching the cushioning, use strong adhesive or upholstery tacks to keep everything in place. Don’t forget to double-check the comfort layer—adding a slight incline or rounded edges can improve ergonomics and safety. By carefully selecting your materials with cushion comfort and durability in mind, you’ll create a riser that’s not only functional but also inviting. This project offers a budget-friendly way to elevate your seating and enhance your viewing experience without sacrificing comfort or style. With a little planning and some basic tools, you’ll have a custom platform that improves your space and provides a comfortable, supportive seat for years to come.
DIY seating riser kit
As an affiliate, we earn on qualifying purchases.
As an affiliate, we earn on qualifying purchases.
Frequently Asked Questions
What Materials Are Safest for Indoor DIY Risers?
You should choose lightweight materials like plywood or foam board for your indoor risers, which are easy to handle and safe. Confirm the surface has a non-slip layer, such as textured tape or grip mats, to prevent slipping. Avoid heavy or toxic materials, and always verify that your chosen materials are non-toxic and safe for indoor use. This keeps your risers both sturdy and safe for everyone.
How Do I Ensure Stability on Uneven Floors?
To guarantee stability on uneven floors, you should start with floor level adjustment by placing shims or adjustable feet under your riser. Then, add non-slip padding beneath the base to prevent slipping and movement. Check for wobbling and make further adjustments as needed. These steps give your riser a secure foundation, making it safe and stable for everyone sitting on it.
Can I Customize the Riser Height Easily?
Your DIY riser is a blank canvas for customization, so yes, you can easily adjust the riser height! Using riser height adjustment techniques, like adding or removing support blocks or adjusting leg lengths, makes customization options limitless. Whether you want a subtle increase or a dramatic step, you have the power to tailor your platform exactly to your needs, transforming your space into a perfect viewing arena.
What Tools Are Essential for Assembly?
You’ll need a power drill to drive screws and assemble your riser securely. A measuring tape is essential for precise measurements, ensuring your platform is the right size and height. Additionally, consider having a saw if cutting materials is necessary, and a level to keep everything even. These tools make the assembly process easier, faster, and help you achieve a professional-looking result.
How Do I Prevent the Riser From Wobbling?
Imagine a sturdy platform beneath your seats, steady and secure. To prevent wobbling, you can use floor level adjustment shims to balance uneven surfaces. Tighten all joints firmly, and consider adding cross-bracing underneath for extra stability. Non-slip pads beneath the riser’s legs also help prevent movement. These wobble prevention techniques guarantee your riser stays firm, giving everyone a safe, wobble-free view from the second row.
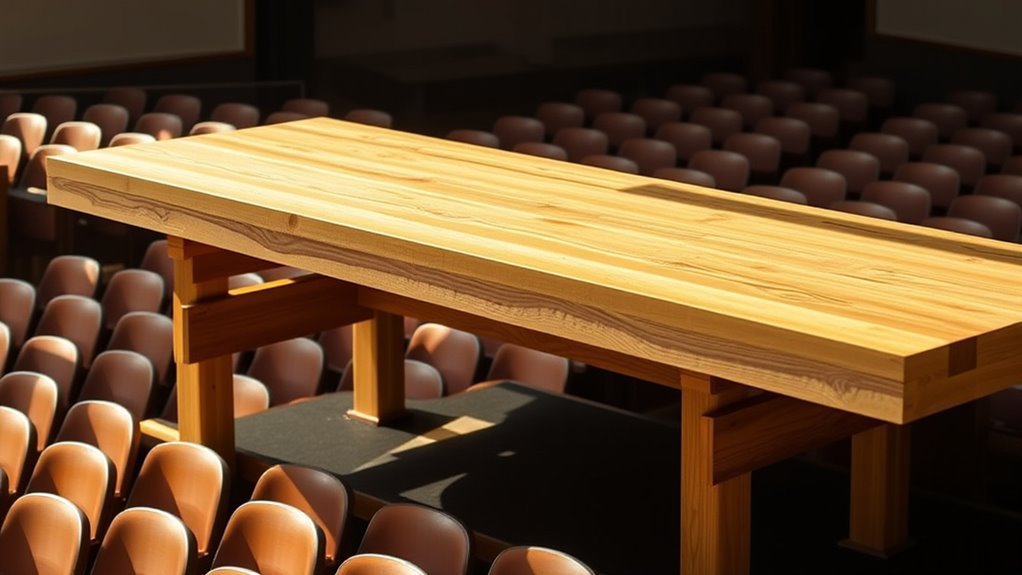
plywood platform for seating
As an affiliate, we earn on qualifying purchases.
As an affiliate, we earn on qualifying purchases.
Conclusion
Now that you’ve built your own riser, you’re like the architect of a theater, crafting a perfect stage for every scene. With your hands, you’ve created a space where everyone gets a clear view, much like a director framing the perfect shot. Just as a well-designed set elevates the performance, your DIY riser turns any gathering into a memorable event. Enjoy your new vantage point—your audience will thank you for the upgrade.
non-slip furniture pads
As an affiliate, we earn on qualifying purchases.
As an affiliate, we earn on qualifying purchases.
upholstery foam for cushions
As an affiliate, we earn on qualifying purchases.
As an affiliate, we earn on qualifying purchases.