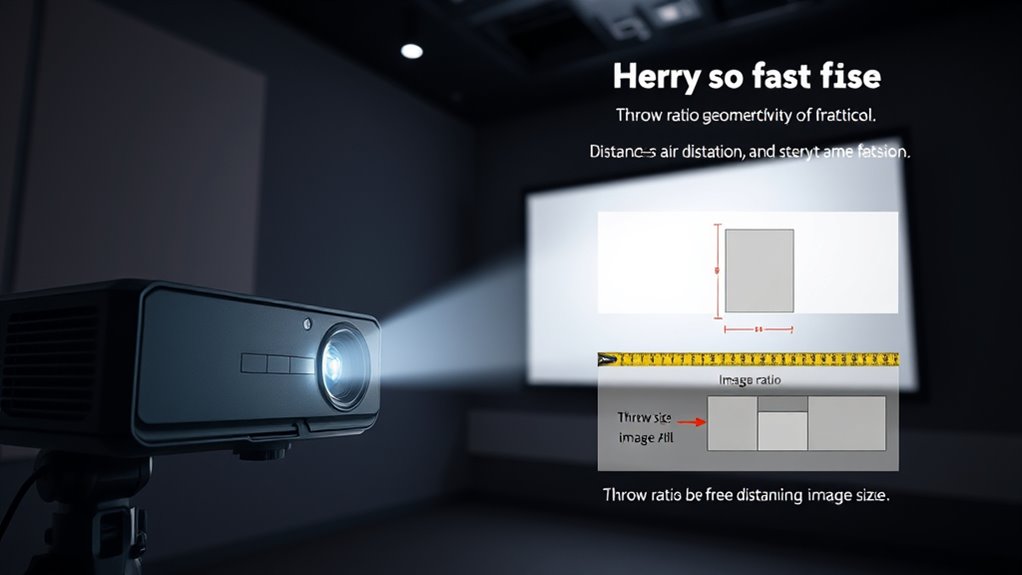
A projector’s throw ratio tells you how far it should be placed from the screen to produce a specific image size. For example, a 1.5:1 ratio means you’ll need 1.5 feet of distance for every foot of image width. Short throw projectors are great for small spaces, while long throw models suit larger rooms. Understanding this helps you set up your projector correctly and optimize image size, so keep exploring to learn how to choose the right throw ratio for your room.
Key Takeaways
- Throw ratio is the projector’s distance from the screen divided by the image width.
- A lower throw ratio means the projector is closer for a large image, ideal for small spaces.
- A higher throw ratio requires more distance, suitable for larger rooms or auditoriums.
- Measuring the distance and image size helps determine the right throw ratio for your space.
- Choosing the correct throw ratio ensures optimal image size, quality, and room setup.
What Is a Throw Ratio?
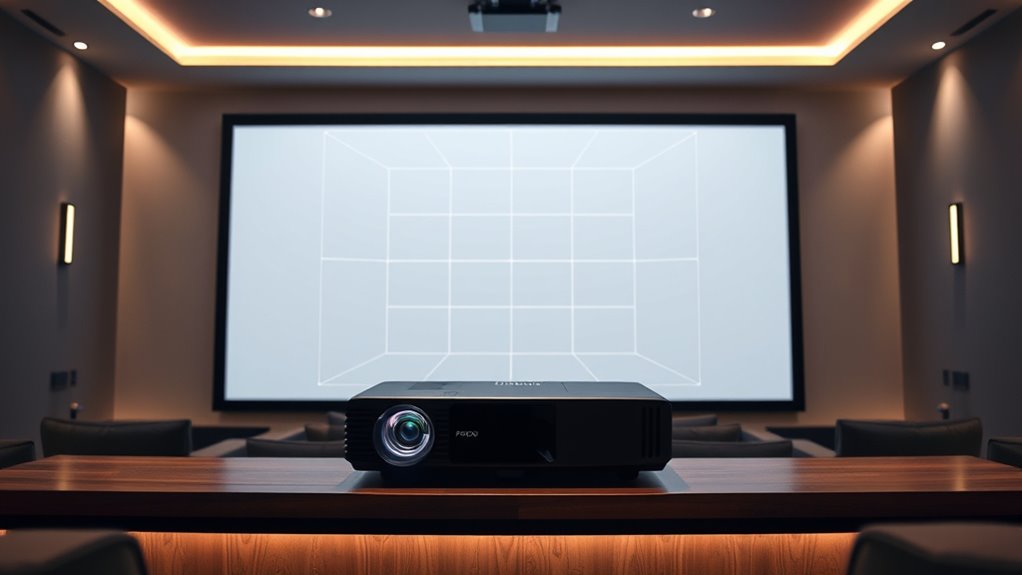
Have you ever wondered how to determine if a projector will fit perfectly in your space? Understanding what a throw ratio is helps you do just that. The throw ratio is the ratio of the projector’s distance from the screen to the width of the projected image. For example, a throw ratio of 1.5 means the projector should be 1.5 feet away for every foot of image width. This helps you plan your setup for suitable image size without sacrificing projector maintenance or audio synchronization. Knowing the throw ratio ensures your projector fits well and performs smoothly. It’s essential for choosing the right model and positioning it correctly, so your viewing experience is sharp, clear, and aligned with your space’s dimensions. Additionally, industry trends can influence which projector models offer optimal throw ratios for different environments.
How Is Throw Ratio Calculated?

Understanding how throw ratio is calculated helps you choose the right projector for your space. You’ll measure the distance from the projector to the screen and consider the lens in use. By doing this, you can determine how large an image the projector will produce at a given distance. Additionally, knowing the contrast ratio can help you assess image quality in various lighting conditions.
Definition of Throw Ratio
The throw ratio is a simple way to determine how large your projected image will be based on the distance from the projector to the screen. It’s calculated by dividing the distance between the projector and the screen by the width of the image. This ratio helps you understand how much space you need for your setup. Keep in mind that projection angles influence image quality, especially in tight spaces. Ambient lighting can also affect how sharp and vibrant your image appears, regardless of throw ratio. A lower throw ratio means a short throw projector, ideal for small rooms. Conversely, a higher ratio suits larger spaces. Knowing this ratio helps you select the right projector to match your room size and lighting conditions, ensuring clear, bright images. Additionally, considering image quality factors such as resolution and contrast can optimize your viewing experience.
Measuring Throw Distance
To measure throw distance, start by placing your projector at the desired location in the room. Once positioned, you’ll need to modify the lens if your projector has zoom or focus features to get a clear image. The throw ratio is calculated by dividing the distance from the projector to the screen by the width of the projected image. Keep ambient light in mind, as bright rooms may require the projector to be closer or settings to be adjusted for a brighter image. Accurate measurement involves noting the lens adjustment needed for sharpness and brightness. Remember, a higher ambient light level can affect perceived image size, so consider this when measuring throw distance to ensure your projected image fits perfectly within your space. Additionally, understanding the throw ratio can help you select the right projector for your room size and setup.
Calculating Lens to Screen
Wondering how to calculate the throw ratio for your projector? It’s straightforward once you understand the basics of lens selection and distance measurement. To determine the throw ratio, you divide the distance from your projector to the screen by the width of the image you want.
- Measure the distance carefully for accurate results
- Select the appropriate lens based on your space and desired image size
- Use the formula: Throw Ratio = Lens to Screen Distance / Image Width
- Adjust your lens choice if your measurements don’t match your target throw ratio
- Keep in mind that Vetted options are designed to offer reliable performance and compatibility with various setups.
Understanding Projector Distance and Image Size

Understanding how projector distance relates to image size is essential for setting up your projection system effectively. The farther the projector is from the screen, the larger the image becomes, but factors like screen resolution and lamp brightness influence clarity and brightness at various distances. Higher resolution offers sharper images, especially at larger sizes, while brighter lamps ensure visibility even at extended distances. Use the following table to gauge your setup:
| Distance (ft) | Image Width (ft) |
|---|---|
| 6 | 4 |
| 8 | 5.3 |
| 10 | 6.7 |
| 12 | 8 |
| 14 | 9.3 |
Adjust your projector placement to match your desired image size without sacrificing resolution or brightness. Proper projector placement is crucial for optimal image quality and viewing experience.
The Difference Between Short Throw and Long Throw Projectors

Short throw and long throw projectors differ primarily in how close they need to be positioned to the screen to produce a given image size. Short throw projectors are designed for small projection distances, making them ideal for tight spaces. They typically have specialized lens options that allow you to place the projector just inches from the screen without sacrificing image quality. Long throw projectors, on the other hand, require a greater projection distance, often several feet or more, which suits larger rooms or auditoriums. The main difference lies in their lens options and how they optimize projection distance. Additionally, projection distance can influence the overall image quality and setup flexibility. – Short throw projectors save space and reduce shadows during presentations – Long throw projectors are better for large venues with ample room – Lens options determine flexibility in setup – Projection distance impacts image clarity and size
Why Throw Ratio Matters for Your Space

Choosing the right throw ratio helps you optimize your space by minimizing clutter and maximizing viewing area. It also gives you better control over image size, so your setup fits perfectly. Plus, understanding throw ratios offers more installation flexibility, making setup easier in any room. Recognizing the significance of entertainment industry revenue can help you appreciate how precise projector setup contributes to a more immersive experience.
Space Optimization Tips
The throw ratio of a projector directly impacts how you can position it within your space, making it a crucial factor in optimizing your setup. It influences the projection angle, which determines how close or far the projector needs to be from the screen. Proper placement helps manage ambient lighting by reducing glare and improving image clarity. To optimize your space effectively, consider these tips:
- Choose a projector with a suitable throw ratio for your room size
- Position the projector to minimize the projection angle and avoid distortion
- Adjust placement to reduce the impact of ambient lighting on image quality
- Use wall color and lighting controls to enhance contrast and clarity
Understanding your space and the projector’s throw ratio can help ensure optimal image quality and viewing comfort.
Image Size Control
Your projector’s throw ratio directly affects how large or small the image appears in your space, making it essential for controlling image size. A lower throw ratio means a shorter distance for a bigger image, while a higher ratio requires more space. Lens flexibility allows you to adjust the image size without moving the projector, but it can introduce some image distortion if not used carefully. Understanding your room’s dimensions helps you choose the right throw ratio to avoid unwanted size issues. Additionally, considering the relationship between projector placement and room layout can optimize your viewing experience.
Installation Flexibility
Installations become more flexible when you understand how throw ratios influence your space. A suitable throw ratio permits you to position your projector at the right distance, optimizing image size without sacrificing quality. This flexibility makes it easier to fit projectors into various room sizes and layouts. With the right throw ratio, you can utilize wireless connectivity options seamlessly, reducing cable clutter and enabling flexible placement. Additionally, choosing a projector with an appropriate throw ratio can help extend lamp lifespan by preventing overuse or improper positioning. It also allows for easier adjustments if you decide to change your setup later. Ultimately, understanding throw ratios ensures your installation is efficient, adaptable, and tailored to your specific environment.
Choosing the Right Throw Ratio for Different Room Sizes
Choosing the right throw ratio depends on the size of your room and how far you can position your projector from the screen. To get the best image, consider your projection distance and guarantee lens compatibility with your projector. A short throw lens is ideal for small rooms or tight spaces, allowing you to place the projector close to the screen while still achieving a large image. Conversely, a long throw lens suits larger rooms where the projector needs to be farther away to produce the same image size. Measure your available space carefully, and check the projector’s specifications for compatible lens options. Matching the throw ratio to your room size ensures excellent image clarity and minimizes the need for repositioning or adjustments later on.
Examples of Common Throw Ratios and Their Uses
Common throw ratios include 0.5:1, 1.0:1, and 1.5:1, each suited for different room sizes and setup needs. A 0.5:1 ratio is ideal for very short projection distances, perfect for small rooms or tight spaces with short-throw lenses. A 1.0:1 ratio works well in medium-sized rooms, offering flexibility with standard lens types. A 1.5:1 ratio is better for larger spaces, requiring longer projection distances for a bigger image. These ratios help you select the right lens type based on your room size. They also influence where you place your projector, ensuring suitable image size and clarity. Knowing these common throw ratios helps you match your projector to your room’s dimensions and projection distance needs.
Tips for Setting up Your Projector With the Correct Throw Ratio
To set up your projector with the correct throw ratio, start by measuring the distance from the projector’s position to your screen or wall. This helps determine the ideal placement based on your desired screen size and mounting height. Keep in mind that larger screens require a longer throw distance, while smaller screens need less space. Adjust your projector’s position accordingly. Use the table below as a guide:
| Screen Size | Mounting Height | Recommended Throw Distance |
|---|---|---|
| 80 inches | 3 feet | 8-10 feet |
| 100 inches | 4 feet | 10-12 feet |
| 120 inches | 4.5 feet | 12-14 feet |
Match your screen size and mounting height to find the most suitable throw distance for a clear, properly scaled image.
Common Mistakes When Considering Throw Ratios

One of the most frequent mistakes when considering throw ratios is neglecting to account for the actual projector placement and screen size. This oversight can lead to poor image quality, affecting color accuracy and overall viewing experience. Additionally, failing to consider projector maintenance can cause brightness and color issues over time, impacting your image’s clarity.
- Ignoring the room’s dimensions and how they influence throw ratio selection
- Overlooking the importance of maintaining your projector for consistent color accuracy
- Choosing a throw ratio without accounting for future space modifications
- Underestimating how improper setup impacts image sharpness and projector longevity
Avoid these mistakes by planning carefully, maintaining your projector, and selecting the right throw ratio for your specific setup.
Frequently Asked Questions
Can I Change My Projector’s Throw Ratio After Purchase?
Yes, you can change your projector’s throw ratio after purchase by swapping out the lens. This enhances installation flexibility and can reduce lens distortion, giving you better image quality and placement options. Just make sure the new lens is compatible with your projector model. Switching lenses is a straightforward way to adapt your setup without needing to buy a new projector, making your viewing experience more tailored and versatile.
How Does Ambient Light Affect Projector Throw Ratio Effectiveness?
Think of ambient light as a fog that blurs your view; it dims the clarity of your projected image. When there’s too much ambient lighting, your projector’s throw ratio becomes less effective, making images appear washed out and less sharp. To maintain ideal image clarity, control ambient light by dimming or blocking it, ensuring your projector can deliver the brightest, clearest picture possible without needing to change its throw ratio.
Are There Projectors With Adjustable Throw Ratios?
Yes, many projectors feature adjustable throw ratios thanks to lens flexibility and zoom capabilities. These models let you change the lens to fine-tune the image size and throw distance without moving the projector. With a zoom lens, you can easily adapt to different room sizes or setup constraints, giving you greater versatility and convenience. This flexibility helps guarantee you get the perfect image regardless of your space or setup needs.
What Is the Impact of Lens Shift on Throw Ratio?
Lens shift dramatically impacts your throw ratio and image positioning, giving you near-magical flexibility. When you adjust lens shift, you can move the image vertically or horizontally without changing the projector’s distance from the screen. This means your throw ratio stays consistent, but you can fine-tune where the image lands, making setup much easier and ensuring your display looks perfect no matter where your projector is placed.
How Does Screen Gain Influence Image Size and Throw Ratio?
Screen gain affects both image size and throw ratio by altering how bright your projector’s image appears. A higher gain screen boosts brightness and can make the image appear larger without changing the projector’s throw ratio, but may reduce contrast ratio and viewing angles. Conversely, a lower gain screen offers better contrast and wider angles but might require a shorter throw or increased brightness to achieve desired screen brightness.
Conclusion
Getting the perfect throw ratio isn’t just a detail—it’s the secret to turning any room into your personal cinema, transforming mundane walls into breathtaking movie screens. Pick the wrong one, and your setup risks chaos, frustration, and a picture so tiny you’ll wish you’d stayed in the theater. But with the right throw ratio, you’ll discover a world of epic visuals and immersive experiences. Don’t settle for less—your ultimate viewing adventure starts with the perfect projector setup!