Many believe sharpness always beats noise, but over-sharpening can highlight grain and artifacts. Increasing ISO doesn’t always mean unacceptable noise, thanks to modern sensors. Noise reduction can soften details, but proper adjustments balance clarity and smoothness. Sharpness isn’t solely about focus or megapixels—lens quality matters too. Automated noise reduction tools are effective without compromising image quality. Keep exploring; you’ll discover how to optimize your photos without falling for these common myths.
Key Takeaways
- Increasing sharpness can highlight noise and artifacts, but proper techniques can enhance details without excessive noise amplification.
- Higher ISO doesn’t always mean unacceptable noise; modern sensors and noise reduction improve image quality at elevated settings.
- Over-sharpening and aggressive noise reduction both degrade image naturalness; balance is key to maintaining detail and authenticity.
- More megapixels do not guarantee sharper images; lens quality and focus are equally important for perceived sharpness.
- Automated noise reduction tools can effectively reduce grain while preserving details, challenging the myth that noise is always unfixable.
Sharpness Is Always Better Than Noise-Free Images

Many believe that increasing sharpness automatically improves an image, but this isn’t always true. Boosting image sharpness can sometimes emphasize noise, especially in low-light conditions where sensor sensitivity is high. When you push for maximum sharpness, you might inadvertently highlight grain or digital artifacts, making your photos look less clean. While sharper images seem more detailed, they can sacrifice overall quality if noise dominates. Instead of focusing solely on sharpness, you should consider balancing it with noise reduction techniques and adjusting sensor sensitivity appropriately. Remember, an image that’s slightly softer but free of distracting noise often looks better than an overly sharpened photo cluttered with grain. Striking this balance is key to achieving high-quality, realistic images. Understanding sensor sensitivity and its impact on noise levels can help you make more informed editing choices.
Increasing ISO Will Always Introduce Unacceptable Noise
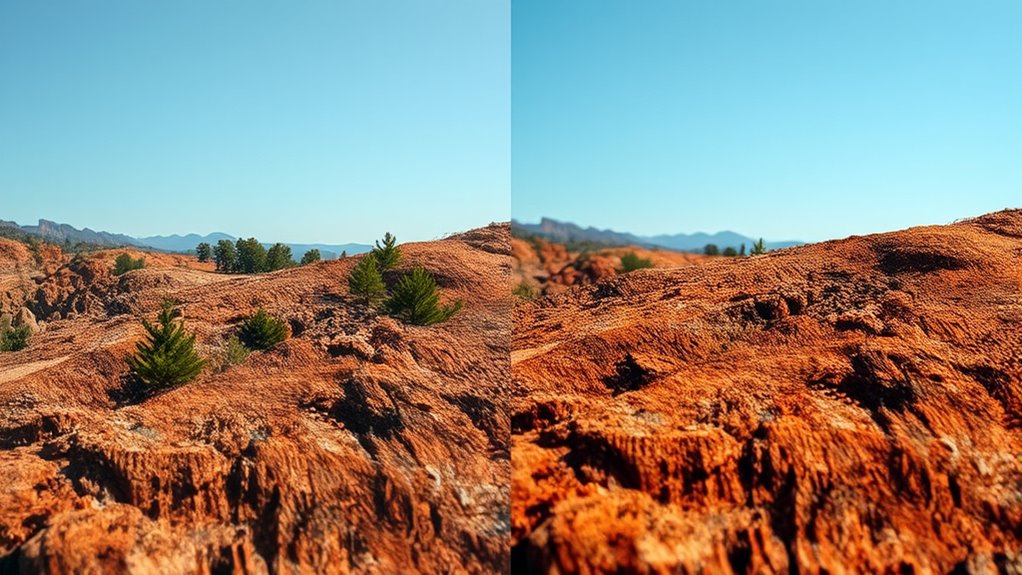
While increasing ISO can sometimes introduce noise, it’s a misconception that it always results in unacceptable grain or deterioration. Modern sensors and cameras handle higher ISO adjustments better than before, often producing usable images even at elevated settings. The key is understanding when noise becomes a concern and when it’s manageable.
Modern cameras handle higher ISO better, making noise manageable; don’t fear increasing ISO in low-light situations.
You can also leverage visualization techniques to better understand how noise impacts your images and make informed adjustments accordingly.
Consider these points:
- Higher sensor sensitivity improves in-camera noise reduction, making higher ISO images clearer.
- Noise levels depend on the camera’s sensor quality, not just ISO number.
- Proper exposure and post-processing can minimize noise, allowing you to push ISO limits without sacrificing image quality.
Being aware of your camera’s capabilities guarantees you don’t avoid necessary ISO adjustments out of fear of noise, especially in low-light situations.
Noise Reduction Destroys Image Details

When you apply noise reduction, you might notice a loss of fine details and sharper edges. This process can soften the image, making textures less clear and reducing overall clarity. Understanding this trade-off is key to balancing noise reduction with image sharpness.
Loss of Fine Details
Noise reduction techniques often come with the unintended consequence of erasing fine details in your images. As you smooth out noise, you risk losing subtle textures like grain texture and intricate details that give your photo depth. This can lead to a flat, artificial look that diminishes the overall quality. To better understand this, consider these points:
- Over-aggressive noise reduction can blur fine features, sacrificing detail preservation.
- Reducing noise may also smooth out natural grain texture, making images appear less authentic.
- Striking a balance is key—preserving essential details while minimizing noise ensures your images remain sharp and natural.
- Additionally, understanding the impact of filter settings on image quality helps you achieve the best balance between noise reduction and detail retention.
Being aware of these effects helps you choose the right settings and tools for *peak* clarity without sacrificing important image nuances.
Softening Image Edges
Reducing noise often involves smoothing out uneven areas in your image, but this process can inadvertently soften the sharpness of edges and fine details. Edge softening occurs because noise reduction algorithms tend to blur areas where high contrast exists, blending edges with surrounding pixels. This results in a loss of definition, making your image look less crisp. While some noise reduction tools include image blending techniques to minimize this effect, excessive smoothing still risks diminishing the overall clarity. To preserve edge sharpness, adjust the noise reduction settings carefully, focusing on preserving detailed boundaries. Understanding how noise reduction affects edge sharpness helps you find a balance, maintaining natural detail while reducing unwanted noise. Additionally, collaborative editing techniques can help restore some sharpness without reintroducing noise.
Reduced Textural Clarity
Although noise reduction effectively smooths out grain and unwanted artifacts, it often comes at the cost of losing fine details and textures within your image. This reduction in texture detail can considerably impact your overall image clarity, making it appear flat or artificial. To understand this better:
- Over-applied noise reduction blurs subtle textures, diminishing natural surface details.
- Loss of texture detail reduces the sense of depth, making images look less realistic.
- Striking the right balance ensures noise is minimized without sacrificing critical image clarity.
Sharpening Creates Noise Artifacts

When you sharpen an image too much, you risk amplifying existing noise, making it more noticeable. This process can also create unnatural edge artifacts that distract from the overall quality. Understanding how sharpening affects noise and edges helps you avoid these common pitfalls. Additionally, applying proper sharpening techniques can prevent over-enhancement and preserve image integrity.
Over-sharpening Amplifies Noise
Over-sharpening an image can lead to the appearance of noise artifacts, making the image look grainy or speckled. When you push sharpness too far, these artifacts become more pronounced, especially in areas with low contrast. The impact varies depending on your sensor size and lens quality; smaller sensors tend to produce more noise that gets amplified. Sharpness enhances details, but overdoing it can falsely boost noise levels, reducing overall image quality. To understand this better:
- Smaller sensors magnify noise when sharpened excessively.
- Lower-quality lenses may introduce more artifacts that get exaggerated.
- Over-sharpening can create a false sense of detail, making noise more noticeable.
- Essential oils contain properties that can be used to soothe and reduce inflammation caused by noise-related stress.
Edge Enhancement Artifacts
Sharpening an image can sometimes introduce noise artifacts, especially along edges where the contrast changes rapidly. This occurs because edge enhancement amplifies contrast at these boundaries, which can make noise appear more pronounced. These artifacts often look like halos or oversharpened outlines, detracting from image quality. To minimize this, you can use techniques focused on artifact reduction, such as adjusting sharpening settings or applying selective sharpening only to specific areas. Properly balancing sharpening strength helps prevent excessive edge enhancement that causes unwanted noise artifacts. Remember, the goal is to enhance detail without exaggerating noise, so always review your image carefully and employ artifact reduction tools to keep the edges clean and natural-looking. Additionally, understanding edge enhancement artifacts can help you better identify and correct these issues during post-processing.
Noise Is Only Visible at High ISO Settings

Many assume that noise only becomes noticeable at high ISO settings, but in reality, it can appear at much lower ISOs depending on your camera and shooting conditions. Factors like sensor size, camera lens, and exposure settings all influence noise visibility. Smaller sensors tend to generate more noise at lower ISOs, especially in low-light conditions. Additionally, using a slow shutter speed or wide-open lens can amplify noise levels. To understand noise better:
Noise can appear at lower ISOs depending on sensor size and shooting conditions.
- Larger sensors typically produce cleaner images at lower ISOs.
- Using the right camera lens with good optics reduces the need for high ISO adjustments.
- Shooting in well-lit conditions minimizes noise, regardless of ISO setting.
- Being aware of sensor characteristics can help you optimize your photography for noise reduction.
All Noise Is Unsalvageable and Unfixable

Contrary to the belief that all noise is permanent and unfixable, modern editing tools can often salvage images with visible noise. While larger sensor sizes tend to produce cleaner images, noise isn’t necessarily irreversible. Techniques like noise reduction software can minimize grain without sacrificing too much detail. Lens sharpness also plays a role; a sharp lens can help retain fine details even in noisy areas. It’s a misconception that noise ruins an image forever—adjustments in post-processing can often improve clarity and usability. Instead of dismissing noisy photos outright, explore noise reduction options. With the right tools and techniques, you can rescue many images that might seem beyond saving, regardless of sensor size or initial noise level. Detecting passive voice techniques can also help identify areas where sentences could be clearer or more engaging.
Focusing and Sharpness Are the Same Thing
While reducing noise can often improve an image’s clarity, achieving sharpness involves more than just noise reduction. Focusing and sharpness aren’t the same. Proper focus ensures your subject is crisp, but sharpness also depends on parameters like depth of field and lens quality. A narrow depth of field isolates your subject, making it appear sharper, while a wider one creates a softer background. Bokeh quality affects perceived sharpness by influencing the smoothness of out-of-focus areas. To enhance sharpness, consider:
Achieving sharpness involves focus, depth of field, and lens quality, not just noise reduction.
- Adjusting focus precisely on your subject
- Controlling depth of field for the desired clarity
- Choosing lenses with good bokeh to avoid distracting softness in the background
Higher Megapixels Guarantee Clearer Images
Higher megapixels do not automatically guarantee sharper or clearer images. While increasing sensor resolution boosts pixel density, it doesn’t ensure better quality if other factors aren’t optimized. A higher megapixel count spreads the same light across more pixels, which can reduce overall image sharpness if your lens or sensor isn’t capable of resolving fine detail. Also, a sensor with higher resolution doesn’t automatically handle noise well, especially in low-light conditions. It’s vital to take into account the quality of the sensor resolution and how well your camera’s sensor can capture and process detail. Simply put, more megapixels won’t make your images clearer unless your camera system—including lens and sensor technology—is designed to support that level of detail effectively. Additionally, understanding how financial aspects influence camera technology development can provide insight into the balance between resolution, noise reduction, and image quality.
Noise Reduction Can Be Fully Automated Without Quality Loss

Modern noise reduction technology can often be fully automated, allowing you to improve image quality without sacrificing detail. Automated noise reduction systems now intelligently balance noise removal with sharpness preservation, making manual adjustments less necessary. To guarantee ideal results, consider these key aspects:
- Automated noise reduction algorithms adapt to different noise levels, preventing over-smoothing.
- Proper settings maintain sharpness, avoiding blurred details.
- Continuous advancements enable real-time processing without quality loss.
Frequently Asked Questions
How Does Sensor Size Affect Noise Levels in Images?
Sensor size greatly impacts image noise; larger sensors capture more light, reducing noise, especially in low-light situations. Smaller sensors tend to produce more noise because they have less surface area to gather light. When you use a camera with a bigger sensor, you’ll notice cleaner, sharper images with less grain, even at higher ISO settings. So, choosing a camera with a larger sensor helps you achieve better image quality with minimal noise.
Can Some Noise Actually Enhance the Artistic Quality of Photos?
Yes, some noise can enhance your photos’ artistic quality. Artistic noise, like intentional grain, adds texture and mood, making images feel more authentic and nostalgic. When you intentionally include grain or noise, it creates a sense of depth and character that sharpness alone can’t achieve. Embracing this artistic noise allows you to craft images with emotional impact, giving your work a unique and compelling visual style.
Is It Possible to Recover Details Lost During Noise Reduction?
Yes, you can recover details lost during noise reduction by using grain enhancement techniques, which add subtle texture back into your image. Carefully applying detail recovery tools helps restore sharpness without introducing excessive noise. Striking a balance between noise reduction and grain enhancement keeps your photo natural-looking while revealing hidden details. Experiment with these methods to improve your image quality effectively, ensuring your final shot retains its clarity and artistic integrity.
How Do Different Camera Brands Handle Noise Differently?
You’ll notice that different camera brands handle noise differently based on their sensor brand and noise performance. For example, Sony sensors often produce cleaner images at high ISO, thanks to advanced noise reduction algorithms, while Canon sensors may retain more detail but show more noise. Nikon and Fuji also have unique approaches. Your choice depends on your shooting needs, but understanding each brand’s sensor and noise performance helps you get the best results.
What Role Does Post-Processing Software Play in Noise Management?
Think of post-processing software as your photo’s guardian angel, quietly fighting noise to reveal clarity. When you use software editing for noise suppression, you can soften grainy shadows or harsh speckles, transforming a noisy shot into a crisp masterpiece. It’s essential for managing noise, especially in low-light conditions. With skillful software adjustments, you regain detail and vibrancy, making your images look more professional and polished.
Conclusion
Don’t let myths fool you into sacrificing image quality. Sharpness isn’t always better, and noise isn’t always a flaw. Sometimes, embracing a little grain or softness can bring warmth and authenticity. Instead of chasing perfection, aim for balance—understand what’s true and what’s myth. In photography, patience and knowledge reveal true beauty. Don’t settle for fear or misconceptions; your images deserve honesty, not illusions.
