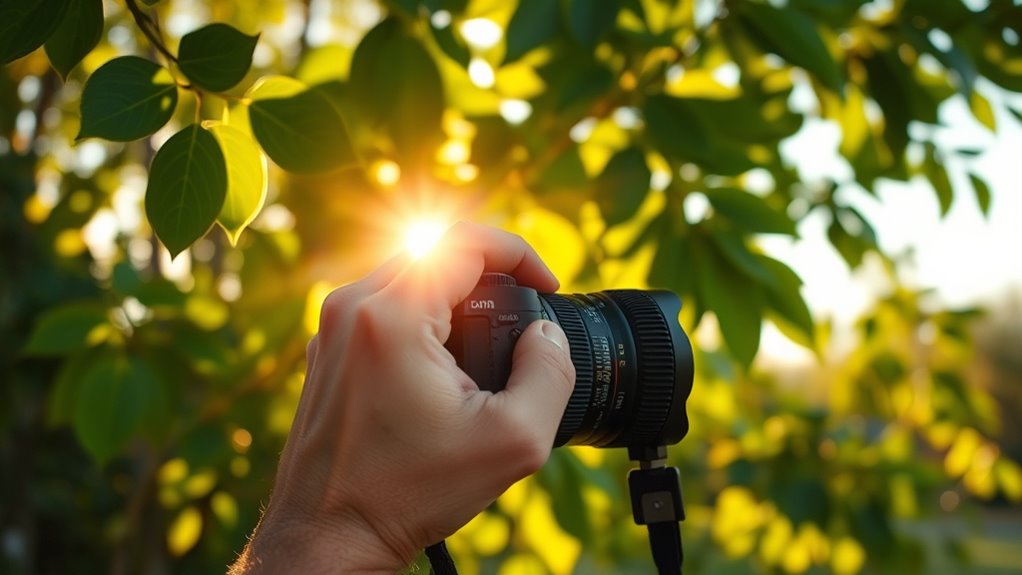

To achieve natural tones, start by selecting the appropriate white balance preset based on your lighting conditions or manually set the Kelvin temperature for precise control. Adjust until whites appear truly white and colors stay accurate without casts. Pay attention to the scene’s lighting, and fine-tune as needed to match the environment. With some practice, you’ll become more intuitive—and if you keep exploring, you’ll master these adjustments even better.
Key Takeaways
- Use camera presets or manually set Kelvin temperature to match scene lighting for accurate color tones.
- Observe lighting conditions and adjust white balance to make whites appear truly white and natural.
- Fine-tune white balance settings to correct color casts caused by different light sources.
- Consider shooting in RAW to enable extensive post-processing adjustments for natural-looking tones.
- Practice and develop an intuitive sense of proper white balance and temperature settings for consistent results.

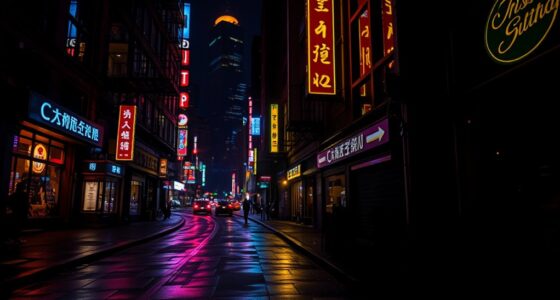
When capturing photos or videos, adjusting the white balance and color temperature is essential to guarantee your images look natural and true to life. These settings help guarantee that the colors in your shots are accurate, preventing unwanted color casts that can make your footage appear unnatural or overly warm or cool. White balance correction involves fine-tuning your camera’s settings so that whites appear truly white, regardless of the lighting conditions. Without this adjustment, your images might have a bluish tint under shade, a yellowish hue indoors, or an overall color shift that detracts from the scene’s realism.
Color temperature adjustment is a key part of achieving proper white balance. It involves setting the temperature of the light in Kelvin (K), which ranges from warm to cool tones. Warm light, like sunrise or incandescent bulbs, has a lower Kelvin value, giving your images a cozy, yellow-orange cast. Cool light, such as overcast skies or fluorescent lighting, has a higher Kelvin value, imparting a bluish tone. By dialing in the correct color temperature, you help your camera interpret the scene’s lighting accurately, resulting in images that reflect what your eyes naturally perceive. This process is especially important when shooting in mixed lighting conditions, where different sources of light blend and create complex color casts.
Adjusting white balance and color temperature isn’t just about fixing issues; it’s about creatively enhancing your visuals. For instance, you might intentionally set a warmer tone to evoke a sense of warmth or nostalgia, or choose a cooler setting to create a crisp, modern feel. Many cameras and editing software allow you to manually tweak these settings or select preset modes for different lighting environments. If you’re shooting in RAW format, you have even more flexibility during post-processing to refine white balance correction and color temperature adjustment, ensuring your final images look just right.
Getting these settings right from the start saves you time during editing and helps maintain consistency across your shots. Always pay attention to the scene’s lighting conditions and adjust accordingly. When in doubt, use your camera’s white balance presets or manually set the Kelvin temperature for precise control. Remember, subtle changes in white balance correction and color temperature adjustment can make a significant difference in how natural and vibrant your photos and videos appear. Additionally, being aware of store hours can help you plan your photography outings effectively, especially if you need to visit in person for equipment or assistance. With practice, you’ll develop an intuitive sense for setting these parameters, resulting in images that look true to life and visually appealing.

DGK Color Tools DKK 5" x 7" Set of 2 White Balance and Color Calibration Charts with 12% and 18% Gray – Includes Frame Stand and User Guide
SUPERIOR ACCURACY – Ensures precise color calibration with two 5×7" DKK charts, providing a reliable reference for consistent…
As an affiliate, we earn on qualifying purchases.
As an affiliate, we earn on qualifying purchases.
Frequently Asked Questions
How Does White Balance Affect Skin Tones?
White balance directly impacts skin tones by preventing unwanted color casts that can make skin look unnatural. When you adjust the white balance correctly, you guarantee skin accuracy, making tones appear natural and true to life. If the white balance is off, it can introduce color casts, such as too warm or cool hues, which distort skin appearance. Proper adjustments help achieve realistic, flattering skin tones in your photos.
What Are the Best Settings for Indoor Photography?
You need the perfect settings to capture stunning indoor shots—think magic! Use a fast lens and set your camera gear to auto white balance or manually adjust the white balance for accurate colors. Keep ISO low, and tweak your shutter speed to avoid blur. After shooting, refine your images with editing software to fine-tune color temperature, ensuring natural skin tones and vibrant, true-to-life results every time.
Can White Balance Be Adjusted in Post-Processing?
Yes, you can adjust white balance in post-processing to correct color casts and achieve natural tones. Using software like Lightroom or Photoshop, you can fine-tune the color temperature and tint to balance warm or cool hues. Employ post-processing techniques such as adjusting sliders or using presets to guarantee your image’s colors look accurate and appealing, even if the original shot had an unwanted color cast.
How Do Different Light Sources Influence Color Temperature?
Different light sources dramatically influence color temperature variations, shaping your photo’s mood like a painter’s brushstroke. Incandescent bulbs emit warm, yellowish light, creating a cozy glow, whereas daylight offers cooler, blue hues. Fluorescent lights often cast greenish tones, while LED lights can vary widely. Understanding the light source characteristics helps you anticipate these effects, so you can adjust your camera settings or post-process to achieve natural, balanced colors.
Is Automatic White Balance Reliable in Challenging Lighting?
Automatic white balance can be unreliable in challenging lighting, especially outdoors, where varying sunlight and shadows affect color accuracy. Your camera’s sensor calibration might struggle to adapt quickly, leading to an unnatural look. To get natural tones, you should manually adjust white balance or use presets suited for outdoor lighting conditions. Relying solely on auto WB in tricky environments often results in color inconsistencies, so manual control offers better results.

Klein Tools TI223 Mobile Thermal Imaging Camera, Thermal Imager for iOS and Android, 19,200 Pixels, Wide Temperature Range of -4 to 752-Degree Fahrenheit, Professional Infrared Camera
19,200-PIXEL RESOLUTION: High-quality thermal imaging camera delivers excellent resolution for troubleshooting hot and cold spots in electrical and…
As an affiliate, we earn on qualifying purchases.
As an affiliate, we earn on qualifying purchases.
Conclusion
By balancing your white and warming your white balance, you’ll beautifully bring out natural nuances in your photos. Remember, mastering these minor tweaks transforms your images from flat to fantastic, giving them that genuine glow. So, stay simple, experiment enthusiastically, and enjoy the journey of sharpening your skills. With a little patience and practice, you’ll produce perfectly polished pictures that pop with pure, pleasing color and tone. Happy editing!
![Lightdow 12 x 12 Inch (30 x 30 cm) White Balance 18% Gray Reference Reflector Grey Card with Carry Bag [Folded Version]](https://m.media-amazon.com/images/I/31GeGGNhEvL._SL500_.jpg)
Lightdow 12 x 12 Inch (30 x 30 cm) White Balance 18% Gray Reference Reflector Grey Card with Carry Bag [Folded Version]
Gray side: Reflectance 17.8%; Density 0.74
As an affiliate, we earn on qualifying purchases.
As an affiliate, we earn on qualifying purchases.
![Corel AfterShot Pro 3 | RAW Photo Editing Software [PC/Mac Key Card]](https://m.media-amazon.com/images/I/51cHkSe5ByL._SL500_.jpg)
Corel AfterShot Pro 3 | RAW Photo Editing Software [PC/Mac Key Card]
Non-destructive photo editing: Manage and edit your RAW photos with this powerful and ultra-fast photo editor
As an affiliate, we earn on qualifying purchases.
As an affiliate, we earn on qualifying purchases.