To control ambient light for the best picture, assess your surroundings and identify sources of natural or artificial light that may cause undesired shadows or color casts. Use diffusers and reflectors to soften and bounce light, making it more even and natural. Adjust your camera settings, like white balance and metering, to match the scene. Manage window light with blackout curtains or blinds, and consider adding additional lighting with mirrors or gels. Explore these techniques further to master ambient light control.
Key Takeaways
- Use diffusers and reflectors to soften and bounce natural light, creating even, balanced illumination.
- Employ blackout curtains, blinds, or flags to block or control unwanted external and artificial light sources.
- Adjust camera settings such as white balance, ISO, and light metering to match ambient light conditions accurately.
- Incorporate gels or filters to correct color temperature mismatches and blend natural with artificial lighting seamlessly.
- Post-process images to fine-tune brightness, contrast, and color temperature for a cohesive, professional appearance.
![[Officially-Licensed App & Auto Focus]White Smart Mini Projector with WiFi and Bluetooth, XuanPad 4K Support Movie Projector, Portable Native 1080P Outdoor Projector with 360° Stand](https://m.media-amazon.com/images/I/51I8uy-U8bL._SL500_.jpg)
[Officially-Licensed App & Auto Focus]White Smart Mini Projector with WiFi and Bluetooth, XuanPad 4K Support Movie Projector, Portable Native 1080P Outdoor Projector with 360° Stand
Exciting Moments Begin - The XuanPad mini projector compatible with Netflix for the ultimate viewing experience.No extra devices...
As an affiliate, we earn on qualifying purchases.
Assessing the Natural Light Environment
Understanding the natural light environment is essential for effectively managing ambient light. Light pollution from urban lighting can interfere with your ability to evaluate natural conditions accurately. You need to observe how daylight interacts with the scene, noting shadows, color temperature, and intensity. Recognize areas affected by excessive artificial lighting, which can distort your perception of natural light. Consider the time of day and weather, as these influence natural illumination. Identifying sources of light pollution helps you plan your shoot, whether by adjusting your position or timing. By thoroughly appraising the natural light environment, you ensure better control over your lighting setup and achieve more authentic, visually appealing results. Pay close attention to how urban lighting impacts the scene to optimize your photography. Incorporating awareness of lifestyle factors like work environments and routines can also influence the best timing and conditions for shooting natural light.

HAPPRUN Native 1080P Projector, Bluetooth Home Theater Movie Projector with Built-in Speaker, Compatible with Smartphone, HDMI, Fire Stick, PS5, Indoor & Outdoor Use -With Google TV System
[ Built-in Official Licensed Google TV ] - Without additional equipment, the smart projector can directly access Netflix,...
As an affiliate, we earn on qualifying purchases.
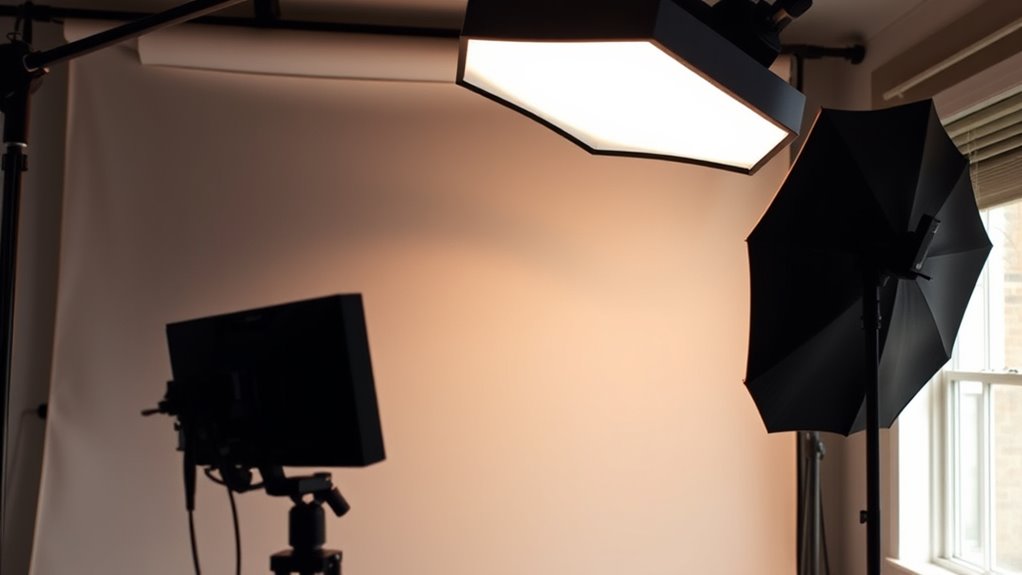
Using Diffusers and Reflectors to Soften Light

Have you ever noticed how harsh sunlight can create unflattering shadows and high contrast in your photos? Using diffusers and reflectors helps you soften that light, making your images more appealing. Diffusers spread light evenly, reducing harshness and balancing color temperature, which guarantees accurate color rendition. Reflectors bounce light back onto your subject, filling in shadows and creating a natural glow. To get the best results, use a light meter to measure ambient light levels and determine the ideal diffuser or reflector placement. This precise control helps you maintain consistent lighting conditions, regardless of changing natural light. Additionally, understanding color accuracy in your lighting setup ensures your images have true-to-life colors and improved visual fidelity. By softening light with these tools, you eliminate unflattering shadows and high contrast, resulting in a more balanced, professional-looking picture.

Aurzen Roku TV Smart Projector with Wifi and Bluetooth, Roku TV Built-in, 1080P FHD, DoIby Audio, Auto Focus & Keystone, Zoom, Movie Portable Outdoor Mini Projector for Soccer Football Game, White
A Roku account and internet connection are required for activation (Creating an account is free). Note: Power Supply:...
As an affiliate, we earn on qualifying purchases.
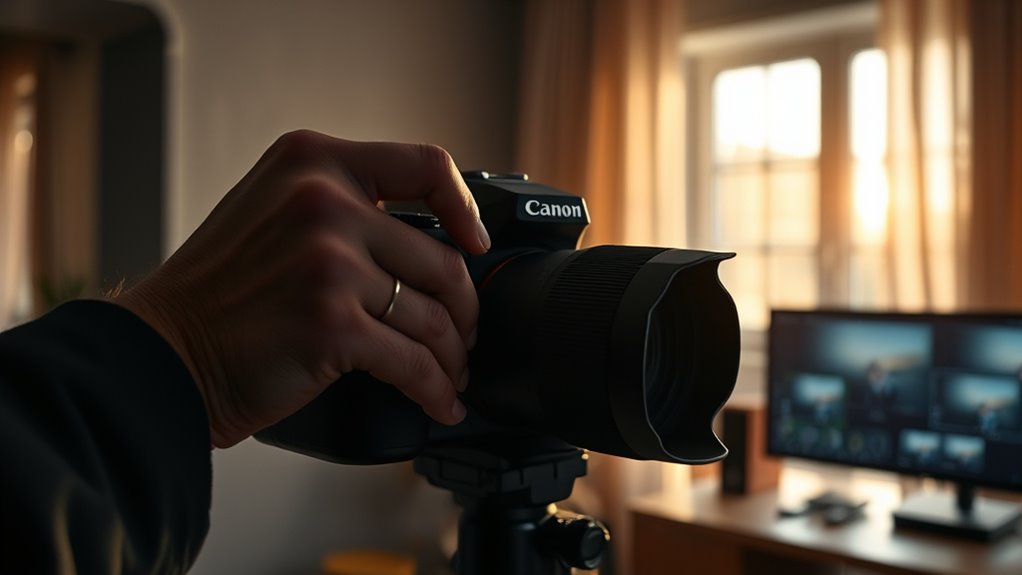
Adjusting Camera Settings for Ambient Conditions

Once you’ve softened and balanced your lighting with diffusers and reflectors, the next step is to adjust your camera settings to match the ambient conditions. Start by setting your camera’s white balance to match the scene’s color temperature, ensuring accurate colors. If your camera offers a Kelvin setting, manually dial in the temperature for precise control. Next, use light metering—spot, evaluative, or matrix—to determine the correct exposure. Meter off a neutral area to avoid over- or underexposure caused by ambient light variations. Adjust ISO, shutter speed, and aperture accordingly to maintain proper exposure. These tweaks help your camera capture the scene as accurately as possible, preserving the mood and tone dictated by the ambient lighting. Proper camera settings are essential for achieving professional-quality images that reflect the true atmosphere of the scene.

ViewSonic PX749-4K 4000 Lumens 4K Gaming Projector, 240Hz and HDR Support for Home Entertainment, 1.3x Optical Zoom, H/V Keystone, and Auto V-Keystone for Flexible Setup, Dual HDMI and USB-C Inputs
4K Home Theater Projector: UHD (3840x2160p) 4K resolution with a 1.1-1.5 throw ratio and 4,000 ANSI lumens perfect...
As an affiliate, we earn on qualifying purchases.
Employing Artificial Light to Fill Shadows
When natural light creates harsh or uneven shadows, adding artificial light can help fill in those dark areas and produce a more balanced image. To match the existing ambient light, choose an artificial light with a similar color temperature, ensuring the light color blends seamlessly. Using lights with adjustable color temperature allows you to fine-tune the light color, preventing unnatural hues or color casting. Soft, diffused artificial light works best for filling shadows without creating harsh highlights. Position your light at an angle that complements the natural light, avoiding direct frontal illumination that can flatten details. By carefully controlling the light color and temperature, you create a harmonious balance that enhances the overall picture quality. Proper financial assessment can also help determine the best lighting setup for your specific environment and budget.
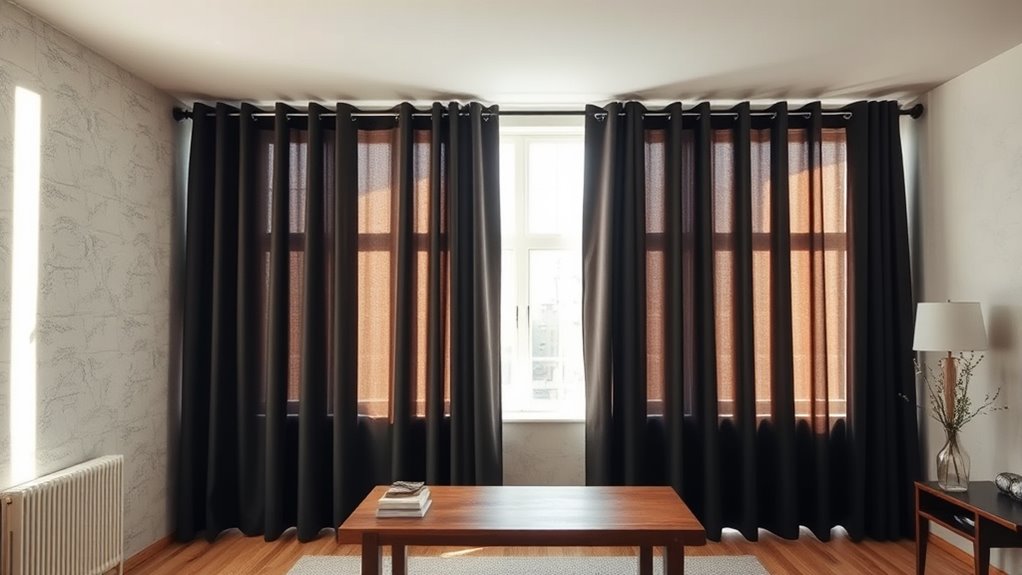
Controlling Window Light and External Brightness
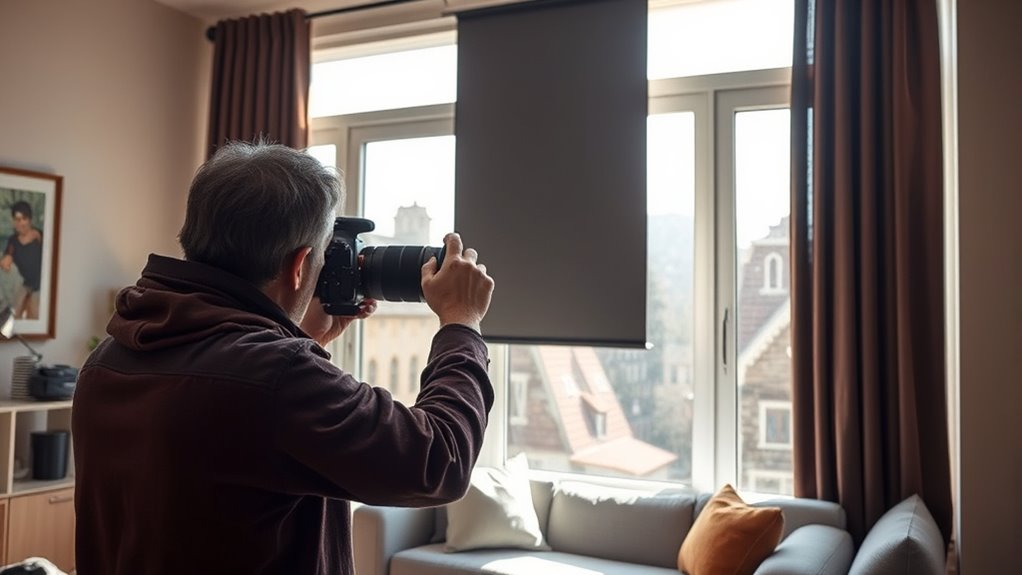
Controlling window light and external brightness is essential for achieving consistent and well-exposed images, especially when natural light varies throughout the day. You can manage this by using window coverings like blackout curtains or blinds to block unwanted light, which helps control color temperature and reduce color shifts. Additionally, be mindful of light pollution, which can introduce unwanted color casts and ambient noise, affecting your shot’s clarity. To optimize your setup:
- Use adjustable curtains to fine-tune incoming light
- Incorporate reflectors or diffusers to soften harsh sunlight
- Monitor external brightness levels, adjusting as needed for consistent exposure
- Employ light control techniques such as blacking out windows or using professional diffusers to maintain ideal lighting conditions
This approach keeps external influences in check, allowing you to focus on capturing the best picture without interference from changing natural conditions.
Choosing the Right Time of Day for Outdoor Shooting

To get the best outdoor shots, you need to choose the right time of day when lighting conditions are ideal. Early mornings and late afternoons usually offer softer, more even light, but weather and cloud cover can also impact your results. Keep an eye on the forecast to guarantee you’re shooting during the most favorable conditions. Additionally, consider the ambient light levels to optimize your picture quality and avoid harsh shadows or overexposure.
Optimal Lighting Conditions
Have you ever noticed how the quality of outdoor light changes dramatically throughout the day? To get the best shot, timing is key. During the golden hour—shortly after sunrise or before sunset—you’ll experience warm color temperature and soft light, ideal for capturing rich, vibrant images. Midday sun, however, delivers harsh light, high light intensity, and cooler color temperature, which can cause unwanted shadows and overexposure. To maximize your outdoor shooting:
- Aim for early morning or late afternoon for softer, warmer light
- Avoid midday hours when the light is harsh and less flattering
- Watch for consistent light conditions to prevent color temperature shifts
- Understanding cryptocurrency regulations can help you plan your investment timing and compliance
Choosing the right time ensures excellent lighting conditions, making your photos look natural and balanced.
Weather and Cloud Cover
Ever wondered how weather and cloud cover influence the quality of your outdoor photos? Cloud cover can soften harsh sunlight, creating even, diffused light that reduces shadows and highlights. Overcast days are ideal for capturing details without glare, while clear skies bring vibrant colors and sharp contrasts. Weather patterns, like approaching storms or fog, can add mood and atmosphere but may also limit visibility and stability. Planning your shoot around weather forecasts helps you choose the best time of day—early morning or late afternoon often offers softer light during changing weather conditions. Keep an eye on cloud cover forecasts to avoid overly dark or overly bright conditions. Adjusting your timing based on these weather patterns guarantees excellent ambient lighting for stunning outdoor images. Additionally, understanding herpes signs can be useful if you’re concerned about health issues that might affect outdoor activities or plans.
Implementing Light Modifiers for Precise Control

To achieve precise control over ambient light, you can use various light modifiers. Diffusers soften shadows and reduce harshness, while barn doors help you direct light exactly where needed. Flags are essential for controlling spill and preventing unwanted illumination from affecting your shot.
Diffusers for Softness
Diffusers are essential tools for softening light and achieving a more natural, flattering illumination. They work by spreading light evenly, reducing harsh shadows, and creating a gentle glow. Choosing the right diffuser materials, like translucent fabric, frosted glass, or plastic, is key for effective softness enhancement. These materials influence how much light is dispersed, impacting the overall look of your image. When selecting a diffuser, consider its size, surface texture, and compatibility with your lighting setup. A larger diffuser provides more widespread softening, while textured surfaces add subtle diffusion effects. Proper use of diffusers helps you control contrast and highlight details without overpowering your scene. Additionally, understanding light modifiers can further refine your control over lighting conditions. This precise control results in a polished, professional appearance for your pictures.
Barn Doors for Direction
Barn doors are versatile light modifiers that allow you to shape and direct light with precision. By attaching barn doors to your light source, you can control the light’s spread and focus it exactly where you want. They give you the ability to block unwanted spill and create sharp, defined edges, making your lighting more intentional. Adjusting the barn doors helps you manipulate light direction, highlighting specific areas or reducing glare. This level of control is essential for achieving the desired mood and clarity in your shot. Whether you’re aiming for a soft falloff or a crisp, directed beam, barn doors let you fine-tune the light’s path effortlessly. They’re an invaluable tool for managing ambient light and enhancing your overall picture quality. Understanding light control techniques is key to mastering how to control ambient light for the best picture.
Flags for Spill Control
Ever wondered how to eliminate unwanted light spilling into your scene? Flags for spill control are your best tool for precise light management. Using flag markers and spill flags, you can block stray rays from hitting your subject or background. Proper placement ensures you prevent light from bouncing where it shouldn’t.
- Attach spill flags to stands or C-stands for quick positioning
- Use flag markers to precisely shape and direct light, blocking specific areas
- Adjust flags dynamically during shoots for ideal control
These tools are essential for creating clean, professional images. By mastering flag placement, you eliminate unwanted spill, improve contrast, and enhance overall picture quality. Flags for spill control give you the power to sculpt your light environment exactly how you want, making your lighting setup more effective and versatile.
Managing Ambient Light During Indoor Shoots

How do you effectively manage ambient light during indoor shoots to make certain your subjects are well-lit and your images look professional? Start by evaluating the existing lighting conditions, paying attention to lighting color and light temperature. Adjust your camera settings or add modifiers to balance color tones, ensuring the ambient light complements your desired mood. Use gels or filters if necessary to correct mismatched light temperatures, preventing unwanted color casts. Control window blinds and turn off or dim artificial lights to reduce unpredictable light sources. Keep in mind that consistent lighting temperature helps maintain a natural look. By carefully managing these factors, you can create a controlled environment that highlights your subjects and results in polished, professional images.
Post-Processing Techniques to Enhance Ambient Light Balance
Once you’ve managed the ambient lighting during your shoot, post-processing offers powerful tools to fine-tune and enhance the overall balance. You can adjust color temperature to ensure the scene looks natural and consistent, correcting any unwanted tint caused by ambient light. Light diffusion effects can soften harsh shadows and create a more even glow, improving the overall aesthetic. To optimize your images, consider these techniques:
Post-processing refines ambient lighting with color tweaks and diffusion effects for a polished, natural look.
- Adjust color temperature to match the scene’s mood
- Use light diffusion filters or effects to smooth out uneven lighting
- Fine-tune brightness and contrast to balance ambient light levels
These adjustments help create a cohesive look, making sure the ambient light complements your subject rather than overpowering it. Proper post-processing ensures your image’s ambient light enhances the scene, not detracts from it.
Frequently Asked Questions
How Does Ambient Light Influence Color Accuracy in Photos?
Ambient light considerably impacts your photo’s color accuracy by affecting color temperature and introducing light pollution. When ambient light is too warm or cool, it shifts the true colors in your images. Light pollution from nearby sources can add unwanted color casts, making your photos look unnatural. To improve color accuracy, control or minimize ambient light, use proper white balance settings, and consider shooting in controlled lighting environments.
Can Specific Camera Lenses Mitigate Ambient Light Issues Effectively?
Yes, specific camera lenses can help mitigate ambient light issues effectively. Using lens filters, like neutral density filters, reduces excess light entering your lens, giving you better control. Adjust your aperture settings to manage exposure and depth of field, helping to minimize ambient light interference. Combining these techniques allows you to maintain ideal image quality even in challenging lighting conditions, ensuring your photos stay sharp and accurately exposed.
What Are the Best Practices for Balancing Mixed Light Sources?
You should use lighting techniques like key, fill, and backlighting to balance mixed light sources effectively. Adjust your lights to complement natural and artificial sources, ensuring consistent color balancing. Use gels or filters to match color temperatures, and rely on a light meter for precise measurements. By carefully controlling and blending your lighting, you create a harmonious scene that minimizes unwanted color shifts and maintains a professional look.
How Does Ambient Light Affect Video Recording Quality?
Ambient light washes over your scene like a fog, disrupting lighting consistency and casting unwanted shadows. It can cause flickering, reduce contrast, and make your footage look flat or inconsistent. To keep your video sharp, control ambient light by managing shadows and balancing sources. Think of it as shaping the light’s dance around your subject, ensuring every shot stays clear, vibrant, and visually compelling.
Are There Portable Tools to Measure Ambient Light Precisely?
Yes, there are portable gadgets designed for precise light measurement. You can use compact light meters or lux meters that easily fit in your pocket, making it simple to gauge ambient light levels on the go. These devices provide accurate readings, helping you adjust your environment for ideal video quality. With reliable portable gadgets, you gain better control over your lighting conditions, ensuring your recordings look professional regardless of where you shoot.
Conclusion
Mastering ambient light is like conducting an orchestra—you control each element to create harmony. By evaluating your environment, using diffusers, adjusting settings, and employing light modifiers, you can craft the perfect shot. Remember, even in the shadows, there’s beauty waiting to be revealed—just like the chiaroscuro in a Caravaggio masterpiece. With practice, you’ll turn everyday lighting into your greatest creative tool, capturing images that truly resonate.